Spring Boot 项目自动发布
专题
简介
在公司从移动端转后端已经快一年了,使用的技术框架一直是Spring Boot,和以前大学时候基于Tomcat的不太一样。
这篇文章简单介绍下如何发布Spring Boot 项目,原先使用Tomcat时候,发布的文件是war文件,现在使用Spring Boot就变得很简单了,直接是一个jar文件,启动方式按照启动jar文件方式即可。
准备工作
使用Idea创建一个带Spring Boot的项目,使用gradle管理项目。
使用gradle依赖很简单,同时创建两个Controller,一个用户表示线上api接口,一个表示心跳接口,用于测试。
dependencies {
    compileOnly('org.projectlombok:lombok')

    compile('org.springframework.boot:spring-boot-starter-web')

    testCompile('org.springframework.boot:spring-boot-starter-test')
}@Slf4j
@RestController
public class HelloWorldController {
@Value("${app.env}")
String env;
@RequestMapping(path = "/hello", method = RequestMethod.GET)
public Object hello() {
log.info("hello>>>");
Map<String, Object> map = new HashMap<>();
map.put("hello", "world");
map.put("env", env);
log.info("map = " + map);
return map;
}
}@Slf4j
@RestController
public class HeartbeatController {
@RequestMapping(path = "/heartbeat")
public Object heartbeat() {
return "success";
}
}同时配置好对应的配置文件,我这有三个配置文件,一个dev环境,一个表示prod环境,还有一个表示开关。
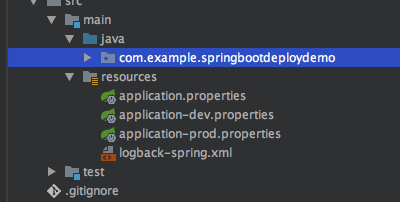
Spring支持选择对应的config文件,开发时候,配置成dev,则生效的文件application-dev.properties。
spring.profiles.active=dev
#spring.profiles.active=prod
dev
server.port=8080
app.env=dev
logging.config=classpath:logback-spring.xml
prod
server.port=8088
app.env=prod
logging.config=classpath:logback-spring.xml我这边用app.env字段表示不同环境的内容,实际情况,可以配置数据库的内容,开发和线上的数据库是不一样的。
启动程序,然后测试下请求。
curl http://127.0.0.1:8080/hello
{"hello":"world","env":"dev"}
数据是正常的,env读取的也是dev数据。
编译和发布
由于项目使用gradle管理,那么在发布时候,直接使用gradle命令编译即可,命令如下,clean是可选的,不过一般在本地开发然后再发布,建议先clean下。
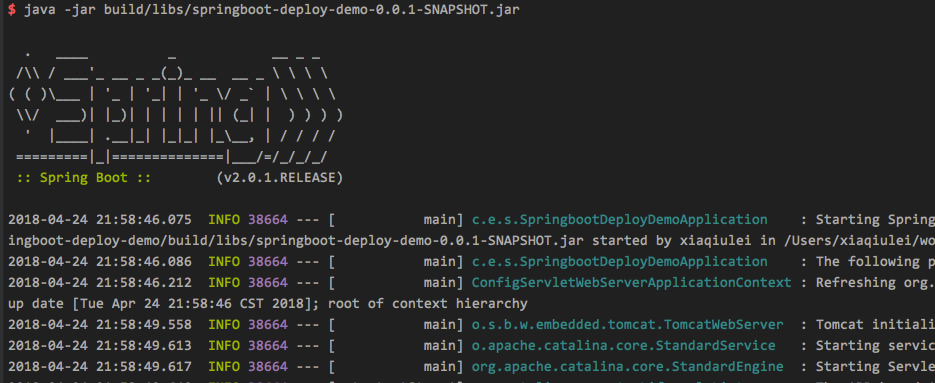
./gradlew clean build编译成功后,在项目生成目录中可以找到对应的jar文件,路径是./build/libs/springboot-deploy-demo-0.0.1-SNAPSHOT.jar。
可以直接使用java命令来启动。
为了方便起见我在项目中写个简单脚本,编译成功后,复制目标文件到相应的目录,然后直接同步到服务器即可。
#!/usr/bin/env bash

./gradlew clean build

cp build/libs/* deploy/
deploy 目录除了有目标文件外,还有线上环境的配置文件,几个服务启动停止shell文件。
start.sh,很简单,在启动前,检查是否已经启动,在没有启动情况下,在启动服务。
#!/bin/sh


#get pwd
DIR_HOME="${BASH_SOURCE-$0}"
DIR_HOME="$(dirname "$DIR_HOME")"
PRGDIR="$(cd "${DIR_HOME}"; pwd)"

jarfile=$PRGDIR/springboot-deploy-demo-0.0.1-SNAPSHOT.jar

#get runing pid
pid=$(ps -ef | grep java | grep $jarfile | awk '{print $2}')

#create log dir
mkdir -p $PRGDIR/log/

if [ "$pid" != "" ];then
    echo "ERROR: $jarfile is running! pid=$pid. You must stop it first!"
else
    nohup java -jar $jarfile -Dfile.encoding=UTF-8 --spring.config.location=$PRGDIR/ >$PRGDIR/log/start.log 2>&1 &
    pid=$(ps -ef | grep java | grep $jarfile | awk '{print $2}')
    echo "INFO: $jarfile is running! pid=$pid"

    url="http://127.0.0.1:8088/heartbeat";
    echo $url
    while [ true ]
    do
        sleep 1
        HTTP_CODE=`curl -G -m 10 -o /dev/null -s -w %{http_code} $url`
        echo "http code: ${HTTP_CODE}"
        if [ ${HTTP_CODE} -eq 200 ]
        then
            echo "server start success..."
            exit 0
        fi
    done
fi
同时启动前,需要配置spring boot运行的参数,最重要的有Spring Boot启动的配置文件的位置--spring.config.location,我配置的位置是./。
需要注意的是,prod的配置文件,一些参数需要注意路径,开发中路径是classpath:开头,线上是不需要的,当然了也是根据实际情况来看。
server.port=8088
app.env=prod
logging.config=logback-spring.xml
在启动服务后,会尝试调用相应的接口,测试启动是否成功。
url="http://127.0.0.1:8088/heartbeat";
echo $url
while [ true ]
do
    sleep 1
    HTTP_CODE=`curl -G -m 10 -o /dev/null -s -w %{http_code} $url`
    echo "http code: ${HTTP_CODE}"
    if [ ${HTTP_CODE} -eq 200 ]
    then
        echo "server start success..."
        exit 0
    fi
done
stop.sh
停止服务很简单,直接查找对应的进程,然后杀掉,这里需要注意进程名字是以jar文件来查找的。
#!/bin/sh

process=springboot-deploy-demo-0.0.1-SNAPSHOT.jar

ifrun=$(ps -ef | grep $process | grep java)
if [ "$ifrun" != "" ];then
    kill -9 `ps -ef | grep $process | grep java | awk '{print $2}'`
    echo "INFO: $process is stoped!"
else
    echo "WARN: Not found $process running."
fi
restart.sh
这个比较简单,就是先停止,再启动。
#!/bin/sh

./stop.sh
./start.sh
同步到服务器
这里做简单演示,我使用的是Ubuntu虚拟机,使用scp命令上传到服务器上,实际情况可以根据自己需求来选择,比如使用svn,ftp等。
scp deploy/* [email protected]:~/deploy然后ssh登陆上192.168.153.134机器,进入deploy目录,执行./start即可。
示例:
$ scp deploy/* [email protected]:~/deploy
[email protected]'s password:
application-prod.properties                                                                                                                                                                  100%   63    84.7KB/s   00:00
application.properties                                                                                                                                                                       100%   27    26.4KB/s   00:00
deploy/log: not a regular file
logback-spring.xml                                                                                                                                                                           100%  881   753.4KB/s   00:00
restart.sh                                                                                                                                                                                   100%   32    23.3KB/s   00:00
springboot-deploy-demo-0.0.1-SNAPSHOT.jar                                                                                                                                                    100%   15MB  32.5MB/s   00:00
start.sh                                                                                                                                                                                     100%  970     1.5MB/s   00:00
stop.sh                                                                                                                                                                                      100%  291   169.0KB/s   00:00

$ ssh [email protected]
[email protected]'s password:
Welcome to Ubuntu 16.04.3 LTS (GNU/Linux 4.4.0-109-generic x86_64)

 * Documentation:  https://help.ubuntu.com
 * Management:     https://landscape.canonical.com
 * Support:        https://ubuntu.com/advantage

299 packages can be updated.
161 updates are security updates.

Last login: Tue Apr 24 23:04:57 2018 from 192.168.153.1

# xiaqiulei @ ubuntu in ~ [23:07:59]
$ cd deploy

# xiaqiulei @ ubuntu in ~/deploy [23:08:01]
$ ./start.sh
INFO: /home/xiaqiulei/deploy/springboot-deploy-demo-0.0.1-SNAPSHOT.jar is running! pid=4645
http://127.0.0.1:8088/heartbeat
http code: 000
http code: 000
http code: 000
http code: 000
http code: 000
http code: 200
server start success...
总结
本文只是简单介绍使相关脚本发布Spring Boot服务到linux机器上,基本满足小项目需求。
当然了,还有不够完善的地方,比如启动的方式是nohup,当进程挂掉以后,不能够自动重启,高级的用法是使用supervisor。
再比如,scp同步的时候,都是简单的文件覆盖,比较友好的方式是,先备份原先的文件,然后再同步文件,这样如果服务有问题,还可以回滚。
源码地址
源码地址 https://github.com/LiushuiXiaoxia/springboot-deploy-demo