udacity / Advancedandroid_emojify
Programming Languages
AdvancedAndroid_Emojify
This is the toy app for the Libraries lesson of the Advanced Android App Development course on Udacity.
How to use this repo while taking the course
Each code repository in this class has a chain of commits that looks like this:
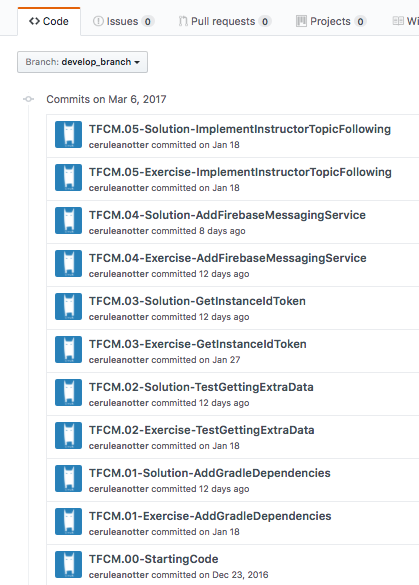
These commits show every step you'll take to create the app. They include Exercise commits and Solution commits.
Exercise commits contain instructions for completing the exercise, while solution commits show the completed exercise. You can tell what a commit is by looking at its commit message.
For example, TFCM.01-Exercise-AddGradleDependencies is the first code step in the Firebase Cloud Messaging (FCM) lesson. This is the exercise commit, and the exercise is called Add Gradle Dependencies.
Each commit also has a branch associated with it of the same name as the commit message, seen below:
 Access all branches from this tab
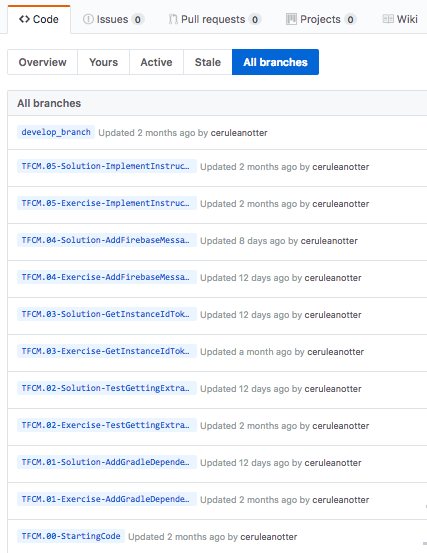

The branches are also accessible from the drop-down in the "Code" tab
Working with the Course Code
Here are the basic steps for working with and completing exercises in the repo. This information is linked whenever you start a new exercise project, so don't feel you need to memorize all of this! In fact, skim it now, make sure that you know generally how to do the different tasks, and then come back when you start your first exercise.
The basic steps are:
- Clone the repo
- Checkout the exercise branch
- Find and complete the TODOs
- Optionally commit your code changes
- Compare with the solution
Step 1: Clone the repo
As you go through the course, you'll be instructed to clone the different exercise repositories, so you don't need to set these up now. You can clone a repository from github in a folder of your choice with the command:
git clone https://github.com/udacity/REPOSITORY_NAME.git
Step 2: Checkout the exercise branch
As you do different exercises in the code, you'll be told which exercise you're on, as seen below:

To complete an exercise, you'll want to check out the branch associated with that exercise. For the exercise above, the command to check out that branch would be:
git checkout TFCM.01-Exercise-AddGradleDependencies
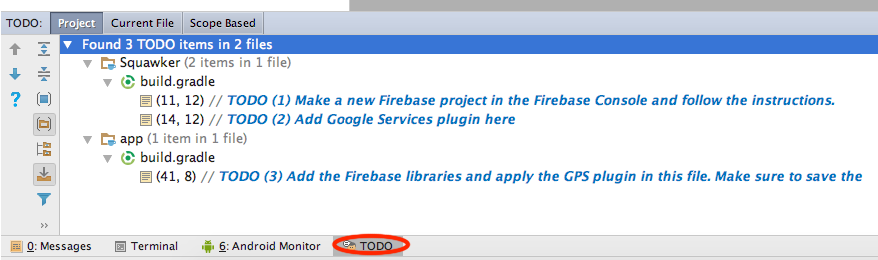
Step 3: Find and complete the TODOs
This branch should always have Exercise in the title. Once you've checked out the branch, you'll have the code in the exact state you need. You'll even have TODOs, which are special comments that tell you all the steps you need to complete the exercise. You can easily navigate to all the TODOs using Android Studio's TODO tool. To open the TODO tool, click the button at the bottom of the screen that says TODO. This will display a list of all comments with TODO in the project.
We've numbered the TODO steps so you can do them in order:
Step 4: Optionally commit your code changes
After You've completed the TODOs, you can optionally commit your changes. This will allow you to see the code you wrote whenever you return to the branch. The following git code will add and save all your changes.
git add .
git commit -m "Your commit message"
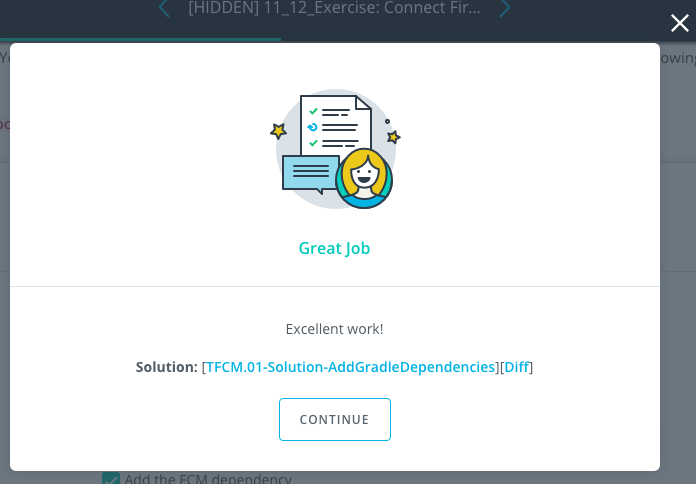
Step 5: Compare with the solution
Most exercises will have a list of steps for you to check off in the classroom. Once you've checked these off, you'll see a pop up window with a link to the solution code. Note the Diff link:
The Diff link will take you to a Github diff as seen below:
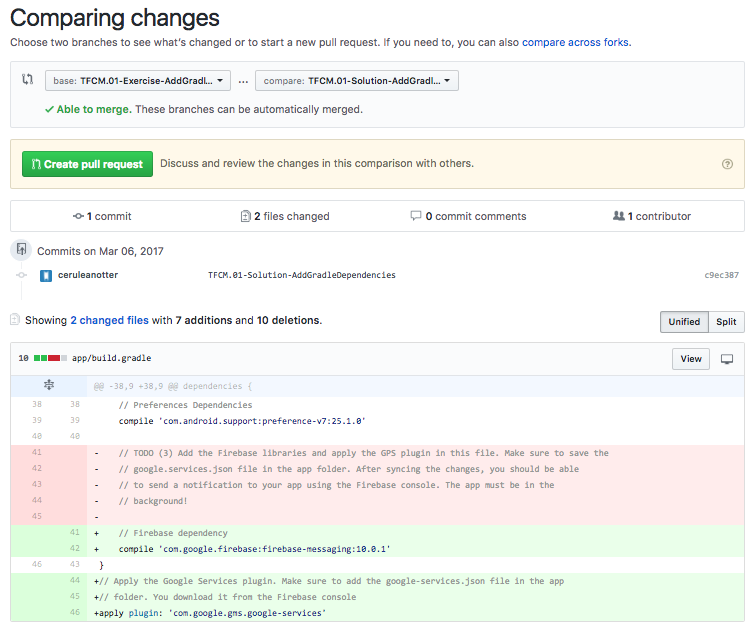
All of the code that was added in the solution is in green, and the removed code (which will usually be the TODO comments) is in red.
Report Issues
Notice any issues with a repository? Please file a github issue in the repository.