atomic14 / Diy Alexa
Labels
Projects that are alternatives of or similar to Diy Alexa

DIY Alexa With the ESP32 and Wit.AI
All the source code for this tutorial is in GitHub
Introduction
This tutorial will guide you through the process of creating your own DIY Alexa using the ESP32 and Wit.ai.
There's a full video tutorial to accompany this available here:
First off, let's define what an Alexa is? What are we going to build?
The first thing we're going to need is some kind of "wake word detection system". This will continuously listen to audio, waiting for a trigger phrase or word.
When it hears this word it will wake up the rest of the system and start recording audio to capture whatever instructions the user has.
Once the audio has been captured it will send it off to a server to be recognised.
The server processes the audio and works out what the user is asking for.
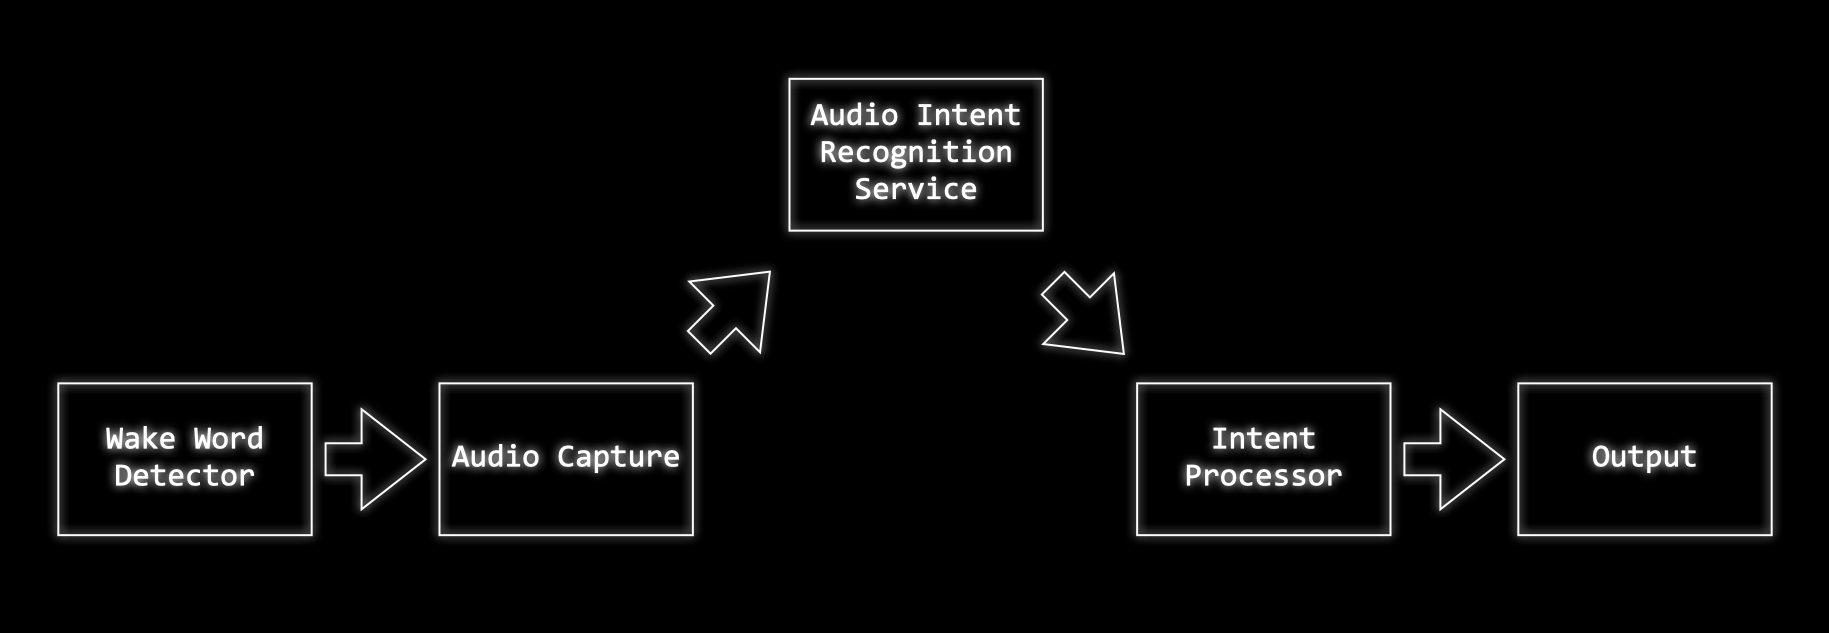
In some systems the server may process the user request, calling out to other services to execute the user's wishes. In the system we are going to build we'll just be using the server to work out what the user's intention was and then our ESP32 will execute the command.
We'll need to build three components:
- Wake word detection
- Audio capture and Intent Recognition
- Intent Execution
We'll wire these together to build our complete system.
Getting Started
We're going to be using some hardware for our project - most of these components can be readily sourced from Amazon, eBay and Adafruit. You may also have local stockists in your own country who can supply the components.
We will need:
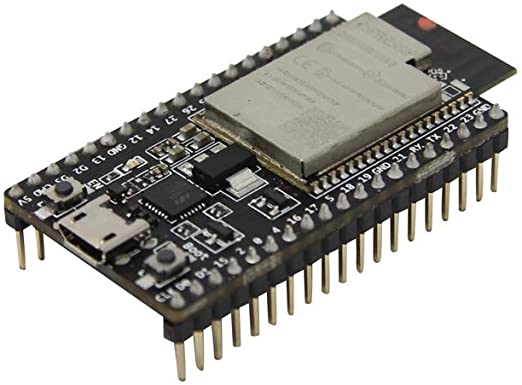
An ESP32 dev kit
These are readily available from a number of suppliers include Adafruit
A good environment for developing for the ESP32 is Platform.io and Visual Studio Code.
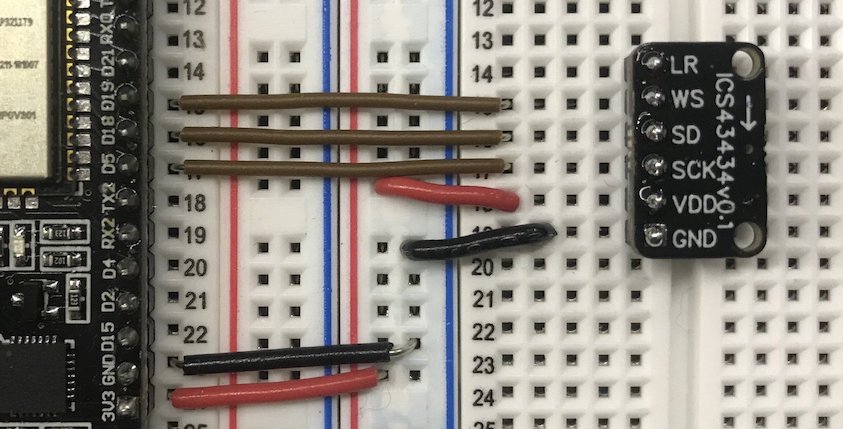
A microphone break out board
I recommend using an I2S MEMS microphone board. These are very low noise microphones that can be connected directly to the ESP32 using a digital interface and require only a few wires. A good choice is either the INMP441 microphone (available from Amazon or eBay) or the ICS-43434 (available from Tindie).
A Speaker
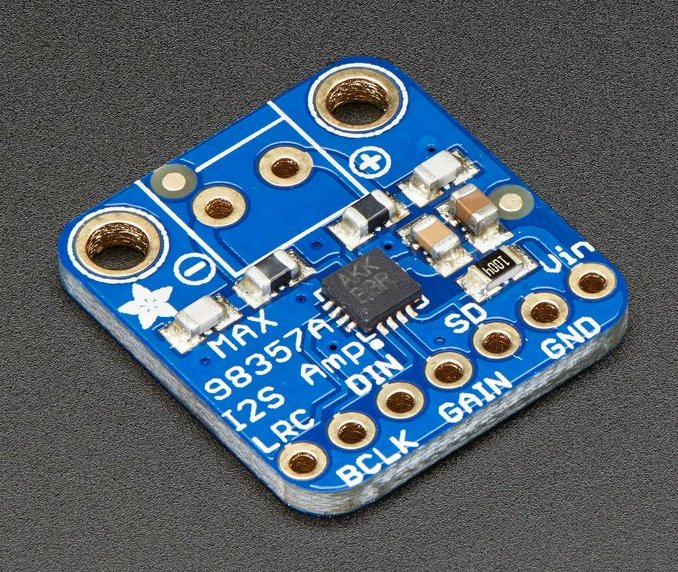
To get our Alexa to talk to us we'll need an amplifier and a speaker. For the amplifier I recommend an I2S breakout board such as this one from Adafruit. This will drive any 4Ω or 8Ω speaker.
Python3+
For the machine learning part of this project you'll need Python 3+ installed. To check to see what you have available try running:
python --version
or
python3 --version
If you need to install Python 3 please follow the instructions here.
Wake Word Detection
Let's start off with the Wake word detection. We need to create something that will tell use when a "wake" word is heard by the system. This will need to run on our embedded devices - an ideal option for this is to use TensorFlow and TensorFlow Lite.
Training Data
Our first port of call is to find some data to train a model against. We can use the Speech Commands Dataset. This dataset contains over 100,000 audio files consisting of a set of 20 core commands words such as "Up", "Down", "Yes", "No" and a set of extra words. Each of the samples is 1 second long.
One of these words in particular looks like a good candidate for a wake word - I've chosen to use the word "Marvin" for my wake word as a tribute to the android from The Hitch Hikers Guide to the Galaxy.
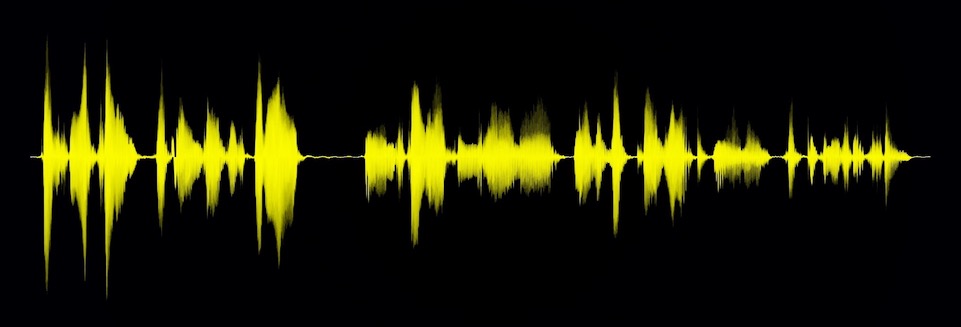
Here's a couple of samples of the word "Marvin":
And here's a few of the other random words from the dataset:
To augment the dataset you can also record ambient background noise, I recorded several hours of household noises and TV shows to provide a large amount of random data.
Features
With our training data in place we need to think about what features we are going to train our neural network against. It's unlikely that feeding a raw audio waveform into our neural network will give us good results.
A popular approach for word recognition is to translate the problem into one of image recognition.
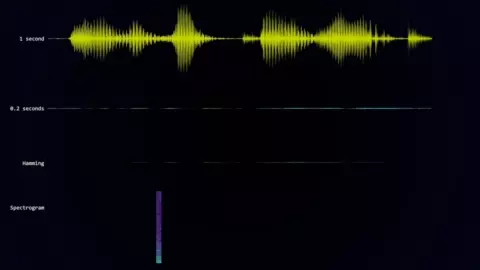
We need to turn our audio samples into something that looks like an image - to do this we can take a spectrogram.
To get a spectrogram of an audio sample we break the sample into small sections and then perform a discrete Fourier transform on each section. This will give us the frequencies that are present in that slice of audio.
Putting these frequency slices together gives us the spectrogram of the sample.
In the model folder you'll find several Jupyter notebooks. Follow the setup instructions in the README.md to configure your local environment.
The notebook Generate Training Data.ipynb contains the code required to extract our features from our audio data.
The following function can be used to generate a spectrogram from an audio sample:
def get_spectrogram(audio):
    # normalise the audio
    audio = audio - np.mean(audio)
    audio = audio / np.max(np.abs(audio))
    # create the spectrogram
    spectrogram = audio_ops.audio_spectrogram(audio,
                                              window_size=320,
                                              stride=160,
                                              magnitude_squared=True).numpy()
    # reduce the number of frequency bins in our spectrogram to a more sensible level
    spectrogram = tf.nn.pool(
        input=tf.expand_dims(spectrogram, -1),
        window_shape=[1, 6],
        strides=[1, 6],
        pooling_type='AVG',
        padding='SAME')
    spectrogram = tf.squeeze(spectrogram, axis=0)
    spectrogram = np.log10(spectrogram + 1e-6)
    return spectrogram
This function first normalises the audio sample to remove any variance in volume in our samples. It then computes the spectrogram - there is quite a lot of data in the spectrogram so we reduce this by applying average pooling.
We finally take the log of the spectrogram so that we don't feed extreme values into our neural network which might make it harder to train.
Before generating the spectrogram we add some random noise and variance to our sample. We randomly shift the audio sample the 1-second segment - this makes sure that our neural network generalises around the audio position.
# randomly reposition the audio in the sample
voice_start, voice_end = get_voice_position(audio, NOISE_FLOOR)
end_gap=len(audio) - voice_end
random_offset = np.random.uniform(0, voice_start+end_gap)
audio = np.roll(audio,-random_offset+end_gap)
We also add in a random sample of background noise. This helps our neural network work out the unique features of our target word and ignore background noise.
# get the background noise files
background_files = get_files('_background_noise_')
background_file = np.random.choice(background_files)
background_tensor = tfio.audio.AudioIOTensor(background_file)
background_start = np.random.randint(0, len(background_tensor) - 16000)
# normalise the background noise
background = tf.cast(background_tensor[background_start:background_start+16000], tf.float32)
background = background - np.mean(background)
background = background / np.max(np.abs(background))
# mix the audio with the scaled background
audio = audio + background_volume * background
To make sure we have a balanced dataset we add more samples of the word "Marvin" to our dataset. This also helps our neural network generalise as there will be multiple samples of the word with different background noises and in different positions in the 1-second sample.
# process all the words and all the files
for word in tqdm(words, desc="Processing words"):
    if '_' not in word:
        # add more examples of marvin to balance our training set
        repeat = 70 if word == 'marvin' else 1
        process_word(word, repeat=repeat)
We then add in samples from our background noise, we run through each background noise file and chop it into 1-second samples, compute the spectrogram, and add these to our negative examples.
With all of this data we end up with a reasonably sized training, validation and testing dataset.
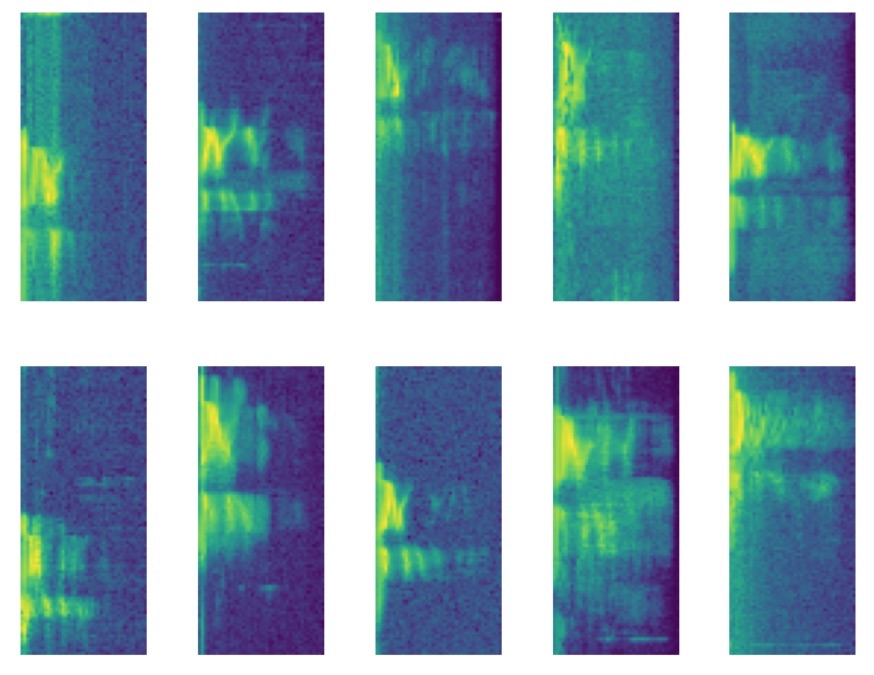
Here's some examples spectrograms of the "Marvin", and here's some examples of the word "yes".
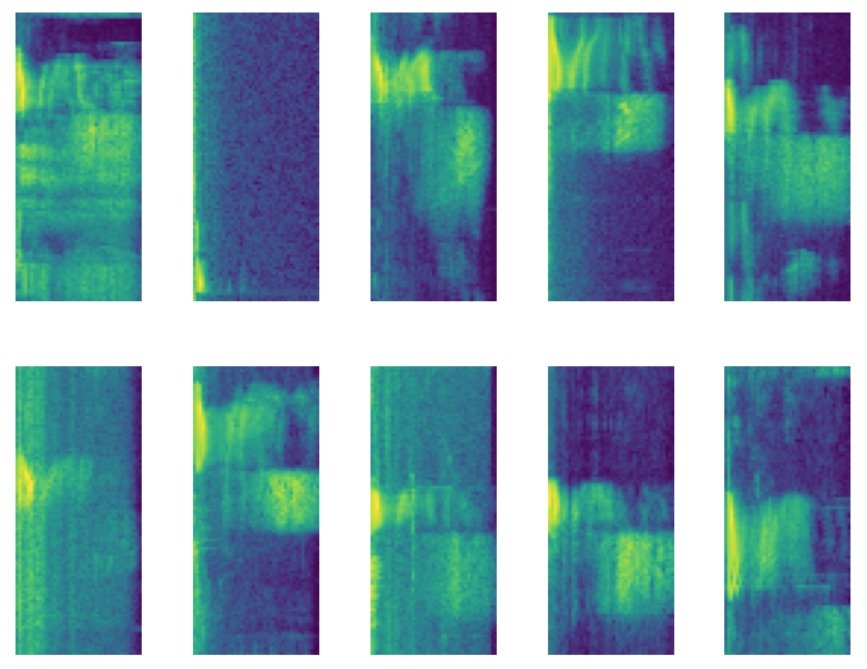
That's our training data prepared, let's have a look at how we train our model up.
Model Training
In the model folder you'll find another Jupyter notebook Train Model.ipynb. This takes the training, test and validation data that we generated in the previous step.
For our system we only really care about detecting the word Marvin so we'll modify our Y labels so that it is a 1 for Marvin and 0 for everything else.
Y_train = [1 if y == words.index('marvin') else 0 for y in Y_train_cats]
Y_validate = [1 if y == words.index('marvin') else 0 for y in Y_validate_cats]
Y_test = [1 if y == words.index('marvin') else 0 for y in Y_test_cats]
We feed this raw data into TensorFlow datasets - we set up our training data repeat forever, randomly shuffle, and to come out in batches.
# create the datasets for training
batch_size = 30

train_dataset = Dataset.from_tensor_slices(
    (X_train, Y_train)
).repeat(
    count=-1
).shuffle(
    len(X_train)
).batch(
    batch_size
)

validation_dataset = Dataset.from_tensor_slices((X_validate, Y_validate)).batch(X_validate.shape[0])

test_dataset = Dataset.from_tensor_slices((X_test, Y_test)).batch(len(X_test))
I've played around with a few different model architectures and ended up with this as a trade-off between time to train, accuracy and model size.
We have a convolution layer, followed by a max-pooling layer, following by another convolution layer and max-pooling layer. The result of this is fed into a densely connected layer and finally to our output neuron.
model = Sequential([
    Conv2D(4, 3,
           padding='same',
           activation='relu',
           kernel_regularizer=regularizers.l2(0.001),
           name='conv_layer1',
           input_shape=(IMG_WIDTH, IMG_HEIGHT, 1)),
    MaxPooling2D(name='max_pooling1', pool_size=(2,2)),
    Conv2D(4, 3,
           padding='same',
           activation='relu',
           kernel_regularizer=regularizers.l2(0.001),
           name='conv_layer2'),
    MaxPooling2D(name='max_pooling2', pool_size=(2,2)),
    Flatten(),
    Dropout(0.2),
    Dense(
        40,
        activation='relu',
        kernel_regularizer=regularizers.l2(0.001),
        name='hidden_layer1'
    ),
    Dense(
        1,
        activation='sigmoid',
        kernel_regularizer=regularizers.l2(0.001),
        name='output'
    )
])
model.summary()
When I train this model against the data I get the following accuracy:
| Dataset | Accuracy |
|---|---|
| Training Dataset | 0.9683 |
| Validation Dataset | 0.9567 |
| Test Dataset | 0.9562 |
These are pretty good results for such a simple model.
If we look at the confusion matrix using the high threshold (0.9) for the true class we see that we have very few examples of background noise being classified as a "Marvin" and quite a few "Marvin"s being classified as background noise.
| Predicted Noise | Predicted Marvin | |
|---|---|---|
| Noise | 13980 | 63 |
| Marvin | 1616 | 11054 |
This is ideal for our use case as we don't want the device waking up randomly.
Converting the model to TensorFlow Lite
With our model trained we now need to convert it for use in TensorFlow Lite. This conversion process takes our full model and turns it into a much more compact version that can be run efficiently on our micro-controller.
In the model folder there is another workbook Convert Trained Model To TFLite.ipynb.
This notebook passes our trained model through the TFLiteConverter along with examples of input data. Providing the sample input data lets the converter quantise our model accurately.
Once the model has been converted we can run a command-line tool to generate C code that we can compile into our project.
xxd -i converted_model.tflite > model_data.cc
Intent Recognition
With our wake word detection model complete we now need to move onto something that can understand what the user is asking us to do.
For this, we will use the Wit.ai service from Facebook. This service will "Turn What Your Users Say Into Actions".
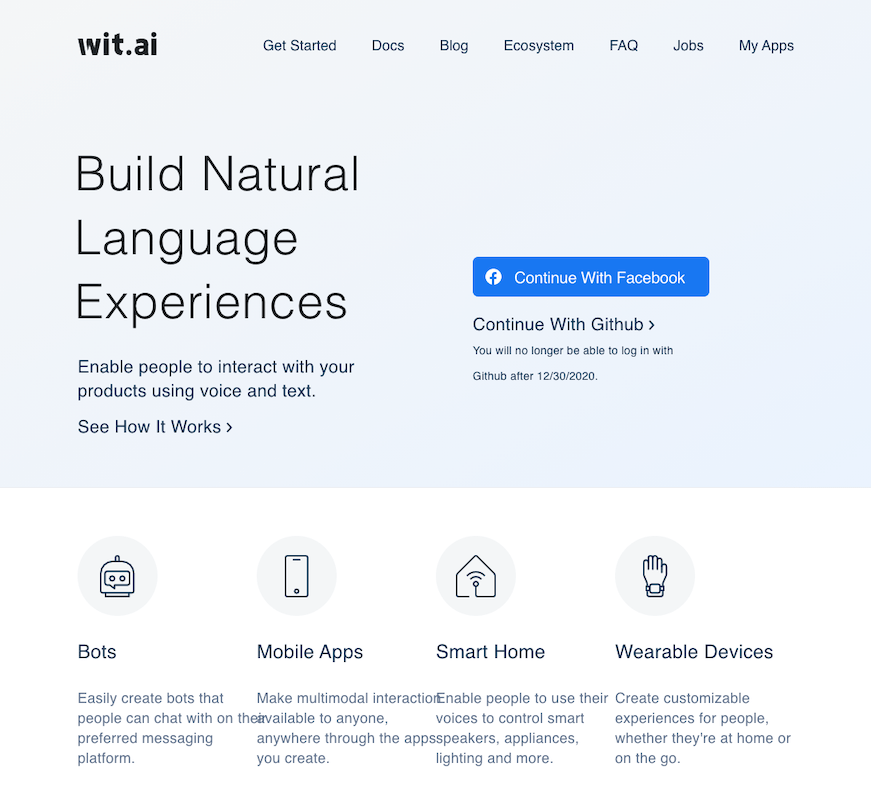
The first thing we'll do is create a new application. You just need to give the application a name and you're all set.
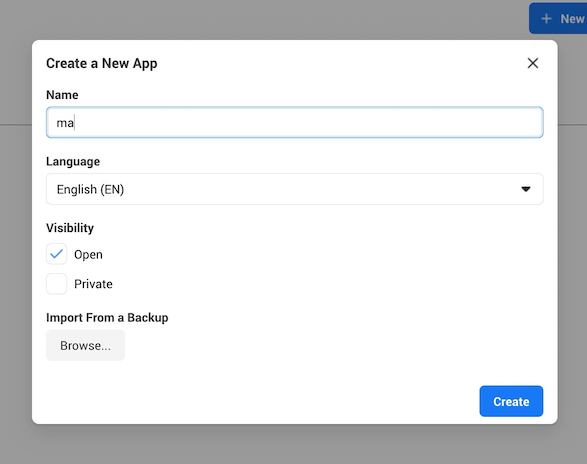
With our application created we need to train it to recognise what our users will say. There are three main building blocks of a Wit.ai application:
- Intents
- Entities
- Traits
We'll give our application sample phrases and train it to recognise what intent it should map the phase onto.
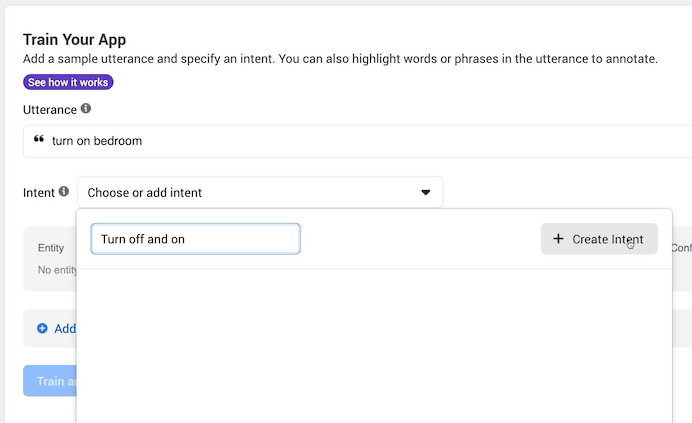
For our project we want to be able to turn devices on and off. Some sample phrases that we can use to train Wit.ai are:
"Turn on bedroom"
"Turn off kitchen"
"Turn on the lights"
We feed these phrases into Wit.ai - for the first phrase we enter we'll create a new intent "Turn_on_device".
As we add more phrases we'll assign them to this new intent. As we give Wit.ai more examples it will learn what kind of phrase should map onto the same intent. In the future when it sees a new phrase it has never seen before - e.g. "Turn on the table" it will be able to recognise that this phrase should belong to the Turn_on_device intent.
This gives us the user's intention - what are they trying to do? - we now need to work out what the object is that they are trying to effect. This is handled by creating entities.
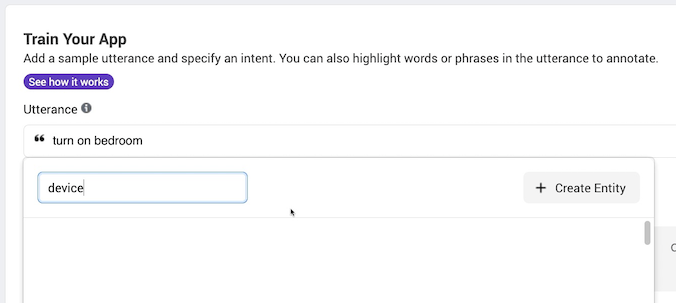
We want to turn off and on devices so we will highlight the part of the phrase that corresponds to the device name. In the following phrase "bedroom" is the device: "Turn on bedroom". When we highlight a piece of text in the utterance Wit.ai will prompt us to assign it to an existing or a new Entity.
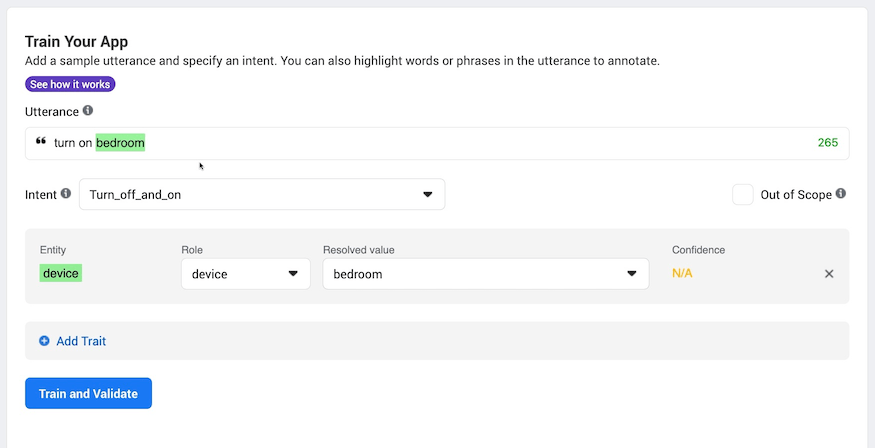
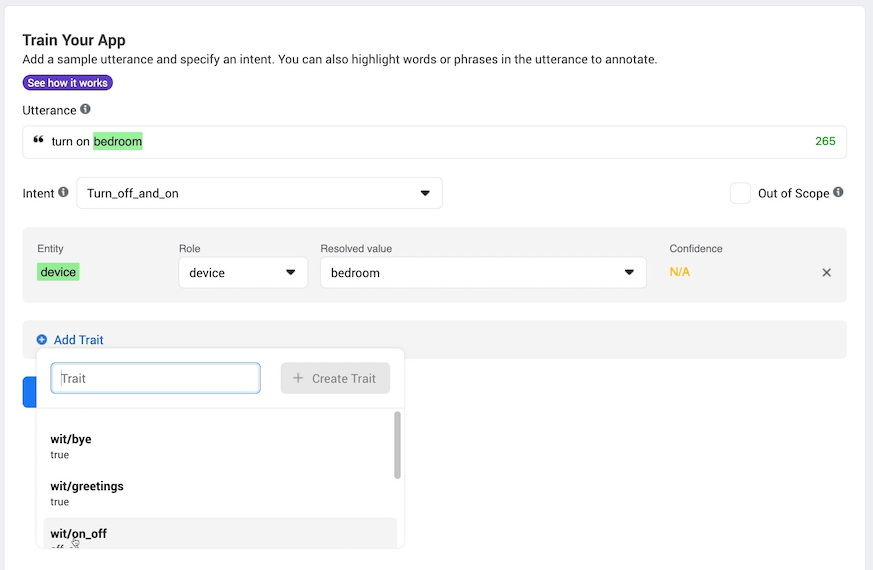
Finally we want to be able detect what the user is trying to do to the device. For this we use Traits. Wit.ai has a built-in trait for detecting "on" and "off" so we can use this for training.
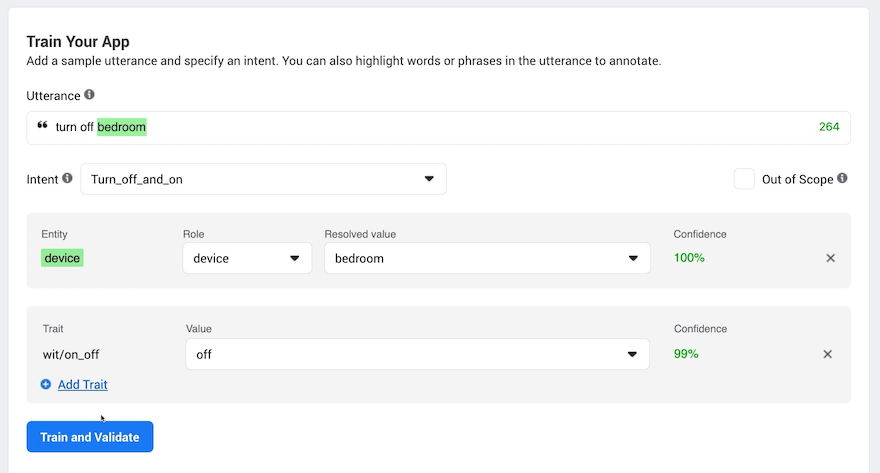
Once we've trained Wit.ai on a few sample phrases it will start to automatically recognise the Intent, Entity and Trait. If it fails to recognise any of these then you can tell it what it should have done and it will correct itself.
Once we are happy that Wit.ai is performing we can try it out with either text or audio files and see how it performs on real audio.
Here's a sample piece of audio:
To send this file to Wit.ai we can use curl from the command line.
curl -XPOST -H 'Authorization: Bearer XXX' -H "Content-Type: audio/wav" "https://api.wit.ai/speech?v=220201015" --data-binary "@turn_on.wav"
This curl command will post the contents of the audio file specified by turn_on.wav to the Wit.ai.
You can get the exact values for the Authorization header and the URL from the settings page of your Wit.ai application.
Wit.ai will process the audio file and send us back some JSON that contains the intent, entity and trait that it recognised.
For the audio sample above we get back:
{
  "text": "turn on kitchen",
  "intents": [
    {
      "id": "796739491162506",
      "name": "Turn_on_device",
      "confidence": 0.9967
    }
  ],
  "entities": {
    "device:device": [
      {
        "id": "355753362231708",
        "name": "device",
        "role": "device",
        "start": 8,
        "end": 15,
        "body": "kitchen",
        "confidence": 0.9754,
        "entities": [],
        "value": "kitchen",
        "type": "value"
      }
    ]
  },
  "traits": {
    "wit$on_off": [
      {
        "id": "535a80f0-6922-4680-b678-0576f248cdcc",
        "value": "on",
        "confidence": 0.9875
      }
    ]
  }
}
As you can see, it's worked out the intent "Turn_on_device", it's recognised the name of the device as "kitchen" and it's worked out that we want to turn the device "on".
Pretty amazing!
Wiring it all up
So that's our building blocks completed. We have something that will detect a wake word and we have something that will work out what the user's intention was.
Let's have a look at how this is all wired up on ESP32 side of things
I've created a set of libraries for the main components of the project.
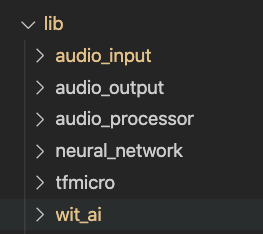
The tfmicro library contains the code from TensorFlow Lite and includes everything needed to run a TensorFlow Lite mode.
The neural_network library contains a wrapper around the TensorFlow Lite code making it easier to interface with the rest of our project.
To get audio data into the system we use the audio_input library. We can support both I2S microphones directly and analogue microphones using the analogue to digital converter. Samples from the microphone are read into a circular buffer with room for just over 1 seconds worth of audio.
Our audio output library audio_output supports playing WAV files from SPIFFS via an I2S amplifier.
To actually process the audio we need to recreate the same process that we used for our training data. This is the job of the audio_processor library.
The first thing we need to do is work out the mean and max values of the sample so that we can normalise the audio.
int startIndex = reader->getIndex();
// get the mean value of the samples
float mean = 0;
for (int i = 0; i < m_audio_length; i++)
{
    mean += reader->getCurrentSample();
    reader->moveToNextSample();
}
mean /= m_audio_length;
// get the absolute max value of the samples taking into account the mean value
reader->setIndex(startIndex);
float max = 0;
for (int i = 0; i < m_audio_length; i++)
{
    max = std::max(max, fabsf(((float)reader->getCurrentSample()) - mean));
    reader->moveToNextSample();
}
We then step through the 1 second of audio extracting a window of samples on each step and computing the spectrogram at each step.
The input samples are normalised and copied into our FFT input buffer. The input to the FFT is a power of two so there is a blank area that we need to zero out.
// extract windows of samples moving forward by step size each time and compute the spectrum of the window
for (int window_start = startIndex; window_start < startIndex + 16000 - m_window_size; window_start += m_step_size)
{
    // move the reader to the start of the window
    reader->setIndex(window_start);
    // read samples from the reader into the fft input normalising them by subtracting the mean and dividing by the absolute max
    for (int i = 0; i < m_window_size; i++)
    {
        m_fft_input[i] = ((float)reader->getCurrentSample() - mean) / max;
        reader->moveToNextSample();
    }
    // zero out whatever else remains in the top part of the input.
    for (int i = m_window_size; i < m_fft_size; i++)
    {
        m_fft_input[i] = 0;
    }
    // compute the spectrum for the window of samples and write it to the output
    get_spectrogram_segment(output_spectrogram);
    // move to the next row of the output spectrogram
    output_spectrogram += m_pooled_energy_size;
}
Before performing the FFT we apply a Hamming window and then once we have done the FFT we extract the energy in each frequency bin.
We follow that by the same average pooling process as in training. And then finally we take the log.
// apply the hamming window to the samples
m_hamming_window->applyWindow(m_fft_input);
// do the fft
kiss_fftr(
    m_cfg,
    m_fft_input,
    reinterpret_cast<kiss_fft_cpx *>(m_fft_output));
// pull out the magnitude squared values
for (int i = 0; i < m_energy_size; i++)
{
    const float real = m_fft_output[i].r;
    const float imag = m_fft_output[i].i;
    const float mag_squared = (real * real) + (imag * imag);
    m_energy[i] = mag_squared;
}
// reduce the size of the output by pooling with average and same padding
float *output_src = m_energy;
float *output_dst = output;
for (int i = 0; i < m_energy_size; i += m_pooling_size)
{
    float average = 0;
    for (int j = 0; j < m_pooling_size; j++)
    {
        if (i + j < m_energy_size)
        {
            average += *output_src;
            output_src++;
        }
    }
    *output_dst = average / m_pooling_size;
    output_dst++;
}
// now take the log to give us reasonable values to feed into the network
for (int i = 0; i < m_pooled_energy_size; i++)
{
    output[i] = log10f(output[i] + EPSILON);
}
This gives us the set of features that our neural network is expecting to see.
Finally we have the code for talking to Wit.ai. To avoid having to buffer the entire audio sample in memory we need to perform a chunked upload of the data.
We create the connection to wit.ai and then upload the chunks of data until we've collected sufficient audio data to capture the user's command.
m_wifi_client = new WiFiClientSecure();
m_wifi_client->connect("api.wit.ai", 443);
m_wifi_client->println("POST /speech?v=20200927 HTTP/1.1");
m_wifi_client->println("host: api.wit.ai");
m_wifi_client->printf("authorization: Bearer %s\n", access_key);
m_wifi_client->println("content-type: audio/raw; encoding=signed-integer; bits=16; rate=16000; endian=little");
m_wifi_client->println("transfer-encoding: chunked");
m_wifi_client->println();
We decode the results from Wit.ai and extract the pieces of information that we are interested in - we care about the intent, the device and whether the users wants to turn the device on or off.
const char *text = doc["text"];
const char *intent_name = doc["intents"][0]["name"];
float intent_confidence = doc["entities"]["device:device"][0]["confidence"];
const char *device_name = doc["entities"]["device:device"][0]["value"];
float device_confidence = doc["entities"]["device:device"][0]["confidence"];
const char *trait_value = doc["traits"]["wit$on_off"][0]["value"];
float trait_confidence = doc["traits"]["wit$on_off"][0]["confidence"];
Our application consists of a very simple state machine - we can be in one of two states - we can either be waiting for the wake word, or we can recognising a command.
When we are waiting for the wake word we process the audio as it streams past grabbing a 1-second window of samples and feeding it through the audio processor and neural network.
When the neural network detects the wake word we switch into the command recognition state.
This state makes a connection to Wit.ai - this can take up to 1.5 seconds as making an SSL connection on the ESP32 is quite slow.
We then start streaming samples up to the server - to allow for the SSL connection time we rewind 1 second into the past so that we don't miss too much of what the user said.
Once we've streamed 3 seconds of samples we ask wit.ai what the user said. We could get more clever here and wait until the user has stopped speaking.
Wit.ai processes the audio and tells us what the user asked, we pass that onto our intent processor to interpret the request and move to the next state which will put us back into waiting for the wake word.
Our intent processor simply looks at the intent name that wit.ai provides us and carries out the appropriate action.
What's next?
So there we have it, a DIY Alexa.
All the source code is in GitHub. It's MIT licensed so feel free to take the code and use it for your own projects.
How well does it actually work?
Reasonably well, we have a very lightweight wake word detection system, it runs in around 100ms and still has room for optimisation.
Accuracy is ok. We need more training data to make it really robust, you can easily trick it into activating by using similar words to "Marvin" such as "marvellous", "martin", "marlin" etc... More negative example words would help with this problem.
You may want to try changing the wake word for a different one or using your own audio samples to train the neural network.
The Wit.ai system works very well and you can easily add your own intents and traits to build a very powerful system. I've added additional intents to my own project to tell me jokes and you could easily hook the system up to a weather forecast service if you wanted to.