Status

Android Client of Apache Fineract CN
Android Client is built on top of the Apache Fineract CN platform. It is the mobile field agent application for its web counterpart
Building the Project
- Install Java Development Kit (JDK)
- Download, install, and run the latest version of Android Studio.
- Fork our repo from
https://github.com/apache/fineract-cn-mobile - From your terminal, download a copy of the forked repo with
git clone https://github.com/your_username/fineract-cn-mobile.gitwhereyour_usernameis your GitHub username. - Enter the new fineract-cn-mobile directory with
cd fineract-cn-mobile. - Set the upstream remote to the original repository url so that git knows where to fetch updates from in future:
git remote add upstream https://github.com/apache/fineract-cn-mobile.git - Import the project to Android Studio.
- Launch the Android Studio application
- Click on
File>Open...>{$FOLDER NAME}
- Once the gradle build is finished, add a virtual device
- Click on the dropdown on the toolbar beside the green play button that has "No Devices" selected

- Select the "AVD MANAGER" option
- Click on the "Create Virtual Device" button
- Select a hardware device and choose "Next"
- Select a system image and choose "Next". You will need to download it first if it's your first time running android studio.
- Configure the settings for your virtual device and choose "Finish" (Default settings are recommended)
- Launch the created AVD in the emulator
- Click on the play button on the newly opened window (Android Virtual Device Manager) to launch the virtual device.
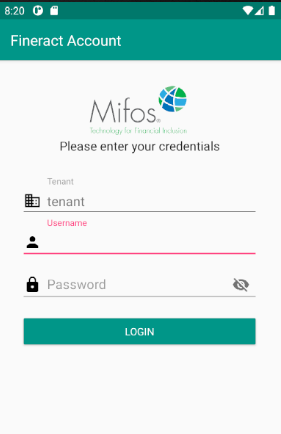
- Once the application has been built successfully, the login screen should appear:
Demo Credentials
You can use these credentials to log in.
Tenant: playground
Username: apache.demo
Password: ven3t1@n
Common Errors and Fixes
- /dev/kvm permission denied
- When choosing a system image, you may come accross this issue. You can find a solution to this here
- System UI isn't responding
- Some time after launching the virtual device, you might encounter this error. This can be solved by choosing a virtual device of lower resolution such as the Nexus 4
Contributing
We love Pull Requests, Bug Reports, ideas, code reviews or any other kind of positive contribution.
Commit Style Guide
We have set of Commit Style Guidelines and Contribution Guidelines. We follow these guideline to track the every change, any bug fixes, any enhancement and any new feature addition. We also suggest you to follow these guidelines to help us manage every commit.