Helmet-Detection-YoloV5
本项目主要基于YoloV5s-V5.0版本实现工地上安全帽佩戴的检测,因此本项目的主要实现背景是在Jetson Nano上部署好安全帽佩戴检测的代码,当然,在Windows/Linux上同样可以实现,并且本项目包含TensorRT加速使其能够在边缘硬件平台上能够更快更实时的处理数据,再次强调本项目使用的YoloV5是属于YoloV5s网络是属于模型最小的,并且版本是V5.0(各个版本不是很兼容各版本有点差别)
Requirement
Python>=3.6.0
Pillow
torch>=1.7.0
torchvision>=0.8.0
numpy>=1.18.5
matplotlib>=3.2.2
opencv-python>=4.1.2
PyYAML>=5.3.1
scipy>=1.4.1
tqdm>=4.41.0
Quick start
- 步骤一 : 配置好对应的环境并且克隆项目到本地
$ git clone https://github.com/FanDady/Helmet-Detection-YoloV5.git
$ cd Helmet-Detection-YoloV5
- 步骤二 : 下载安全帽检测模型文件和安全帽TensorRT加速的engine文件并存放到相应位置
$ 安全帽模型文件百度网盘链接:https://pan.baidu.com/s/1n7pq4HoUCDcClURTPt9D5w
$ 安全帽模型文件提取码:k24b
$ 安全帽tensorRT文件百度网盘链接:https://pan.baidu.com/s/1olMmUR6T5tQN4aBJeINK9Q
$ 安全帽tensorRT文件提取码:ywfk
$ 如果链接失效请邮件联系我或者在Issue下留言
- 步骤三 :在非TensorRT加速下YoloV5s推理
$ cd helmet_yolov5
$ python detect.py --source 0  # webcam
                            file.jpg  # image
                            file.mp4  # video
                            path/  # directory
                            path/*.jpg  # glob
                            rtsp://170.93.143.139/rtplive/470011e600ef003a004ee33696235daa  # rtsp stream
                            http://112.50.243.8/PLTV/88888888/224/3221225900/1.m3u8  # http stream

$ 例子:python detect.py --source test.jpg --weights helmet.pt
- 步骤四(可选): 在TensorRT加速下进行YoloV5推理
$ cd helmet_tensorrt
$ python3 yolov5_trt.py --source img
                                 video
                                 csiCam
                                 usbCam
$ 例子 : python3 yolov5_trt.py --source img --img_dir test.jpg --engine_dir helmet.engine
        python3 yolov5_trt.py --source img --img_dir test.jpg --engine_dir helmet.engine
        python3 yolov5_trt.py --source usbCam --engine_dir helmet.engine (默认调用dev 0摄像头)
        python3 yolov5_trt.py --source csiCam --engine_dir helmet.engine (CSI摄像头参数根据自己实际去设置)
Helmet Dataset
注意:下面两个格式的数据集中的内容都是一样的只不过是内容存放的格式以及内容需要的文件格式不同而已,二者可以相互转换
- 安全帽VOC格式数据集
# 百度网盘链接:https://pan.baidu.com/s/1dE23iElE3iGVdsPfQYm3jg
# 提取码:ir9x
- 安全帽Yolo格式数据集
# 百度网盘链接:https://pan.baidu.com/s/1CceCFIYzpBjjPcCe4_dr7g
# 提取码:gyre
How to train
- 准备好安全帽的yolo格式数据集(已上传如上)和官方YoloV5s权重文件
# yoloV5s权重百度网盘链接:https://pan.baidu.com/s/1PPEDV2UZsPLpugEAEW2wGg
# 提取码:6pfy
- (可选)制作自己的数据集,收集好图像并命名好使用Labelbox 、CVAT 、精灵标注助手等标注工具标注生成xml文件并且文件格式放置参照VOC数据集格式如下其中Main文件的txt文件可通过
../utils/generate_txt.py生成
---|
   |---Annotations----.xml
   |
   |---JPEGImages-----.jpg
   |
   |---Main-----------|
                      |--train.txt
                      |--val.txt
                      |--trainval.txt
                      |--test.txt
- (可选)将VOC格式数据集转换成yolo格式数据集,在
../utils/gen_yolo_format.py生成yolo格式数据集如下格式
---|
   |---images--|
   |           |--test
   |           |--train
   |           |--val
   |
   |---labels--|
               |--train
               |--val
               |--test
- 克隆YoloV5官方的代码到本地
$ git clone https://github.com/ultralytics/yolov5.git
- 准备好环境
$ cd yolov5
$ pip install -r requirements.txt
- 创建配置文件修改
data/custom_data.yaml文件
# 设置数据集的路径
train: data/Safety_Helmet_Train_dataset/score/images/train
val: data/Safety_Helmet_Train_dataset/score/images/val

# 分类数量
nc: 2

# 类别名称
names: ['person', 'hat']
- 在models文件夹中选择需要训练的模型这里选择的是yoloV5s训练并修改配置存放好为
yolov5s.yaml
# 这里只需要修改类别数量即可
nc: 2  # number of classes
- 执行训练文件
$ python train.py --epochs 200 --data custom_data.yaml --cfg yolov5s.yaml --weights yolov5s.pt --device 0
- 在路径下会生成runs文件夹里面找到weights里的best.pt就是训练好的权重
- 使用TensorRT加速训练好的模型详情请见官方教程YoloV5_tesnorrt
Results
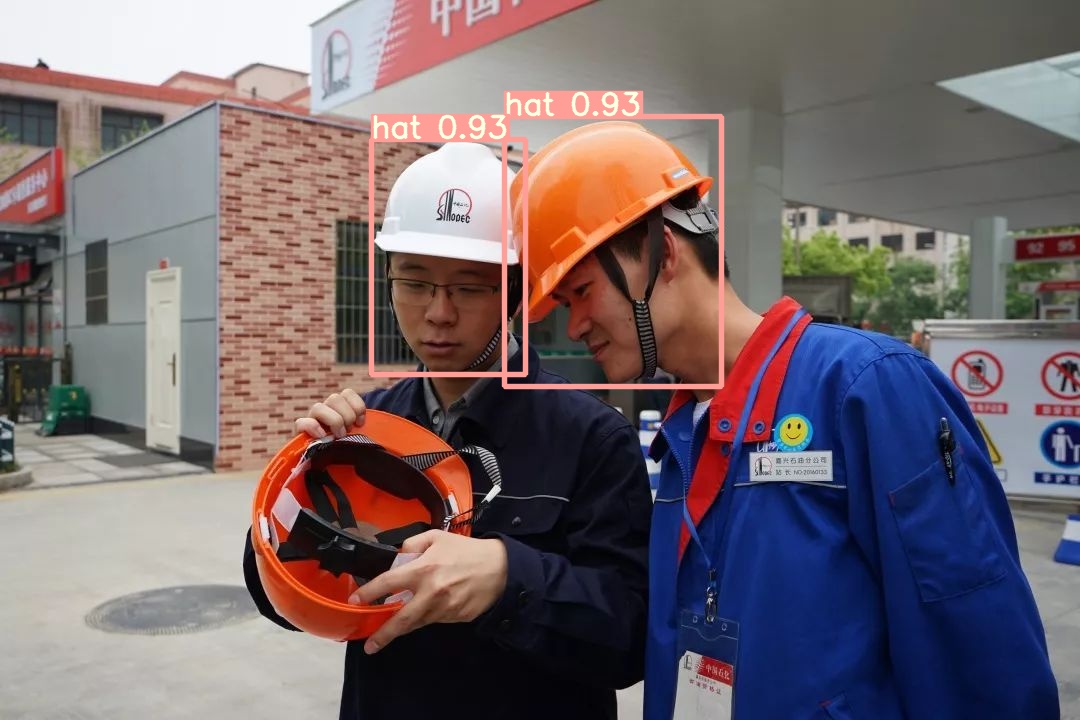
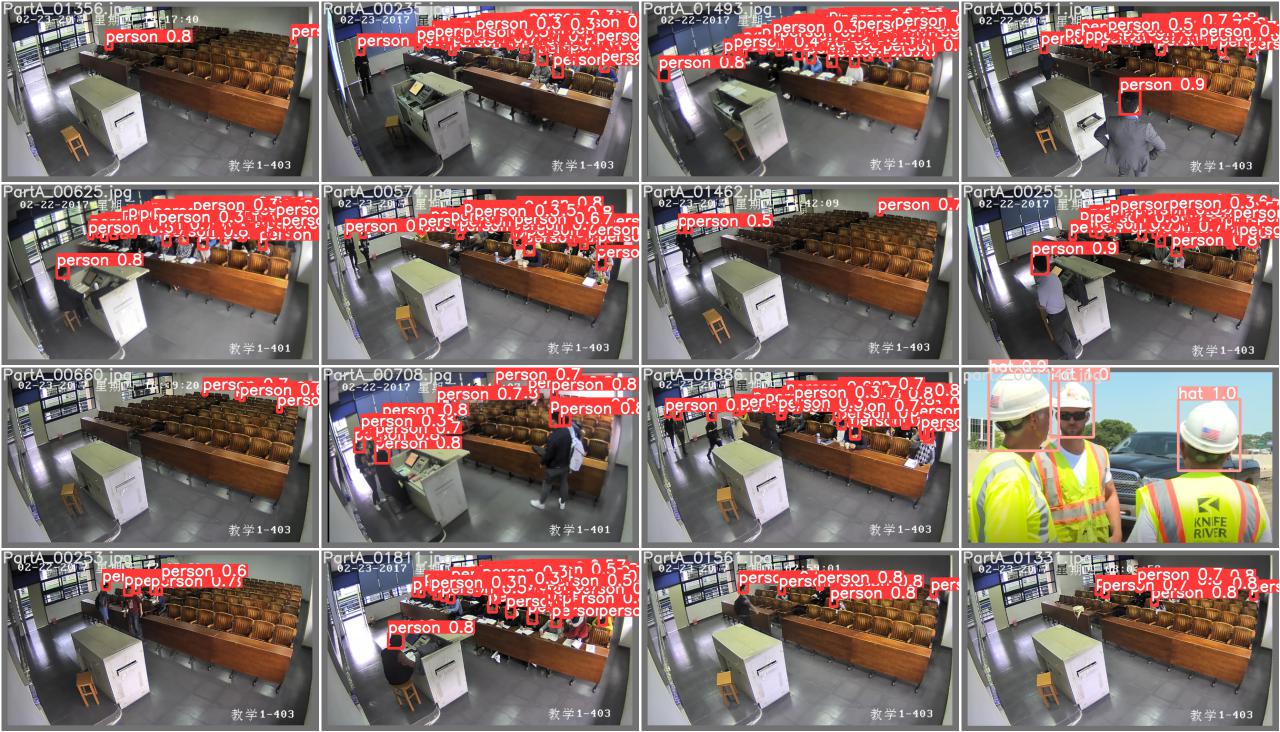
- 检测分类为person和hat分别代表没戴安全帽和戴安全帽
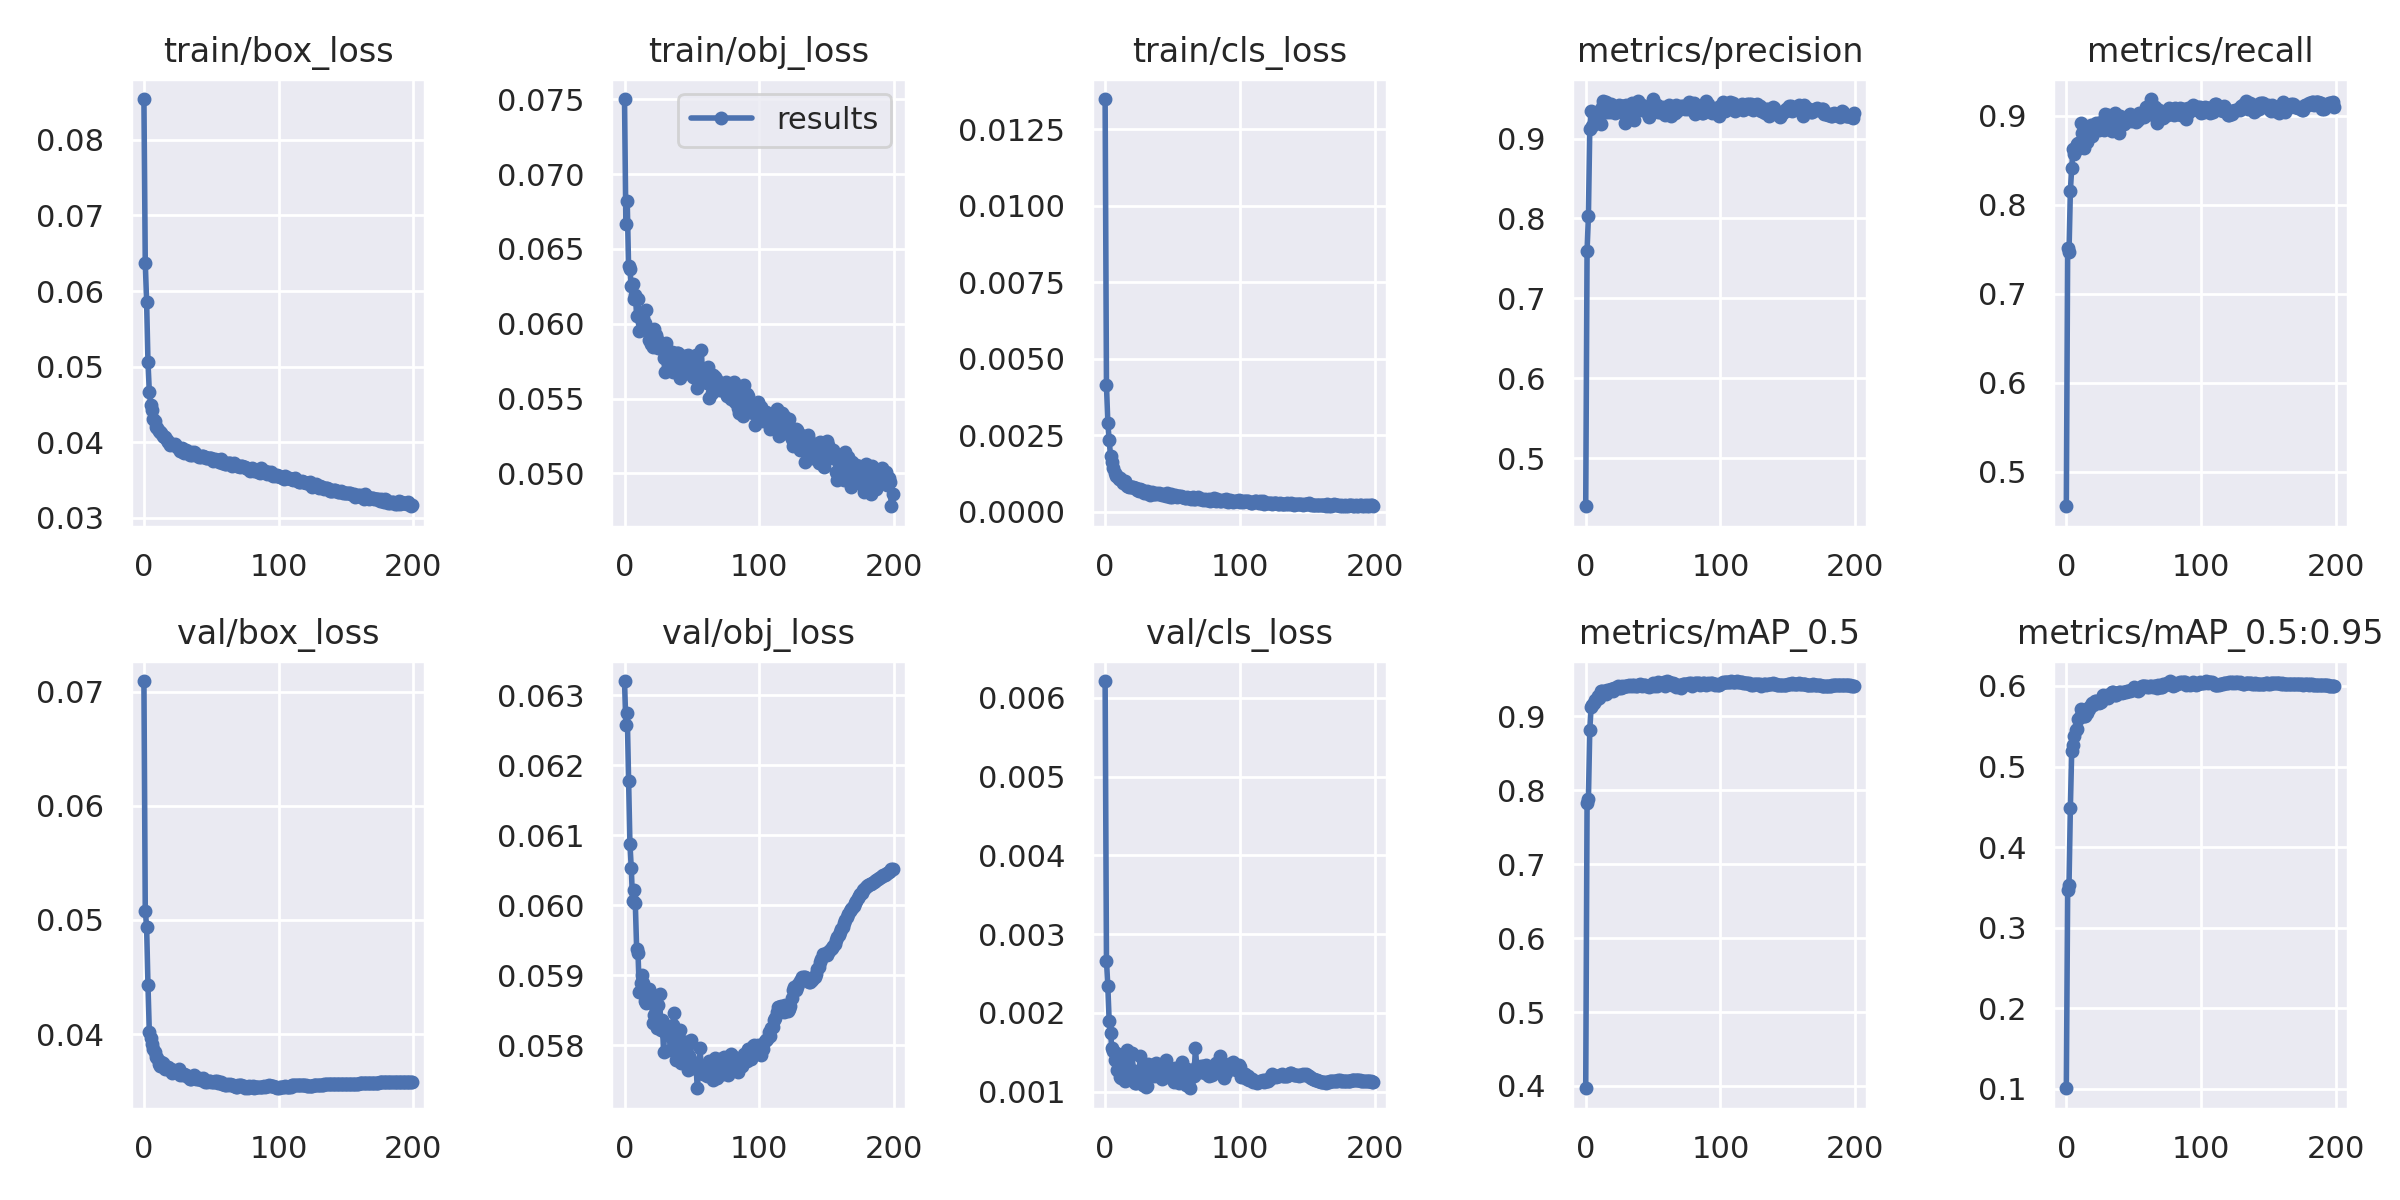
- 下图为训练的一个指标结果图