kinefx tools
Collection of rigging tools and utils for Houdini kinefx.
 Tools work only with Houdini 19 or newer versions. If you are still using Houdini 18.5 use tools from the h18.5 branch
Support
If you're finding what I'm doing useful in any way, maybe you would like to support me by getting virtual coffee:

Installation
Python scripts
Copy: create_obj_ctrls.py to source python directory. Houdini DOCs - Python scripts location or add it to your sys.path
Digital assets
Be sure that all digital assets are installed and ready to use before using scripts.
Tutorial
-
Download From github: https://github.com/kamilhepner/kinefx_tools
-
Extract zip in a directory/folder of your choosing. It will be called something like Eg. “C:\Users\YourUsername\Downloads\houdini\KineFX_Kamil_Tools\kinefx_tools-main”
-
Re-name the folder “kinefx_tools-main” to “kinefx_tools”
-
In your Houdini user preferences create a folder called “scripts” Eg. “C:\Users\YourUsername\Documents\houdini18.5\scripts”
-
Right mouse click to create “New Text Document.txt”
-
Rename it 123.py and open it
-
Paste the location of the kinefx_tools:
import sys ; sys.path.append('C:\Users\YourUsername\Downloads\houdini\KineFX_Kamil_Tools\kinefx_tools')- In your preferences there is a file called "houdini.env"
- Paste location of "kinefx_tools/hda" eg.
KINFX=C:\Users\YourUsername\Downloads\houdini\KineFX_Kamil_Tools\kinefx_tools\hda
- Add $KINFX to your otls path. Eg.
HOUDINI_OTLSCAN_PATH = $KINFX;$MOPS/otls;@/otls;@/otls;$QLIB/base;$QLIB/future;$QLIB/experimental
- Open Houdini
- Create a new shelf called kinefx_tools
- Add a button in scripts paste:
import sys ; sys.path.append('C:\Users\YourUsername\Downloads\houdini\KineFX_Kamil_Tools')

import kinefx_tools
kinefx_tools.create_obj_ctrls.run()
HDAs
There are a few handy HDAs, some of them are required to be installed in order to use them with scripts.
-
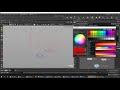
Controls library (controls_library::1.0) (OBJ)
Generates different shapes of controls as geometry which can be used in conjunction with Attach Control Geometry SOP
required by: create_obj_ctrls.py
-
Attach Control Geometry (kinefx::attach_obj_control::1.0) (SOP)
Modified attach joint geometry sop. Added extra functionality to make the process of creating object level controls much faster. You can assign individual colors for controls, manipulate the scale of controls and their offsets directly from this one node.

In case if your skeleton for these particular controls has been mirrored by the scale you need to set Mirrored by scale -> ON and specify at which Axis controls have been mirrored. For example, if your controls been mirrored along X-Axis, set the mirror scale to {-1.0, 1.0, 1.0}

You can specify which channels will be locked after creating controls by setting Translate/Rotate/Scale Lock parameter
Control Folder Let you specify the name of the folder into which controls will be promoted on your rig HDA. It's a second step to promote controls to your HDA, so filling that parameter is optional.
Also, this node adds extra attributes the jointgeo dictionary:

Those extra values are quired during the creation of object level controls. Check step by step tutorial. Setting Xray parameter ON will make object level controls automatically set to Xray.
required by: create_obj_ctrls.py


-
rig control 1.0 (rig_control::1.0) (OBJ)
Node used directly as rig control. Allow for dynamic change of control shape, which is loaded from the controls library. Thickness parameter adds easy control of how thick control should be displayed.

This node will be should be used in conjunction with rig_zero node as its parent (zero group).
required by: create_obj_ctrls.py

-
rig zero 1.1 (rig_zero::1.1) (OBJ)
This acts as a zero group for controls. But also moves them to keep them in sync with the joint's position. That node reads detail attributes generated by create_zero_attr::1.2

All of that is created and connected automatically when using the create_obj_ctrls.py script.
World space checkbox defines if the position of rig zero node should be queried from local or world transformation. It's handled automatically so you don't need to worry about it but in case if you unparent control which previously had a parent remember to turn ON world space


required by: create_obj_ctrls.py


-
create zero attrs 1.1 (create_zero_attr::1.1) (SOP)
Breaks down localtransform matrix per channel and saves it as detail attribute for every joint. That information later is used by rig_zero node to move it. From version 1.2 it also breaks down world transformation and outputs for rig_zero node
required by: create_obj_ctrls.py
-
joint apply offset (joint_apply_offset::1.0) (SOP)
Applies offset to joints. Useful for example when you do spline IK, after solving IK you would like to keep joints offset in such a way that they will match the original skeleton in the default pose.
To see it in action open: start.hiplc


-
Space switch (space_switch::1.1) (SOP)
The space switch node allows you to change spaces for the specified joint. To the first input connect joint/control (those are the same things) for which space switch you want to perform. Second input get all parent's information, those transforms will represent your different spaces.
You can specify as many spaces as you want by adding entries with + sing next to the Config parameter

In the Joint type the joint name with @name= at front of it. Space switch will happen for this joint. Use the multi-instance parameter Config to chose how many space switches you would like to have.
Stash Input Need to be pressed in order to stash transform offsets. Also you need to stash your inputs if incoming skeletons changed (hierarchy or position)
Space name: it's a descriptive name of your space switch. That name will show up on the menu where you can choose your spaces Parent: Joint name (with @name=) of that particular space/transform/parent.
Space Allow you to chose currently active space:

Components Let you specify for which transformation components you want to perform space switch. For example, for head FK control you only have a rotation space switch.
Tip: In case if you would like to have a separated Translation and Rotation space switch. You can stack those two nodes, one after another.
Tutorial: Check out this handy tutorial about how to use it:


Usage
Create object level control
# You can add this code as button on shelf
from kinefx_extra import create_obj_ctrls
create_obj_ctrls.run()
Promote selected controls:
After the creating controls with above script. Now at object level you will have a group called controls.

That will let you easily select all controls for your rig. Then just run script:
# You can add this code as button on shelf
import kinefx_tools
kinefx_tools.create_obj_ctrls.promote_selected_controls()
Create object level controls - Video:
Easy way of locking channels- Video:
Create object level controls - Video:

How to use Space Switch node - Video:
Tips
Bypass Attach Controls Geometry node
After creating your object level controls, you can bypass all Attach Controls Geometry nodes. That will speedup rig significantly due to the slow Python SOP inside. They aren't needed anymore, but keep them in case you would like to change something later. The bypass is enough. You can create group: or bundle if you prefer to be able to easily switch them ON and OFF.
Use blast instead of delete joints SOP
Delete joints sop does an extra reparenting steps via python code. Use blast wherever you can.
Contributing and support
Pull requests are welcome. For major changes, please open an issue first to discuss what you would like to change.