KlassViz - Kieler Class Diagram Visualization
KlassViz provides a way to dynamically show class diagrams just by clicking a context menu entry on your Eclipse project browser. The project also provides a textual language to describe and save diagrams. The whole thing is based on the KIELER Lightweight Diagrams (KLighD) framework.
Installing KlassViz
Automatic builds are done on every update by the GitHub Actions CI Builds. To install KlassViz, open your Eclipse installation and select Install New Software... from the Help menu. Use the following update site:
http://rtsys.informatik.uni-kiel.de/~kieler/updatesite/nightly-openkieler/
From the Class Diagram Visualization category, select KlassViz and install it.
Using KlassViz
To use KlassViz, install it into your existing Eclipse installation from our Nightly Builds update site as explained below. Once that is done, there are two ways to use KlassViz: through context menus or through class diagram files.
Using KlassViz through Context Menus
To quickly pull up a bunch of classes in a class diagram, simply select your source files (or the types contained therein) in the project explorer, right-click, and select Generate class diagram file from selection. Choose a folder and file name to save the generated file to.
To view the class diagram, proceed with the section Viewing Class Diagram Files.
Using KlassViz through Class Diagram Files
Creating Class Diagram Files
To create a new class diagram file, simply create a new plain file with the file extension .klaviz. Here's an example of what such a file could look like (this example assumes that you have pulled the de.cau.cs.kieler.debukviz project into your IDE):
// Import one or more projects whose classes to show in the diagram
import project de.cau.cs.kieler.debukviz

// Modify some of the colors
classdata.classColor2="#c4cde2"
classdata.abstractClassColor1="#fbe8c4"
classdata.abstractClassColor2="#eac47c"

// Layout options. See the Kieler Layout project for details
de.cau.cs.kieler.algorithm="de.cau.cs.kieler.klay.layered"
de.cau.cs.kieler.direction=DOWN

// List the different packages whose classes to include
package de.cau.cs.kieler.debukviz {
    // List the different classes and their members to include
    class DebuKVizSynthesis {
        transform(IVariable)

        // "depend" adds additional arrows
        depend "invokes" VariableTransformation
    }

    class DebuKVizTransformationService {
        transformationFor(IVariable)

        depend "manages" VariableTransformation
    }

    class VariableTransformation {
        transform(IVariable, KNode, VariableTransformationContext)

        depend "uses" VariableTransformationContext
    }

    class VariableTransformationContext {
        associateWith(IVariable, KNode)
        findAssociation(IVariable)
    }
}
KlassViz supports the following options:
| Name | Description |
|---|---|
classdata.borderColor |
The color of borders around types. |
classdata.edgeColor |
The color of edges. |
classdata.classColor1 |
First background color of the gradient for classes. |
classdata.classColor2 |
Second background color of the gradient for classes. |
classdata.abstractClassColor1 |
First background color of the gradient for abstract classes. |
classdata.abstractClassColor2 |
Second background color of the gradient for abstract classes. |
classdata.interfaceColor1 |
First background color of the gradient for interfaces. |
classdata.interfaceColor2 |
Second background color of the gradient for interfaces. |
classdata.enumColor1 |
First background color of the gradient for enumerations. |
classdata.enumColor2 |
Second background color of the gradient for enumerations. |
classdata.shadow |
Whether types should have a subtle shadow (true) or not (false). |
classdata.fontName |
The font used throughout the diagram. |
classdata.printMethodParameterNames |
Whether to show the actual names of method parameters. |
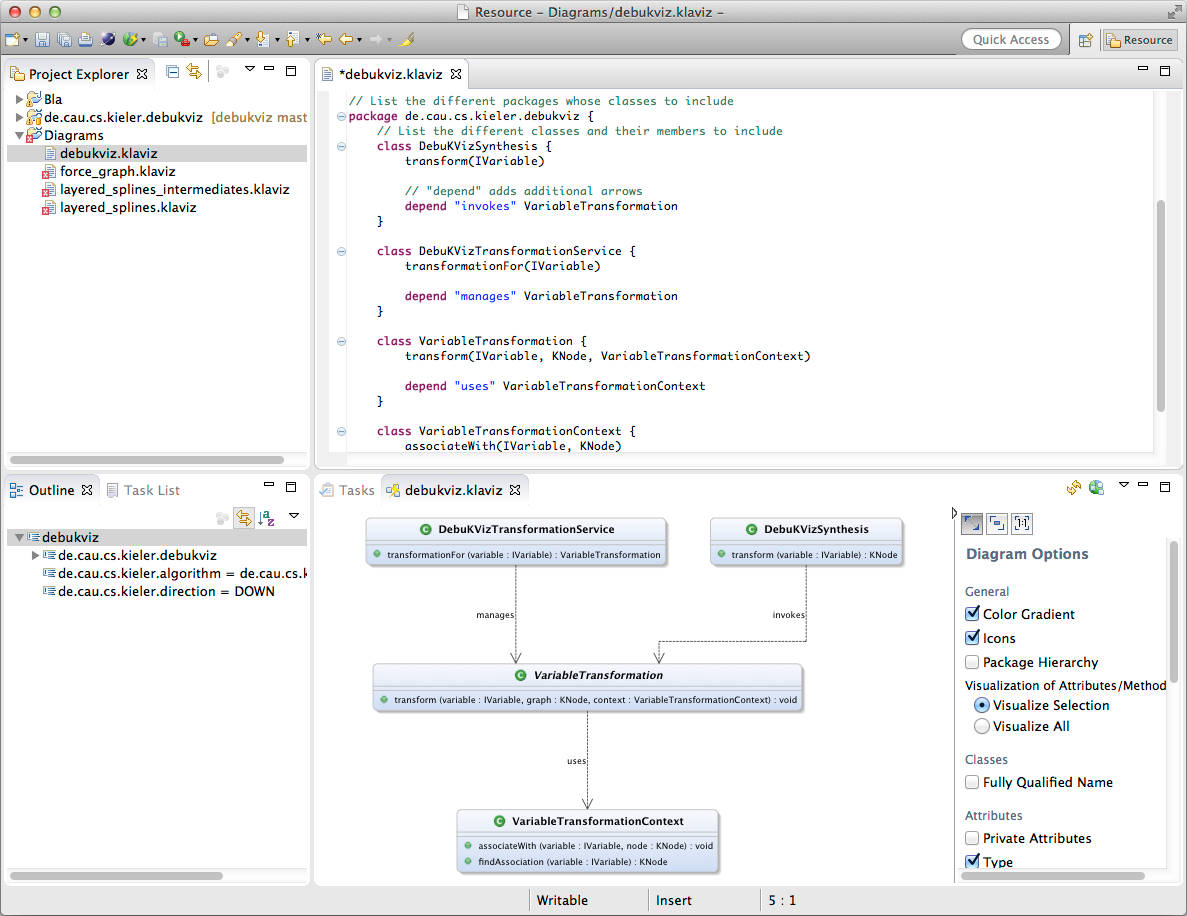
Viewing Class Diagram Files
To open the Diagram View, enter "diagram" into the 'Quick Access'-search field and select Diagram from the views category.
To visualize a class diagram file, simply open it and it should be displayed in the Diagram View.
Development
Building KlassViz
To build KlassViz manually from the sources, make sure you have Maven installed. Change into the build directory and execute this command:
mvn clean package
Contribute Your Own Code
Our development process is quite easy: the master branch is supposed to always be stable. All development takes place in feature branches. Once a feature is deemed stable enough, the code is merged into the master branch and thus gets shipped through the nightly builds.
Setting Up Your Development Environment
You will first need an Eclipse installation to hack away on OpenKieler with. Since we have a shiny Oomph setup available, this turns out to be comparatively painless (note that our setup assumes that you have a GitHub account):
-
Go to this site and download the Eclipse Installer for your platform. You will find the links at the bottom of the "Try the Eclipse Installer" box.
-
Start the installer. Click the Hamburger button at the top right corner and select Advanced Mode. Why? Because we're computer scientists, that's why!
-
Next, we need to tell Oomph to get everything ready for OpenKieler development. Download our Oomph setup file, click the Plus button at the top right corner and add the setup file to the Github Projects catalog. Double-click the new Klassviz entry. This will cause an item to appear in the table at the bottom of the window. Once you're done, click Next.
-
Oomph now asks you to enter some more information. You can usually leave the settings as is, except for the Installation folder name. This will be the directory under which all your Eclipse installations installed with Oomph will appear, each in a separate sub-directory. Select a proper directory and click Next.
-
If Oomph fails to clone our GitHub repository, this is probably due to Eclipse not finding your SSH key for GitHub. Fix it by going to the Eclipse preferences. You can manage your keys under General > Network Connections > SSH2. Once you have setup your SSH keys, let Oomph try again by selecting Perform Setup Tasks from the Help menu.