lfs-scripts 🐧
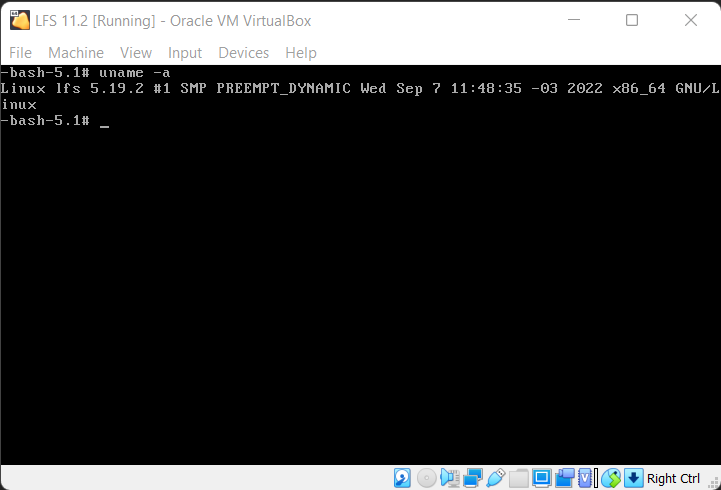
Instructions and scripts to build Linux From Scratch (LFS), version 11.2, as simply as possible (I know, not that simple, but anyway).
Foreword
First, this guide does not replace reading the whole LFS book. I highly recommend that you read it at least once. Only then you should use the automated scripts provided here.
This build will be accomplished inside a virtual machine. I'll be using Oracle VirtualBox, but you can use any tool of your personal preference. I'm running an Arch Linux VM, feel free to use your GNU/Linux distribution of choice. Just be sure to install the development tools available (base-devel package on Arch).
My VM has two virtual hard disks: one for the host (Arch Linux itself) and another for building LFS. You could also use a single hard disk with two partitions, that's also up to personal taste. I've decided to use two separate hard disks so I can completely isolate LFS from the host after the build. At the end, you'll be able to create a separate VM and boot from it directly.
The packages needed to build LFS were downloaded from here (474 MB), other mirrors are available here (look for the "LFS HTTP/FTP Sites" section at the bottom, the file you need is lfs-packages-11.0.tar).
Build instructions
Create a partition and a filesystem in the virtual hard disk (/dev/sdb):
fdisk /dev/sdb
Use the following basic options: n- new partition, accept the default values, w- write changes
Create a filesystem, a mount point, and mount it:
mkfs.ext4 /dev/sdb1
mkdir /mnt/lfs
mount /dev/sdb1 /mnt/lfs
Add the following line to root's .bashrc:
export LFS=/mnt/lfs
Source the file:
source .bashrc
Download all the packages and extract them to $LFS/sources.
cd $LFS
cp /<location_of_the_package>/lfs-packages-11.2.tar .
tar xf lfs-packages-11.2.tar
mv 11.2-rc1 sources
chmod -v a+wt $LFS/sources
Copy all the shell scripts from this repository to your $LFS directory:
cp /<location_of_the_scripts>/*.sh $LFS
Create the basic filesystem for LFS:
mkdir -pv $LFS/{etc,var} $LFS/usr/{bin,lib,sbin}

for i in bin lib sbin; do
  ln -sv usr/$i $LFS/$i
done

case $(uname -m) in
  x86_64) mkdir -pv $LFS/lib64 ;;
esac

mkdir -pv $LFS/tools
Create the lfs user, used during the initial build process (you will have to type a password):
groupadd lfs
useradd -s /bin/bash -g lfs -m -k /dev/null lfs
passwd lfs
Make lfs own the entire filesystem:
chown -R lfs:lfs $LFS/*
chown lfs:lfs $LFS
Login as the lfs user:
su - lfs
Create a .bash_profile file:
cat > ~/.bash_profile << "EOF"
exec env -i HOME=$HOME TERM=$TERM PS1='\u:\w\$ ' /bin/bash
EOF
Create a .bashrc file:
cat > ~/.bashrc << "EOF"
set +h
umask 022
LFS=/mnt/lfs
LC_ALL=POSIX
LFS_TGT=$(uname -m)-lfs-linux-gnu
PATH=/usr/bin
if [ ! -L /bin ]; then PATH=/bin:$PATH; fi
PATH=$LFS/tools/bin:$PATH
CONFIG_SITE=$LFS/usr/share/config.site
export LFS LC_ALL LFS_TGT PATH CONFIG_SITE
EOF

source ~/.bashrc
Run the lfs-cross.sh script, which will build the cross toolchain and cross compiling temporary tools from chapters 5 and 6:
sh $LFS/lfs-cross.sh | tee $LFS/lfs-cross.log
Exit from the lfs user to become root again:
exit
Make root own the entire filesystem again:
chown -R root:root $LFS/*
chown root:root $LFS
Prepare virtual kernel file systems:
mkdir -pv $LFS/{dev,proc,sys,run}
mount -v --bind /dev $LFS/dev
mount -v --bind /dev/pts $LFS/dev/pts
mount -vt proc proc $LFS/proc
mount -vt sysfs sysfs $LFS/sys
mount -vt tmpfs tmpfs $LFS/run
if [ -h $LFS/dev/shm ]; then
  mkdir -pv $LFS/$(readlink $LFS/dev/shm)
fi
Enter the chroot environment:
chroot "$LFS" /usr/bin/env -i   \
    HOME=/root                  \
    TERM="$TERM"                \
    PS1='(lfs chroot) \u:\w\$ ' \
    PATH=/usr/bin:/usr/sbin     \
    /bin/bash --login
Create essential directories, files and symlinks:
mkdir -pv /{boot,home,mnt,opt,srv}
mkdir -pv /etc/{opt,sysconfig}
mkdir -pv /lib/firmware
mkdir -pv /media/{floppy,cdrom}
mkdir -pv /usr/{,local/}{include,src}
mkdir -pv /usr/local/{bin,lib,sbin}
mkdir -pv /usr/{,local/}share/{color,dict,doc,info,locale,man}
mkdir -pv /usr/{,local/}share/{misc,terminfo,zoneinfo}
mkdir -pv /usr/{,local/}share/man/man{1..8}
mkdir -pv /var/{cache,local,log,mail,opt,spool}
mkdir -pv /var/lib/{color,misc,locate}
ln -sfv /run /var/run
ln -sfv /run/lock /var/lock
install -dv -m 0750 /root
install -dv -m 1777 /tmp /var/tmp
ln -sv /proc/self/mounts /etc/mtab

cat > /etc/hosts << EOF
127.0.0.1  localhost $(hostname)
::1        localhost
EOF

cat > /etc/passwd << "EOF"
root:x:0:0:root:/root:/bin/bash
bin:x:1:1:bin:/dev/null:/usr/bin/false
daemon:x:6:6:Daemon User:/dev/null:/usr/bin/false
messagebus:x:18:18:D-Bus Message Daemon User:/run/dbus:/usr/bin/false
uuidd:x:80:80:UUID Generation Daemon User:/dev/null:/usr/bin/false
nobody:x:65534:65534:Unprivileged User:/dev/null:/usr/bin/false
EOF

cat > /etc/group << "EOF"
root:x:0:
bin:x:1:daemon
sys:x:2:
kmem:x:3:
tape:x:4:
tty:x:5:
daemon:x:6:
floppy:x:7:
disk:x:8:
lp:x:9:
dialout:x:10:
audio:x:11:
video:x:12:
utmp:x:13:
usb:x:14:
cdrom:x:15:
adm:x:16:
messagebus:x:18:
input:x:24:
mail:x:34:
kvm:x:61:
uuidd:x:80:
wheel:x:97:
users:x:999:
nogroup:x:65534:
EOF

echo "tester:x:101:101::/home/tester:/bin/bash" >> /etc/passwd
echo "tester:x:101:" >> /etc/group
install -o tester -d /home/tester
touch /var/log/{btmp,lastlog,faillog,wtmp}
chgrp -v utmp /var/log/lastlog
chmod -v 664  /var/log/lastlog
chmod -v 600  /var/log/btmp

exec /usr/bin/bash --login
Run the lfs-chroot.sh script, which will build additional temporary tools:
sh /lfs-chroot.sh | tee /lfs-chroot.log
Cleanup before the final build phase:
rm -rf /usr/share/{info,man,doc}/*
find /usr/{lib,libexec} -name \*.la -delete
rm -rf /tools
For the final build phase, run the lfs-system.sh script:
sh /lfs-system.sh | tee /lfs-system.log
You must now set a password for the root user (you will have to type a password):
passwd root
Run the final script to configure the rest of the system:
sh /lfs-final.sh | tee /lfs-final.log
The end
You can now create a new VM using the virtual hard disk with the LFS build. It will be bootable and fully functional. Enjoy!