Guide
Installation
MeshMage can be fully installed and configured with Ansible. From a machine with Ansible and git installed, fork MeshMage and go into the Ansible directory.
git clone https://github.com/symkat/MeshMage.git
cd MeshMage/Ansible
MeshMage should be installed on a Debian 10 machine. You will need ssh access to root@ on the target node for Ansible to access it. Replace the IP address 10.0.0.1 with the IP address of your Debian 10 machine; don't remove the comma inside the single-quotes.
ansible-playbook -i '10.0.0.1,' install-meshmage.ymlThe installation process usually takes about 30 minutes to run.
Creating the first user account
Once MeshMage is installed, you can access it over http and you will be directed to create the initial user account. The initial user account can be created without any authentication.
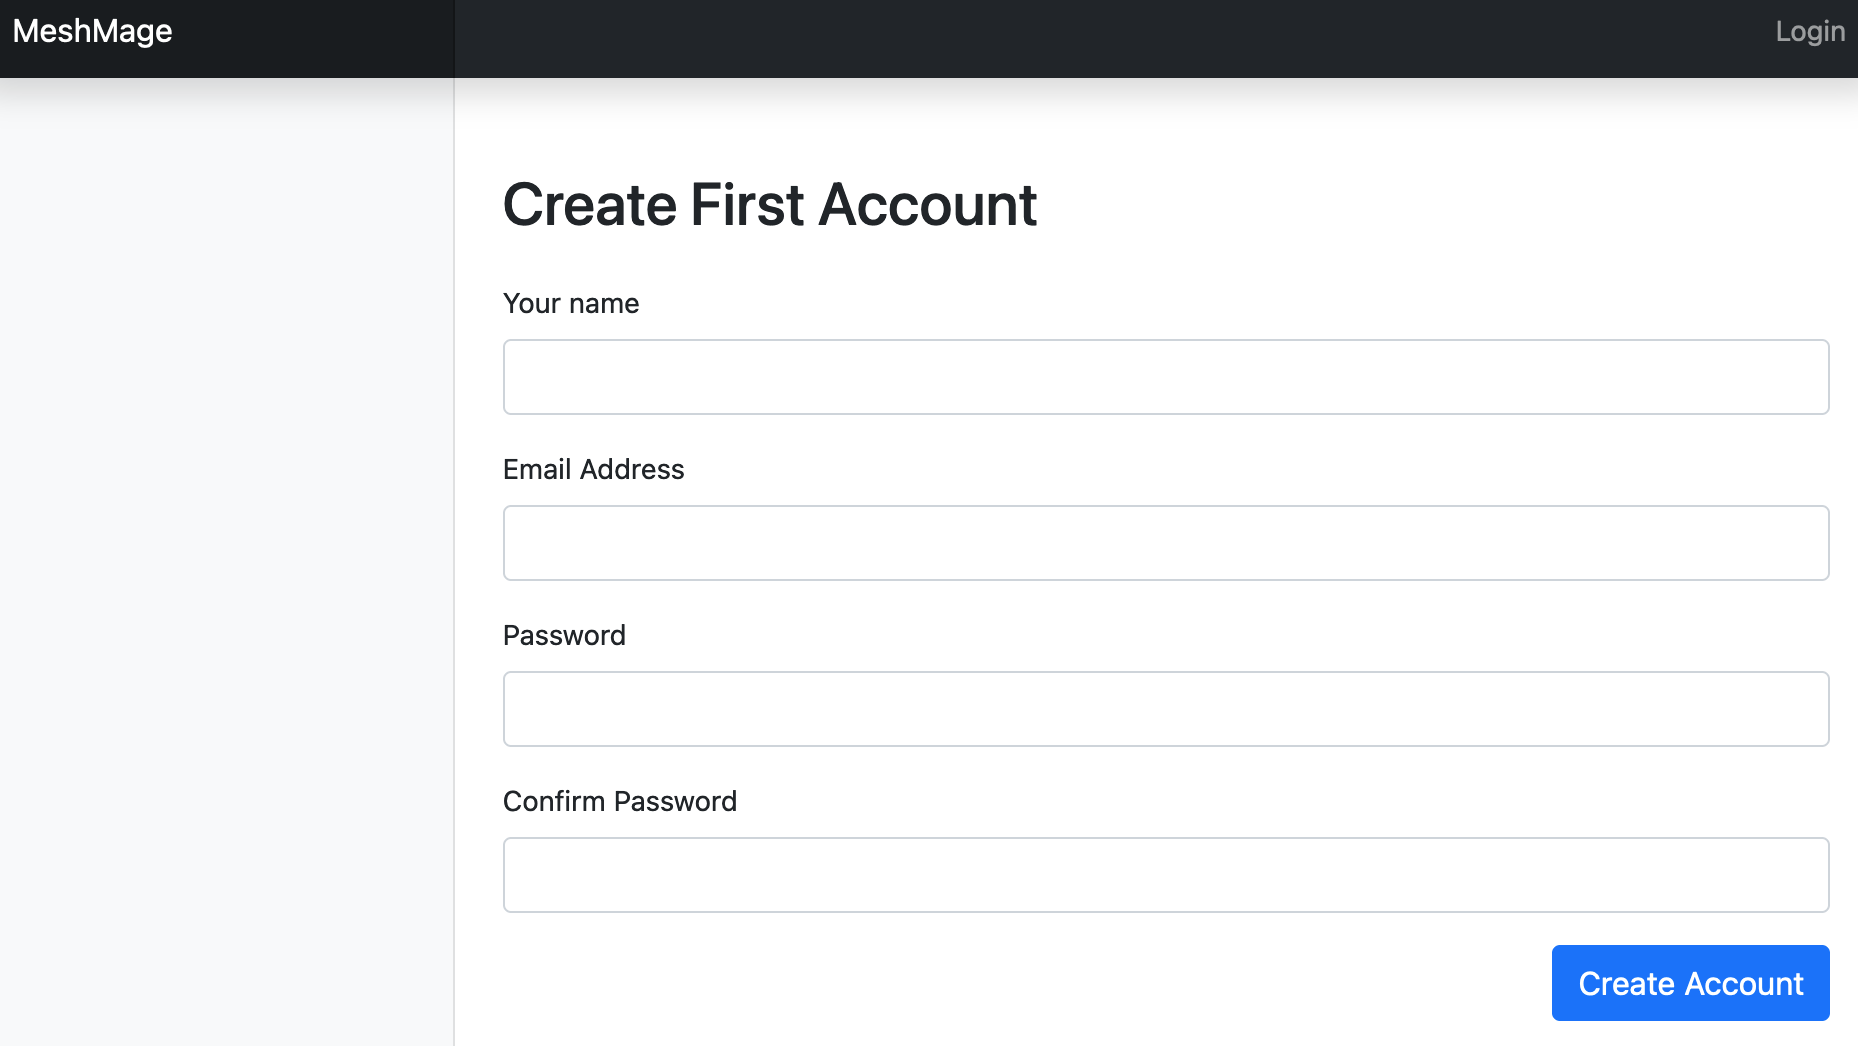
Enter your name, email address and password. Your email address and password will be used as the login information and click Create Account. If there are no errors, your account will be created and you will be logged into MeshMage.
Creating a network
The first time you log into MeshMage the Dashboard will let you know you have no networks defined. You'll see this prompt until you add a network.
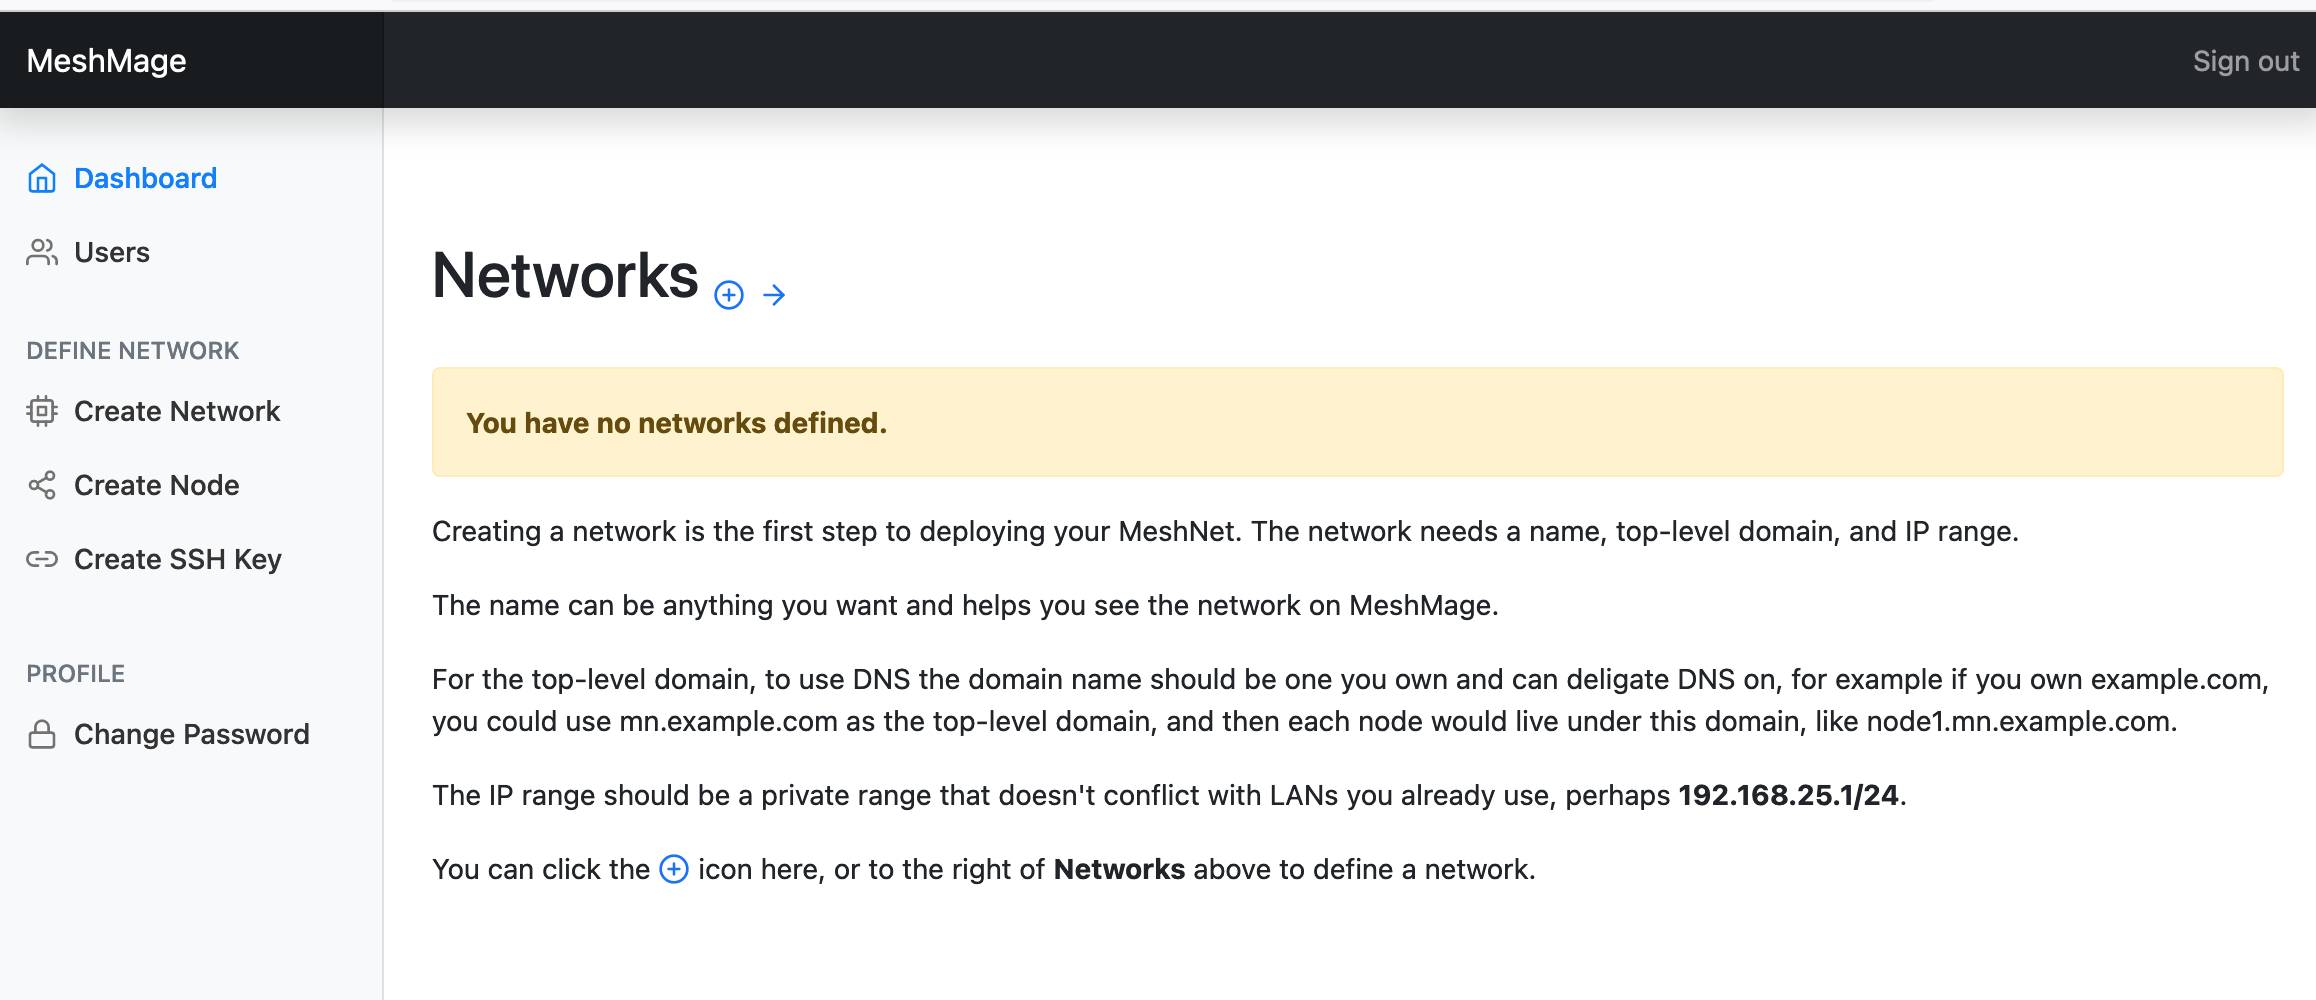
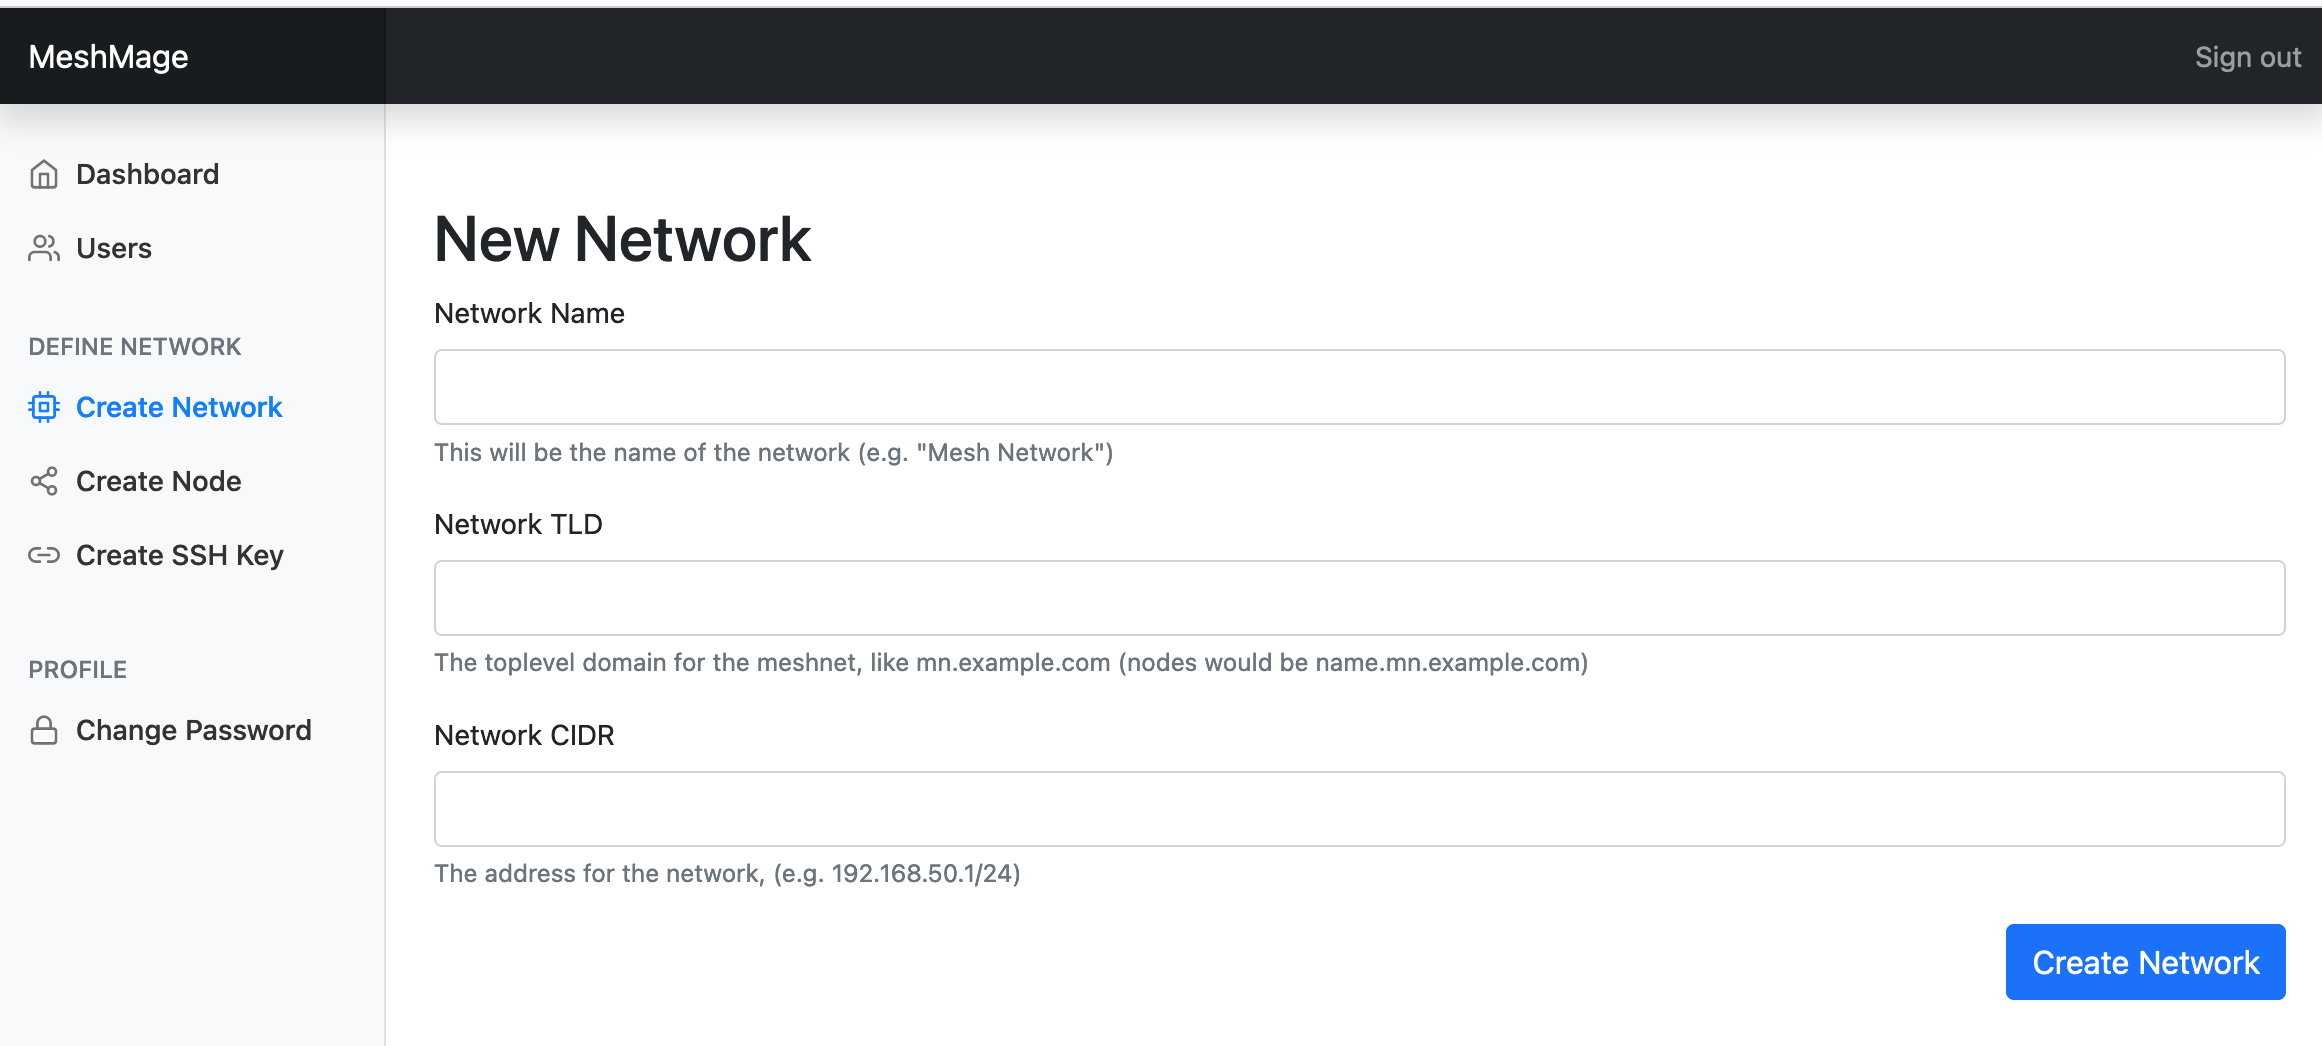
Each Network has a name, top-level domain, and IP range. Each Network has its own encryption certificates. Once a network is created, nodes -- laptops, VMs, cloud machines -- can be added to the network. Click the plus sign to create your first network.
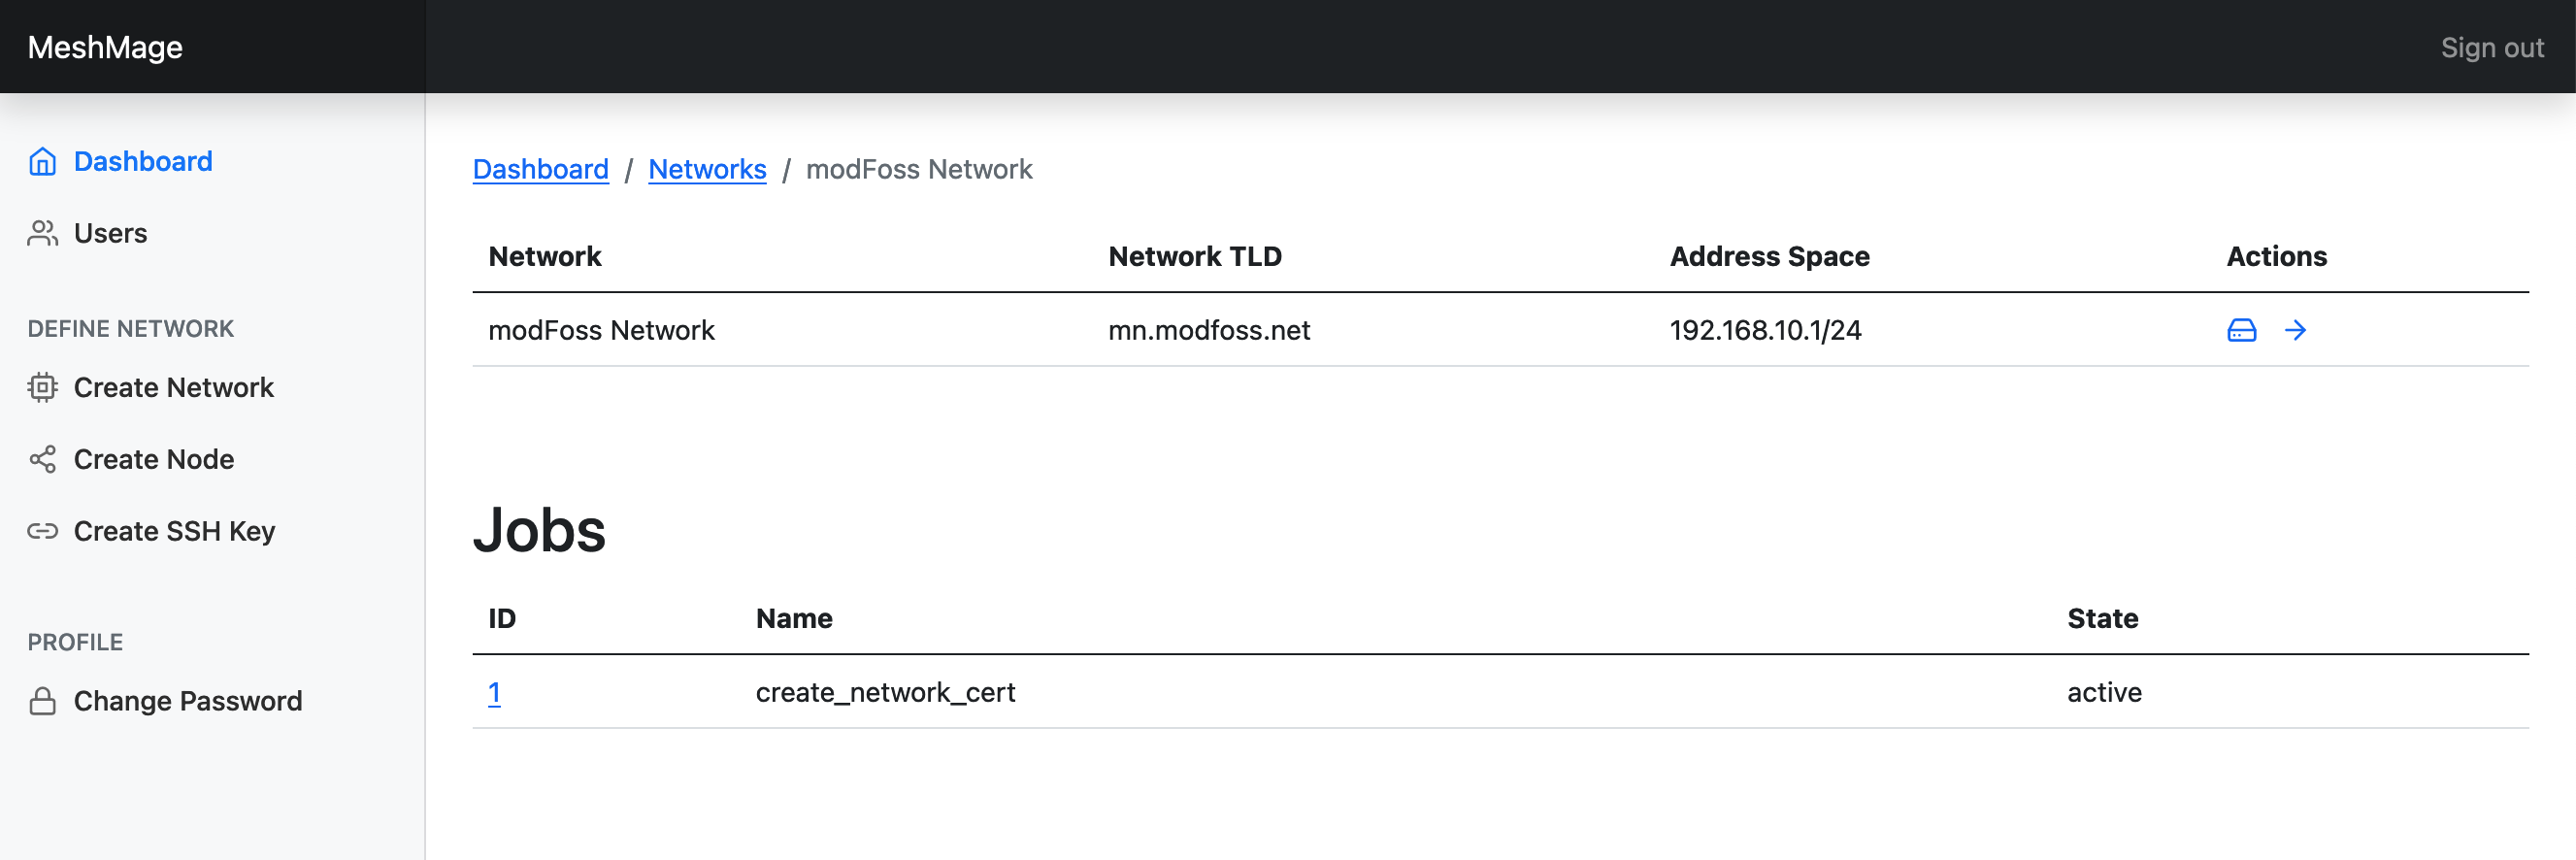
For this example, we will create a network for modFoss. The IP range will be 192.168.10.1 to 192.168.10.255 for all of the nodes on the network. The network TLD will be set to mn.modfoss.net, so each node will have a DNS entry for nodename.mn.modfoss.net.
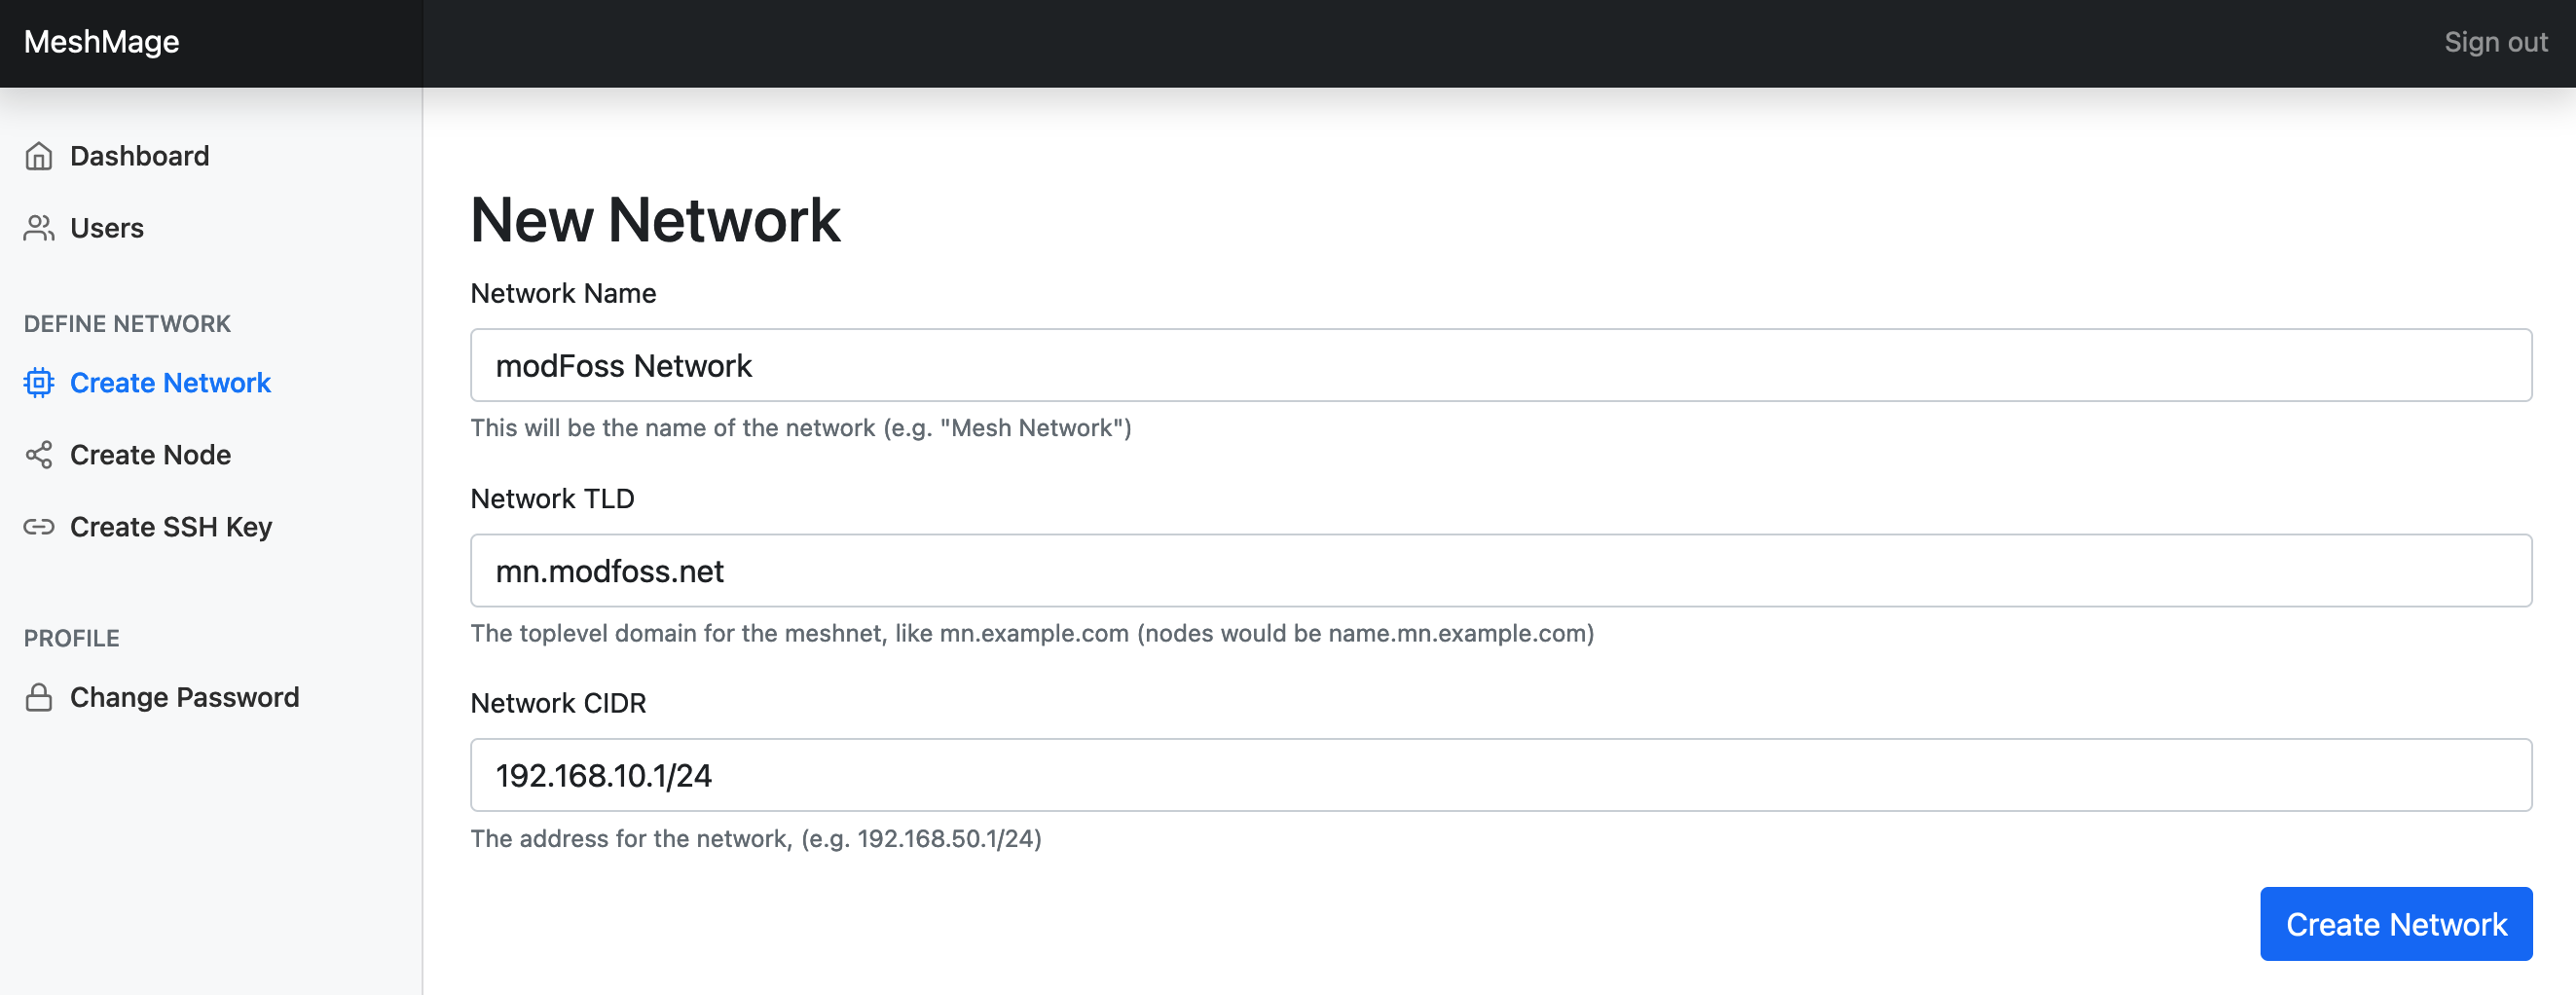
After clicking Create Network, the network will be added to MeshMage and nodes can be created for it.
Adding a Lighthouse
A Lighthouse node provides DNS services for the network and facilitates nodes behind NATs to talking to one another. Each Network should have at least one lighthouse node.
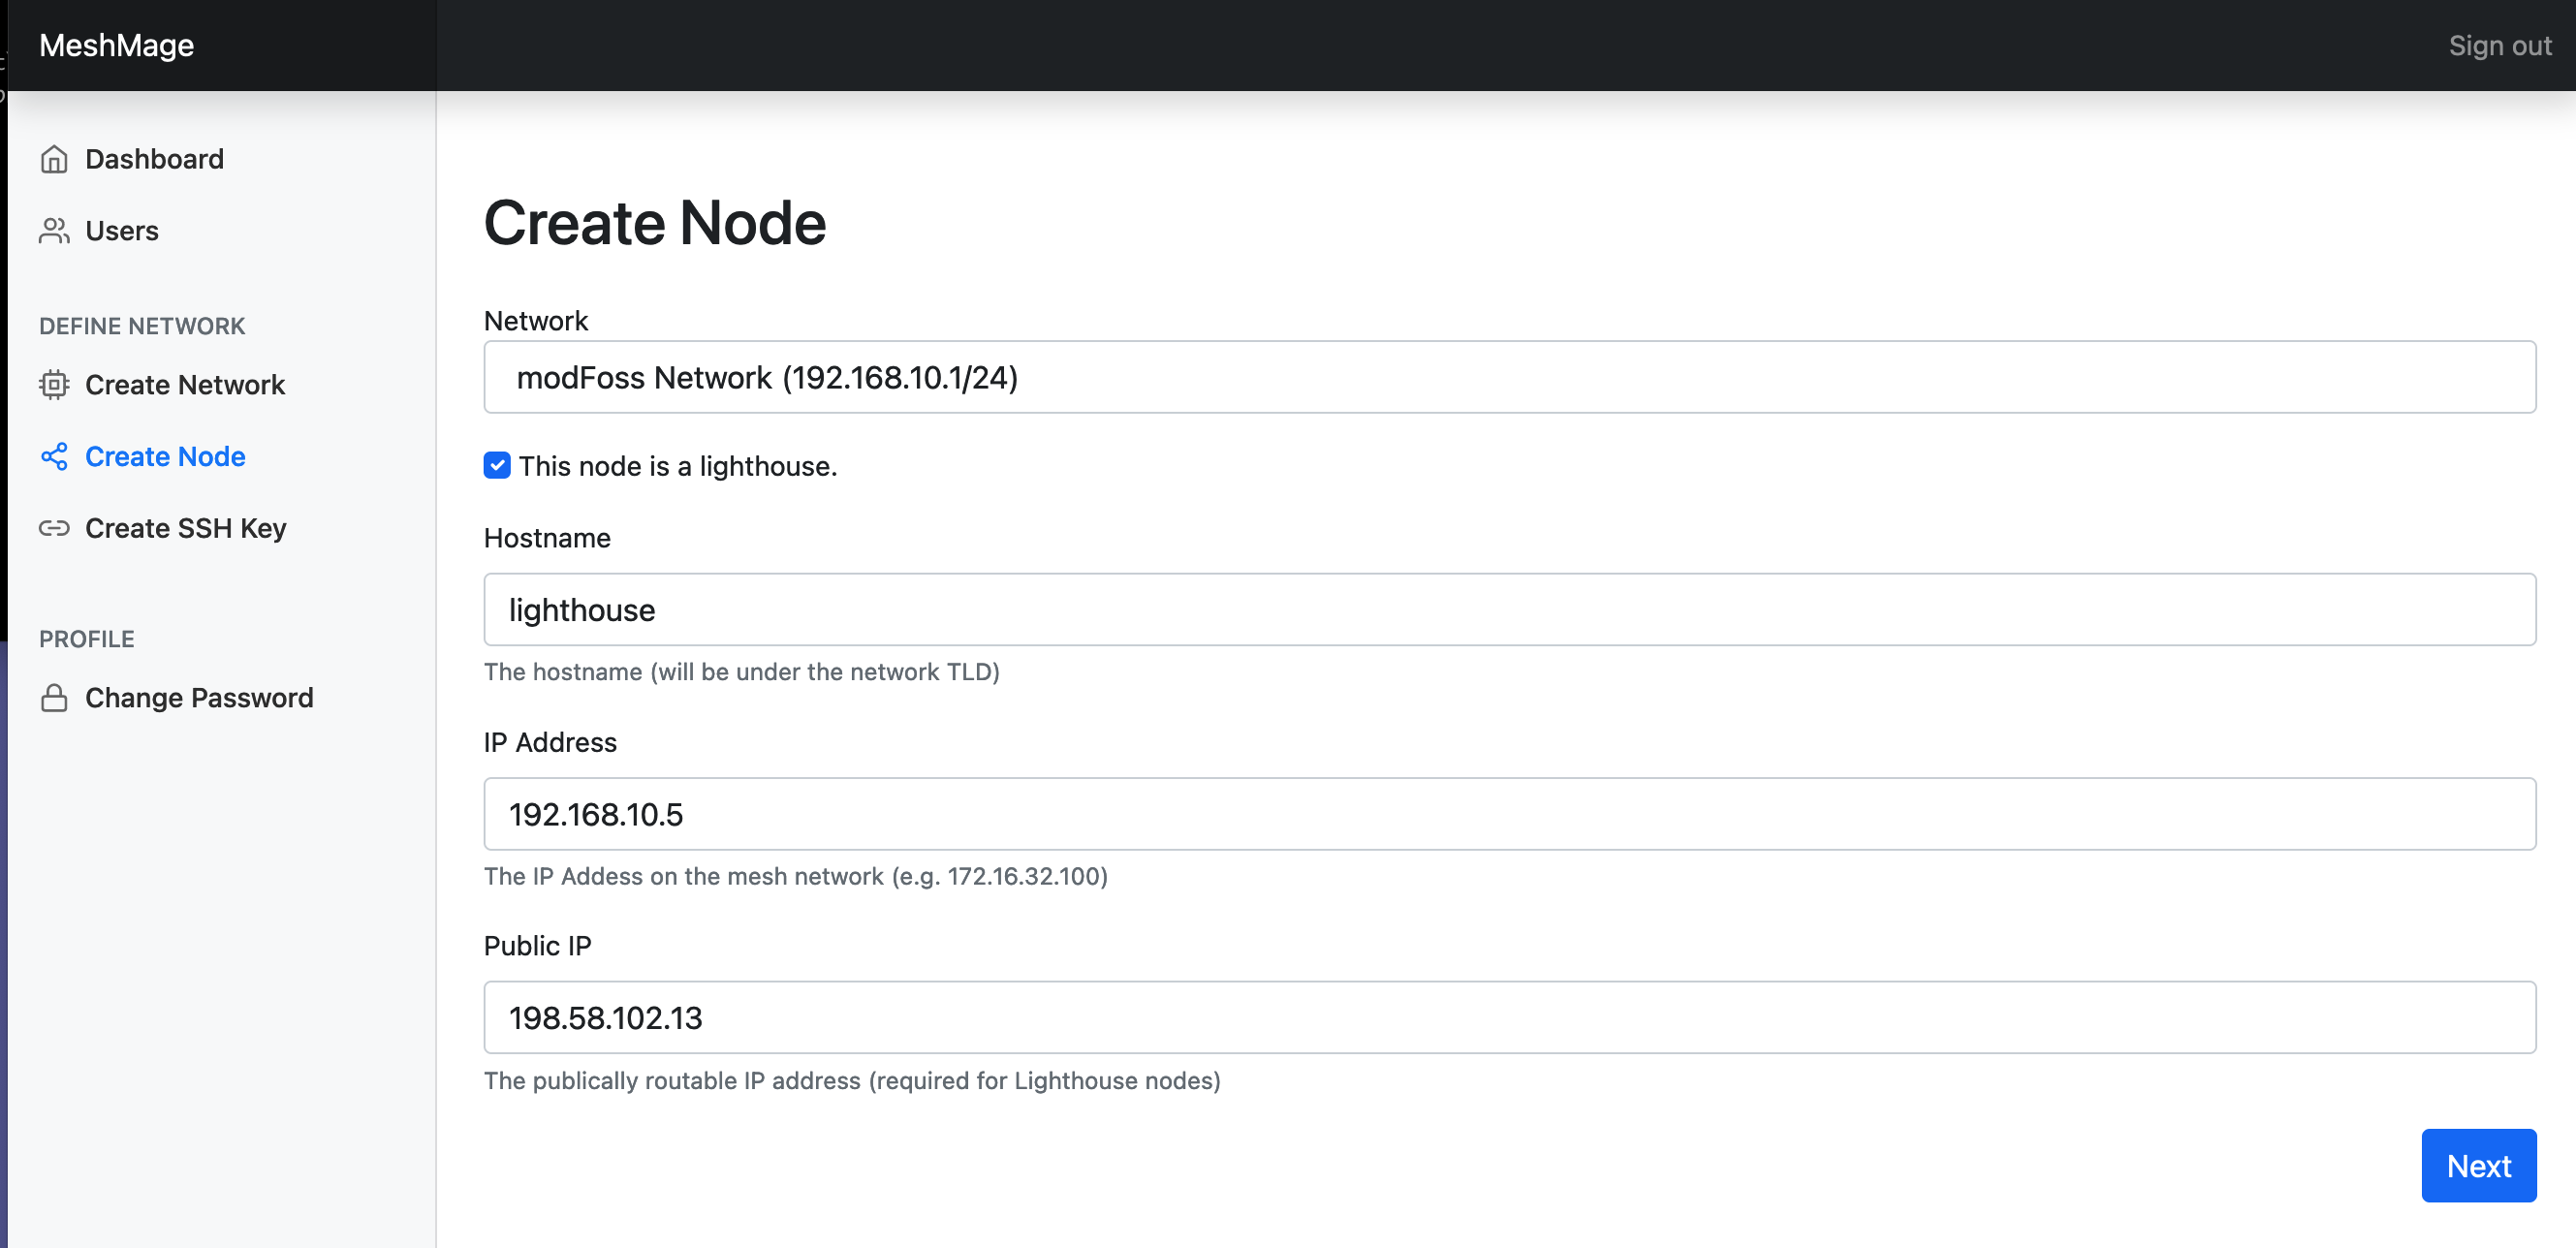
Let's create a Lighthouse node for the modFoss network and call it lighthouse.mn.modfoss.net. Nodes can be added by clicking Create Node on the sidebar, or clicking the node icon under the Network's Actions column.
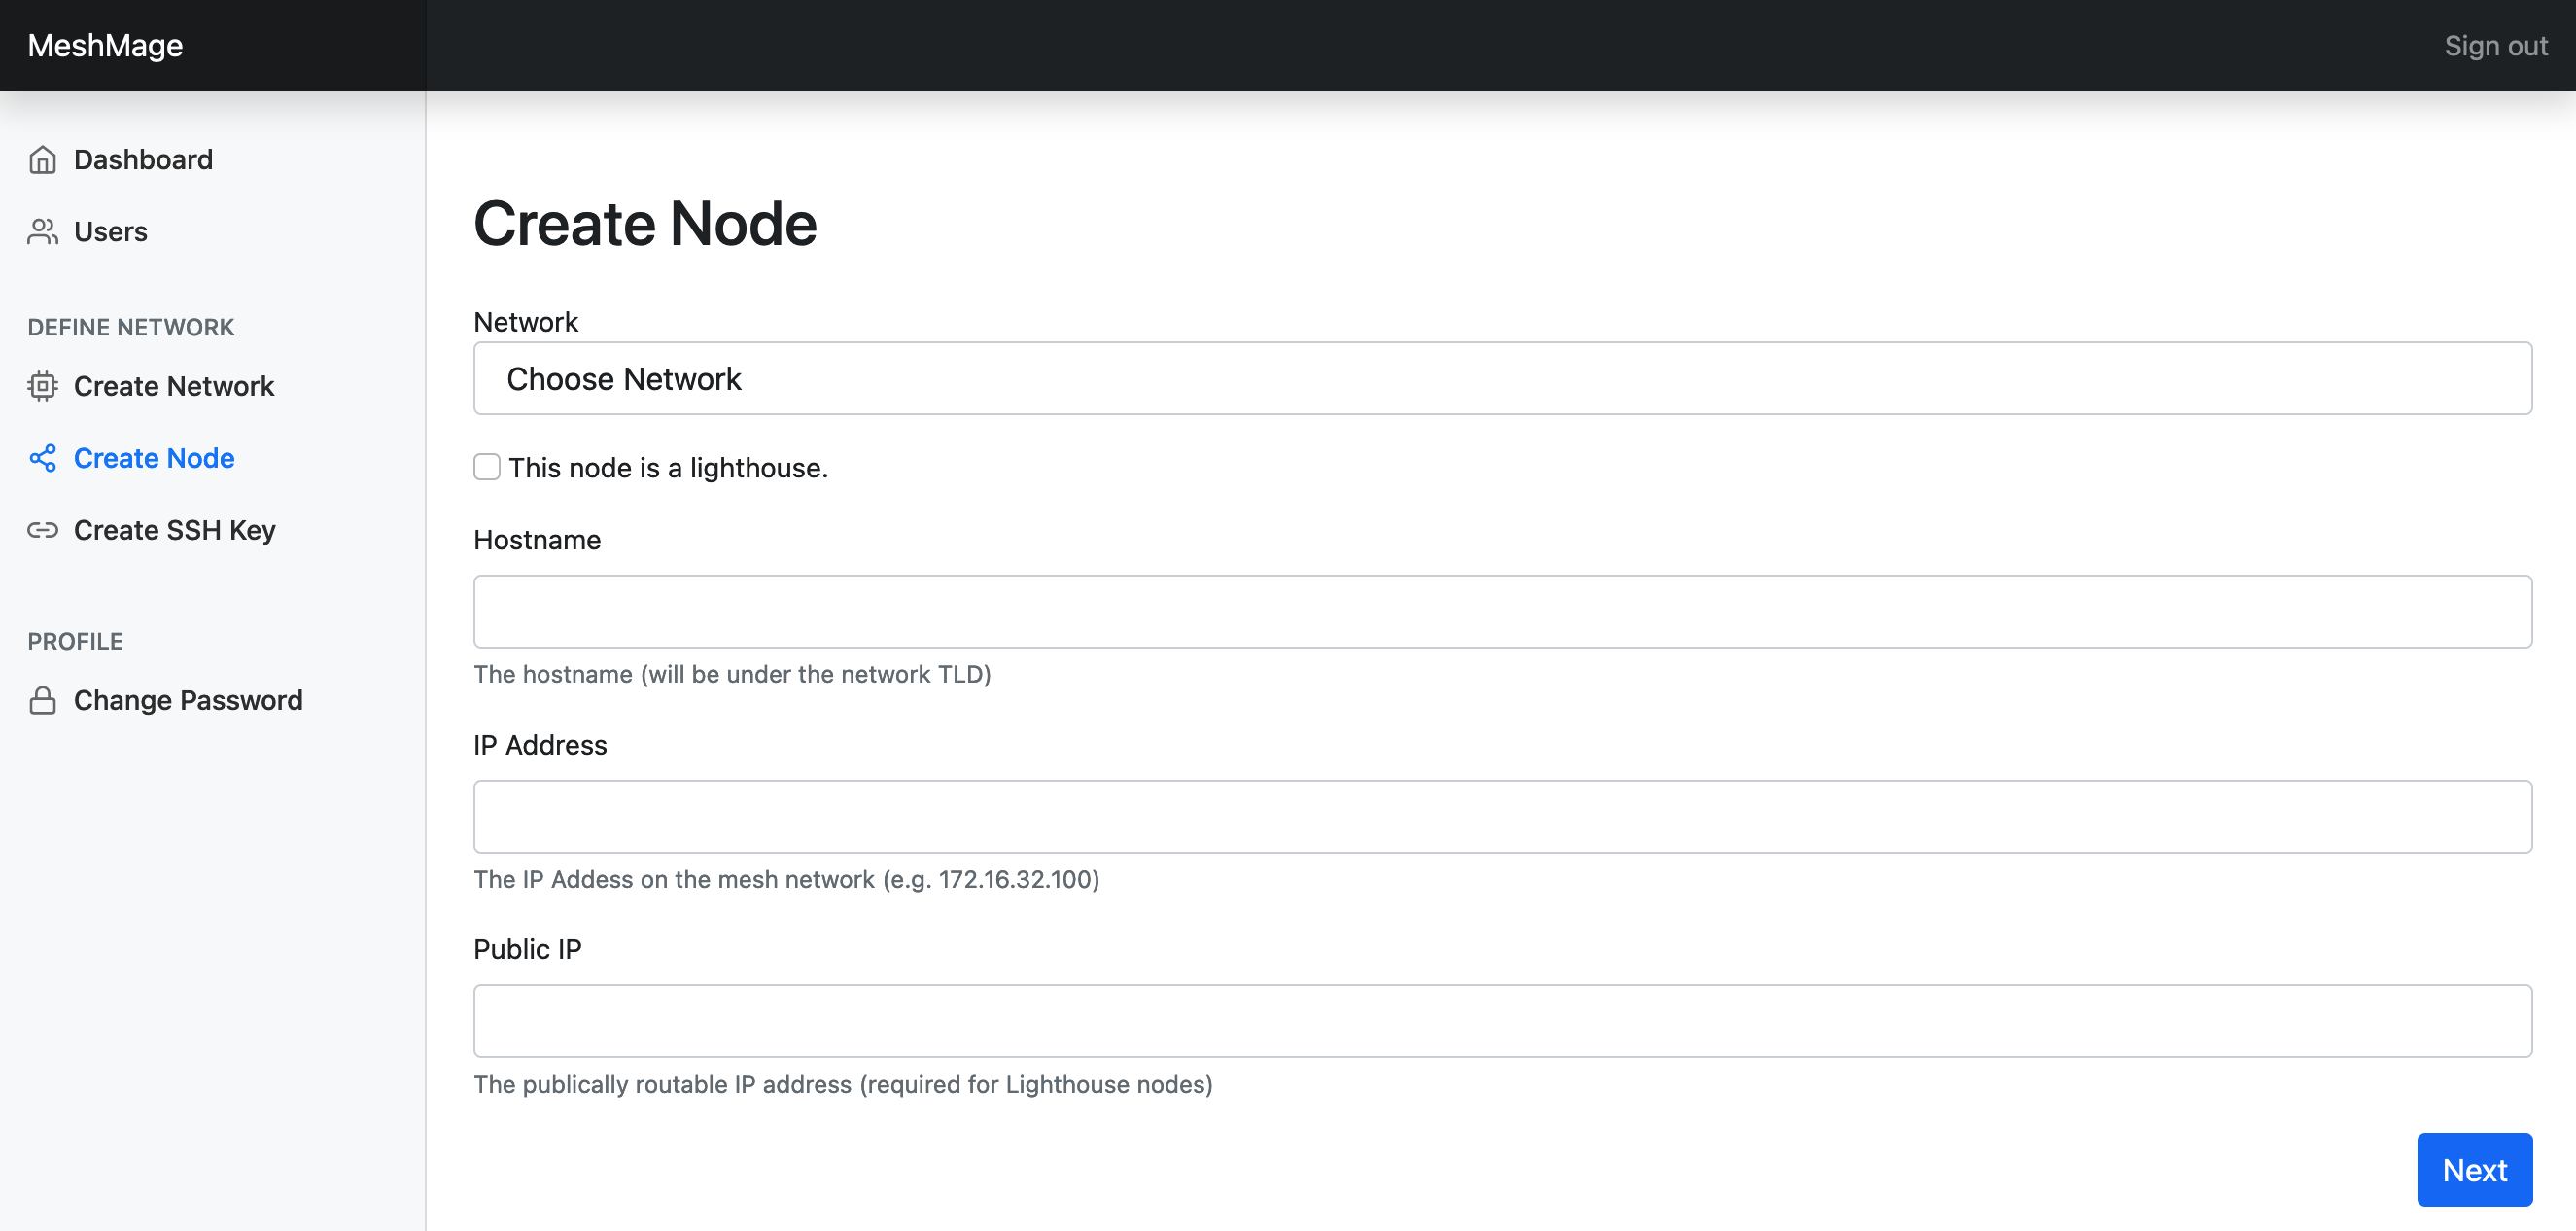
When adding the node, first we select the network for the node. This node will be a lighthouse, so we check the box to declare it as one. The housename will be lighthouse.mn.modfoss.net, so we enter lighthouse as the hostname. The IP address field will determine the IP address of the node on the MeshNet. The Public IP is required for lighthouse nodes since they must be on the open internet to work.
Once the node is created, we'll be brought to the node page for lighthouse.mn.modfoss.net and can deploy it.
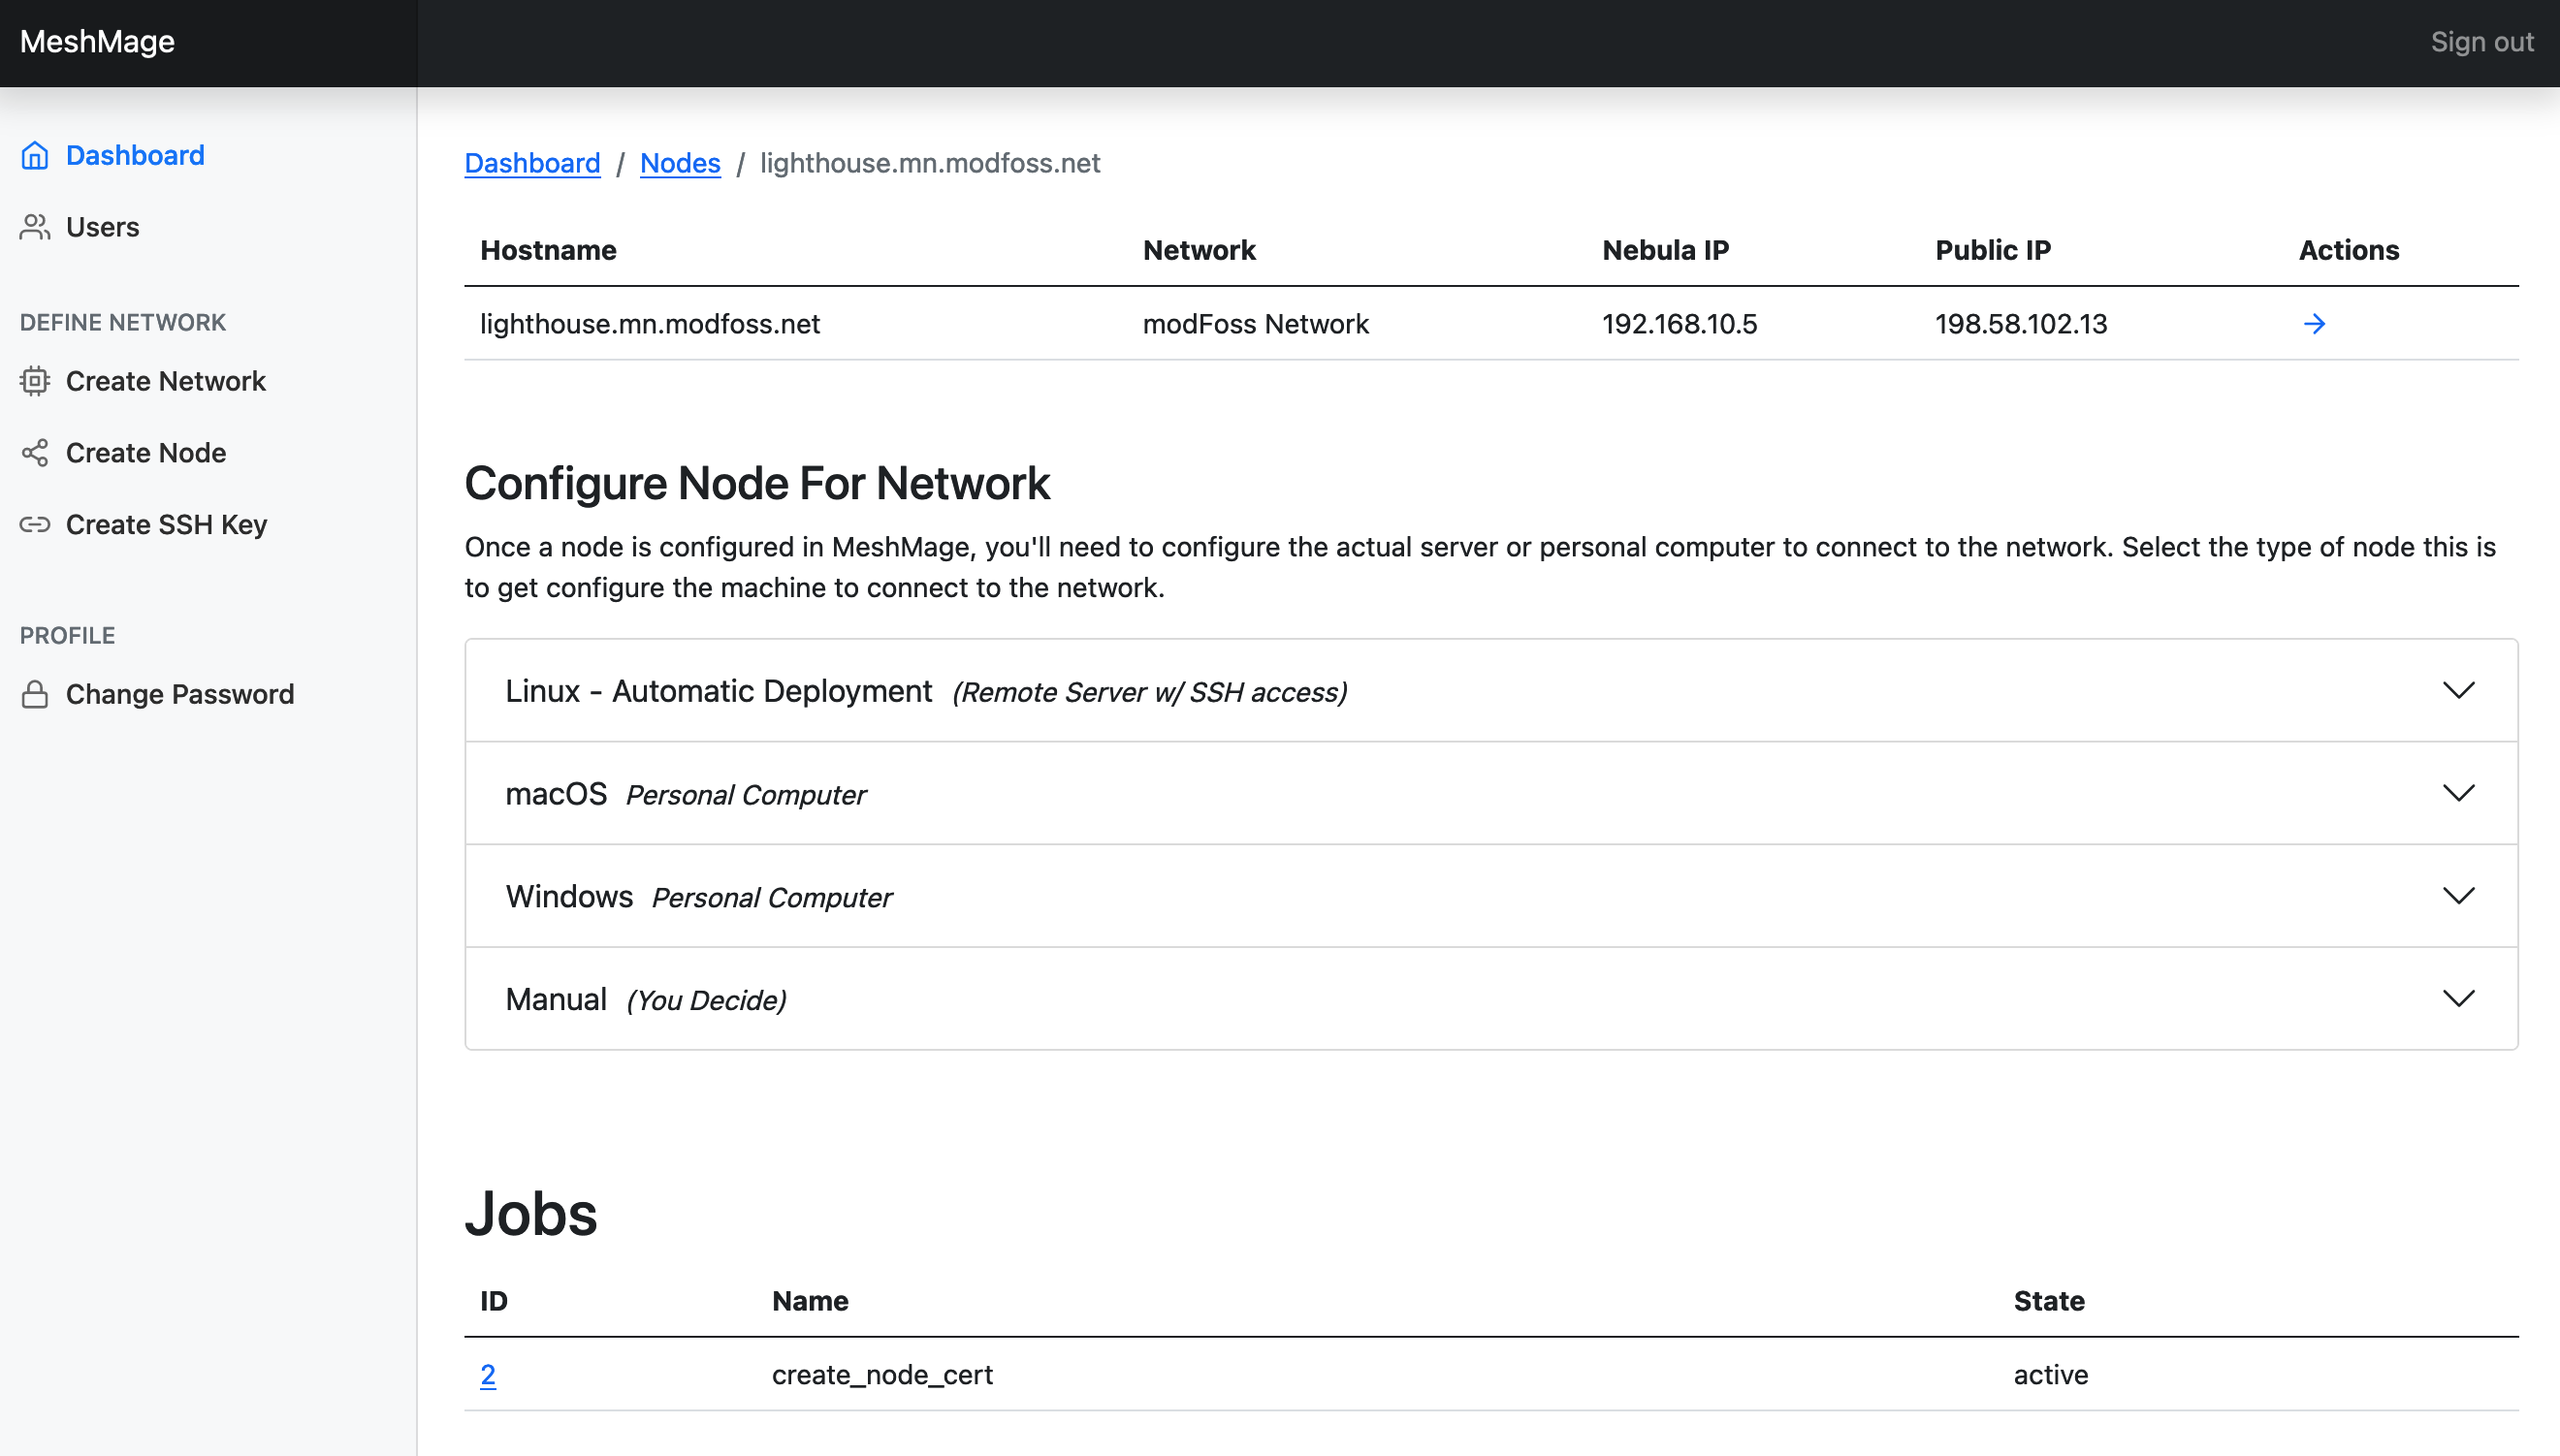
Deploy Lighthouse
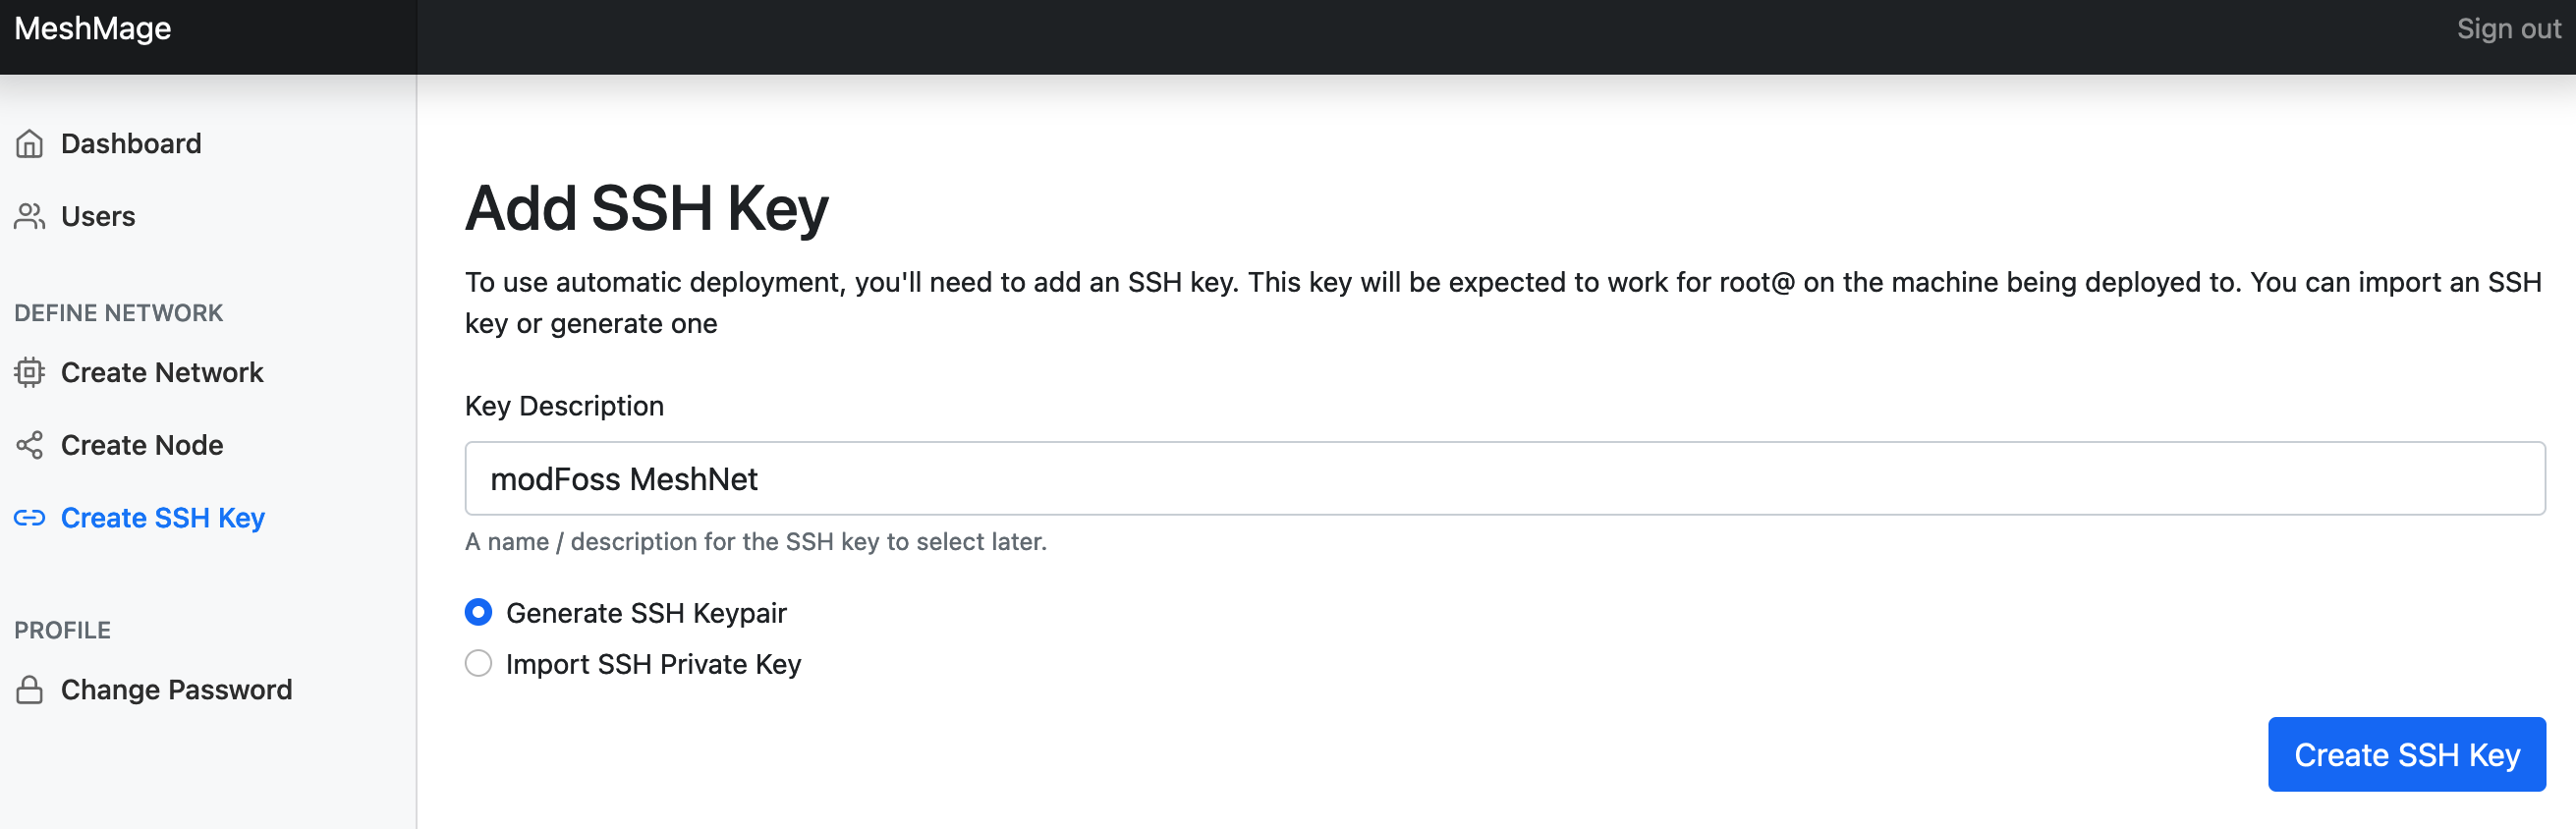
The step above created the keys and configuration for the Lighthouse node, however it hasn't been set up. The node is a Debian 10 VM, and we will want to automatically configure it. Before doing that, we need to create an SSH Key. We'll click Create SSH Key and have MeshMage generate one for us.
After clicking Create SSH Key, we'll be brought back to the dashboard:
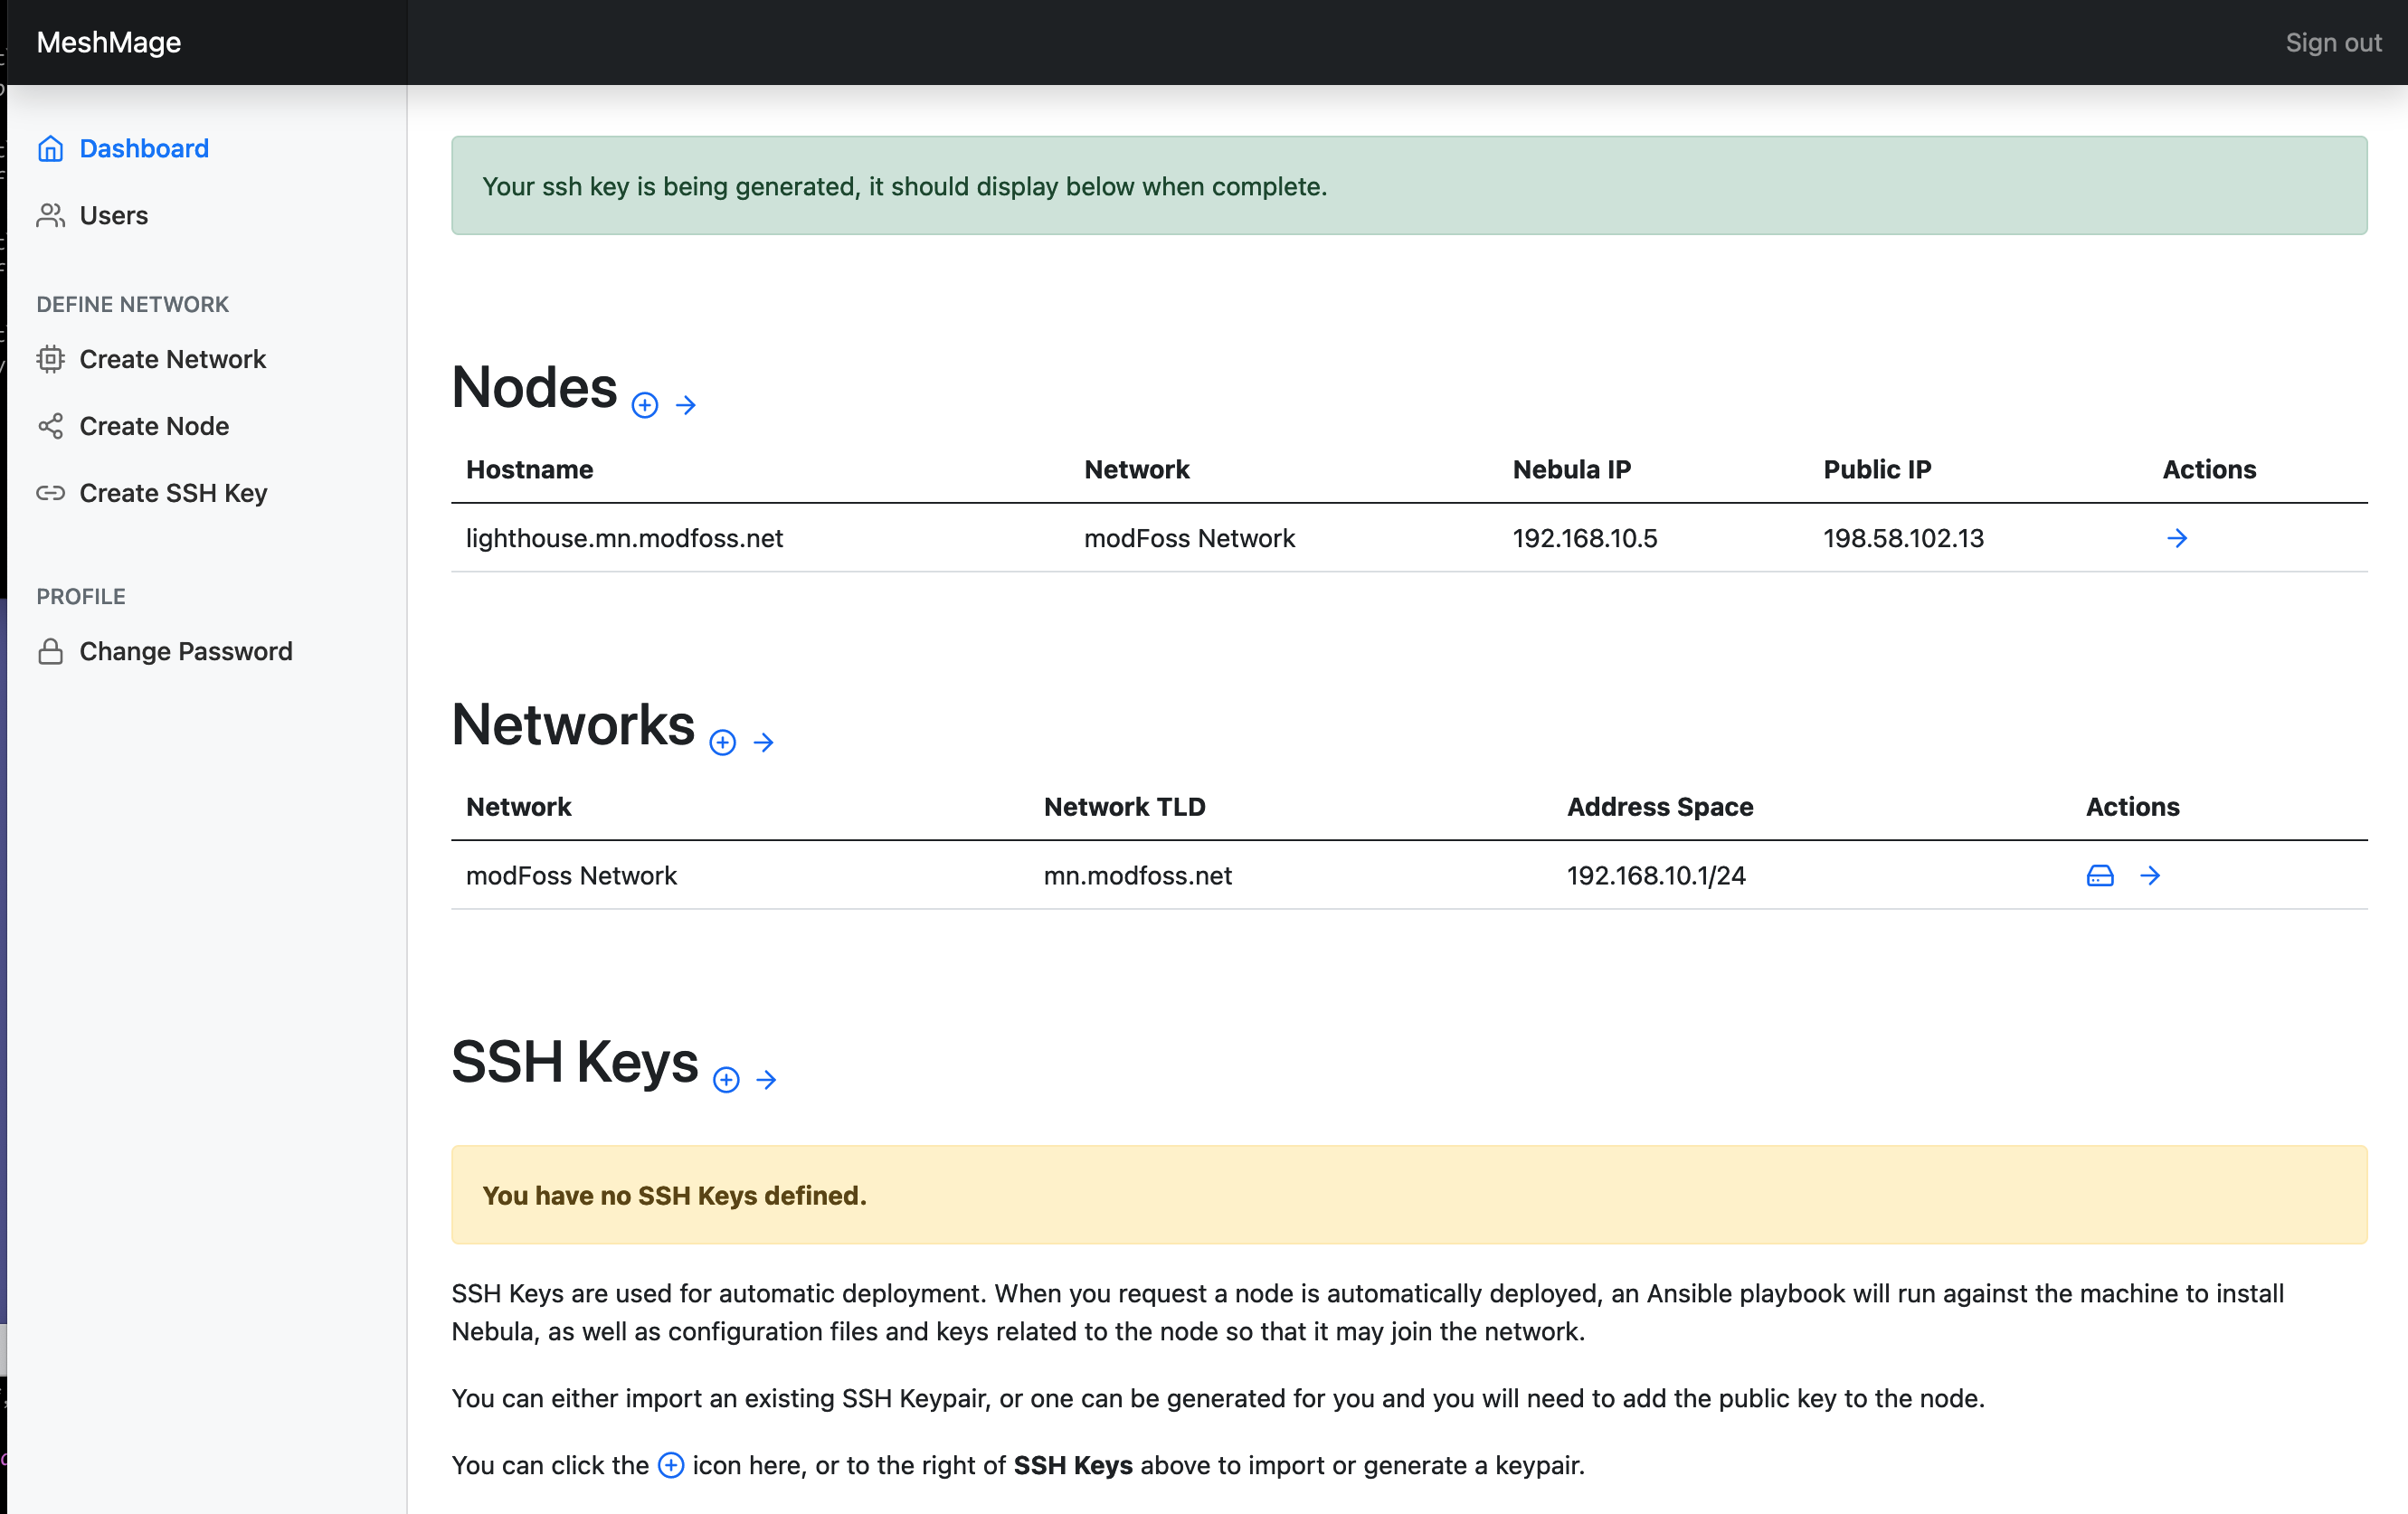
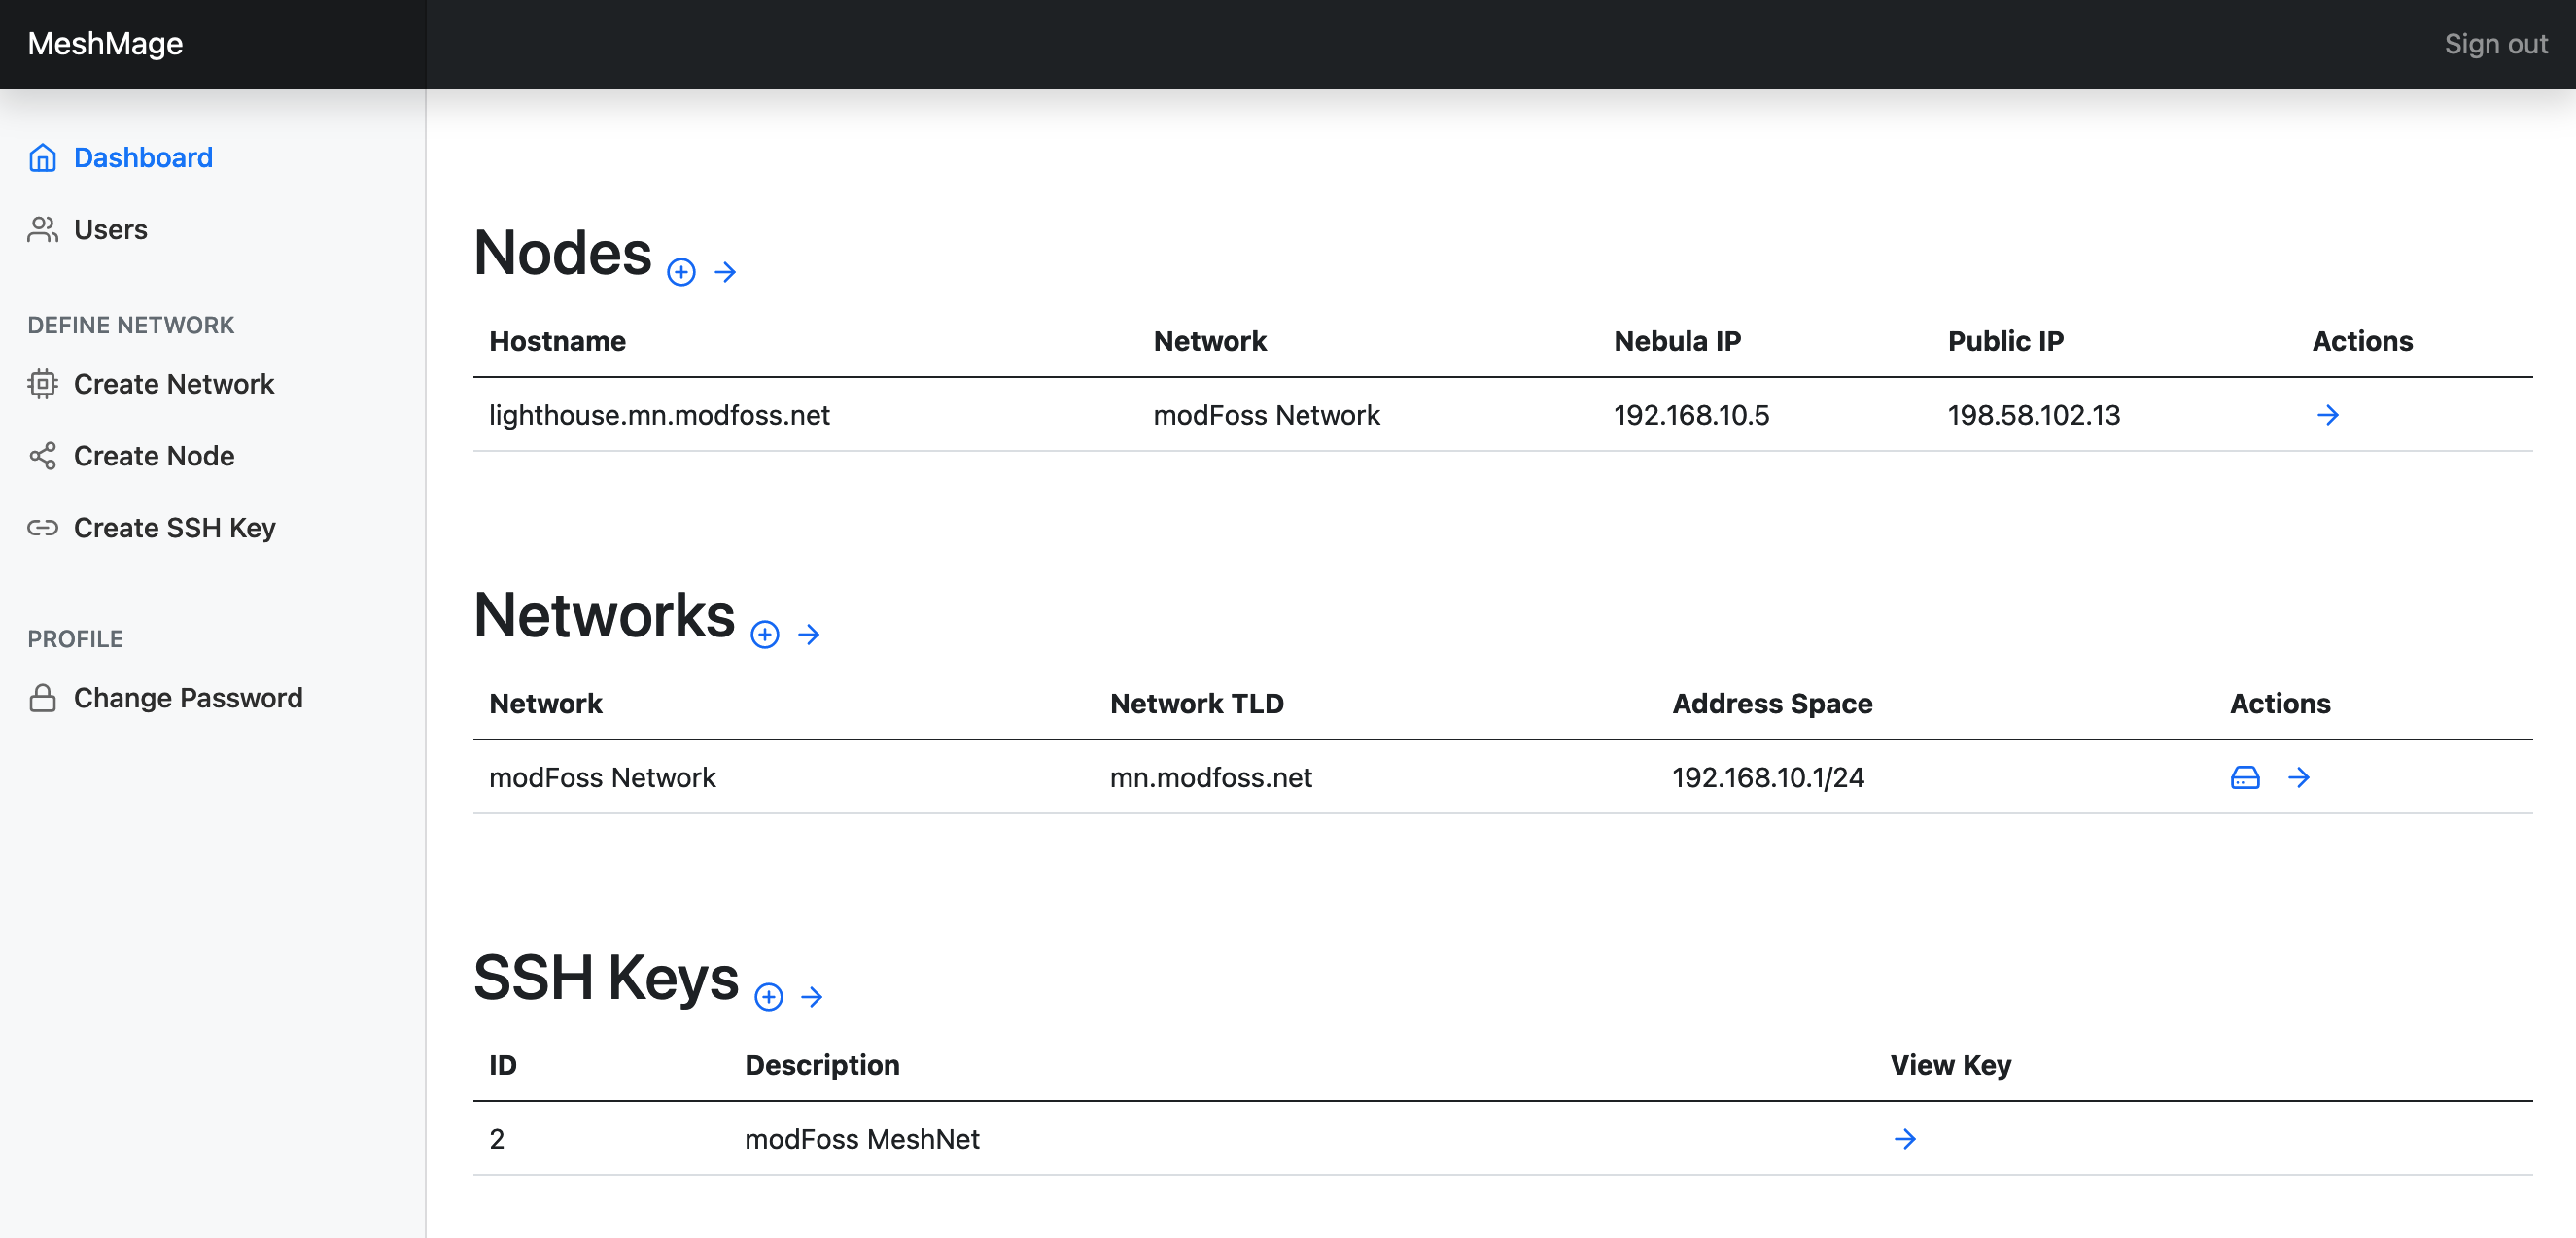
Refresh the page and we'll see the key had been created. We can click the arrow to view the key.
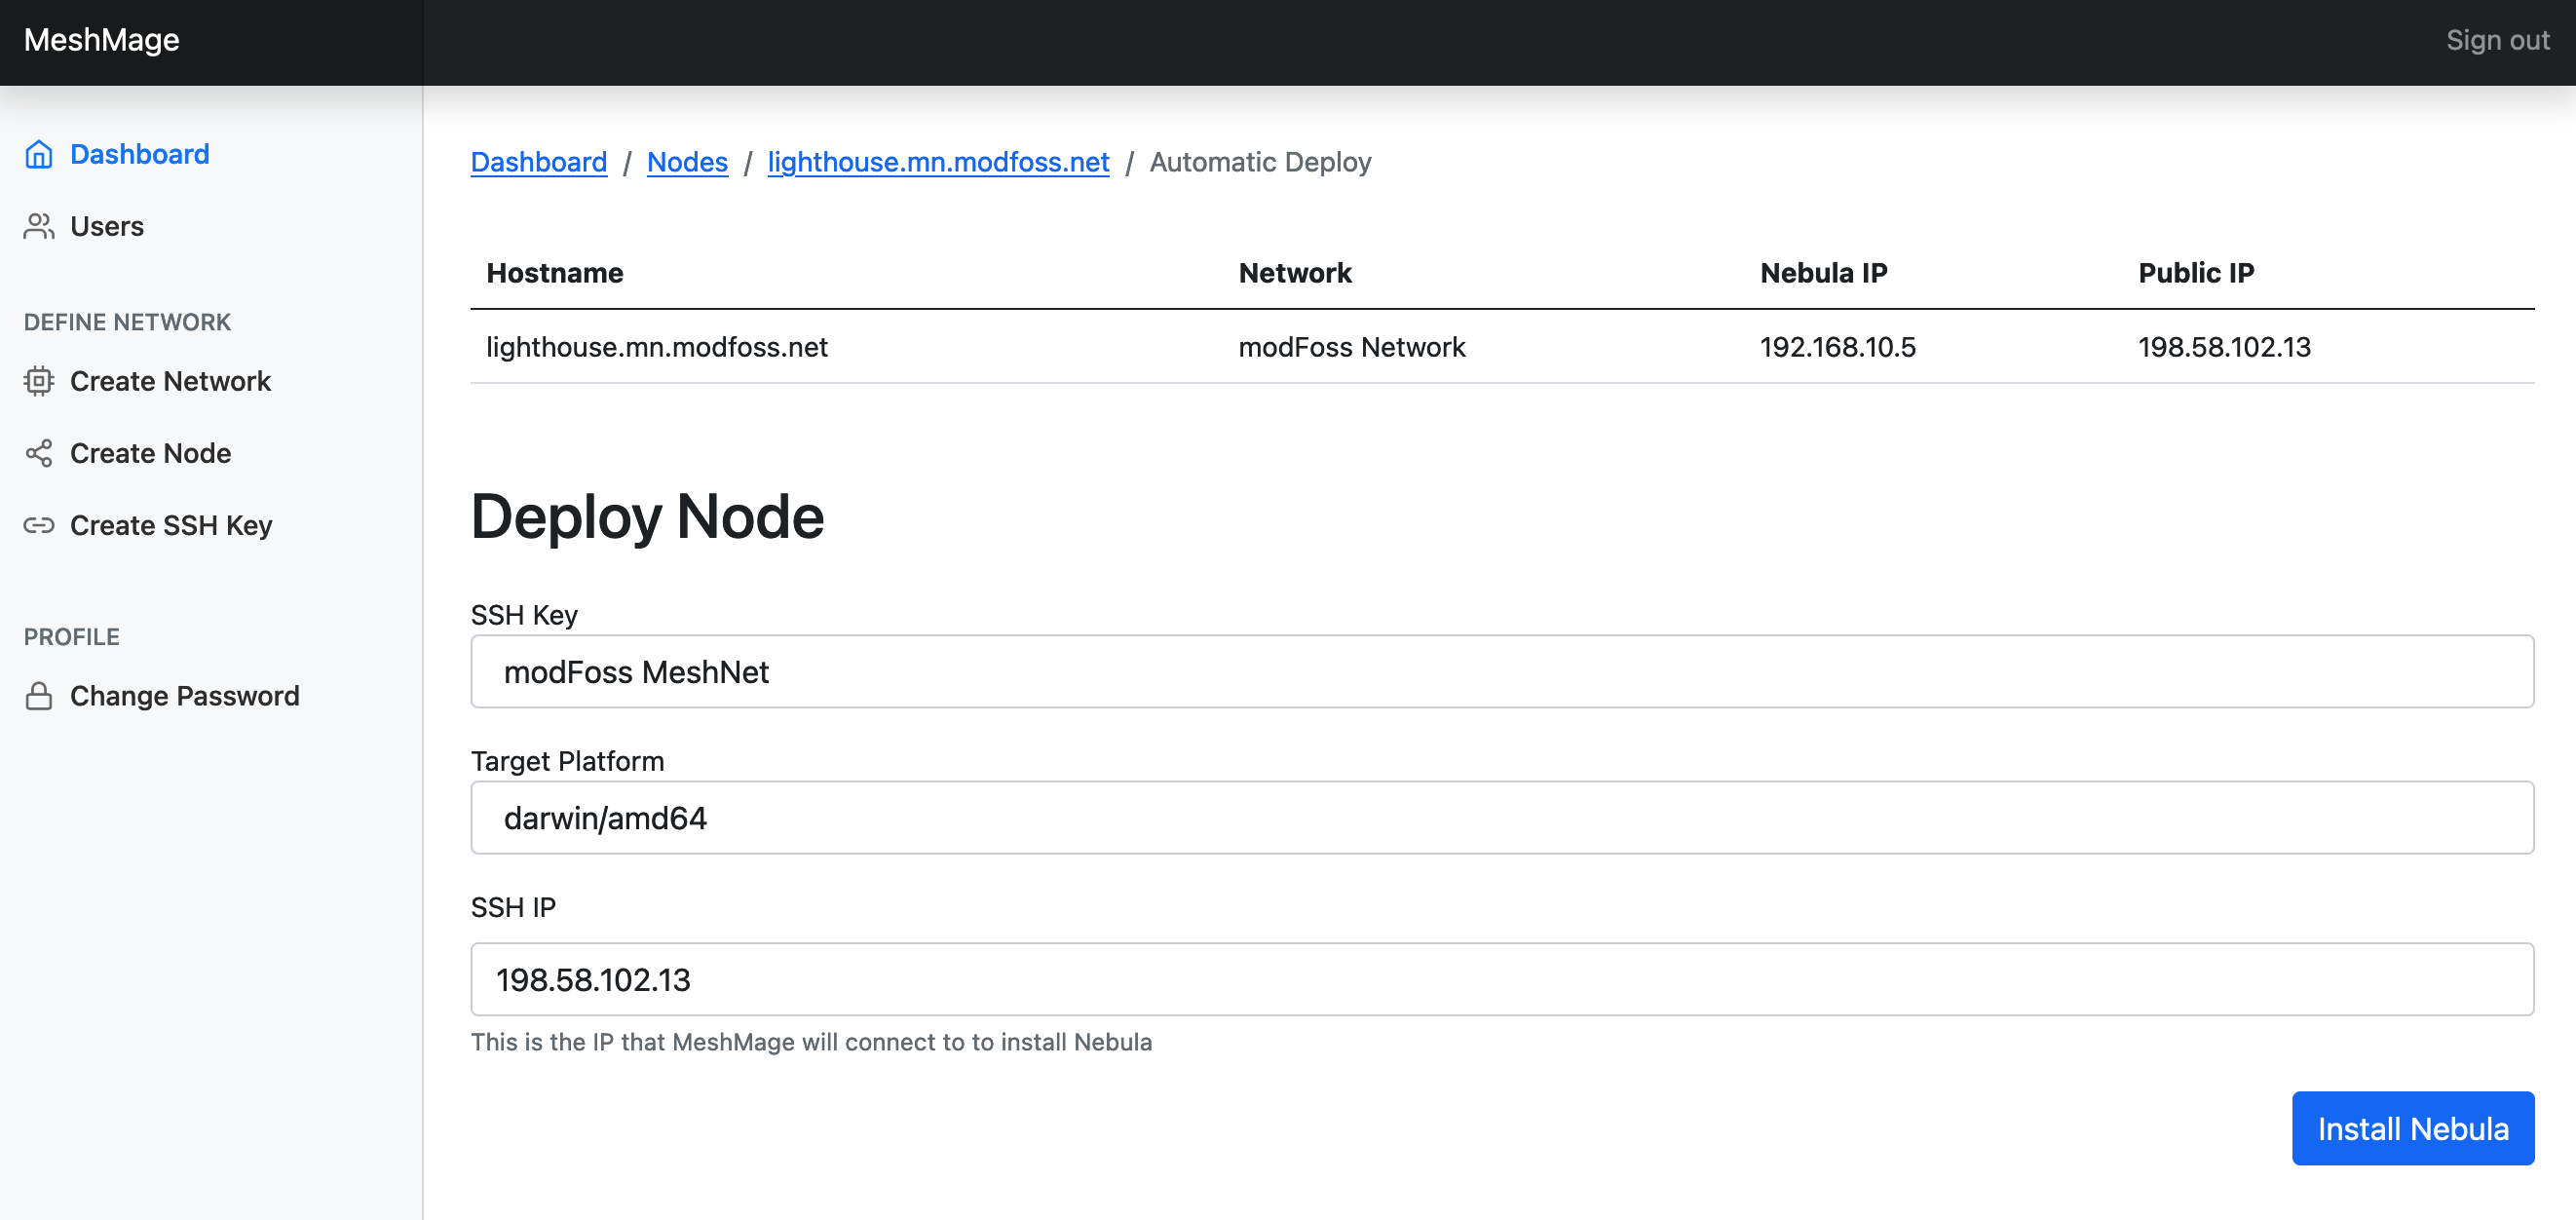
We'll want to ensure that the SSH key is installed to root@ on the lighthouse machine. Once that is done, we'll return to the Dashboard, and click the arrow on the node, then select Linux - Automatic Deployment and click Let's Do It.
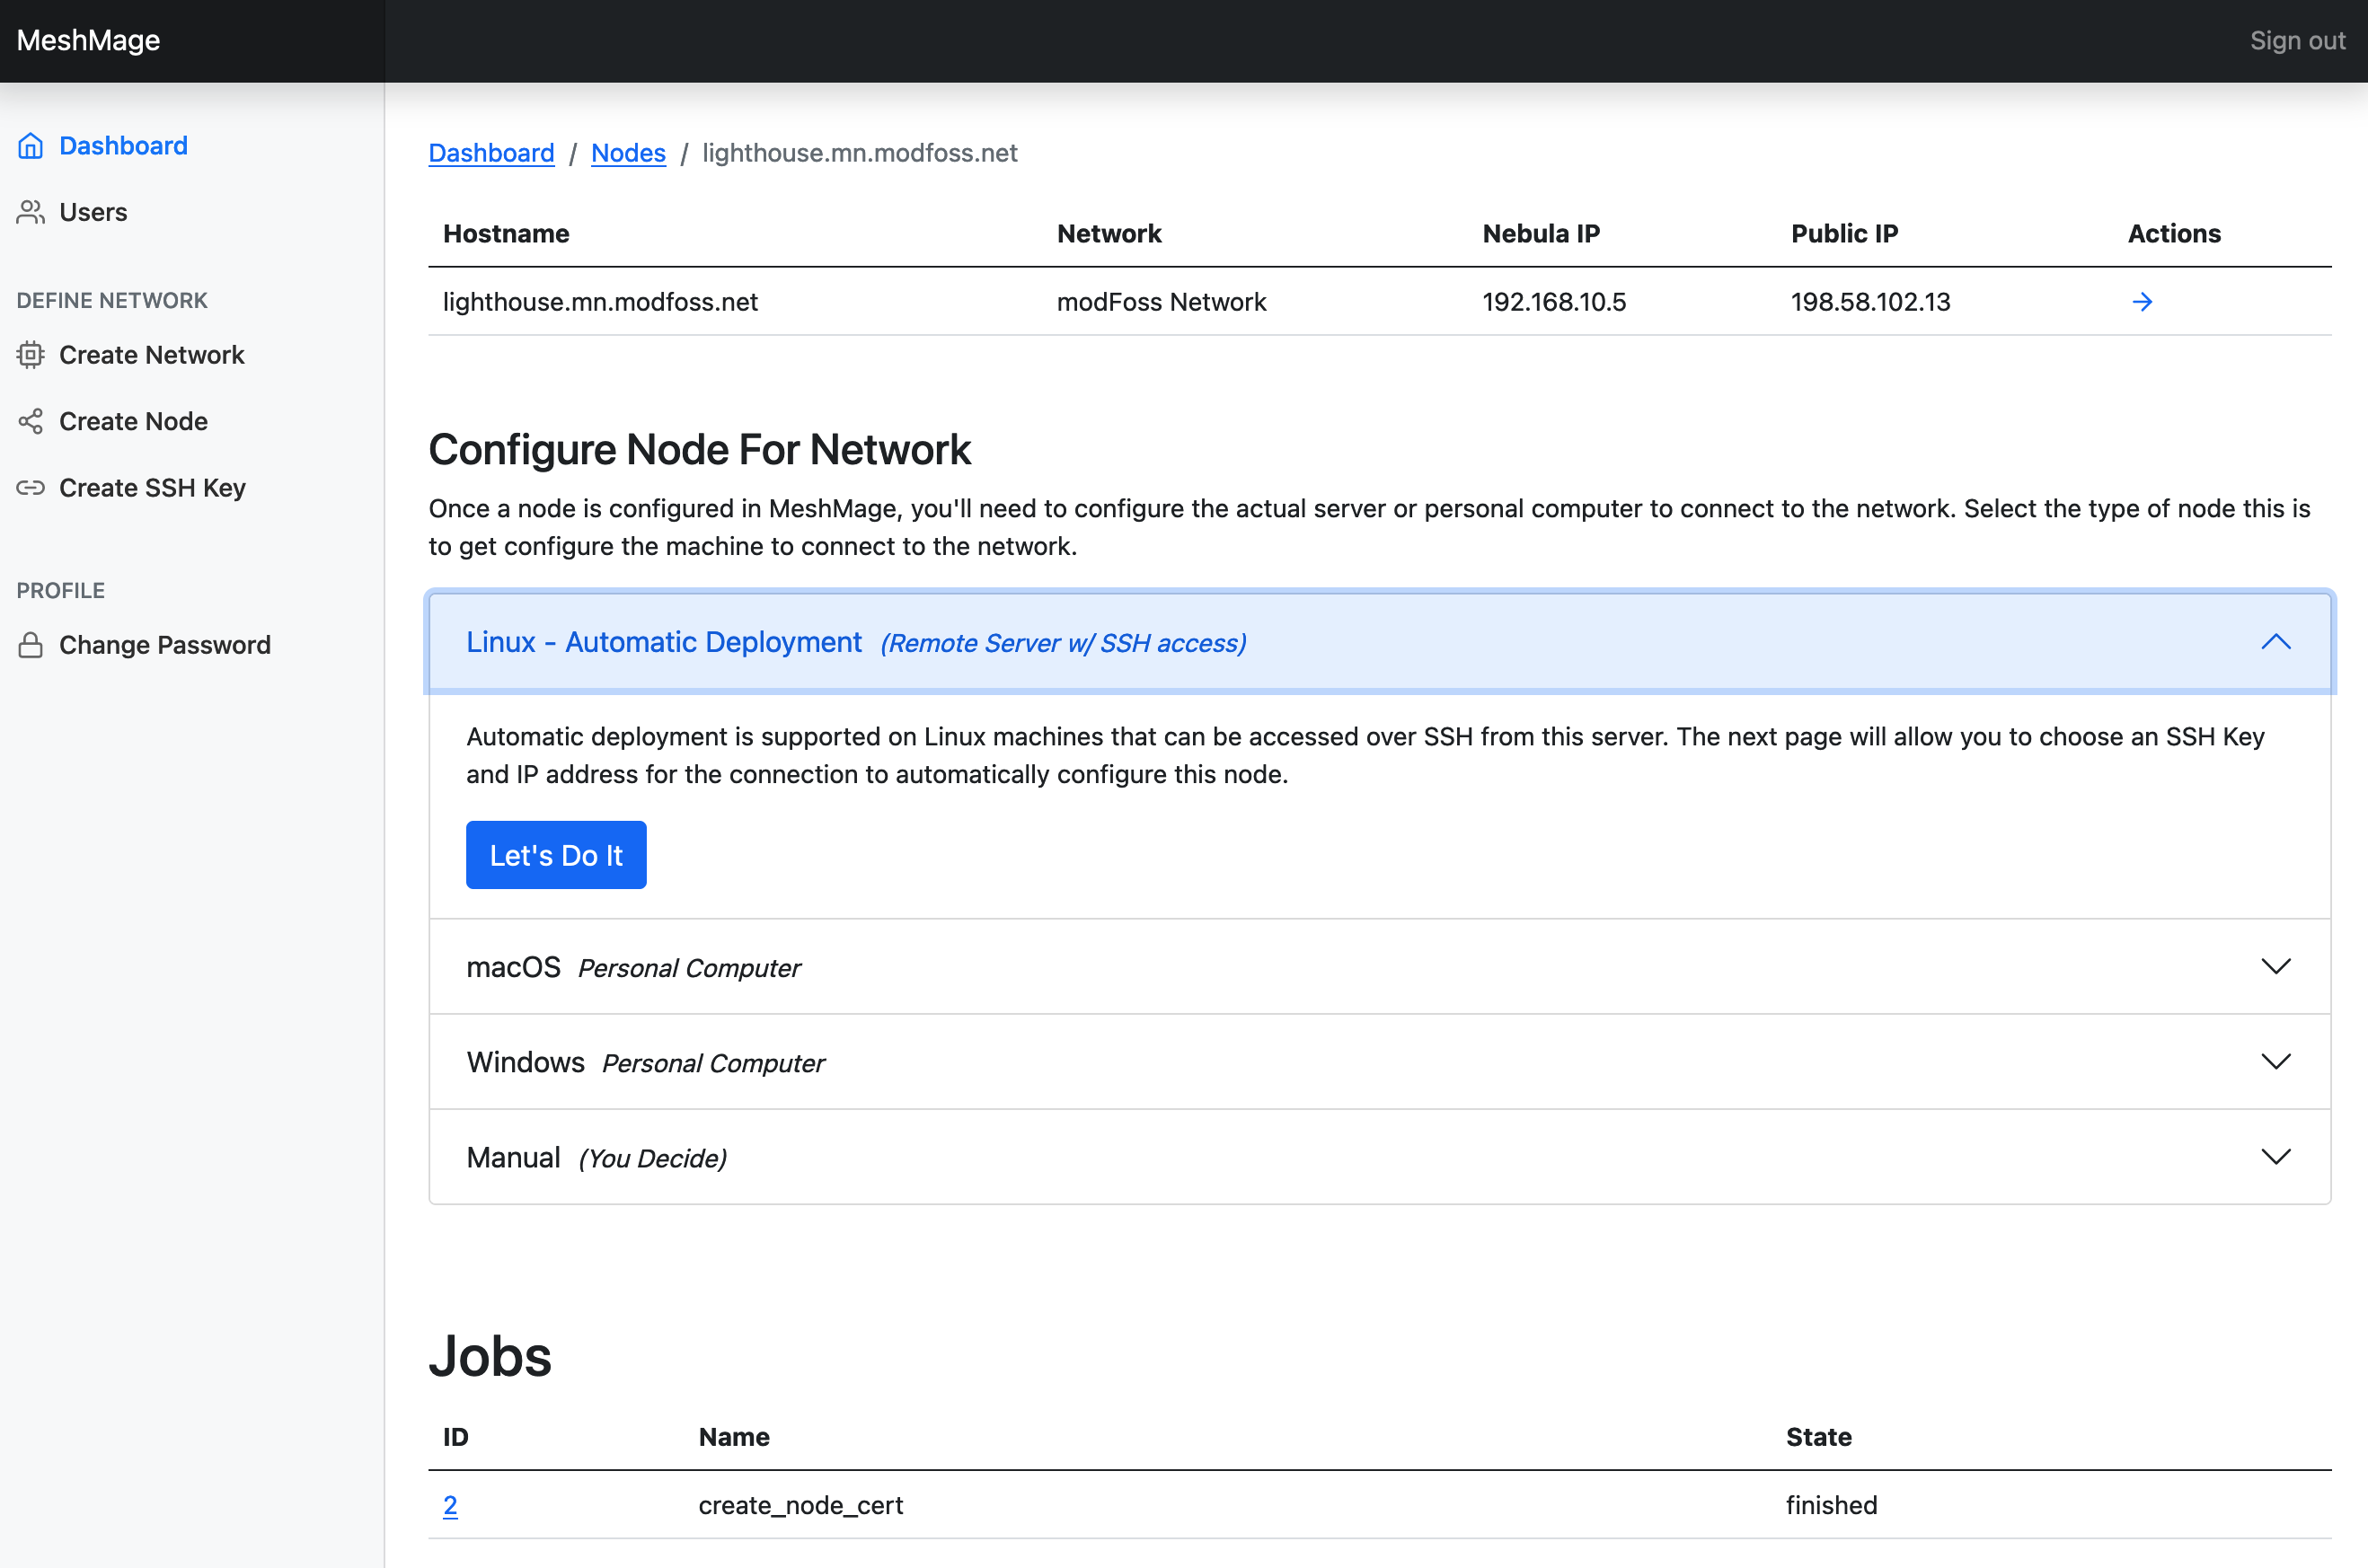
We'll need to select to target platform. We're using a Linux machine with an x86_64 processor, so we'll select linux/amd64 and click Install Nebula.
Setting up DNS
Creating a node
Creating an SSH key
Setting up a Linux node
Setting up a macOS node
Setting up a Windows node
Setting Up Development Environment
Debian 10
- Install Docker
As root on a fresh Debian 10 machine, docker can be installed as follows:
apt-get update
apt-get remove -y docker docker-engine docker.io containerd runc
apt-get install -y apt-transport-https ca-certificates curl gnupg lsb-release
curl -fsSL https://download.docker.com/linux/debian/gpg | gpg --dearmor -o /usr/share/keyrings/docker-archive-keyring.gpg

echo \
  "deb [arch=amd64 signed-by=/usr/share/keyrings/docker-archive-keyring.gpg] https://download.docker.com/linux/debian \
  $(lsb_release -cs) stable" | tee /etc/apt/sources.list.d/docker.list > /dev/null

apt-get update
apt-get install -y docker-ce docker-ce-cli containerd.io docker-compose- Install Ansible
echo "deb http://ppa.launchpad.net/ansible/ansible/ubuntu trusty main" \
    > /etc/apt/sources.list.d/ansible.list
apt-key adv --keyserver keyserver.ubuntu.com --recv-keys 93C4A3FD7BB9C367
apt-get install -y ansible- Install system dependancies
apt-get install -y build-essential libpq-dev libssl-dev libz-dev cpanminus liblocal-lib-perl- Add a user account with docker permissions and install public key
useradd --shell /bin/bash -m -U -G docker meshmage
echo 'eval "$(perl -I$HOME/perl5/lib/perl5 -Mlocal::lib)"' >> /home/meshmage/.bashrc
mkdir /home/meshmage/.ssh
chown meshmage.meshmage /home/meshmage/.ssh
chmod 0700 /home/meshmage/.ssh
cp ~/.ssh/authorized_keys /home/meshmage/.ssh/
chown meshmage.meshmage /home/meshmage/.ssh/authorized_keys
chmod 0600 /home/meshmage/.ssh/authorized_keys- Install MeshMage
The previous 4 steps were all done as root. For this step, you'll need to login as the meshmage user.
cpanm App::plx App::opan App::Dex Carton Dist::Zilla
git clone https://github.com/symkat/MeshMage.git
cd MeshMage/DB
dzil build
cd ../Web
plx --init
plx --config libspec add 00tilde.ll $HOME/perl5
plx --config libspec add 40dblib.dir ../DB/lib
plx opan init
plx opan add ../DB/MeshMage-DB-1.tar.gz
plx opan merge
plx opan carton install
Now you will want to copy Web/meshmage.yml.sample to Web/meshmage.yml and fill out the config file.
cp Web/meshmage.yml.sample Web/meshmage.yml- Run The App
You'll want to grab a second shell to start the DB. Make sure you're in the top level directory of MeshMage.
meshmage@localhost:~/MeshMage$ dex db startOnce the database, open a third terminal to start the web server. Make sure you're in MeshMage/Web.
meshmage@localhost:~/MeshMage/Web$ plx morbo script/meshmage_webWith the Web and Database running, open a fourth terminal to run the job queue. Make sure you're in MeshMage/Web.
meshmage@localhost:~/MeshMage/Web$ plx script/meshmage_web minion workerOnce this has started, you can access MeshMage through port http://127.0.0.1:3000 or any other exposed IP address. Using morbo will cause the Web app to reload when changes are made to the webapp. Changes to DB/ will require the app be restarted, and changes to the Minion tasks will require the minion worker be restarted.
Software Licenses Used
This project distributes binaries from Nebula under their MIT License, included here.
MIT License

Copyright (c) 2018-2019 Slack Technologies, Inc.

Permission is hereby granted, free of charge, to any person obtaining
a copy of this software and associated documentation files (the
"Software"), to deal in the Software without restriction, including
without limitation the rights to use, copy, modify, merge, publish,
distribute, sublicense, and/or sell copies of the Software, and to
permit persons to whom the Software is furnished to do so, subject to
the following conditions:

The above copyright notice and this permission notice shall be
included in all copies or substantial portions of the Software.

THE SOFTWARE IS PROVIDED "AS IS", WITHOUT WARRANTY OF ANY KIND,
EXPRESS OR IMPLIED, INCLUDING BUT NOT LIMITED TO THE WARRANTIES OF
MERCHANTABILITY, FITNESS FOR A PARTICULAR PURPOSE AND
NONINFRINGEMENT. IN NO EVENT SHALL THE AUTHORS OR COPYRIGHT HOLDERS BE
LIABLE FOR ANY CLAIM, DAMAGES OR OTHER LIABILITY, WHETHER IN AN ACTION
OF CONTRACT, TORT OR OTHERWISE, ARISING FROM, OUT OF OR IN CONNECTION
WITH THE SOFTWARE OR THE USE OR OTHER DEALINGS IN THE SOFTWARE.