
simple state management for vanilla JS

NANNY STATE makes it simple to build state-based web apps in vanilla JS.
- SIMPLE - build interactive user-interfaces with just a few lines of code.
- FAST - automatic page renders that are blazingly fast.
- MINIMAL - only 3kb minified and zipped.
NANNY STATE stores data in a single state object and automatically renders the view when it changes. This keeps your code organized and easier to maintain without the bloat of other libraries. And everything is written in vanila JS and HTML, which means you don't have to learn any new syntax!
It's easy to get started - just follow the examples below and you'll see some impressive results in just a few lines of code.
What Is NANNY STATE?
NANNY STATE uses a one-way data flow model comprised of 3 interdependent parts:
- State - an object or value that stores all the app data
- View - a function that returns a string of HTML based on the current state
- Update - a function that is the only way to change the state and re-render the view

The state is the single source of truth in the application and it can only be changed using the Update function, ensuring that any changes are deterministic with predictable outcomes. The view is an HTML representation of the data stored in the state. When a user interacts with the page, the Update function changes the state and the view is automatically re-rendered to reflect these changes.
Background
NANNY STATE was inspired by Hyperapp and Redux and uses the µhtml library for rendering. It is open source software; please feel free to help out or contribute.
The name is inspired by the British phrase for an overly protective, centralised government. In a similar way, NANNY STATE protects all the app data by storing it centrally.
Installation
Using NPM CLI
Install nanny-state from NPM.
npm install nanny-stateThen import like this:
import { Nanny, html } from "nanny-state";ES Modules
If you use ES Modules, you don't need NPM. You can import from a CDN URL in your browser or on CodePen.
<script type="module">
  import { Nanny,html } from 'https://cdn.skypack.dev/nanny-state';
</script>
Quick Start Guide
Building a NANNY STATE app is simple and straightforward. It always follows these steps:
- Import the
Nannyandhtmlfunctions:import { Nanny, html } from 'nanny-state'
- Decide on the structure of your data and create a state object (settings are also properties of the
Stateobject but are always written in PascalCase):const State = { name: "World", View } ```
- Decide how you want the data to be displayed and create a view template:
const View = state =>
   html`<h1>Hello ${name}
        <button onclick=${hello}>Click Me</button>`
- Create an event handler to call the
Updatefunction and update the state:
const hello = event => Update({ name: "Nanny State" })- Assign the
Updatefunction to the return value ofNanny(State):
const Update = Nanny(State)The basic structure of any NANNY STATE app is:
import { Nanny, html } from 'nanny-state'

const View = state => html`some view code here`
const State = {
  prop: value,
  View
}

const handler = event => Update({newState})

const Update = Nanny(State)
Usage examples
The easiest way to learn how NANNY STATE works is to try coding some examples. All the examples below can be coded on CodePen by simply entering the code in the 'JS' section.
Alternatively you could set up a basic HTML file and place all the code inside the <script> tags. You can see example files here.
And if you want it to look pretty, just copy the CSS code from the examples on CodePen!
Hello World Example

This is a simple example to show how Nanny State renders the view based on the state.
You can see finished app and code on CodePen.
Start by importing the relevant functions:
import { Nanny, html } from 'nanny-state'Next, create an object to represent the initial state (the state is usally an object, but can be any data-type). The state stores every bit of information about our app as data. In this simple example, we just want to store the value of a property called 'name':
const State = { name: "World" }Our next job is to create the view - this is a function that accepts the state as an argument and returns a string of HTML that depends on the value of the state's properties. In NANNY STATE, everything is stored as a property of the state, even the app settings such as the view! Properties that are settings are written in PascalCase to differentiate them from the other state properties that are written in camelCase. So we store the view template in a property of the state called View. This can be set like so:
State.View = state => html`<h1>Hello ${state.name}</h1>`Views in NANNY STATE use the html template function that is part of µhtml. This is a tag function that accepts a template literal as an argument. The template literal contains the HTML code for the view and uses ${expression} placeholders to insert values from the state.
These values are then bound to the view and will automatically update to reflect any changes in the state. In this example we are inserting the value of the state object's 'name' property into the <h1> element.
Last of all, we need to call the Nanny function with State provided as an argument:
Nanny(State)This passes the State object into the Nanny function, which renders the view based on the initial state.
Hello Batman Example

This example shows how the state object can be updated using the Update function.
You can see the finished app and code on CodePen.
It starts in the same way as the last example, by importing the same two functions:
import { Nanny, html } from 'nanny-state'Next we'll create the view template and assign it to the variable View (remember that this is a function that accepts the current state as an argument):
const View = state =>
  html`<h1>Hello ${state.name}</h1>
       <button onclick=${state.beBatman}>I'm Batman</button>`
This view is similar to the one we used in the Hello World example, but it also contains a button with an inline event listener. When the button is clicked the event handler beBatman will be called. We want this function to update the state object so the 'name' property changes to 'Batman'. This is exactly what the Update function is for.
To update the state a new representation of the state is passed as an argument to the Update function. NANNY STATE will then automatically re-render the view using µhtml, which only updates the parts of the view that have actually changed. This means that re-rendering after a state update is fast and efficient.
It's really easy to update the state using the Update function - simply pass it an object containing any state properties that you want to update or create (any other properties of the state will be assumed to have stayed the same). These new properties are then merged into the current state and a new state is created. The view is then re-rendered to reflect this update.
To see this in action, let's write the beBatman event handler function to use the Update function to update the state and change the 'name' property to 'Batman'.
The Update function accepts an object containing any state properties that we want to change. In our example, we want to change the 'name' property to 'Batman' so we just need to pass the object {name: "Batman"} as an argument to the Update function like so:
const beBatman = event => Update({name: "Batman"})Because beBatman is an event handler, the only parameter is the event object (although it isn't actually needed in this example). The purpose of this function is to call the Update function that changes the 'name' property to 'Batman', but it's useful to know that it's an event handler.
Next, we need to assign the initial state object to the State variable:
const State = {
  name: 'Bruce Wayne',
  beBatman,
  View
}
Notice that as well as assigning the 'name' property the value of 'Bruce Wayne', we also add the View and beBatman svariable as a properties of the State object using the shorthand object assignment. In NANNY STATE, evething is a property of the state!
Last of all, we need to call the Nanny function. The Update function returned by the Nanny function, so we assign it to the variable Update (not that the convention is to call it Update but it can be any legal variable name):
const Update = Nanny(State)Calling the Nanny function does 2 things:
- Renders the initial view based on the initial state provided as an argument (as we saw in the Hello World example).
- Returns the
Updatefunction that is the only way to update the state.
We now have everything wired up correctly. When the user clicks the button, the beBatman event handler is called. This calls the Update function which changes the 'name' property to 'Batman' and re-renders the page based on this new state.
Try clicking the button to see the view change based on user input!
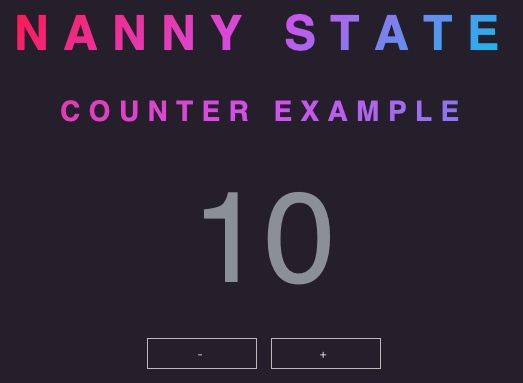
Counter Example
The next example will be a simple counter app that lets the user increase or decrease the count by pressing buttons. The state will change with every click of a button, so this example will show how easy NANNY STATE makes dynamic updates.
You can see the finished app and code on CodePen
The value of the count will be stored in the state as a number (the state is usually an object, but it doesn't have to be). Let's import the relevant functions and initialize the state with a value of 10:
import { Nanny, html } from 'nanny-state';

const State = 10;
Now let's create the view that will return the HTML we want to display:
const View = state =>
html`<h1>Nanny State</h1>
     <h2>Counter Example</h2>
     ${Counter(state)}`
This view contains a component called Counter. A component is a function that returns some view code that can be reused throughout the app. They are easy to insert into the main view using the ${ComponentName} placeholder notation inside the template literal.
Now we need to write the code for the Counter component (note it is convention to use PascalCase when naming components):
const Counter = state =>
html`<div id='counter'>${state}</div>
     <button onclick=${e=>Update(state - 1)}>-</button>
     <button onclick=${e=>Update(state + 1)}>+</button>`
The two buttons call inline event handlers that call the Update function to change the value of the state when they are pressed.
Last of all, we just need to call the Nanny function and assign its return value to the variable Update. In this example, the state is a number, so we cannot assign any properties to it. This means we can't make the view a property of State. Fortunately, the Nanny function accepts a second options parameter. This is an object that has a property called 'view' that can be assigned to the variable View using the object property shorthand notation:
const Update = Nanny(State,{ View })This will render the initial view with the count set to 10 and allow you to increase or decrease the count by clicking on the buttons.
Transformer Functions
In the examples we've just seen, the Update function was passed a new representation of the state, but it can also accept a transformer function. They are particularly useful when the new state is based on the previous state.
A transformer function accepts the current state as an argument and returns a new representation of the state. They are basically a mapping function from the current state to a new state as shown in the diagram below:

ES6 arrow functions are perfect for transformer functions as they visually show the mapping of the current state to a new representation of the state.
Transformer functions must be pure functions. They should always return the same value given the same arguments and should not cause any side-effects. They take the following structure:
state => newStateIf the transformer function needs to accept parameters, then the 'double arrow' notation is used to perform partial application:
state => params => newStateIn the Counter example above, we could use the following transformer functions:
const increment = state => state + 1
const decrement = state => state - 1
Transformer functions are passed by reference to the Update function. The current state is implicityly passed as an argument to any transformer function (similiar to the way the event object is implicitly passed to event handlers).
For example, we could use the increment and decrement transformer functions in the Counter example with the following view:
const Counter = state =>
html`<div id='counter'>${state}</div>
     <button onclick=${e=>Update(decrement)}>-</button>
     <button onclick=${e=>Update(increment)}>+</button>`
Note: The current state is implicitly provided as an argument by the Update function, so does not need to be included when calling Update.
Transformer functions don't need to return an object that represents every property of the new state. They only need to return an object that contains the properties that have actually changed. For example, if the initial state is represented by the following object:
const State = {
  name: "World",
  count: 10
}
If we write a transformer function that doubles the count, then we only need to return an object that shows the new value of the 'count' property and don't need to worry about the 'name' property:
const double = state => ({ count: state.count * 2})Note: when arrow functions return an object literal, it needs wrapping in parentheses
The state object in the parameter can also be destructured so that it only references properties required by the transformer function:
const double = { count } => ({ count: count * 2})Adding Additional Arguments to Transformer Functions
If you want a transformer function to have parameters in addition to the state, then this must be done using a 'double-arrow' function and partial application. The additional arguments always come first and the state should be the last parameter provided to the transfomer function:
const transformer = params = state => newStateFor example, if we wanted a counter app that had buttons that increased the count by 1, 2 or 3, instead of writing a separate transformer function for each button, we could write a single transformer function with a parameter of how much to increase the value of state.count by. It would look like this:
const increaseBy = n => state => ({count: state.count + n})Here the parameter n is used to determine how much state.count is increased by, making the transformer function more flexible.
When passing a transformer function with parameters to the Update function, it needs to be partially applied with any arguments. For example, this is how we could use the increaseBy transformer function in the view:
const Counter = number =>
html`<div id='counter'>${number}</div>
     <button onclick=${e=>Update(increaseBy(1))}>Add 1</button>
     <button onclick=${e=>Update(increaseBy(2))}>Add 2</button>
     <button onclick=${e=>Update(increaseBy(3))}>Add 3</button>
Anonymous Or Named Functions?
Because NANNY STATE uses vanilla JS, you can choose to use named or anonymous event handlers and transformer functions or a combination of the two in your code. This is often a question of coding style, but there are a few nuances to condsider with each appraoch. To demonstrate the different approaches, let's look at 4 different ways of writing the code for the counter example:
- Anonymous event handlers, anonymous transformer functions:
const Counter = state =>
   html`<div id='counter'>${state}</div>
   <button onclick=${e=>Update(state => state - 1)}>-</button>
<button onclick=${e=>Update(state => state + 1)}>+</button>`- Named event handlers, anonymous transformer functions:
const Counter = state =>
   html`<div id='counter'>${state}</div>
   <button onclick=${increment}>-</button>
   <button onclick=${decrement}>+</button>`

const decrement = event => Update(state => state - 1)
const increment = event => Update(state => state + 1)- Anonymous event handlers, named transformer functions:
const Counter = state =>
   html`<div id='counter'>${state}</div>
   <button onclick=${e=>Update(count(-1))}>-</button>
   <button onclick=${e=>Update(count(1))}>+</button>`

const count = n => state => state + n- Named event handler, named transformer functions:
const Counter = state =>
   html`<div id='counter'>${state}</div>
   <button onclick=${increment}>-</button>
   <button onclick=${decrement}>+</button>`

const decrement = event => Update(count(-1))
const increment = event => Update(count(1))
const count = n => state => state + n
Named event handlers and transformer functions work in a similar way. A named event handler will have the event object passed to it implicityly and named transformer functions have the state passed to them implicitly. One thing to consider is that anonymous event handlers can access the state becasue they are defined inside the View function, which accepts the current state as an argument, whereas named event handlers do not have access to the state.
More NANNY STATE Examples
You can see a full set of examples of how Nanny State can be used, with source code, on CodePen. This includes:
-
Numble - A numerical Wordle clone (by Olivia Gibson)
-
Times Tables Quiz (by Olivia Gibson)
Extra Info
Now that you've learnt the basics of NANNY STATE, here's some extra info that helps give you some extra control over the settings.
Before and After Functions
Before and After are properties of the state object and are functions that are called before or after a state update respectively. They can also be passed to the Nanny function as part of the options object.
For example, try updating the last line of the 'Hello Batman' example to the following code instead:
State.Before = state => console.log('Before:', state)
State.After = state => console.log('After:', state)

const Update = Nanny(State)
Now, when you press the I'm Batman button, the following is logged to the console, showing how the state has changed:
"Before:"
{
  "name": "Bruce Wayne"
}
"After:"
{
  "name": "Batman"
}
Default Element
By Default the view will be rendered inside the body element of the page. This can be changed using the Element property of the state object or by providing it as part of the options object of the Nanny function. For example, if you wanted the view to be rendered inside an element with the id of 'app', you just need to specify this as an option when you call the Nanny function:
State.Element = document.getElementById('app')Debug Mode
Debug is a property of the state that is false by default, but if you set it to true, then the value of the state will be logged to the console after the initial render and after any state update"
State.Debug = trueLocal Storage
LocalStorageKey is a property of the state that ensures that the state is automatically persisted using the browser's local storage API. It will also retrieve the state from the user's local storage every time they visit the site, ensuring persitance of the state between sessions. To use it, simply set this property to the string value that you want to be used as the local storage key. For example, the following setting will use the string "nanny" as the local storage key and ensure that the state is saved to local storage after every update:
State.LocalStorageKey = 'nanny'Docs
You can see more in-depth docs here
- The Nanny State API
- Code Organization in Nanny State
- Nanny State Structure