NeuralGenetic: Training Neural Networks using the Genetic Algorithm
NeuralGenetic is a Python project for training neural networks using the genetic algorithm.
NeuralGenetic is part of the PyGAD library which is an open-source Python 3 library for implementing the genetic algorithm and optimizing machine learning algorithms. Both regression and classification neural networks are supported starting from PyGAD 2.7.0.
Check documentation of the NeuralGenetic project in the PyGAD's documentation: https://pygad.readthedocs.io/en/latest/README_pygad_gann_ReadTheDocs.html
The library is under active development and more features are added regularly. If you want a feature to be supported, please check the Contact Us section to send a request.
Before using the NeuralGenetic project, install PyGAD.
Donation
You can donate via Open Collective: opencollective.com/pygad.
To donate using PayPal, use either this link: paypal.me/ahmedfgad or the e-mail address [email protected].
Tutorial Project
IMPORTANT If you are coming for the code of the tutorial titled Artificial Neural Networks Optimization using Genetic Algorithm with Python, then it has been moved to the [Tutorial Project](https://github.com/ahmedfgad/NeuralGenetic/tree/master/Tutorial Project) directory on 15 May 2020.
Installation
To install PyGAD, simply use pip to download and install the library from PyPI (Python Package Index). The library lives a PyPI at this page https://pypi.org/project/pygad.
pip3 install pygadPyGAD is developed in Python 3.7.3 and depends on NumPy for creating and manipulating arrays and Matplotlib for creating figures. The exact NumPy version used in developing PyGAD is 1.16.4. For Matplotlib, the version is 3.1.0.
To get started with PyGAD, please read the documentation at Read The Docs https://pygad.readthedocs.io.
PyGAD Source Code
The source code of the PyGAD' modules is found in the following GitHub projects:
- pygad: (https://github.com/ahmedfgad/GeneticAlgorithmPython)
- pygad.nn: https://github.com/ahmedfgad/NumPyANN
- pygad.gann: https://github.com/ahmedfgad/NeuralGenetic
- pygad.cnn: https://github.com/ahmedfgad/NumPyCNN
- pygad.gacnn: https://github.com/ahmedfgad/CNNGenetic
- pygad.kerasga: https://github.com/ahmedfgad/KerasGA
- pygad.torchga: https://github.com/ahmedfgad/TorchGA
The documentation of PyGAD is available at Read The Docs https://pygad.readthedocs.io.
PyGAD Documentation
The documentation of the PyGAD library is available at Read The Docs at this link: https://pygad.readthedocs.io. It discusses the modules supported by PyGAD, all its classes, methods, attribute, and functions. For each module, a number of examples are given.
If there is an issue using PyGAD, feel free to post at issue in this GitHub repository https://github.com/ahmedfgad/GeneticAlgorithmPython or by sending an e-mail to [email protected].
If you built a project that uses PyGAD, then please drop an e-mail to [email protected] with the following information so that your project is included in the documentation.
- Project title
- Brief description
- Preferably, a link that directs the readers to your project
Please check the Contact Us section for more contact details.
Life Cycle of PyGAD
The next figure lists the different stages in the lifecycle of an instance of the pygad.GA class. Note that PyGAD stops when either all generations are completed or when the function passed to the on_generation parameter returns the string stop.
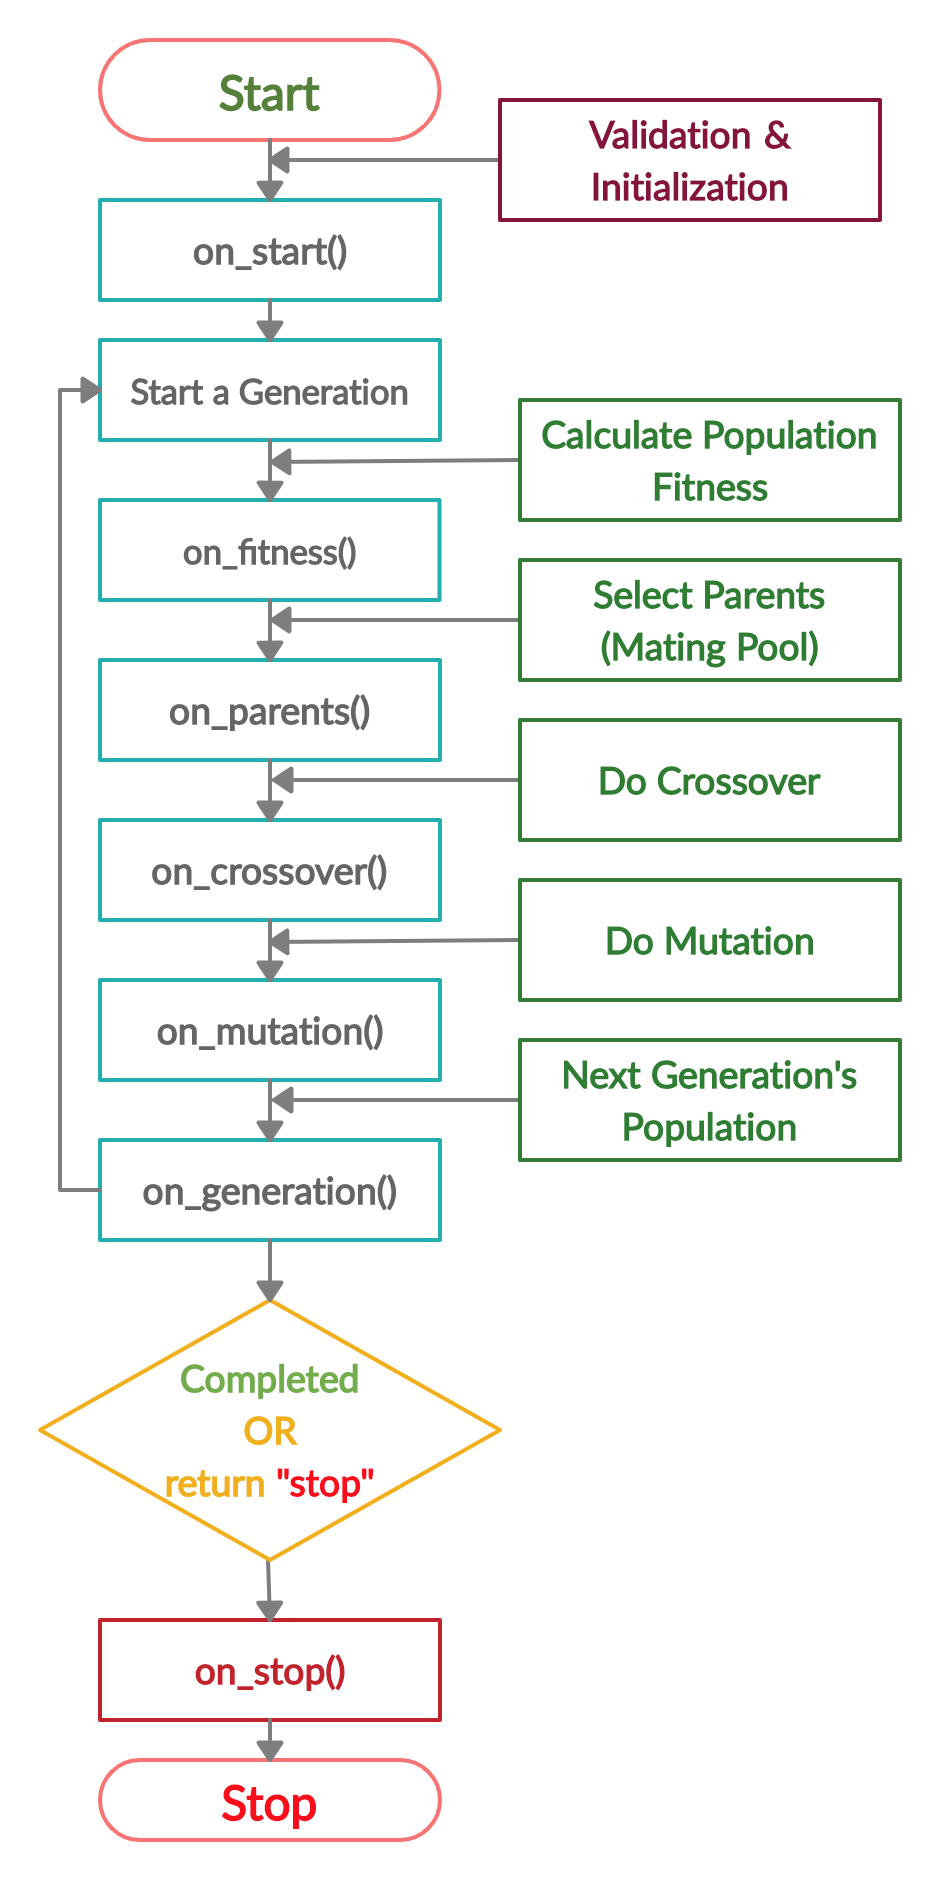
The next code implements all the callback functions to trace the execution of the genetic algorithm. Each callback function prints its name.
import pygad
import numpy

function_inputs = [4,-2,3.5,5,-11,-4.7]
desired_output = 44

def fitness_func(solution, solution_idx):
    output = numpy.sum(solution*function_inputs)
    fitness = 1.0 / (numpy.abs(output - desired_output) + 0.000001)
    return fitness

fitness_function = fitness_func

def on_start(ga_instance):
    print("on_start()")

def on_fitness(ga_instance, population_fitness):
    print("on_fitness()")

def on_parents(ga_instance, selected_parents):
    print("on_parents()")

def on_crossover(ga_instance, offspring_crossover):
    print("on_crossover()")

def on_mutation(ga_instance, offspring_mutation):
    print("on_mutation()")

def on_generation(ga_instance):
    print("on_generation()")

def on_stop(ga_instance, last_population_fitness):
    print("on_stop()")

ga_instance = pygad.GA(num_generations=3,
                       num_parents_mating=5,
                       fitness_func=fitness_function,
                       sol_per_pop=10,
                       num_genes=len(function_inputs),
                       on_start=on_start,
                       on_fitness=on_fitness,
                       on_parents=on_parents,
                       on_crossover=on_crossover,
                       on_mutation=on_mutation,
                       on_generation=on_generation,
                       on_stop=on_stop)

ga_instance.run()
Based on the used 3 generations as assigned to the num_generations argument, here is the output.
on_start()

on_fitness()
on_parents()
on_crossover()
on_mutation()
on_generation()

on_fitness()
on_parents()
on_crossover()
on_mutation()
on_generation()

on_fitness()
on_parents()
on_crossover()
on_mutation()
on_generation()

on_stop()
Example
Check the PyGAD's documentation for information about the implementation of this example.
import numpy
import pygad
import pygad.nn
import pygad.gann

def fitness_func(solution, sol_idx):
    global GANN_instance, data_inputs, data_outputs

    predictions = pygad.nn.predict(last_layer=GANN_instance.population_networks[sol_idx],
                                   data_inputs=data_inputs)
    correct_predictions = numpy.where(predictions == data_outputs)[0].size
    solution_fitness = (correct_predictions/data_outputs.size)*100

    return solution_fitness

def callback_generation(ga_instance):
    global GANN_instance, last_fitness

    population_matrices = pygad.gann.population_as_matrices(population_networks=GANN_instance.population_networks,
                                                            population_vectors=ga_instance.population)

    GANN_instance.update_population_trained_weights(population_trained_weights=population_matrices)

    print("Generation = {generation}".format(generation=ga_instance.generations_completed))
    print("Fitness    = {fitness}".format(fitness=ga_instance.best_solution()[1]))
    print("Change     = {change}".format(change=ga_instance.best_solution()[1] - last_fitness))

    last_fitness = ga_instance.best_solution()[1].copy()

# Holds the fitness value of the previous generation.
last_fitness = 0

# Preparing the NumPy array of the inputs.
data_inputs = numpy.array([[1, 1],
                           [1, 0],
                           [0, 1],
                           [0, 0]])

# Preparing the NumPy array of the outputs.
data_outputs = numpy.array([0,
                            1,
                            1,
                            0])

# The length of the input vector for each sample (i.e. number of neurons in the input layer).
num_inputs = data_inputs.shape[1]
# The number of neurons in the output layer (i.e. number of classes).
num_classes = 2

# Creating an initial population of neural networks. The return of the initial_population() function holds references to the networks, not their weights. Using such references, the weights of all networks can be fetched.
num_solutions = 6 # A solution or a network can be used interchangeably.
GANN_instance = pygad.gann.GANN(num_solutions=num_solutions,
                                num_neurons_input=num_inputs,
                                num_neurons_hidden_layers=[2],
                                num_neurons_output=num_classes,
                                hidden_activations=["relu"],
                                output_activation="softmax")

# population does not hold the numerical weights of the network instead it holds a list of references to each last layer of each network (i.e. solution) in the population. A solution or a network can be used interchangeably.
# If there is a population with 3 solutions (i.e. networks), then the population is a list with 3 elements. Each element is a reference to the last layer of each network. Using such a reference, all details of the network can be accessed.
population_vectors = pygad.gann.population_as_vectors(population_networks=GANN_instance.population_networks)

# To prepare the initial population, there are 2 ways:
# 1) Prepare it yourself and pass it to the initial_population parameter. This way is useful when the user wants to start the genetic algorithm with a custom initial population.
# 2) Assign valid integer values to the sol_per_pop and num_genes parameters. If the initial_population parameter exists, then the sol_per_pop and num_genes parameters are useless.
initial_population = population_vectors.copy()

num_parents_mating = 4 # Number of solutions to be selected as parents in the mating pool.

num_generations = 500 # Number of generations.

mutation_percent_genes = 5 # Percentage of genes to mutate. This parameter has no action if the parameter mutation_num_genes exists.

parent_selection_type = "sss" # Type of parent selection.

crossover_type = "single_point" # Type of the crossover operator.

mutation_type = "random" # Type of the mutation operator.

keep_parents = 1 # Number of parents to keep in the next population. -1 means keep all parents and 0 means keep nothing.

init_range_low = -2
init_range_high = 5

ga_instance = pygad.GA(num_generations=num_generations,
                       num_parents_mating=num_parents_mating,
                       initial_population=initial_population,
                       fitness_func=fitness_func,
                       mutation_percent_genes=mutation_percent_genes,
                       init_range_low=init_range_low,
                       init_range_high=init_range_high,
                       parent_selection_type=parent_selection_type,
                       crossover_type=crossover_type,
                       mutation_type=mutation_type,
                       keep_parents=keep_parents,
                       on_generation=callback_generation)

ga_instance.run()

# After the generations complete, some plots are showed that summarize how the outputs/fitness values evolve over generations.
ga_instance.plot_fitness()

# Returning the details of the best solution.
solution, solution_fitness, solution_idx = ga_instance.best_solution()
print("Parameters of the best solution : {solution}".format(solution=solution))
print("Fitness value of the best solution = {solution_fitness}".format(solution_fitness=solution_fitness))
print("Index of the best solution : {solution_idx}".format(solution_idx=solution_idx))

if ga_instance.best_solution_generation != -1:
    print("Best fitness value reached after {best_solution_generation} generations.".format(best_solution_generation=ga_instance.best_solution_generation))

# Predicting the outputs of the data using the best solution.
predictions = pygad.nn.predict(last_layer=GANN_instance.population_networks[solution_idx],
                               data_inputs=data_inputs)
print("Predictions of the trained network : {predictions}".format(predictions=predictions))

# Calculating some statistics
num_wrong = numpy.where(predictions != data_outputs)[0]
num_correct = data_outputs.size - num_wrong.size
accuracy = 100 * (num_correct/data_outputs.size)
print("Number of correct classifications : {num_correct}.".format(num_correct=num_correct))
print("Number of wrong classifications : {num_wrong}.".format(num_wrong=num_wrong.size))
print("Classification accuracy : {accuracy}.".format(accuracy=accuracy))
For More Information
There are different resources that can be used to get started with the genetic algorithm and building it in Python.
Tutorial: Implementing Genetic Algorithm in Python
To start with coding the genetic algorithm, you can check the tutorial titled Genetic Algorithm Implementation in Python available at these links:
This tutorial is prepared based on a previous version of the project but it still a good resource to start with coding the genetic algorithm.

Tutorial: Introduction to Genetic Algorithm
Get started with the genetic algorithm by reading the tutorial titled Introduction to Optimization with Genetic Algorithm which is available at these links:
Tutorial: Build Neural Networks in Python
Read about building neural networks in Python through the tutorial titled Artificial Neural Network Implementation using NumPy and Classification of the Fruits360 Image Dataset available at these links:
Tutorial: Optimize Neural Networks with Genetic Algorithm
Read about training neural networks using the genetic algorithm through the tutorial titled Artificial Neural Networks Optimization using Genetic Algorithm with Python available at these links:
Tutorial: Building CNN in Python
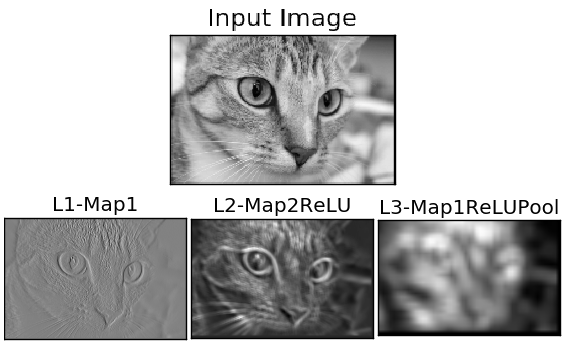
To start with coding the genetic algorithm, you can check the tutorial titled Building Convolutional Neural Network using NumPy from Scratch available at these links:
This tutorial) is prepared based on a previous version of the project but it still a good resource to start with coding CNNs.
Tutorial: Derivation of CNN from FCNN
Get started with the genetic algorithm by reading the tutorial titled Derivation of Convolutional Neural Network from Fully Connected Network Step-By-Step which is available at these links:
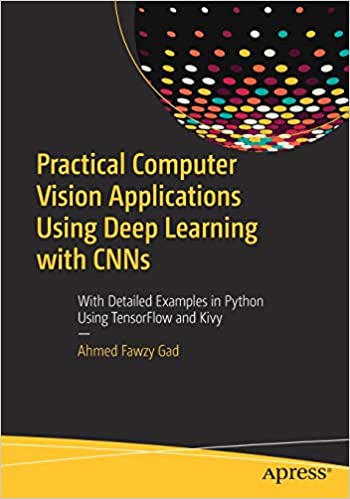
Book: Practical Computer Vision Applications Using Deep Learning with CNNs
You can also check my book cited as Ahmed Fawzy Gad 'Practical Computer Vision Applications Using Deep Learning with CNNs'. Dec. 2018, Apress, 978-1-4842-4167-7 which discusses neural networks, convolutional neural networks, deep learning, genetic algorithm, and more.
Find the book at these links:
Citing PyGAD - Bibtex Formatted Citation
If you used PyGAD, please consider adding a citation to the following paper about PyGAD:
@misc{gad2021pygad,
      title={PyGAD: An Intuitive Genetic Algorithm Python Library},
      author={Ahmed Fawzy Gad},
      year={2021},
      eprint={2106.06158},
      archivePrefix={arXiv},
      primaryClass={cs.NE}
}