OpenAmiga600FastRamExpansion
OpenAmiga600FastRamExpansion is an Open Hardware 4 MB Fast RAM Expansion for the Commodore Amiga 600 Computer.
Summary
Most low-end Amiga models only came with Chip RAM. "Big Box" models allowed for a different type of memory to be installed, known as Fast RAM, where fast means that it's dedicated to the main processor, so that it doesn't have to compete with the other chips in order to gain access to it (as is the case with Chip RAM). While both Chip and Fast RAM are limited in size, you can have at least a few MB of the latter on all Amigas (usually up to 8), while the former can never exceed 2 MB.
OpenAmiga600FastRamExpansion will allow you to add 4 MB of Fast RAM to your Amiga 600. This way you will be able to run more applications at once and more quickly. If you combine it with a chip RAM expansion, you will also be able to run almost all games supported by WHDLoad, pushing the smallest of the Amigas to its limits. The Fast RAM will be mapped to $200000-$5fffff, which means it will not interfere with the PCMCIA address space.
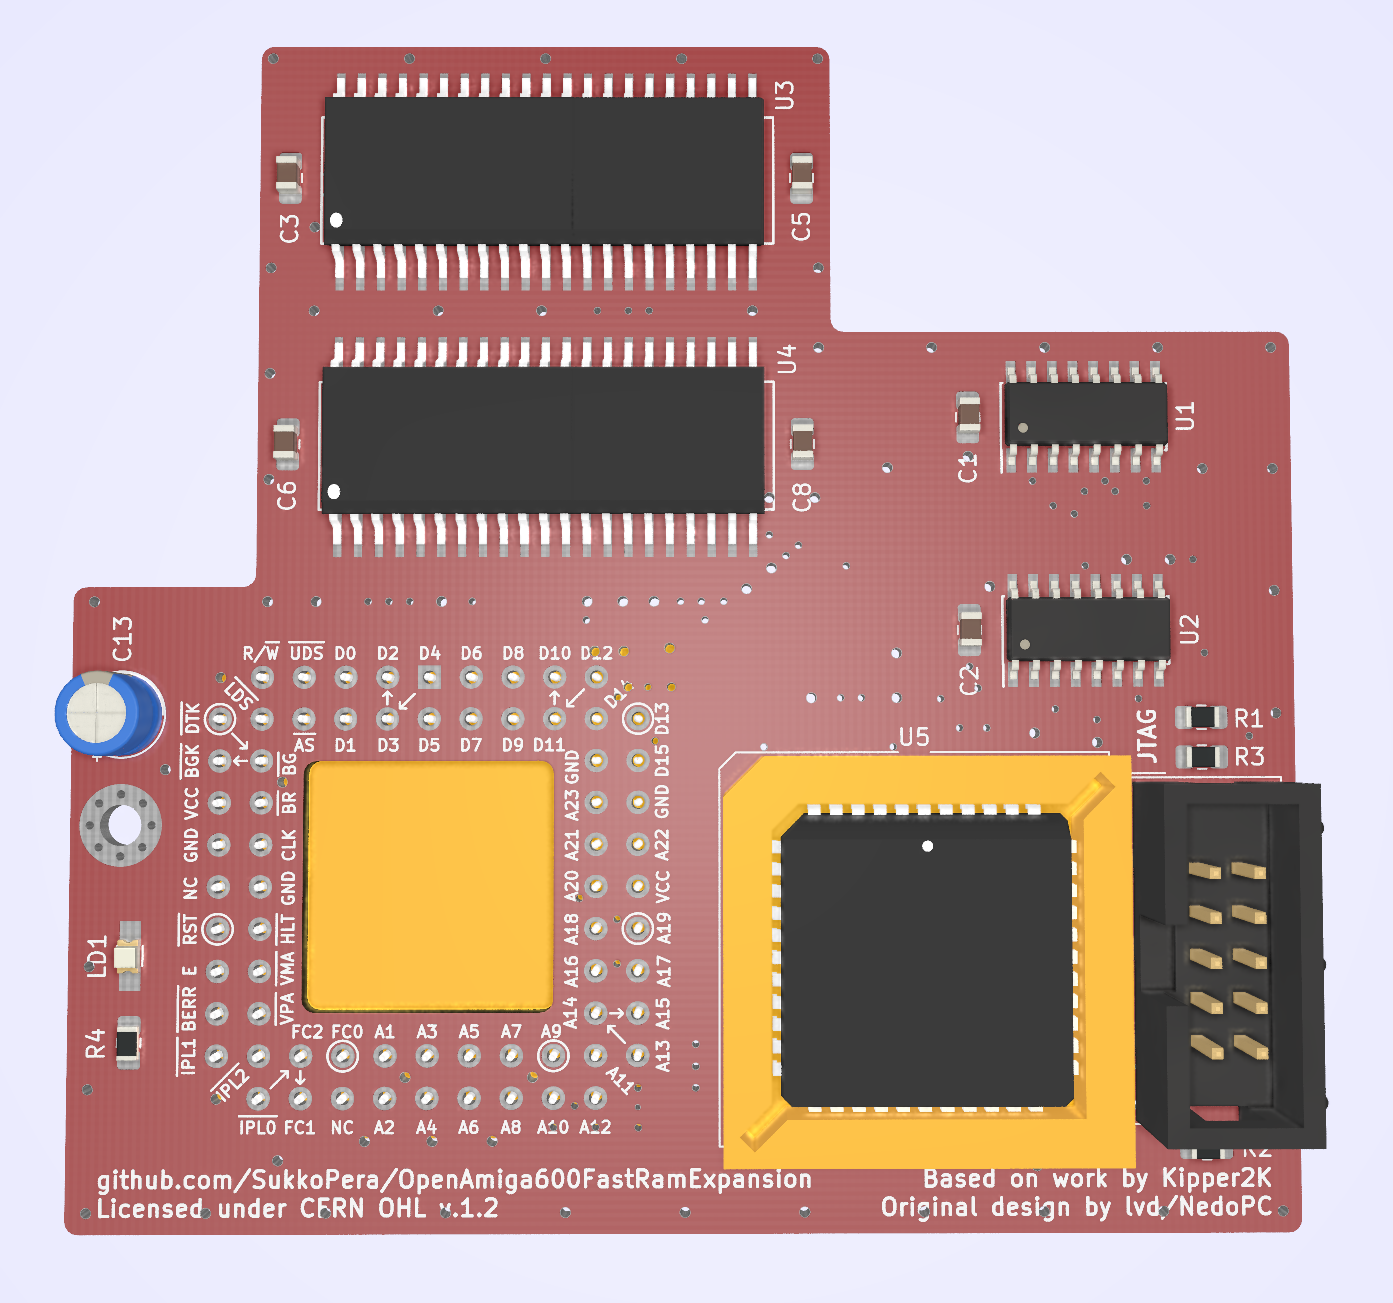
Note that the A600 was not originally designed to support a Fast RAM expansion, which means Commodore didn't provide any connector for it. In theory it could be sandwiched between the CPU and mainboard, as usually done on A500s, but in the A600 the CPU is soldered directly to the mainboard and cannot be removed. Thus the only way to install it is to clip it over the CPU, using a PLCC socket placed upside-down. PLCC sockets are not meant to be used this way, so this is really a bit of a hack and might not even work in all cases. Space around the CPU is quite limited, hence the odd shape of this board.
OpenAmiga600FastRamExpansion is basically a clone of a RAM expansion produced by Kipper2K a few years ago, based on an earlier design by lvd/NedoPC. He has since stopped producing and selling these cards and I thought it was a pity that he didn't open his designs and actually took all of them down, as this card is quite cheap to build and really useful. So I set about recreating it from scratch. Kipper2K has also made other expansions, including an 8 MB version of this card, but I chose to work on this one as it was simpler and probably enough for most uses. Other cards might come in the future.
Memory Compatibility
The required RAM Type is 16 Mbit (1M×16) DRAM in the SOJ-42 package with up to 70-80 ns access time. It is 5v-only DRAM (not SDRAM!) often found in old 72-pin SIMMs, EDO chips might work or not. All chips having 8160 in their part number should be OK.
See OpenAmiga500FastRamExpansion for a compatibility list.
Assembly and Installation
Open your A600, doing your best not to crack any of the small tabs that hold the case together. If your A600 has the top part of the shielding, remove it and store it somewhere, as you will not be able to put it back in place when the expansion is installed. The same goes for the HD cradle, sorry.
Lots of A600s (and of A1200s, for the record) have issues with leaking electrolytic capacitors, therefore I really recommend to inspect them first, while you have your Amiga open. They might be leaking even if your Amiga shows no problems and when it finally will, it might be too late (= expensive) to salvage it. So, if you notice any white or brownish marks around those shiny metal cylinders, get them replaced. It is NOT an easy thing to do and you need some decent tools anyway, so I really recommend to contact a professional, there are many people on Amiga forums offering this kind of service.
I suggest soldering the RAM chips first: these can either be soldered directly to the board or installed in sockets. While soldering the chips might not be trivial for the unexperienced, sockets for the SOJ-42 package are hard to find and not really easier to solder either, so the choice is up to you.
Next you should solder all the remaining surface mount components, first on the top side and then on the bottom side. Keep the CPLD and CPU socket last. Normally it is not necessary to mount all the decoupling capacitors for the RAM: I usually skip C4 and C7. Maybe capacitor C13 can be left out as well, your choice. R4 should be chosen according to the particular led you will be using for LD1. Actually you are free to skip LD1 and R4 altogether, if you hate power LEDs.
Before soldering the CPU socket you will need to rework it a bit if you want a really good fit: get some sandpaper and follow these instructions. After it has been soldered, you can cut the bottom of it so that the window in the PCB continues through the socket. Most sockets will already have holes on the bottom that will make this operation easier. This will allow you to install a 14x14mm heatsink on the CPU, which might be a good idea since placing this board over the CPU will somewhat reduce the heat dissipation capabilities of the chip. Make sure to use good thermal adhesive/glue, otherwise you risk to make the dissipation even worse.
When you are done with the soldering you will need to program the CPLD. Whenever you do so, make sure to carefully remove the board from your Amiga, or you might risk damaging it. You can find the firmware here, along with instructions on how to flash it. Make sure you use the 4 MB version! You can provide power through the pads of C13 if you need to do so.
You are finally ready to install the expansion in your A600 but, before you do this, I suggest to clean the CPU pins using contact cleaner or isopropyl alcool and a toothbrush or cotton swabs, as all sorts of gunk will have probably gathered on them over the years. Let them dry well, then place the expansion over the CPU with the correct orientation and push it down firmly until it feels solidly in place. There should be no need to use the Force™.
Before reassembling your case, I recommend to run SysTest/Amiga Test Kit. Use the Memory option (F1), it must show 4 MB of Fast RAM. Then start the Memory Test (F1 again) and let it run for 50-100 rounds: if it doesn't find any errors, you are probably good to go. If you get any errors, power off your computer and try to give the expansion a better fit, by pushing it further down or slightly twisting it back and forth.
It might happen that the board slowly works its way out of the socket over time. To avoid this you can anchor it to the mainboard using the hole to the left of the CPU, which should align with one of the holes for the HD cradle legs. If you have a 3D printer, another option is using this nice frame designed by blekihun.
Note that, as already mentioned, PLCC sockets are not meant to be used this way, which means that the contact quality degrades a bit with every insertion or removal of the board. So, try not to remove it unnecessarily. If you find that the contact has degraded so much that the machine is no longer stable, replace the socket with a new one.
License
The OpenAmiga600FastRamExpansion documentation, including the design itself, is copyright © SukkoPera 2019.
OpenAmiga600FastRamExpansion is Open Hardware licensed under the CERN OHL v. 1.2.
You may redistribute and modify this documentation under the terms of the CERN OHL v.1.2. This documentation is distributed as is and WITHOUT ANY EXPRESS OR IMPLIED WARRANTIES whatsoever with respect to its functionality, operability or use, including, without limitation, any implied warranties OF MERCHANTABILITY, SATISFACTORY QUALITY, FITNESS FOR A PARTICULAR PURPOSE or infringement. We expressly disclaim any liability whatsoever for any direct, indirect, consequential, incidental or special damages, including, without limitation, lost revenues, lost profits, losses resulting from business interruption or loss of data, regardless of the form of action or legal theory under which the liability may be asserted, even if advised of the possibility or likelihood of such damages.
A copy of the full license is included in file LICENSE.pdf, please refer to it for applicable conditions. In order to properly deal with its terms, please see file LICENSE_HOWTO.pdf.
The contact points for information about manufactured Products (see section 4.2) are listed in file PRODUCT.md.
Any modifications made by Licensees (see section 3.4.b) shall be recorded in file CHANGES.md.
The Documentation Location of the original project is https://github.com/SukkoPera/OpenAmiga600FastRamExpansion/.
Support the Project
Since the project is open you are free to get the PCBs made by your preferred manufacturer, however in case you want to support the development, you can order them from PCBWay through this link:

You get my gratitude and cheap, professionally-made and good quality PCBs, I get some credit that will help with this and other projects. You won't even have to worry about the various PCB options, it's all pre-configured for you!
Also, if you still have to register to that site, you can use this link to get some bonus initial credit (and yield me some more).
Again, if you want to use another manufacturer, feel free to, don't feel obligated :). But then you can buy me a coffee if you want:
Thanks
- lvd for the initial design
- Kipper2K for making his boards
- majinga for helping with the testing