PRIMITIVE-IO / Primitive
Labels
Projects that are alternatives of or similar to Primitive
Primitive Immersive Development Environment - User Manual
Primitive is available on Viveport and Steam for non-commercial use. If you're interested in using Primitive as part of a larger organization, please reach out to us at [email protected].

View your own repo (free for non-commercial use)
In the environment.yaml file in
Steam Installation: C:\Program Files (x86)\Steam\steamapps\common\Primitive\PRIMITIVE_Data\StreamingAssets
Viveport Installation: C:\...\675c92c6-7df2-4ee3-b919-1bfbb6e5e8cc\...\Primitive\PRIMITIVE_Data\StreamingAssets
edit
localDirectories:
  directories:
     - C:\path\to\my\repo1
     - C:\path\to\my\repo2
Your folders containing files and source code will now be visible on the "Local" browser sphere.
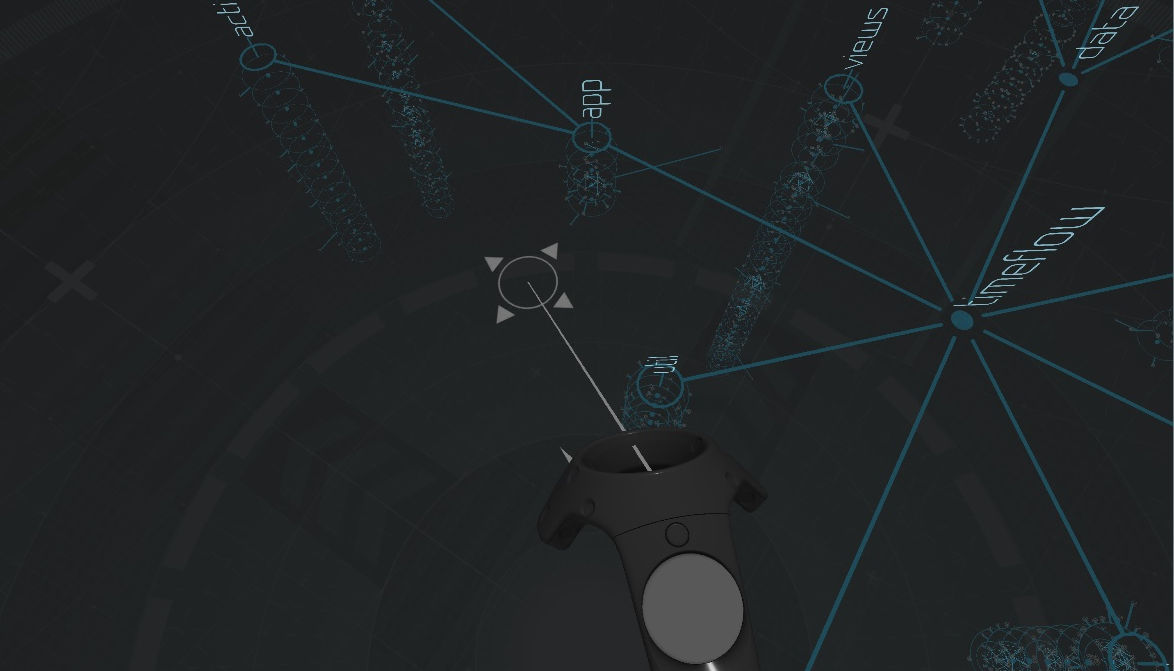
First Impressions
In Primitive, there is a nested sphere containing analyses. Selecting an analysis will "land" you on the analysis.
Select the Return button to return to the global view.
Controls
Wands (HTC Vive)

The two wands have different functions in Primitive:
-
The Exploration Wand. In the dominant hand, the exploration wand is used to make selections and manipulate objects in the world. It features two pincers used to aim at selections. The pincers close when the user points to a selectable object.
A line comes out of the exploration wand which shows the direction the user is pointing in. The line locks on objects that can be selected. The trigger can be used to make selections.
-
The Runtime Wand. In the other hand, the runtime wand is used to view and control the program execution (supported projects only).
Touch Controllers (Oculus Rift)

The two controllers have different functions in Primitive:
-
The Exploration Controller. In the right hand, the exploration controller is used to make selections and manipulate objects in the world.
A line comes out of the exploration controller which shows the direction the user is pointing in. The line locks on objects that can be selected. The trigger can be used to make selections.
-
The Runtime Controller. In the left hand, the runtime controller is used to view and control the program execution (supported projects only).
GearVR Touchpad (GearVR)
The GearVR headset contains a touchpad on the right side of the headset. The touchpad can be swiped, as well as pressed in each direction, up, down, left and right. Above the touchpad is a back button.
When looking at a selectable object with the GearVR, the object will indicate it can be interacted with. The object can be selected by tapping the center of the touchpad.
GearVR Controller (GearVR)
The GearVR Controller has the combined functions of the exploration controller and the runtime controller integrated together. The trigger is used for selection, the touchpad is used for scrolling and stepping, and the back button is used for escaping.
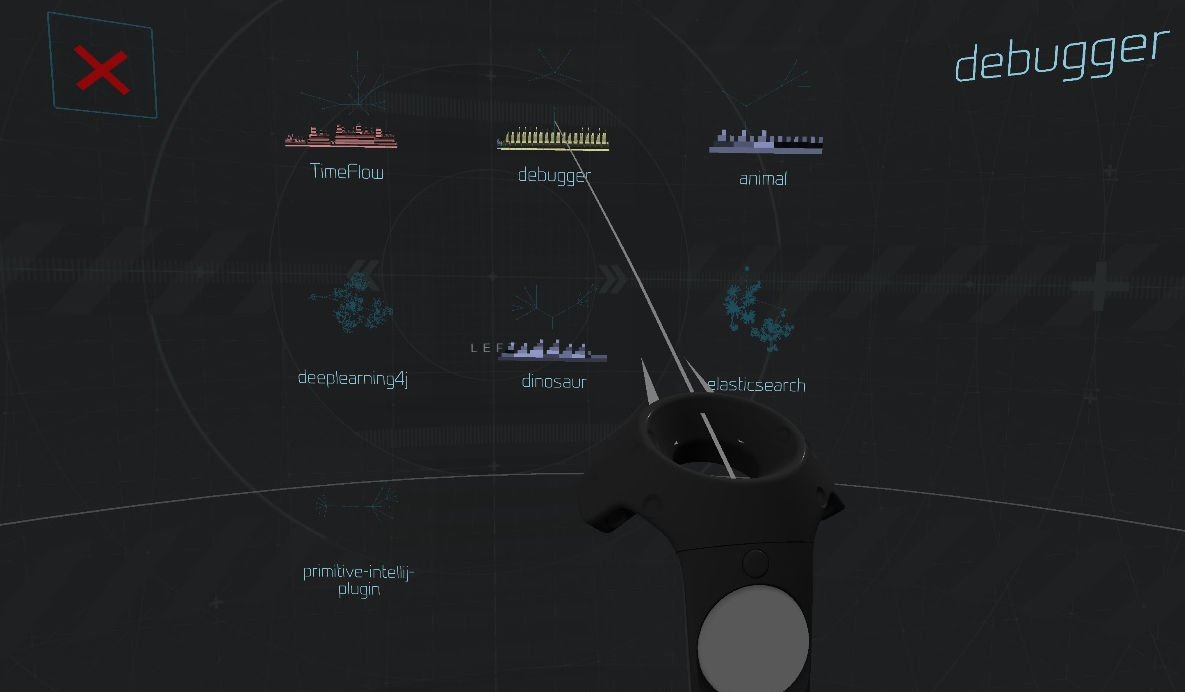
Selecting a Project
-
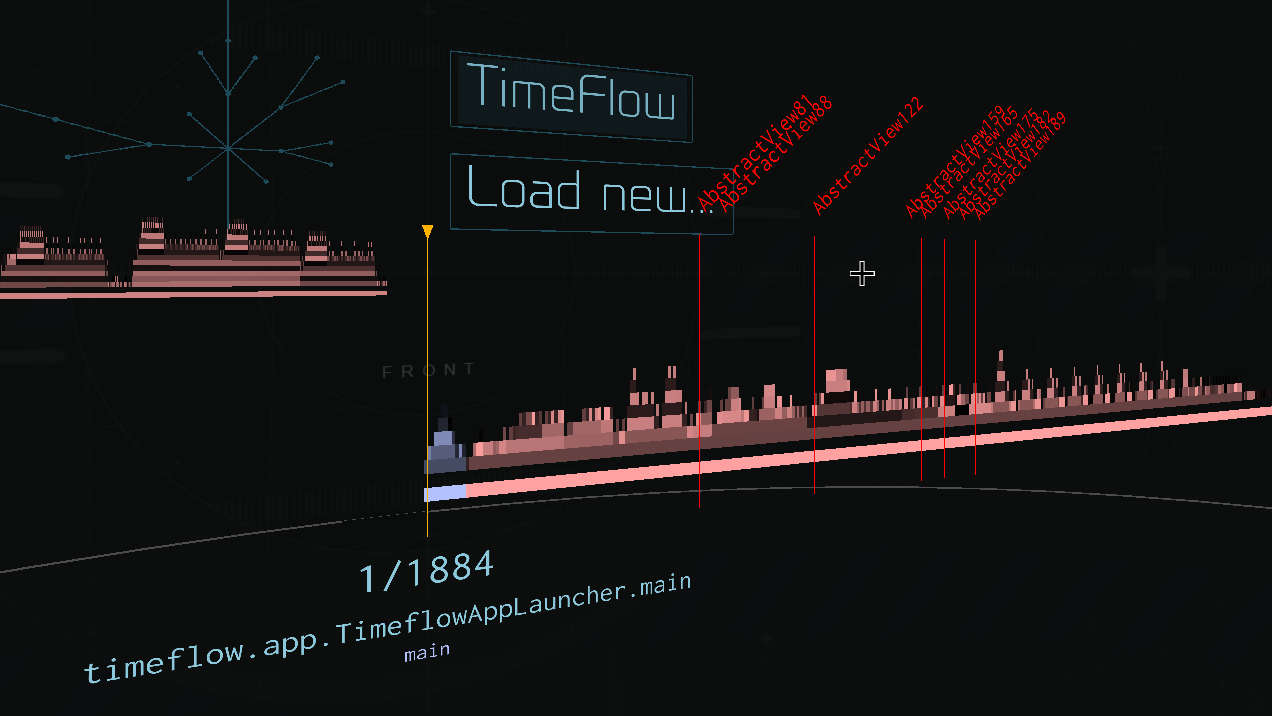
Select the Load new... button on the menu.

-
Point at any of the available projects for more information about that project.
-
Load a project by selecting it.


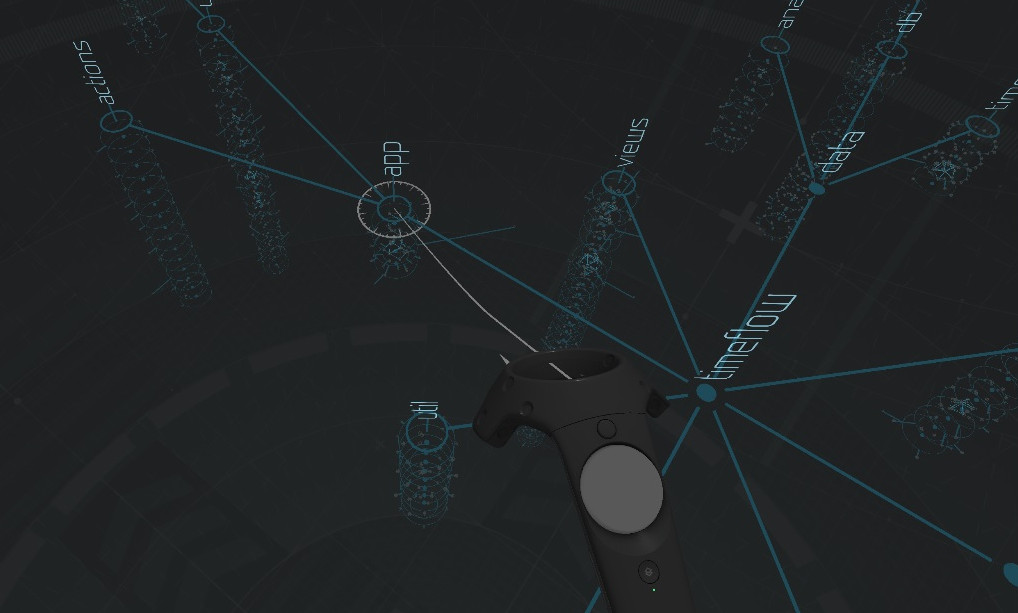
Navigating the Project
Moving the World
With Controllers
-
Aim at an empty spot on the ground.
-
Hold down the trigger on the exploration wand (on Vive) or controller (on Rift or GearVR Controller), then move the wand or controller to move the world.
-
Release the trigger to stop moving the world.

GearVR without Controllers
- Holding down the GearVR touchpad for 3 seconds will allow the user to teleport to the point that they are looking at on the ground.
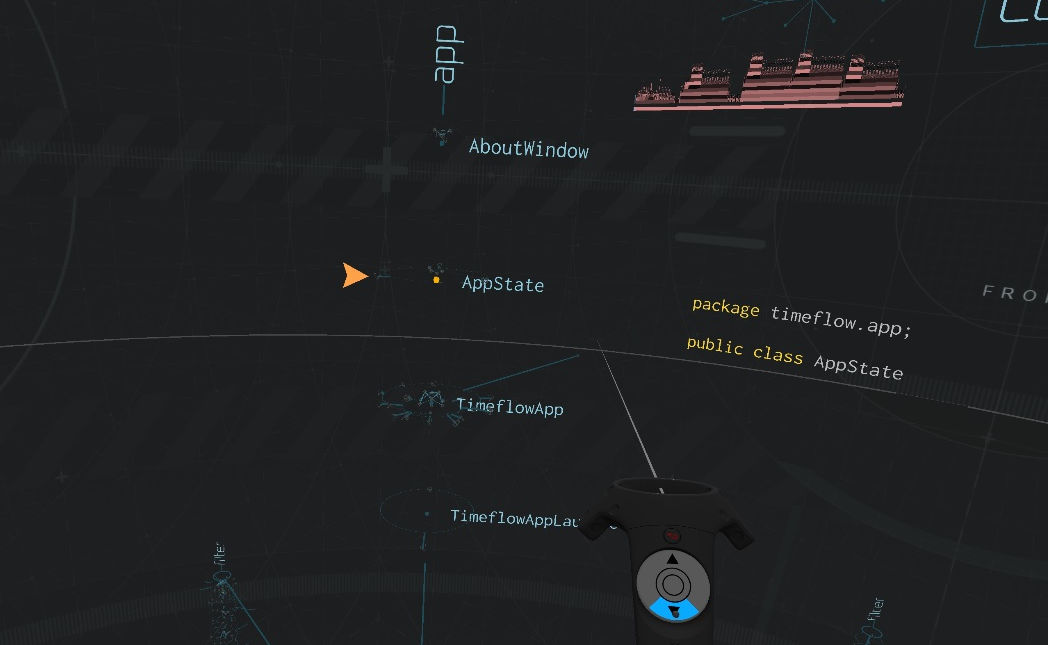
Opening and Browsing a Directory
-
Aim at a directory. Select the directory to open it.
-
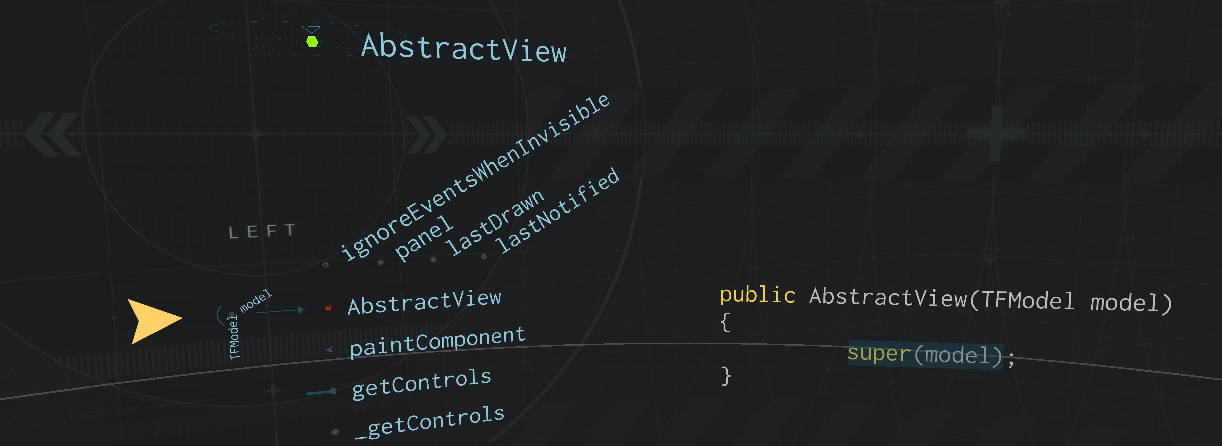
The first class in the directory will be selected and will have an arrow next to it. Scroll through the classes with the up and down buttons on the exploration wand trackpad (on Vive or GearVR Controller), by pressing up and down on the exploration controller joystick (on Rift), or by swiping up and down on the GearVR touchpad (on GearVR).
-
Open a class by pressing the center of the exploration wand trackpad (on Vive or GearVR Controller), by pressing the A button (on Rift), or tapping on the GearVR touchpad (on GearVR). The methods and fields of the class are now listed.
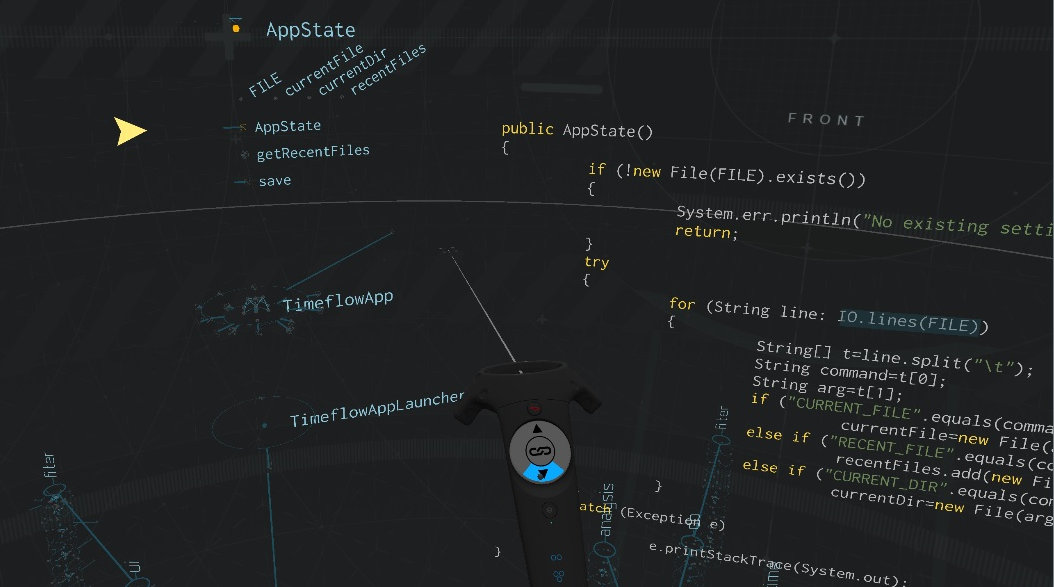
-
The source code can be moved up and down by aiming at the source code and dragging the source code with the trigger (on Vive, Rift, and GearVR Controller).


Closing Classes and Directories
-
A selected class can be collapsed, thus collapsing its methods and fields, by pressing the exploration wand menu button (on Vive), the B button (on Rift), or the back button (on GearVR).
Collapsing a class works even when selected on one of its methods or fields.
-
An open directory can closed by pointing at the base of the directory, then pressing the exploration wand menu button (on Vive), the B button (on Rift), or the back button (on GearVR).


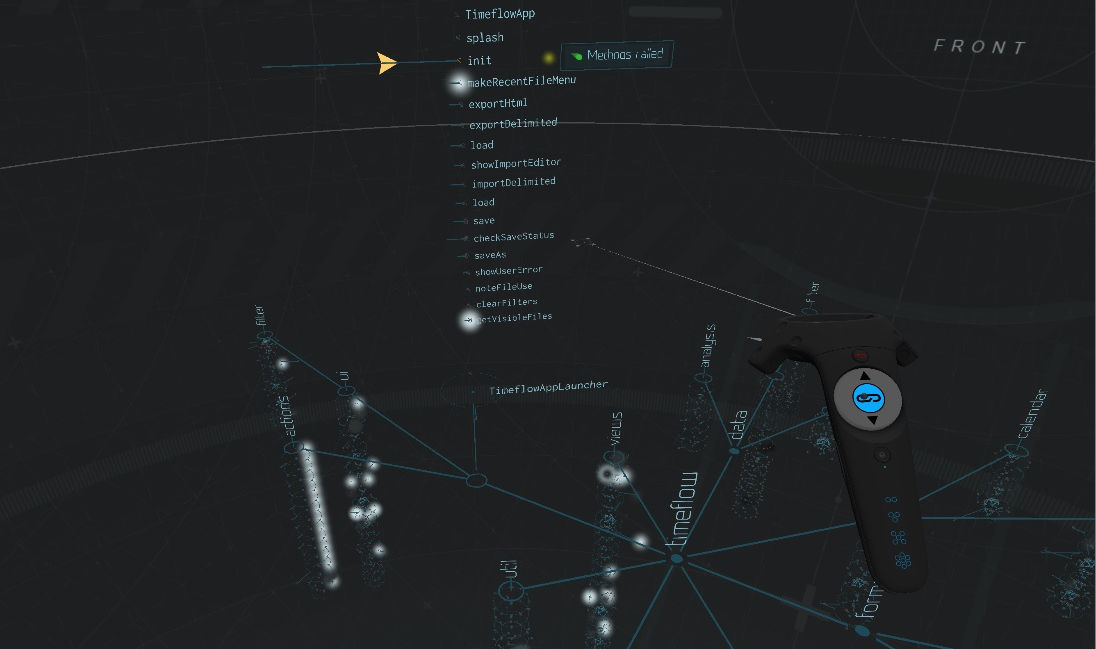
Viewing Method Calls/Class Extensions
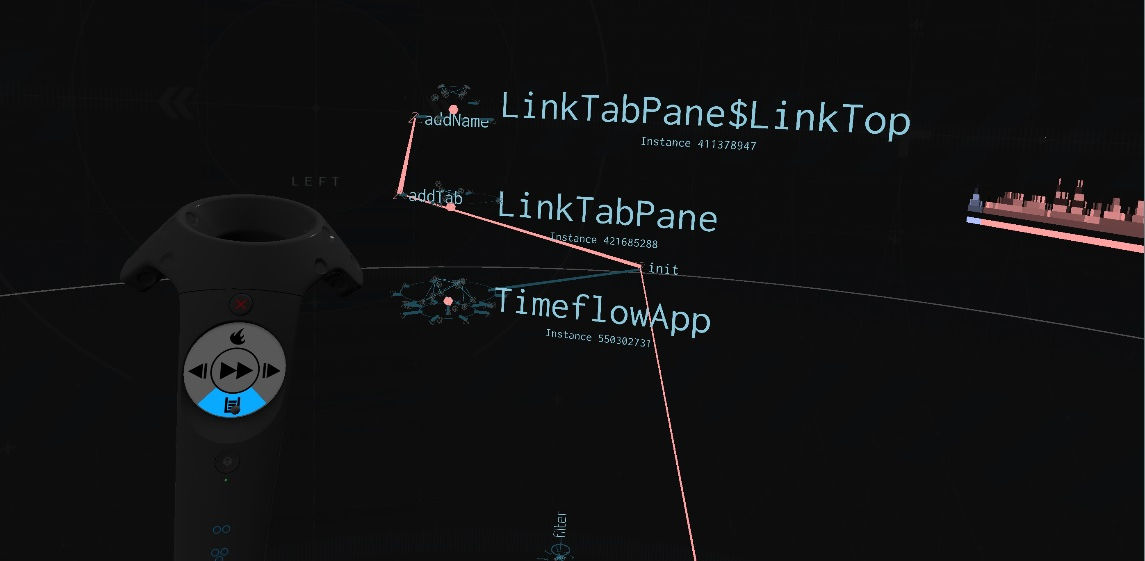
If a method calls out to other methods within the project, the source code for that method will contain selectable links. Aim at a link and select it to navigate to the called method.

-
While selected on a method or expanded class, press the "link" button on the exploration wand trackpad (on Vive or GearVR Controller) or the A button (on Rift) to view the references to and from that method or class. Not all methods and classes have references.
-
A menu will appear next to the method or class showing the different types of references available for that method or class. Press the up and down buttons on the exploration wand touch pad (on Vive or GearVR Controller), press up and down on the exploration controller joystick (on Rift) or swipe up and down on the GearVR touchpad (GearVR) to select a different type of reference.
Not all methods and classes have more than one type of reference.
-
When a type of reference is selected, all referenced elements will be highlighted with a glowing particle. For example, when viewing methods called by the currently selected method, the particles are on the methods being called.
Dimmer particles represent higher-degree references. For example,when viewing methods called by the currently selected method, a dim particle shows that the current method calls a method, which calls another method, which eventually calls the method with the dim particle on it.

Viewing the Project Runtime (select projects only)
-
If the current project has a recorded runtime, the runtime can be viewed by finding and selecting the "EXECUTE" handle on a launcher class in the model.
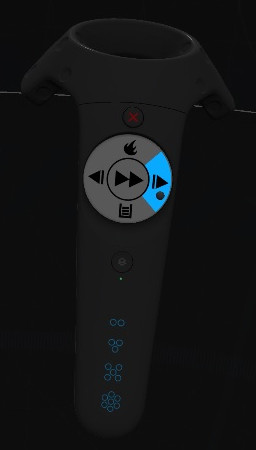
-
The runtime can be stepped through by pressing the "next" button on the right of the runtime wand trackpad (on Vive), pressing right on the runtime controller joystick (on Rift), or pressing right on the GearVR touchpad (on GearVR).

-
The call stacks for the entire execution are displayed in the timeline underneath the menu. Aim at any point on the timeline and select it to jump to that point in the execution.
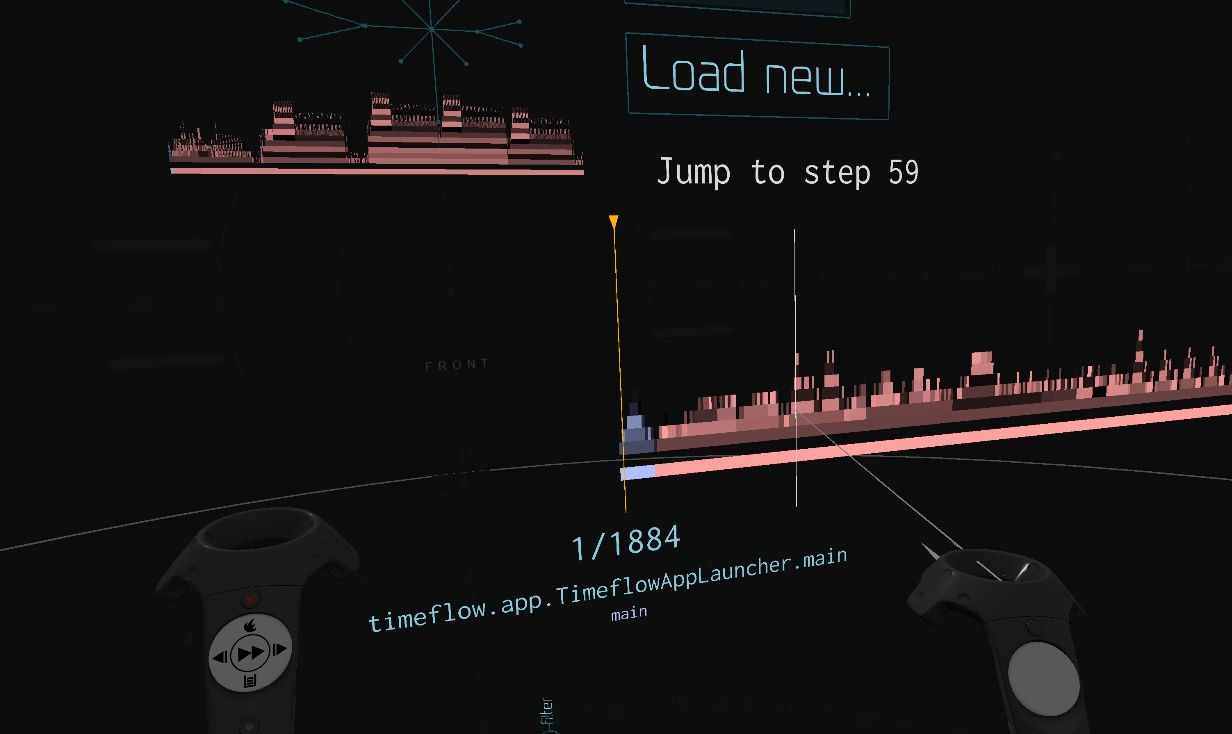
-
The runtime can be toggled in and out of fast step mode by pressing the "fast forward" button in the middle of the runtime wand trackpad (on Vive or GearVR Controller), pressing the X button (on Rift) or tapping the middle of the GearVR touchpad (on GearVR).


Exiting the Runtime
- The runtime can be exited by pressing the menu button on the runtime wand (on Vive), the X button (on Rift), the back button or by selecting the EXECUTE button on the menu (on GearVR).
Runtime Objects
As objects are instantiated, they are displayed above the directory map. The objects are grouped into a tree that is organized by the order in which the objects were created (the Factory Model).
Each thread of execution is shown as a brightly colored line. If there are multiple threads executing concurrently, they will be shown in different colors. Each thread connects from method to method depending on the call stack.

Viewing Call Stacks
Not all objects in the runtime are active on the currently executing call stacks.
-
To isolate the currently executing call stacks, press the "stack" button on the runtime wand trackpad (on Vive), press down on the runtime controller joystick (on Rift) or press the down button on the GearVR touchpad (on GearVR). This initiates the Call Stack Mode.
-
To view the source code of methods on one of the call stacks, aim at the call stack and select an object on the stack. The lowest method on the object will be selected and the source code will be visible.

-
Scroll through the methods on the call stack by pressing up and down on the exploration wand trackpad (on Vive), by pressing up and down on the exploration controller joystick (on Rift).


Setting Breakpoints
It is possible to set a breakpoint on individual methods.
-
When not in runtime mode, navigate to a method.
-
Press the left button on the exploration wand trackpad (on Vive), press left on the exploration controller joystick (on Rift) or press the left button on the GearVR touchpad (on GearVR). This sets a breakpoint on that method, and the icon next to the method turns red.
To remove the breakpoint, press the right button on the exploration wand trackpad (on Vive), press right on the exploration controller joystick (on Rift) or press the right button on the GearVR touchpad (on GearVR).
-
Switch to runtime mode. The execution timeline will now show red lines at all points in the execution where the methods with breakpoints are executed. If no lines appear, the methods with breakpoints are not executed in the particular recording being shown.
-
To jump to one of the points in time when a breakpointed method is executed, aim at one of the red lines and select the line.


Viewing the Method Call Heatmap
If a project has a recorded runtime, then it's possible to see how many times each method in the project was called. When not in runtime mode, press the "heatmap" button on the runtime wand trackpad (on Vive) or press up on the runtime controller joystick (on Rift).

Methods with red particles on them are called the most number of times relative to other methods in the project. Methods with blue particles are not called as many times.
Method call counts are applicable for the recorded runtime associated with the project.