React Native Architecture
Core principles, patterns and best practices for building a react native application
Table of Contents
- Tech Stack
- Technical design
- Style guide
- Technical decisions
- Why Expo?
- Why Feature-Oriented Architecture?
- Why TypeScript?
- Why Functional Javascript?
- Why Ramda over lodash, or underscore?
- Why prefer Stateless Functional Component over Stateful Component, Higher Order Component and Recompose?
- Why prefer formik over redux-form?
- Why Glamorous Native
- Why prefer date-fns over moment?
- Recipes
Tech Stack
Application Blueprint
- Always up-to-date React Native scaffolding
- Modular and well-documented structure for application code
- Expo Easy to build a React Native app without any build configuration
- Redux for safe and reasonable state management
- Painless React forms with formik
- React Navigation for awesome navigation with 60fps transitions
- Typescript for static type checking
- Ramda and Ramda Adjunct for functional Javascript
- Recompose for building higher order components
- Glamorous Native for creating UI components
- i18n-js for providing i18n translations
- Feature flags
- Clean and testable service layer for interacting with GraphQL queries and mutations
⭐ Multi-environment configuration (dev, staging, production,...) for iOS and Android⭐ Built-in error handling, loading, updating and customizable screens
Testing Setup
- Jest for unit testing application code and providing coverage information
- Enzyme and fully mocked React Native for unit testing UI components
Dev tools
- TSLint An extensible linter for the TypeScript language
- Prettier as an opinionated code formatter
- lint-staged Run linters on git staged files
- insomnia Powerful HTTP and GraphQL tool belt
Technical design
// TODO: TBD
Style guide
Core ideology
WRITE SMALL, REUSABLE AND COMPOSABLE FUNCTIONS
Code structure
- No duplicate file name in the whole application. Every file need to have a suffix to explain its type
Why? It's easier to search for a file and reduce the confusion of same file names
./src/modules/Login/
├── Login.lifecycle.tsx
├── Login.handler.tsx
├── Login.reducer.tsx
├── Login.screen.tsx
├── Login.selector.tsx
├── Login.view.tsx- Organize your files around product features, not roles. Also, place your test files next to their implementation. Details
Why? Instead of a long list of files, you will create small modules that encapsulate one responsibility including its test and so on. It gets much easier to navigate through and things can be found at a glance.
- A separate directory for each component, module, higher order component,...
Why? It's easier to extend and organize files. Make a change on a component won't affect the structure of its parent directory
./src/components/
├── MenuItem/
├── MenuList/
├── LoadingMask/
└── UI/- Only use index files (
index.tsx) for indexing (logic code are not allowed)
Why? Using index files eases importing files in a deep structure. However, adding logic code to these files would make it more difficult to reason about the application (hidden logic in unexpected places).
- Put all export statements at the end of file
Why? Export randomly variables, functions, interfaces,...make it hard to keep track of what have been exported, especially in a large file
// thousands of lines of code
...
export { myVar, myFunction, IMyInterface, MyTypeAlias }
export default myModule
Code convention
-
Use TSLint to enforce code style.
-
Early exit instead of a long
ifblock. Details -
Only arrow functions. Details
Why? Traditional functions don’t bind lexical scope, which can lead to unexpected behavior when accessing 'this'.
- Prefer
const. Requires that variable declarations useconstinstead ofletandvarif possible. Details
Why? Avoid unexpected variable mutations (side effects)
- Prefer conditional expressions. Recommends to use a conditional expression instead of assigning to the same thing in each branch of an
ifstatement. Details
Why? Reduce duplication and can eliminate an unnecessary variable declaration.
- Depending on the size of the task use //TODO: comments or open a ticket.
Why? So then you can remind yourself and others about a small task (like refactoring a function or updating a comment). For larger tasks use //TODO(#3456) which is enforced by a lint rule and the number is an open ticket.
- Always comment and keep them relevant as code changes. Remove commented blocks of code.
Why? Your code should be as readable as possible, you should get rid of anything distracting. If you refactored a function, don't just comment out the old one, remove it.
- Avoid irrelevant or funny comments, logs or naming.
Why? While your build process may(should) get rid of them, sometimes your source code may get handed over to another company/client and they may not share the same banter.
- Make your names search‑able with meaningful distinctions avoid shortened names. For functions use long, descriptive names. A function name should be a verb or a verb phrase, and it needs to communicate its intention.
Why? It makes it more natural to read the source code.
- Organize your functions in a file according to the step‑down rule. Higher level functions should be on top and lower levels below.
Why? It makes it more natural to read the source code.
- We use Prettier with a pre‑commit hook to format code.
Why? While prettier itself can be very powerful, it's not very productive to run it simply as a npm task alone each time to format code. This is where lint-staged (and husky) come into play.
Naming convention
const UI_TYPE = 'component' | 'view' | 'form'
const TEST_TYPE = 'component' | 'view' | 'form' | 'handler' | 'selector' | 'util'
Components
Location: ./src/components/
- Component:
<ComponentName>.component.tsx - Component styles:
<ComponentName>.component.style.tsx - Snapshot and behavior tests:
<ComponentName>.component.test.tsx
./src/components/LoadingMask/
├── LoadingMask.component.tsx
├── LoadingMask.component.style.tsx
├── LoadingMask.component.test.tsx
└── __snapshots__
    └── LoadingMask.component.test.tsx.snap
HOC
Location: ./src/hoc/
- HOC
<HOCName>.hoc.tsx - Test
<HOCName>.hoc.test.tsx
./src/hoc/withUpdating/
├── withUpdating.hoc.tsx
└── withUpdating.hoc.test.tsx
Utility functions
Location: ./src/utils/
- Utility function
<UtilityName>.util.tsx - Test
<UtilityName>.util.test.tsx
./src/utils/
├── __tests__
│   ├── common.util.test.js
│   └── platform.util.test.js
├── common.util.js
├── platform.util.js
Constants
Location: ./src/constants/
<ConstantName>.constant.tsx
Configs
Location: ./src/configs/
<ConfigName>.config.tsx
Module
Location: ./src/modules/<ModuleName>
- Screen component (stateful)
<ModuleName>.screen.tsx - State selector for screen component
<ModuleName>.selector.tsx - Event handlers for screen component
<ModuleName>.handler.tsx - Lifecycle callbacks for screen component
<ModuleName>.lifecycle.tsx - Module's reducer
<ModuleName>.reducer.tsx - Module's utility functions
<ModuleName>.util.tsx - UI view component
<ModuleName>.view.tsx - Form component
<ModuleName>.form.tsx - Style
<ModuleName>.<UI_TYPE>.style.tsx - Test
<ModuleName>.<TEST_TYPE>.test.tsx
GraphQL queries
Location: ./src/modules/<ModuleName>/Query/
Each query has to export at least 2 things: query and params
// getUserList.query.tsx
const query = gql``
const params = {
  options: {
    variables: {
      id: '123'
    }
  }
}

export default { query, params }
Usage
import getUserList from '../<ModuleName>/Query/getUserList.query'
...
const enhance = compose(
  graphql(getUserList.query, getUserList.params)
)
GraphQL mutations
Location: ./src/modules/<ModuleName>/Mutation/
Each mutation has to export at least 2 things: mutation and params
// updateUserStatus.mutation.tsx
const mutation = gql``
const params = {
  options: {
    variables: {
      id: '123'
    }
  }
}

export default { mutation, params }
Usage
import updateUserStatus from '../<ModuleName>/Mutation/updateUserStatus.query'
...
const enhance = compose(
  graphql(updateUserStatus.mutation, updateUserStatus.params)
)
Testing guidelines
- Place your test files next to the tested modules using a naming convention, like
<ComponentName>.component.test.tsx.
Why? You don't want to dig through a folder structure to find a unit test.
- Put your additional test files into a separate test folder to avoid confusion.
Why? Some test files don't particularly relate to any specific implementation file. You have to put it in a folder that is most likely to be found by other developers:
__test__folder.
- Write testable code, avoid side effects, extract side effects, write pure functions
Why? You want to test a business logic as separate units. You have to "minimize the impact of randomness and nondeterministic processes on the reliability of your code". A pure function is a function that always returns the same output for the same input. Conversely, an impure function is one that may have side effects or depends on conditions from the outside to produce a value. That makes it less predictable.
- Run tests locally before making any pull requests
Why? You don't want to be the one who caused production‑ready branch build to fail. Run your tests after your rebase and before pushing your feature‑branch to a remote repository.
Technical decisions
Why Expo?
When creating a new React Native app, it’s common to think in terms of two choices. Using Expo. Or not using Expo. Even the official React Native Getting Started docs describe it in these terms.
-
Serving an Expo project for local development
-
Opening a deployed Expo app


Expo has become incredibly popular for several reasons:
- You can test on a real device without having an Apple Developer Account ($99/year). This is accomplished via their free Expo app in the Google Play and App Store. Inside the Expo app, you can run your own app. It’s not exactly like installing your app on a device since you’re really just in the Expo app. But it’s still pretty cool.
- Expo handles a bunch of config steps for deploying your app. A lot of people learning React Native are not coming from a mobile development background, so doing this configuration themselves seems daunting.
- Expo has an SDK to handle all kinds of things like using the camera, accelerometer, maps, location tracking, analytics, etc. Granted, most of these features can be implemented using open source packages, but it is nice that Expo provides so many of these in one place.
Expo’s Shortcomings
When you create your app via Expo, it creates a file structure for you that does not include the iOS and Android project files. Some features require you to tweak these files though. One example is adding a third‑party push notification library. To do this, you must do the following in that project file:
- Turn on the push notifications capability.
- Link the push notification library to your app’s bundle (something that react-native link would likely do for you, depending on the push library you’re implementing).
With Expo, you can’t do those steps because there is no project file to do them in. So here is where the road leads to “detaching” from Expo. Detaching will produce these project files so you can configure them.
There are two options when detaching from Expo.
- Completely remove Expo. This gives you a project similar to what you’d get with
react-native init. - Partially remove Expo (often referred to as ExpoKit). This allows you to still use the Expo SDK. Your Javascript continues to be hosted remotely and
updated via
exp publish.
Both options give you the iOS and Android project files so you can configure them yourself.
Why Feature-Oriented Architecture?
Traditionally, developers structured their React applications by type. This means they had folders like components, containers, reducers, actions, etc and put feature-related files into different places.
While this works fine for examples, once you have hundreds or potentially thousands of components, development becomes very hard. To add a feature, you would have to search for the correct file in half a dozen different folders with thousands of files. This would quickly become tedious, and confidence in the code base would wane.
Instead of grouping the files of your application by type, group them by feature! That is, put all files related to one feature in the same folder.
Let’s look at what the folder structure would look like for our Login module:
./src/modules/Login/
├── Login.form.tsx
├── Login.form.style.tsx
├── Login.lifecycle.tsx
├── Login.handler.tsx
├── Login.reducer.tsx
├── Login.screen.tsx
├── Login.selector.tsx
├── Login.view.tsx
├── Login.view.style.tsx
|── Login.util.tsx
|── MenuItem.component // only used for this module
|── MenuList.component // only used for this module
|── __test__
Developers working on this application would need to go into only a single folder to work on something. And they would need to create only a single folder to add a new feature. Renaming is easy to find and replace, and hundreds of developers could work on the same application at once without causing any conflicts!
Why TypeScript?
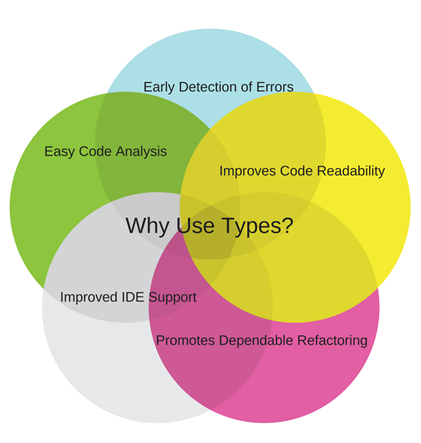
TypeScript is a superset of JavaScript which primarily provides optional static typing, classes, and interfaces. One of the big benefits is to enable IDEs to provide a richer environment for spotting common errors as you type the code.
For a large JavaScript project, adopting TypeScript might result in more robust software, while still being deployable where a regular JavaScript application would run.
Why Functional Javascript?

As a multi‑paradigm programming language, JavaScript can be written in many styles.
Functional programming is a style of programming which models computations as the evaluation of expressions. Contrast this with imperative programming where programs are composed of statements which change global state when executed.
Functional programming typically avoids using mutable state and favors side‑effect free functions and immutable data instead. This encourages writing composable and declarative programs that are easy to reason about.
Why Ramda over lodash, or underscore?
There are already several excellent libraries with a functional flavor. Typically, they are meant to be general‑purpose toolkits, suitable for working in multiple paradigms. Ramda has a more focused goal. It's a library designed specifically for a functional programming style, one that makes it easy to create functional pipelines, one that never mutates user data.
The main advantages of Ramda:
- All functions from Ramda are automatically curried.
- No side effects are allowed, unless you do it manually
- The API for lists favors point‑free code
- There are lots of useful utilities, like flip, pipe, complement, identity, lens, etc.
- Also all Ramda functions take data as the last argument which makes it easier to compose.
Links:
Why prefer Stateless Functional Component over Stateful Component, Higher Order Component and Recompose?
Stateless functional components are more elegant and usually are a good choice for building the presentational components. Because they are just functions, you won't have a hard time writing and understanding them, and moreover, they are dead easy to test.
It should be noted that stateless functional components (SFC) don't have the upper hand in terms of optimization and performance because they don't have:
- state
- A
ShouldComponentUpdate()hook. - Class methods (we'd avoid anonymous functions in JSX due to unnecessary re‑renders)
So how can we get things done by only using SFC(s)? Higher order components came to the rescue.
What is a Higher Order Component?
A Higher Order Component (HOC) is just a function that returns a function used to render React Components.
import { Component } from 'react'

function enhancer() {
  return (BaseComponent) => {
    return class extends Component {
      constructor() {
        this.state = { visible: false }
      }
      componentDidMount() {
        this.setState({ visible: true })
      }
      render() {
        return <BaseComponent {...this.props} {...this.state} />
      }
    }
  }
}
When architecting your components, we strongly advocate a split between Presentational Components and Enhancers/HOCs. Enhancers allow us to understand what they are trying to achieve.
An Enhancer’s job is to:
- Allow you to reuse the same enhancement to another Presentational Component.
- Clean up bloated components that may be hard to read.
- Can manipulate the rendering of the component to your choosing.
- Can add “state” to any component which means you don’t have to rely Redux for everything (if you are doing so now)
- Manipulate the props you send down to the Presentational Component (map, reduce, w/e you want!)
Why not use classes and be done with it?
We strongly prefer composing the application’s UI from many functional stateless components. However, use ES6 Classes if you need (only using HOCs might become an anti‑pattern in a few cases).
By using Functional components you encourage:
- Modular code — Reusable pieces that can plug in across your site
- Reliance on a props‑only interface — Stateless interface by default
- Easily Unit Tested — Easily test interface with enzyme/jest
- Easily Mocked — Easily mock props for different situations
And there we were, digging the pattern, and off to the races. We hit a couple of problems along the way. It became super tedious to constantly write the same HOC syntax for simple things, we didn't have patterns for combining multiple enhancers together, and we couldn't prevent the development of duplicate enhancers. It was getting hard to prove the value of this pattern as people were getting bogged down in the syntax and the ideas of HOCs (much like engineers do).
We needed something that
- Enforced Patterns
- Easily composed
- Easy to use
That’s when we turned to Recompose
Recompose is a React utility belt for function components and higher‑order components. Think of it like lodash for React.
Why prefer formik over redux-form?
Formik helps with the major problems of handling forms in React:
- Transforming props to form state
- Validation and error messages
- Handling form submission
Why not redux-form?
- According to Dan Abramov, form state is inherently ephemeral and local, so tracking it in Redux (or any kind of Flux library) is unnecessary
redux-formcalls your entire top‑level Redux reducer multiple times ON EVERY SINGLE KEYSTROKE. This is fine for small apps, but as your Redux app grows, input latency will continue to increase if you useredux-formredux-formis 22.5 kB minified gzipped (Formik is 12.7 kB)
Why Glamorous Native
// TODO
Why prefer date-fns over moment?
- Modular - include only parts you need and stop bloating your project with useless functionality
date-fnsdoesn't reinvent the wheel and uses the existing native type. Also, it doesn't extend core objects for safety sakedate-fnsis built using pure functions and always returns a new date instance instead of changing the passed one. It allows to prevent bugs and skip long debugging sessions- Supports both Flow and TypeScript
- The functional programming submodule provides a better alternative to chaining — composition, which makes your code clean, safe and doesn't bloat your build
Recipes
Render multiple snapshots for a React component
import { testSnapshots } from '../../utils/test.util'
import TextInput from './TextInput.component'

const props = {}

describe('Form Inputs - TextInput', () => {
  testSnapshots(TextInput, [
    {
      props,
      description: 'basic render'
    },
    {
      props: {
        ...props,
        fieldProps: {
          ...props.fieldProps,
          values: { title: '' },
          touched: { title: true },
          errors: { title: 'Title is required' }
        }
      },
      description: 'render an error'
    }
  ])
})
Render a single snapshot for a React element
import { singleSnapTest } from '../../utils/test.util'

describe('sub render', () => {
  const List = wrapper.find('FlatList')
  const Item = List.props().renderItem({ item })
  singleSnapTest(Item, 'render goal item correctly')
})
Pattern matching on values
import match from 'match-values'

const pattern = {
  h1: 20,
  h2: 18,
  title: 16,
  description: 14,
  _: 13 // use _ for the default case
}
const fontSize = match(fontStyle, pattern)
// fontStyle = 'title' => 16
// fontStyle = 'unknown' => 13Pattern matching on functions
// A common implementation
const getIconNameFromIndex = (index, rating) => {
  if (index <= rating) {
    return 'ic_rating_full'
  } else if (index - rating < 1) {
    return 'ic_rating_half'
  } else {
    return 'ic_rating_empty'
  }
}
// a simple `multiclause` function
import { cond, compose, lte, always, T, subtract, gt } from 'ramda'
// isHalfRating: (number, number) => bool
const isHalfRating = compose(gt(1), subtract)
const getIconNameFromIndex = cond([
[lte, always('ic_rating_full')],
[isHalfRating, always('ic_rating_half')],
[T, always('ic_rating_empty')]
])Pattern matching on components
import { renderWhen } from 'react-native-hocs'

const MyComponent = props => <View><MainComponent /></View>
const isLoading = props => {}
const hasErrror = props => {}
const isSomethingA = props => {}
const isSomethingB = props => {}
const enhance = renderWhen([
  {
    when: isLoading,
    render: Loading
  },
  {
    when: hasError,
    render: ErrorComponent
  },
  {
    when: isSomethingA,
    render: ComponentA
  },
  {
    when: isSomethingB,
    render: ComponentB
  }
])

export default enhance(MyComponent)