sendgrid-parse-api-example
Example application using the SendGrid Parse API.
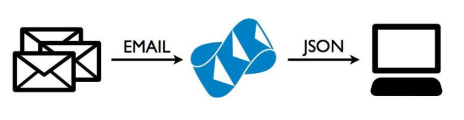
This application demonstrates how to use SendGrid's Parse API. Additionally, it acts as a boilerplate of code that you can adjust to your own needs. It comes with complete instructions for getting the SendGrid Parse API working.
Getting Started
You will need an account on SendGrid.
Production
1. Deploy to Heroku
Click this button to deploy to Heroku.

2. Check for 200 OK
Then you should be able to run the following - receiving a success 200 response.
$ curl -I -X POST http://your-heroku-subdomain.herokuapp.com/inbound
3. Set SendGrid Parse Settings
Next, setup your SendGrid Parsing Incoming Emails setting like the following but with a hostname of your own and the url you deployed this app to. (You'll notice I actually made my hostname a subdomain m.carve.io. You can do the same or the more standard root of your domain.)

4. Configure Your MX Records
Now you have to configure an MX record on the hostname you set above. It should look something like the following.

Now wait a couple hours to 48 hours. (It can take up to 48 hours for MX records to propagate around the world.)
5. Send an Email
Send an email to [email protected] and this app will now parse it.
It will deliver an email back to you with an attachment containing the content of the webhook data. The contents will look something like this.
6. Adjust the code
You can now adjust the code in routes/inbound.js to do whatever logic you require.
Development
1. Set ENV vars
$ mv .env.example .env
Change the contents of .env to your username and password.
SENDGRID_USERNAME=your_sendgrid_username
SENDGRID_PASSWORD=your_sendgrid_password
2. Run App
$ npm install
$ node app.js
3. Setup ngrok
Detailed install instructions here.
$ wget https://dl.ngrok.com/darwin_amd64/ngrok.zip
$ unzip ngrok.zip -d /usr/local/bin
$ ngrok 3000
Note the url the ngrok command gives you.
4. Set SendGrid Parse Settings
Next, setup your SendGrid Parsing Incoming Emails setting like the following but with a hostname of your own and the url granted to you from the ngrok command above plus the /inbound path.

5. Configure Your MX Records
Now you have to configure an MX record on the hostname you set above. It should look something like the following.
Wait 1-48 hours. (It can take up to 48 hours for MX records to propagate around the world.)
6. Send an Email
Send an email to [email protected] and this app will now parse it.
It will deliver an email back to you with an attachment containing the content of the webhook data. The contents will look something like this.
Alternatives
If you just need a quick way to inspect the payload contents of the Parse API webhook, I recommend using one of the following. You'll still have to setup your MX records.