giantswarm / Swarm Wercker
Programming Languages
Swacker: Continuously Integrated Containers
Swacker (swarm-wercker) is a minimal static webapp which is deployed to a public version of Giant Swarm's Giant OS using Wercker's continuous integration service. This repository is being continously deployed to http://swacker-kord.gigantic.io and has the following status:
This respository's wercker.yml file depends on the Giant Swarm Step for Wercker.
The most interesting thing about Swacker is the fact you don't need git, docker, boot2docker, or anything else installed locally to launch your own containerized website on Giant Swarm. Shoot, now I think about it, you could probably launch the software using just your phone!
Let's get started with the detailed walk-through for deploying the code. If you like, you can skip to the blog post version, which is less filling.
Prerequisites
At a minimum you will need the following to launch the software:
Note: Giant Swarm's shared public cluster is currently in private alpha. Ping me on Twitter if you need your application pushed through!
If you want to do local development, testing, and deploys you should have the following installed:
- A functional install of boot2docker.
- The
swarmcommand line client installed. - The
werckercommand line client installed. - The
gitcommand line client installed.
Video Walk-through
Videos guides are becoming a dime-a-dozen nowadays. I do mine from the hip and try not to overproduce them, which gives them a slightly artisan feeling. That's what I tell myself, anyway.
Getting Started
You should be able to do all these steps from a web browser, including editing a few configuration files. Make sure you have a Giant Swarm account before you begin!
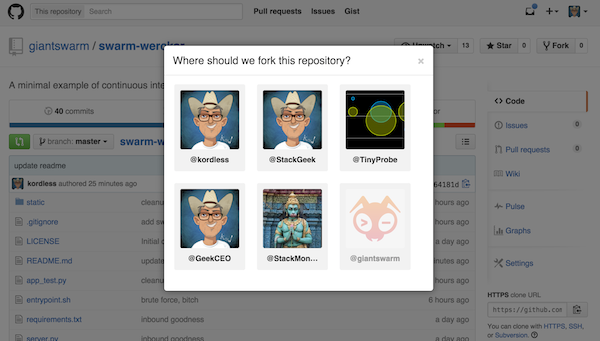
Fork the Repo
Start by forking this repository by clicking on the fork button at the top right of the repository page on Github. Fork the repo into a publicly accessible organization or your default organization on Github:
Log In to Wercker and Add the Project
Next, head on over to Wercker's login page and click on the Log in with Github button at the bottom. You'll want to allow Wercker to have access to your public and private repos:
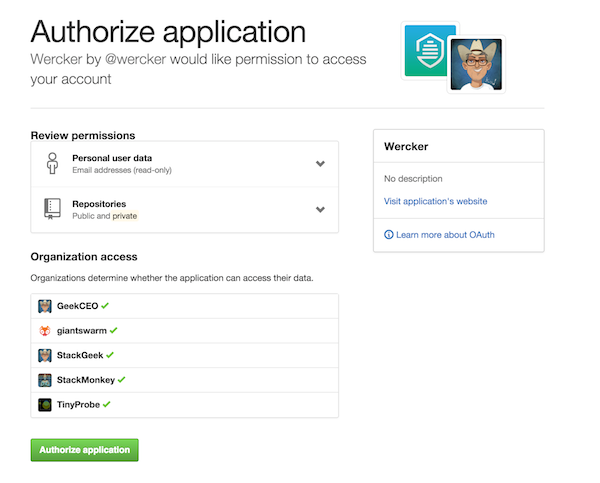
After you allow access to your Github account, Wercker will prompt you to finish signing up for their service.
After you are done setting up your Wercker account and are logged in, click on the create new application pulldown at the top of the page to create a new application. You'll click on the Use Github option in step #1 and then in step #2, select the repo named swarm-wercker:
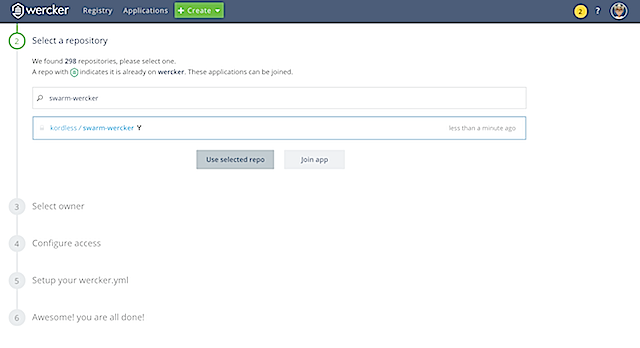
Under step #3, select owner, choose the default self-organization. Under step #4, configure access, choose wercker will checkout the code without using an SSH key and then click the next step button. Regardless of whether Wercker finds a valid wercker.yml file in step #5 or not, click the next step button and then click the finish button.
You should be taken to the project overview page for the swarm-wercker project.
Create a Deploy Target
At the top right of the swarm-wercker project, click on the gear icon to view the application's settings. Click on the deploy targets tab to the left, and then click on the add deploy target pulldown. Select custom deploy and then enter prod for your deploy target name. Check the auto deploy successful builds to branch checkbox and enter master in the branch field:
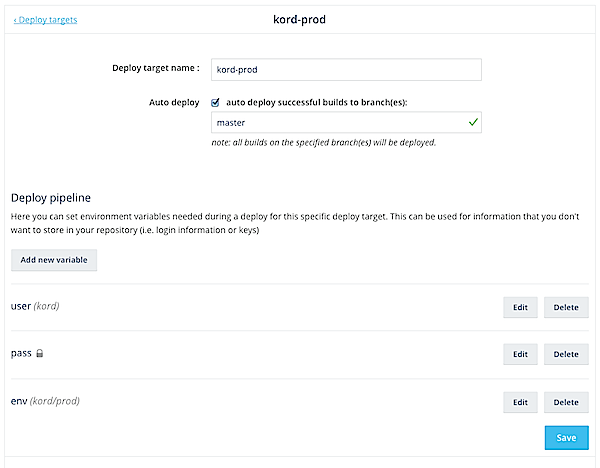
Click on the add new variable button. You will need to create three variables, one named user, one named pass, and one name env, all of which you can reference in the image above.
These values will be, respectively, your Giant Swarm username, password and desired environment (which usually defaults to <username>/dev). Be sure to check the protected checkbox before clicking on ok when adding the password variable!
Click on the save button to save the deploy target settings.
Note: From a security perspective, using a username and password from one site in another site is less than ideal. While Giant Swarm supports tokenized operations via our API, we do not (yet) support them with our hosted Docker registry. Please contact @kordless for more information on how to address this issue with alternate registries.
Build and Deploy the Project
Builds and deploys for the project occur when you do code pushes to the master branch of your newly forked swarm-wercker repo. To trigger the build, navigate back to the project's repo in your Github account and edit the index.html file in the static directory to look something like this:
<h2>Lamas love CI!</h2>
<img src="/lama.jpg" \>
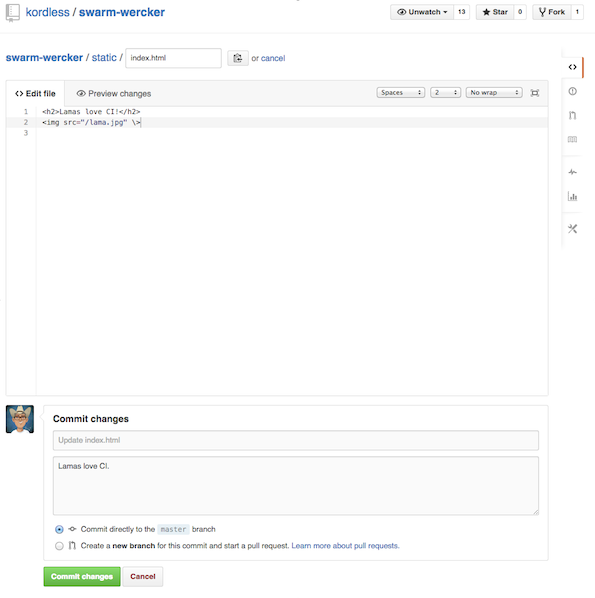
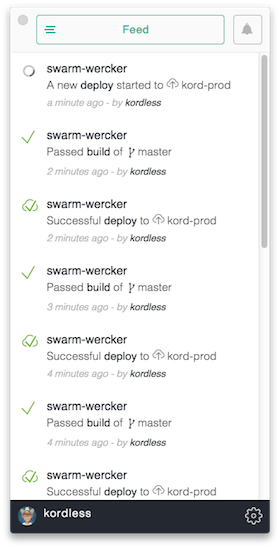
When you are done editing the file, click on the commit changes button at the bottom. Wercker will start building your project and deploy it within a few minutes. I recommend installing the Wercker desktop app to monitor your builds.
Accessing the Application
When Wercker gets done with deploying your application, you should have a simple website up and running at the following URL:
http://swacker-<username>.gigantic.io/
Obviously, you'll need to substitute your Giant Swarm username for the <username> placeholder in the URL above!
Use the Giant Swarm CLI to Manage Your Application
You can manage your application on Giant Swarm by using the Giant Swarm's CLI.
Start out by cloning the repository to your local machine using your Github username:
$ git clone https://github.com/<github_username>/swarm-wercker.git
Cloning into 'swarm-wercker'...
remote: Counting objects: 149, done.
remote: Compressing objects: 100% (8/8), done.
remote: Total 149 (delta 2), reused 0 (delta 0), pack-reused 141
Receiving objects: 100% (149/149), 82.77 KiB | 0 bytes/s, done.
Resolving deltas: 100% (74/74), done.
Checking connectivity... done.
Next, copy the swarmvars.json.example to swarmvars.json:
$ cd swarm-wercker
$ cp swarmvars.json.example swarmvars.json
Edit the swarmvars.json file to suit your Giant Swarm account setup, substituting your username for <username> as shown in the example below:
{
  "<username>/prod": {
    "user": "<username>"
  }
}
Finally, we'll scale our application up by one instance to keep it highly available during Wercker pushes by using the swarm scaleup command:
$ swarm scaleup swacker/swacker-service/flask 1
$ swarm status
App swacker is starting

service          component  image                                       instanceid    created              status
swacker-service  flask      registry.giantswarm.io/kord/swacker:latest  122j16cp7tsx  2015-07-18 19:24:38  starting
swacker-service  flask      registry.giantswarm.io/kord/swacker:latest  g0s2o5hn1in8  2015-07-18 18:40:05  up
More information about using the swarm CLI is available in the Giant Swarm documentation.
Local Development with Wercker
You can do local development on this project by using Wercker's CLI. To start the development server, use the wercker command:
$ wercker dev
You can access the develop server by using the following URL:
http://0.0.0.0:5000
More information about using the wercker CLI is available in the Wercker Devcenter.