ShawnHymel / Tinyml Example Anomaly Detection
Labels
Projects that are alternatives of or similar to Tinyml Example Anomaly Detection
TinyML Example: Anomaly Detection
This project is an example demonstrating how to use Python to train two different machine learning models to detect anomalies in an electric motor. The first model relies on the classic machine learning technique of Mahalanobis distance. The second model is an autoencoder neural network created with TensorFlow and Keras.
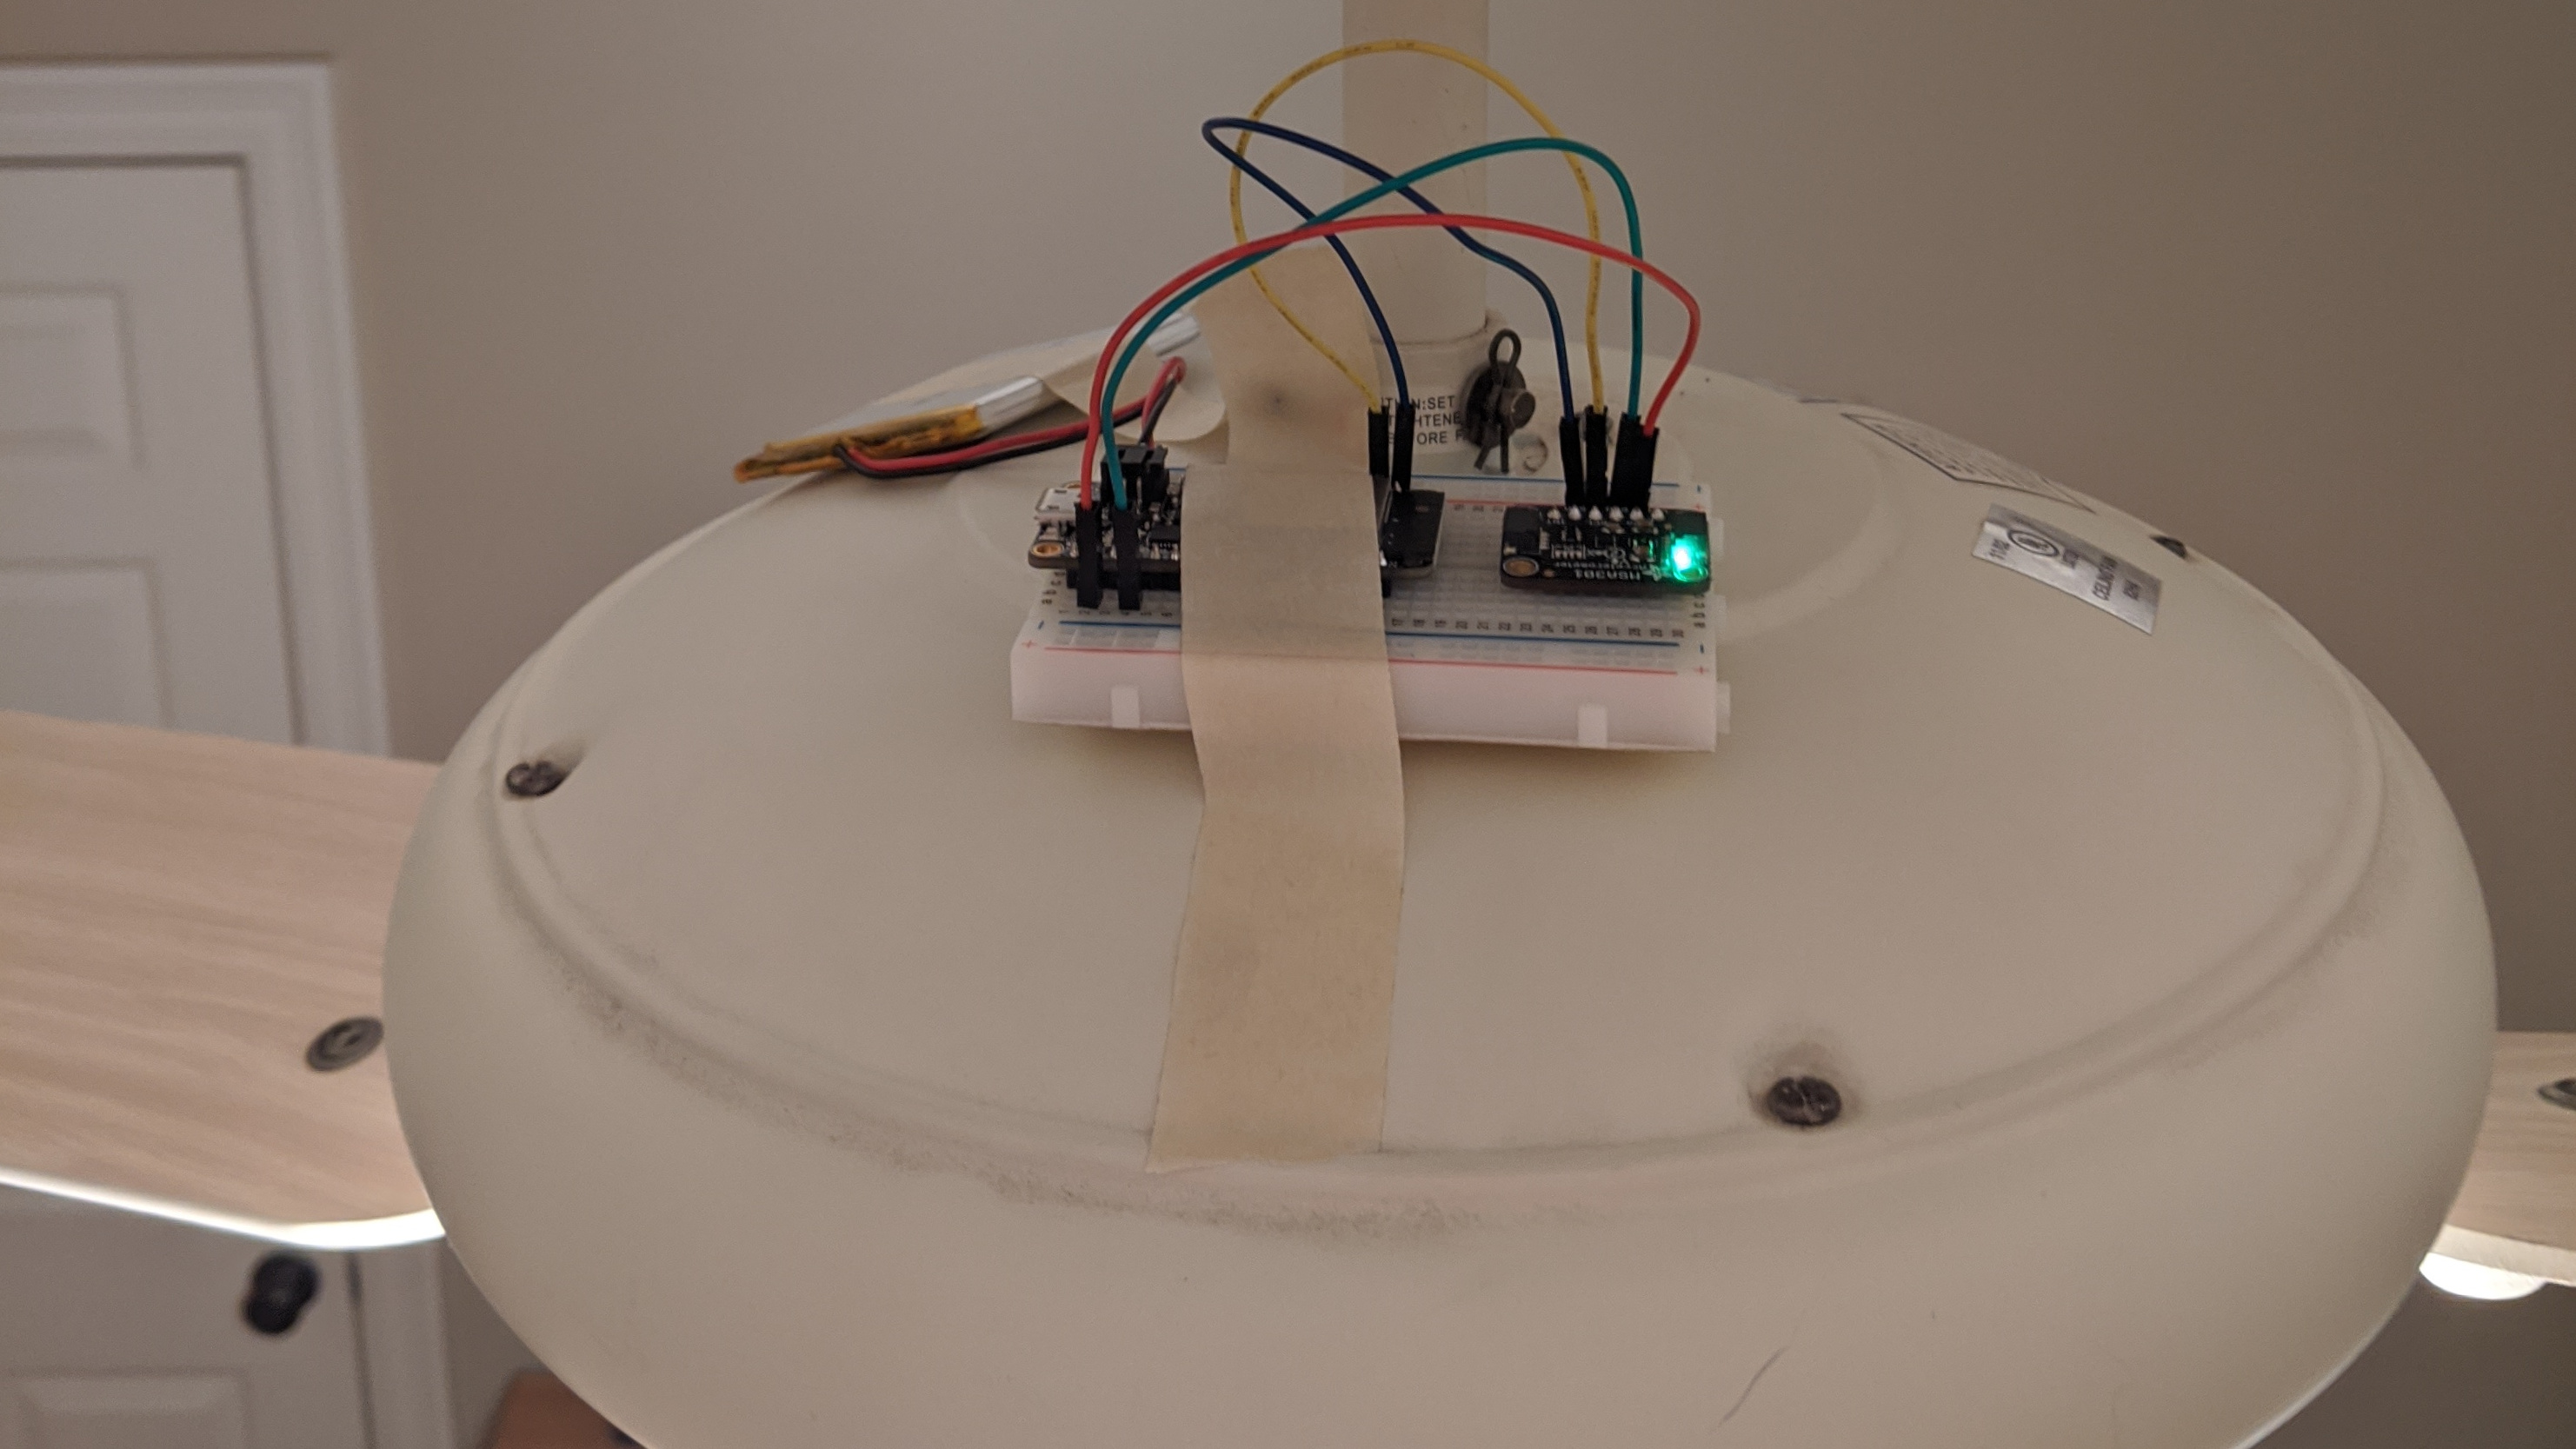
Data was captured using an ESP32 and MSA301 3-axis accelerometer taped to a ceiling fan. Each sample is about 200 samples of all 3 axes captured over the course of 1 second. Fan was run at multiple speeds (off, low, medium, high) with and without a weight. 1 "weight" is one US quarter taped to one of the fan's blades to create an offset motion. All raw data is stored in the ceiling-fan-dataset directory.
Note that if you create a "robust" model by moving the fan around during data collection, the Autoencoder works much better than the Mahalanobis Distance method.
The full articles that explain how these programs work and how to use them can be found here:
- Edge AI Anomaly Detection Part 1 - Data Collection
- Edge AI Anomaly Detection Part 2 - Feature Extraction and Model Training
- Edge AI Anomaly Detection Part 3 - Machine Learning on Raspberry Pi
- Edge AI Anomaly Detection Part 4 - Machine Learning Models on Arduino
Here are the accompanying YouTube videos that explain how to use these programs and some of the theory behind them:
- Edge AI Anomaly Detection Part 1: Data Collection
- Edge AI Anomaly Detection Part 2: Feature Extraction and Model Training
- Edge AI Anomaly Detection Part 3: Deploy Machine Learning Models to Raspberry Pi
- Edge AI Anomaly Detection Part 4: Deploy TinyML Model in Arduino to ESP32
Prerequisites
You will need to install TensorFlow, Keras, and Jupyter Notebook on your desktop or laptop. This guide will walk you through that process.
Alternatively, you can use Google Colab to run a Jupyter Notebook instance in the cloud, however, loading files (e.g. training samples) will require you to upload them to Google Drive and write different code to import them into your program. This guide offers some tips on how to do that.
If you plan to collect data yourself, you will need an Adafruit Feather Huzzah32, Adafruit MSA301 accelerometer breakout board, battery, breadboard, and jumper wires.
For deployment, you will want to install TensorFlow Lite on your Raspberry Pi by following these instructions. For Arduino, you will want to install the TensorFlow Lite for Microcontrollers Arduino library.
Hardware
For this project, you will need the following:
You can use whatever breadboard, jumper wires, and battery you want to connect everything together.
Getting Started
Please read the tutorials above for full documentation on how to use the scripts found in this project.
In general, you will want to perform the following steps:
- Collect data samples
- Analyze data for good features
- Train one or more machine learning models
- Convert models for deployment
- Deploy machine learning model to end system
Collect Data
Download this repository. Connect an MSA301 accelerometer breakout board to the ESP32 Feather. Open the data_collection/esp32_accel_post/esp32_accel_post.ino Arduino sketch and change the WiFi SSID, password, and server IP address. Upload to your ESP32. Place your ESP32 and accelerometer on the system you wish to monitor (e.g. ceiling fan).
Run data_collection/http_accel_server.py on your server computer to collect data. Repeat this process for however many normal and anomaly states you wish to collect data from. I recommend at least 200 sample files per state.
See the Collecting Your Own Data section below for more information on how to use the server script.
Analyze Data
Open data_collection/anomaly-detection-feature-analysis in Jupyter Notebook and run it. Change the dataset_path to point to wherever you collected your sample files. Change the op_lists to be the names of the directories in that dataset path. Note that by default, the dataset path is set to datasets/ in this repository. You are welcome to use my collected data (although it might not be indicative of your particular system).
Carefully look at the various plots to determine which features can be used to best discriminate between normal and anomalous operation.
Train Machine Learning Models
You have two options for detecting anomalies: Mahalanobis Distance, which is a more classical machine learning method, and Autoencoder, which is a neural network.
Open mahalanobis_distance/anomaly-detection-training-mahalanobis-distance.ipynb with Jupyter Notebook to train the Mahalanobis Distance model. Change the datasets variables to point to your normal and anomaly samples. The model is the mean and covariance matrix of the normal dataset's median absolute deviation (MAD). It should be saved as a .npz file (you can find mine stored in mahalanobis_distance/models).
For the Autoencoder, open autoencoder/anomaly-detection-training-autoencoder.ipynb. Change the datasets variables to point to your normal and anomaly samples. The model is a trained neural network. Note that you might need to create and train the model several times (initialized parameters are random) to get a good separation between normal and anomaly mean squared errors (MSEs). The model is saved as a .h5 Keras file (you can find my models in autonecoder/models).
Convert Models
If you are deploying the model(s) to a Raspberry Pi (or other single board computer), you can use the generated .npz file for the Mahalanobis Distance. For the Autoencoder, you will want to convert the .h5 file to a TensorFlow Lite (.tflite) file. The functions for converting the .h5 file to a .tflite file can be found in autoencoder/anomaly-detection-tflite-conversion.ipynb.
For use on a microcontroller, you will want to develop a set of C functions to calculate the MAD and Mahalanobis Distance or use TensorFlow Lite for Microcontrollers.
To generate constant arrays in C and header files, use the functions in utils/c_writer.py.
Converting the Mahalanobis Distance model to C can be done with mahalanobis_distance/anomaly-detection-md-conversion.ipynb. Note that this Notebook also saves a normal and anomaly sample as a C header file for use in testing.
Converting the Autoencoder model to C can be done with autoencoder/anomaly-detection-tflite-conversion.ipynb. This will generate a .tflite model file and then convert that file to a constant C array (inside of a .h header file).
You will need to copy the generated .h files (model, test samples, etc.) to your microcontroller project (i.e. in your Arduino sketch directory).
Deploy Models
If you wish to use your ESP32 remotely (i.e. it sends raw accelerometer data back to a server that performs inference), run the original data collection sketch on it. For your server, run mahalanobis_distance/http_server_anomaly_detection_md.py or autoencoder/http_server_anomaly_detection_tflite.py, depending on which model you want to use. Note that for the Autoencoder, you will want to install TensorFlow Lite on your server.
To use the model locally on your microcontroller (ESP32), you will want to use mahalanobis_distance/esp32_deploy_md for the Mahalanobis Distance or autoencoder/esp32_deploy_tflite for the Autoencoder. You will need to copy the respective model .h file generated in the previous step to the Arduino sketch's folder. Note that utils.h and utils.c (found in the utils directory) are also required, as they contain necessary C functions for computing MAD, matrix multiplication, etc.
By default, a piezo buzzer is to be connected to pin A1 of the ESP32 Feather board, which buzzes any time an anomaly is detected. Feel free to change this to whatever action you want to take to alert the user.
If you are curious, mahalanobis_distance/esp_test_md and autoencoder/esp32_test_tflite are used to test inference using the normal and anomaly samples generated earlier. You would want to use these files to check your C implementation against known good outputs in Python.
Collecting Your Own Data
If you wish to collect your own data, you will need to connect an MSA301 accelerometer to an ESP32 (I used the Adafruit Feather Huzzah32) via I2C. Open the data_collection/esp32_accel_post/esp32_accel_post.ino sketch and change the WiFi credentials and server IP address to match your computer's IP address. Upload the sketch to the ESP32.
Attach a battery to the ESP32 and secure it (using something like tape) to your electric motor (I used a ceiling fan).
Start data_collection/http_accel_server.py with the following arguments:
python http-accel-server.py -d <output directory where samples are stored> -p <port, such as 1337> -t <time to run server; something like 2400 seconds seems to work well>
You'll want to run the collection process for each operating mode of your motor. For a ceiling fan, that's off, low, medium, and high. It can also help to collect some "anomaly" data in a separate folder. For example, tape a coin to a ceiling fan blade and run the collection process again with all operating modes (except for "off").
To create a more "robust" model, I recommend slightly moving the fan's base around every minute or so during "normal" sample collection. See the 4th YouTube episode for more details.
License
All code in this repository, unless otherwise specified, is for demonstration purposes and licensed under Beerware.
Distributed as-is; no warranty is given.