T T T 

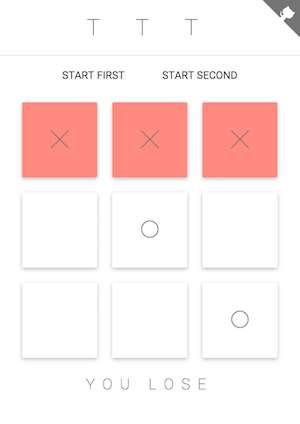
A Tic-Tac-Toe game with React and an unbeatable AI.
Introduction
Even though this might seem like a simple project, I was carried away and ended up making it way more comprehensive than I initially wanted it to be. Initially, I just wanted to make a simple AI for Tic-Tac-Toe after reading this blog post, but it led to me experimenting with ES6, Web Workers, React, Gulp and even headaches such as making the game mobile responsive in the across browsers and devices.
Structure
The core game logic is written as a Node.js module with the endpoint at ./src/js/game/index.js, which exposes the necessary objects that should be used on the client side, such as the Game Board, and the Player classes.
As the Javascript code is written in ES6, Babel is used to compile them into ES5 Javascript, in either ./lib for Node.js development, or ./dist with Gulp for the Web.
These game module contains classes coded such that only key functions are exposed to the user on a high level. For example, we can use these objects to implement a command line version of Tic-Tac-Toe, in ./src/js/game/implementation/.
Because of this, the game can be set up concisely with callbacks in ./src/js/main.js, with a simplified version as follows:
import gameApi from './src/js/game/index.js';
const game = new gameApi.TicTacToe();
const aiPlayer = new gameApi.players.PerfectPlayer(game, 'AI-Player');
const clientPlayer = new gameApi.playersPlayer(game, 'You');

clientPlayer.onBoardChange(grid => {
    // updateView(grid);
});

clientPlayer.onMyTurn(() => {
    // makeGridClickable();
});

clientPlayer.onGameOver(winnerData => {
    // showWinner(winnerData);
});

game.registerPlayers(aiPlayer, clientPlayer);
game.newGame();
React acts as a view for the game which aids in rendering the correct DOM elements depending on it's state.
Finally, all that needs to be done is to Browserify main.js with Babel as a plugin, and all the required modules will be compiled for web use. A Gulp task is defined for this, for an automated workflow.
React
This is my first time using React, and I found it extremely helpful in managing the state of the game in a controlled manner. For example, I want apply a game-disabled CSS class to the rendered <div> when it is not the client player's turn. Instead of having to set this class directly, React allows me to make the view depend on the component state. A small except would be as follows:
class Game extends React.Component {
  newGame = () => {
    // set up game
    // ...

    clientPlayer.onMyTurn(() => {
      this.setState({ myTurn: true });
    });
  }
  // helper function to get the css class
  gridCss = () => {
    if (this.state.myTurn) {
      return 'game-enabled';
    } else {
      return 'game-disabled';
    }
  }
  render() {
    // apply reactive css class
    return <div className={this.gridCss()}>
      // ...
    <div>
  }
}
When the callback for clientPlayer.onMyTurn() is executed, the game.state.MyTurn variable is mutated, which implicitly triggers a new render of the result with a different CSS class attribute.
I highly recommend this introduction to React.
Babel
Three plugins are used:
es2015
To compile the ES6 syntax used
react
To compile Javascript for React written in JSX
stage-0
To simplify creation of React classes with ES6 classes.
In ES6:
class ExampleButton extends React.component {
  onClick() {
    // do things
  }
  render() {
    return (
      <div onClick={this.onClick.bind(this)}>Click Me!</div>
    );
  }
}
With ES7 property initializers in stage-0, we don't have to explicitly bind our onClick method to this.
class ExampleButton extends React.component {
  onClick = () => {
    // do things
  }
  render() {
    return (
      <div onClick={this.onClick}>Click Me!</div>
    );
  }
}
Read more about React with ES6.
Web Workers
When I finished implementing the game for the browser, I realized that on the first few turns made, the AI takes a few seconds to process the move that needs to be made. Normally, this would not be a problem, but the synchronous implementation of the Minimax algorithm ended up blocking the entire browser while the move is computed. Thus, I used Web Workers to compute the next move on a separate thread, so that the user experience of the game is preserved.
Usage
Installation
Dependencies
You need Gulp installed globally to build the webpage.
# Install Gulp
$ npm install --global gulp
Building
$ git clone https://github.com/jiahaog/ttt.git
$ cd ttt

# Install dependencies
$ npm install

# Build compiled game to `./dist/index.html`
$ gulp build
Development
Game Module
We can test the game modules separately from the browser, with these commands below.
The compiled module files are built to ./lib for development purposes.
Building
# Do this before running any files in `./lib`
$ npm run build
Other Commands
# watch and build es6 source files in `./src` to `./lib`
$ npm run watch

# run compiled files, etc.
$ node lib/js/game/implementation/vsAi.js

# Run two player cli game
$ npm run two-player

# Run vs AI cli game
$ npm run vs-ai
Tests
Tests in ./test for the game module are written in Mocha, and can be executed using the following command.
$ npm testWebpage development
The gulpfile has been set up with various tasks to compile and Browserify all the Javascript modules into ./dist, and the final game can be viewed by opening ./dist/index.html after gulp build has been completed.
Commands
# build files to `./dist`
$ gulp build

# Watch files with browserSync
$ gulp watch

# deployment to GitHub Pages
$ gulp deploy