simpletut / Universal React Apollo Registration
Programming Languages
Projects that are alternatives of or similar to Universal React Apollo Registration
Open Source Universal User Registration System – NodeJS React Apollo GraphQL JWT MongoDB
![]()


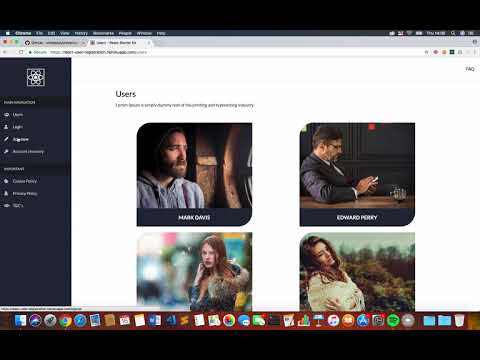
Online Demo
As the Demo is hosted on a free Heroku account, the servers its hosted on enter ‘sleep mode’ when not in use. If you notice a delay, please allow a few seconds for the servers to wake up.
YouTube Video Tutorials
Introduction (Getting started)
System includes:
Registration, Login, Dashboard, Email Password, Logout
Account Update, Edit User Profile
Browse Users, Public Profile Pages
Cookie Policy, Privacy Policy, T&C’s, FAQ
404 (Not Found)
The User Registration System is Fully Responsive out the box and you can Restrict Access to any page!
Tech Stack:
- NodeJS
- React
- Server-side Rendered
- Apollo Client
- GraphQL
- MongoDB
- JSON Web Tokens
- Webpack
- SASS
- ESLint
- Husky (pre-push)
Top Features:
- Bcrypt password encryption/verification
- CKEditor - WYSIWYG editor
- File Upload – Profile Images
- Nodemailer – Custom mail server used to send password reset emails
- Custom ‘Password Reset’ Template (Built with MJML Framework)
- Multiple Layouts – Create unlimited layouts for pages/routes
- Toastr - Simple javascript toast notifications
- 100% FREE & Open Source
Screenshot

Table of Contents
- YouTube Video Tutorials
- System includes
- Tech Stack
- Top Features
- Screenshot
- Software
- Useful links
- Top Features
- Screenshot
- Project architecture
- Download & Install Dependencies on your machine
- Configure Webpack
- Set-up MongoDB
- Adding a User to your database
- Connecting our Registration System to our Database
- Configuring our Registration System to Connect to our Database
- JSON Web Tokens
- Mail Server (Send password recovery email)
- Run a Build
- Lunch/Run the project
- Server & Client Bundles
- Unit tests
- Create new pages
- Restrict Access (Authenticated Users Only)
- Custom Layouts
- Custom Page titles and SEO
- 12 Col Grid Boiler template
- Acknowledgements
- License
Getting Started
This repository contains the source code for User Registration System. This documentation will cover the installation on your localhost machine, project architecture and working with the app in general.
Project architecture
For a detailed guide through the project architecture and more information on configuring and deploying the system, please watch our YouTube Video Tutorial (Please scroll to the top ^)
├── src
│   ├──_test_
│   ├──assets
│   |  ├── email_templates
│   |  ├── graphics
│   |  └── scss
│   ├──components
│   |  ├── auth
|   |  |   └── editProfile_mutations
│   |  ├── footer
│   |  ├── header
│   |  └── sidebar
│   ├── helpers
|   |   └── renderer
│   ├── hoc
|   |   ├── withAuth
|   |   └── withSession
│   ├── layouts
|   |   └── mainLayout
│   ├── models
|   |   └── User
│   ├── pages
|   |   ├── auth
|   |   |   ├── editProfile
|   |   |   ├── forgotPassword
|   |   |   ├── signIn
|   |   |   ├── signOut
|   |   |   ├── signUp
|   |   |   └── updateAccount
|   |   ├── policiesAndConditions
|   |   |   ├── cookiePolicy
|   |   |   ├── faq
|   |   |   ├── privicyPolicy
|   |   |   └── terms
|   |   ├── 404
|   |   ├── dashboard
|   |   ├── user
|   |   └── users
│   ├── queries
|   |   └── index
│   ├── app
│   ├── client
│   ├── resolvers
│   └── schema
├── user-uploads
│   └── profile-images
├── package.json
├── server.js
├── variables.env
├── webConfig.json
├── webpack.client.js
└── webpack.server.js
Software
Before proceeding, please ensure you have the following software installed on your computer.
- Node
- Yarn (optional but recommended)
- Git command line tools
Useful links
- Download Git CLT - Windows: https://git-scm.com/download/windows Mac: https://git-scm.com/download/mac
- Download Node - https://nodejs.org/en/
- Download Yarn CLT - https://yarnpkg.com/lang/en/docs/install/
- Download VSCode - https://code.visualstudio.com/
Installation
Please fork a copy of this repository. Forking a repository allows you to freely experiment with changes without affecting the original project. Alternatively download or clone the master branch.
Download & Install Dependencies on your machine
- Clone the repo to your machine
git clone <CloneURL>
- Within terminal or cmd ensure you have navigated inside the cloned directory and install the dependencies
cd <new-dir>
yarn install OR npm install
Configure Webpack
Before we can build, run or deploy our app it is important to ensure that the 'webConfig.json' file is configured correctly for our environment.
{
    "siteURL": "http://localhost:3000",
    "environment": "development"
}
Please ensure that 'siteURL' is set to either localhost or your websites domain. You must update this before running a build or deploying your web app.
In the same way, set ‘environment’ to either ‘development’ or ‘production’. This will change the way webpack compiles your code.
Set-up MongoDB (Setting up your database)
This web app uses MongoDB to save, query and process data. Whilst you may have a preference of your service provider (AWS, Microsoft Azure etc…) we will be using ‘mlab’.
Please visit ‘mlab’ register/login to your account.
Link- https://mlab.com/
- From your control panel select ‘Create new’
- Choose any of the Cloud Provider’s
- Select the appropriate ‘Plan Type’ for you. For now, let’s select the ‘Free’ plan
- Click Continue
- Select the ‘Region’ that’s closest to your location and click continue
- Enter a new database name and click continue
- Confirm your selections and click ‘Submit order’ (Free)
The database will now be created, and you will have been redirected back to your dashboard.
Adding a User to your database
- Under ‘MongoDB Deployments’ click on the database you just created
- Select ‘Users’
- Select ‘Add database users’
- Enter a Username and Password and click ‘Create’
Please remember this information as we will need it later.
Connecting our Registration System to our Database
We need a ‘connection string’ provided by ‘mlab’ to link our Registration System with our Database.
Please ensure that you are still navigated inside the database you just created.
It looks something like this:
To connect using a driver via the standard MongoDB URI:

mongodb://<dbuser>:<dbpassword>@...
Copy this URL as we will need it later.
Configuring our Registration System to Connect to our Database
We are using Node Environment Variables to supply our app with some more sensitive information. This includes our mail server user & password. In addion to our JWT Secret.
To define, please go back to your terminal or cmd and write the following command
export db_connection_string=<Your-connection-string>
Please note: Windows users should use 'set' instead of 'export'
JSON Web Tokens
We store a JSON Web Token within a Cookie to verify users.
For security reasons, these Tokens have been configured to expire after 1 hour at which point the user will be asked to login again before continue browsing the website. (The expiration time can be updated within the signup and login resolvers).
Whenever we check the validity of a Token, we compare it will a ‘Secret Key’ that is stored as a Node Environment Variable.
To define, please go back to your terminal or cmd and write the following command
export jwt_secret_key=<Your-json-web-token-secret-key>
Please note: Windows users should use 'set' instead of 'export'
This should be a random string of numbers and characters.
Mail Server (Send password recovery email)
We use a package called ‘Nodemailer’ to handle the sending of emails from our Node Server.
As we are using one-way password encryption, the account recovery tool automatically generates a new secure password and sends it to the email associated with the account.
Before you can use this feature, you will need to configure ‘Nodemailer’.
- Open ‘config/default.json’ in your chosen text editor
- Update your mail server host and from email address.
For security reasons we store your mail server 'user' and 'password' in Node Environment Variables.
To define, please go back to your terminal or cmd and write the following commands
export mailServer_user=<Your-mail-server-user>
export mailServer_pass=<Your-mail-server-password>
Please note: Windows users should use 'set' instead of 'export'
You may need to contact your provider for this information
Run a Build
Before we can lunch the project, we need to run a build
yarn run build OR npm run build
Lunch/Run the project
Now we have a build, lets run the project
yarn run dev OR npm run dev
Your project is now running on: http://localhost:3000
Server & Client Bundles
Webpack outputs both a Server and Client bundle.
For security reasons, the server bundle exits outside of the public directory, which means that the file is NOT publicly accessible.
Webpack is also configured not to bundle any libraries that exist in the 'node_modules' folder into the server bundle as they are not needed.
Unit tests
Writing unit tests is recommended for any new features or logic that you develop.
Whilst we are primarily using 'Jest' (framework from Facebook), to write our unit tests we are using a number of other libraries for testing. Please see the 'package.json' file for more information.
We are currently writing tests for the following:
- Components
- Queries
- Mutations
There are two commands you can use to run tests.
- yarn test OR npm test
- This will run your initial tests.
- yarn test-coverage OR npm test-coverage
- Shows test coverage across our application.
Please note: not all code within our project requires testing or is testable.
When should I run these tests?
You should run these unit tests before pushing any work to a remote branch. Please do not approve any PR’s into the dev branch without the proper unit tests having been written.
In the event a test fails, please ensure any relevant errors are resolved prior to committing the changes or creating a new PR.
General usage
Create new pages
- Create a file in the following directory ‘src/pages’
To help maintain consistence please use the same naming conventions as the other files. (camel casing)
- Build your new page. For example:
import React from 'react';

class NewPage extends React.Component {
    render(){
        return(
            <div>

            </div>
        )
    }
}

export default NewPage;
- Open ‘src/app.js’ and import your new Page Component
import NewPage from './pages/newPage;
- Add a new route to the Root constant
<Route path="/new-page" render={props => (
    <MainLayout>
        < NewPage {...props} session={session} />
    </MainLayout>
)} />
Based on the example above, you can visit the new page via the following URL:
http://localhost:3000/new-page
Restrict Access (Authenticated Users Only)
Follow these steps to prevent unauthenticated users from accessing your chosen pages/routes
- Open ‘src/app.js’ and find your chosen route within the ‘Root’ constant
- If not already pass the ‘session’ as props to your Component
<Route path="/dashboard" render={props => (
    <MainLayout>
        <Deshboard {...props} session={session} />
    </MainLayout>
)} />
Notice the ‘session={session}’ on the ‘Deshboard’ Component.
- Open you’re the JS file accociated with your Chossen Compoent. For example, ‘src/pages/dashboard.js’
- Import ‘withAuth’. This is a higher order component.
import withAuth from './../hoc/withAuth';
Please ensure that the path is correct based on your component file.
- Wrap your export with our our ‘withAuth’ higher order component.
export default withAuth(session => session && session.getCurrentUser)(Dashboard);
Please note: If you copy/paste this line, please ensure you update ‘Dashboard’ with the name of the Class your exporting.
That’s it!
User will now need to LogIn before accessing this page/route
Custom Layouts
You can create a custom layout for any page/route.
- Create a new layout file within ‘src/layouts’
- Ensure you have a constructer at the top of your class
constructor(props) {
    super(props)
}
- Place the following code within your layout, wherever you want to render your routes
{this.props.children}
- Open ‘src/app.js’ and import your new layout
import LayoutComponent from './layouts/ layoutComponent;
- Within your ‘Root’ constant, create your new route and wrap the route with your layout Component
<Route path="/my-new-page" render={props => (
    < LayoutComponent >
        <MyRoute {...props} session={session} />
    </ LayoutComponent>
)} />
Custom Page titles and SEO
We use a package called ‘helmet’ to set custom page titles and add meta tags on pages within our app.
- Open the page component you wish to add custom page title
- Copy the following code just above the render method:
head() {
    return (
        <Helmet bodyAttributes={{ class: "myClassName" }}>
            <title>My new page title</title>
        </Helmet>
    );
}
- Call this method anywhere within your return statement
render() {

    return (
        <div className="grid pageHeaderSection">
        {this.head()}
            <div className="column column_12_12">
                <div className="content_wrap">
                    <h2>Users</h2>
                    <p className="desc">
                        Lorem Ipsum is simply dummy text of the printing and typesetting…
Styles
We are using SCSS (CSS pre-processor/bracketed version of SASS) to enable us to write cleaner and more reusable css code.
CSS
In order to ensure the integrity of the project and long-term maintainability, we recommend the following rules:
- Media queries should be written/maintained within '_responsive.scss'.
- REM CSS measurement units:
We are using rem's to style our app. Whilst you should not use any other measurement unit, it is correct to use ‘px’ for certain properties. For example, you should still use 'px' for setting a border or the width of a media query to ensure more accurate break points.
The root font size is set to '10px'. This means the calculation required to implement rem’s is simple: (target font size / 10 OR 18 / 10 = 1.8rem).
'config.js'
Please utilize our configuration partial file wherever possible. This contains global variables for generic/brand colours, keyframes, mixins and more! For consistency please reference these instead of redefining where possible (or add to this file).
12 Col Grid Boiler template
We are using a 12 Column Grid that works as follows:
The grid has 12 columns
Each columns width is a % value that can be calculated using the following:
Target Columns (Example '6')
Minus Number of Total Columns (12)
Times 100 = 50%
Example HTML mark-up for a 2-column layout:
<div class="grid">

  <div class="column column_6_12">
    Half
  </div>

  <div class="column column_6_12">
    Half
  </div>

<div>
Each column has a ‘20px’ gutter/ Each column has 10px padding on either side.
The grid should not be used within areas that require custom mark-up (such as your header/footer) to avoid having to override default styling. This will ensure the integrity of the code. Please DO NOT apply any styling to the grid directly. These should be global classes which are not overridden (ensures you will not break styling in other places).
To centre your content, simply apply a 'max-width' to the parent wrapper '.grid'. You can either set this globally within the '_css_grid.scss' partial file or target it specifically via a custom parent class.
Looking for something similar?
Open Source Universal React Redux Boilerplate
Acknowledgements
This software was developed by Ashley Bibizadeh.
License
The User Registration System is open source software licensed as MIT.