![]()
![]()
XamList
An iOS and Android app showcasing Xamarin.Forms, Azure Functions, Azure SQL Database, Azure API and App Center.
Visual Studio Requirements
Visual Studio for Mac
This solution requires Visual Studio for Mac Version 7.1 Build 1294 or later.
Earlier versions of VSMac don't support Shared Project references from .NET Standard libraries.
Visual Studio for PC
This solution requires Visual Studio for PC Version 15.3 or later.
Earlier versions of VS don't support Azure Functions.
Getting Started
1. Create Azure API App
- Open a browser, navigate to the Azure Portal and log in.

- After logging in, click on New -> Enter
API Appinto the Search Bar -> SelectedAPI Appfrom the search results -> Click Create

- Name the API App
- I named mine XamListAPIApp
- Select the Subscription
- I selected my Visual Studio Enterprise subscription
- If you do not have a VS Enterprise Subscription, you will need to select a different option
- Create a new Resource Group
- I named my resource group XamList
- Create a new App Service Plan
- Click App Service Plan
- Click Create New
- Name the App Service Plan
- I named my App Service Plan XamListAppService
- Select the location closest to you
- I selected South Central US
- Select the Free Pricing Tier
- Click "Pricing Tier"
- Select "Free"
- Click "Select"
- Click "OK"
- Click "Create"
2. Create Azure Function App

- In the Azure portal, click on New -> Enter
Function Appinto the Search Bar -> SelectedFunction Appfrom the search results -> Click Create

- Name the Function App
- I named mine XamListFunctionApp
- Select Consumption for the Hosting Plan
- Select the XamList Resource Group
- We created this resource group when we made our API App, above
- Select the Location closest to you
- Under Storage, Select Create New
- I named my storage "xamlistfunctionapp"
- Click Create
3. Create Azure SQL Database

- In the Azure portal, click on New -> Enter
SQL Databaseinto the Search Bar -> SelectedSQL Databasefrom the search results -> Click Create

- Name the SQL Database
- I named mine XamListDatabase
- Select the Subscription
- I selected my Visual Studio Enterprise subscription
- If you do not have a VS Enterprise Subscription, you will need to select a different option
- Select the XamList Resource Group
- We created this resource group when we made our API App, above
- Select Blank Database

- Select Server
- Select Create New Server
- Enter the Server Name
- I named mine xamlistdatabaseserver
- Create a Server admin login
- Store this password somewhere safe, because we will need to use it for our database connection later!
- Create a password
- Select the closest location
- Click "Select"

- Select "Not Now" for the SQL Elastic Pool option
- Select Pricing Tier
- Select Basic
- Move the slider to maximum, 2GB
- Don't worry, it's the same price for 2GB as it is for 100MB. No clue why!
- Click Apply
- Click Create
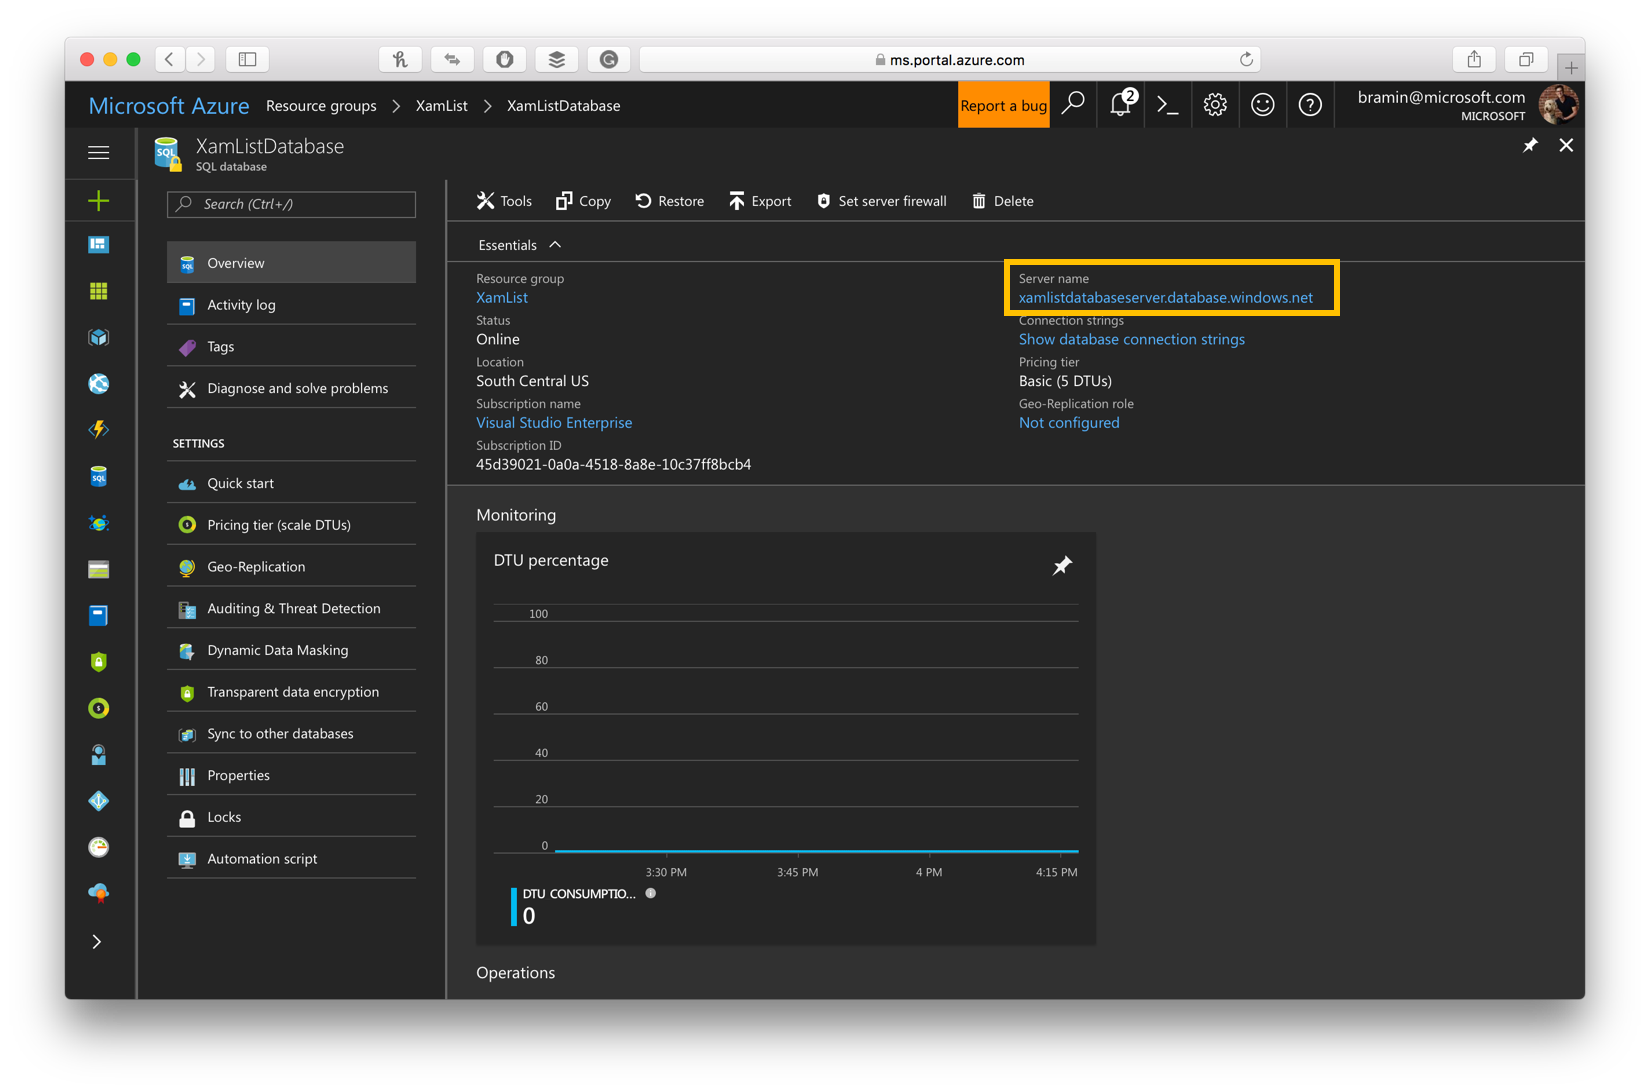
4. Get SQL Database Connection String

- On the Azure Portal, navigate to the SQL Database we created, above
- Click on "Connection Strings" -> "ADO.NET"
- Copy the entire Connection String into a text editor

- In the text editor, change "{your_username}" and "{your_password}" to match the SQL Database Username / Password created above
- Don't use my username / password because it won't work ;-)
5. Connect SQL Database to the API App

- In the Azure Portal, navigate to the API App
- I named mine XamListAPIApp
- Click Application Settings
- In the Application Settings, scroll down to "Connection Strings"
- Create a new connection string
- Set the name as
XamListDatabaseConnectionString- Make sure to use this exact name, otherwise the source code will not work
- Copy/paste the connection string from the text editor
- From the drop-down menu, Select SQLDatabase
- Set the name as
- Click Save
6. Connect SQL Database to the Azure Function App

- On the Azure Portal, navigate to the Functions App we create above
- Select "Application Settings"

- In the Application Settings, scroll down to "Connection Strings"
- Create a new connection string
- Set the name as
XamListDatabaseConnectionString- Make sure to use this exact name, otherwise the source code will not work
- Copy/paste the connection string from the text editor
- From the drop-down menu, Select SQLDatabase
- Set the name as
- Click Save
7. Create the ContactModel Table in the SQL Database

- In the Azure Portal, navigate to the SQL Database Server we created in a previous step
- Enter your public IP Address
- Your public IP address is listed on this page as "Client IP Address"
- Alternatively, you can discover your public IP Address by navigating to http://whatismyipaddress.com
- Click Save
- On the Azure Portal, retrieve the URL of the database we created in the previous steps.
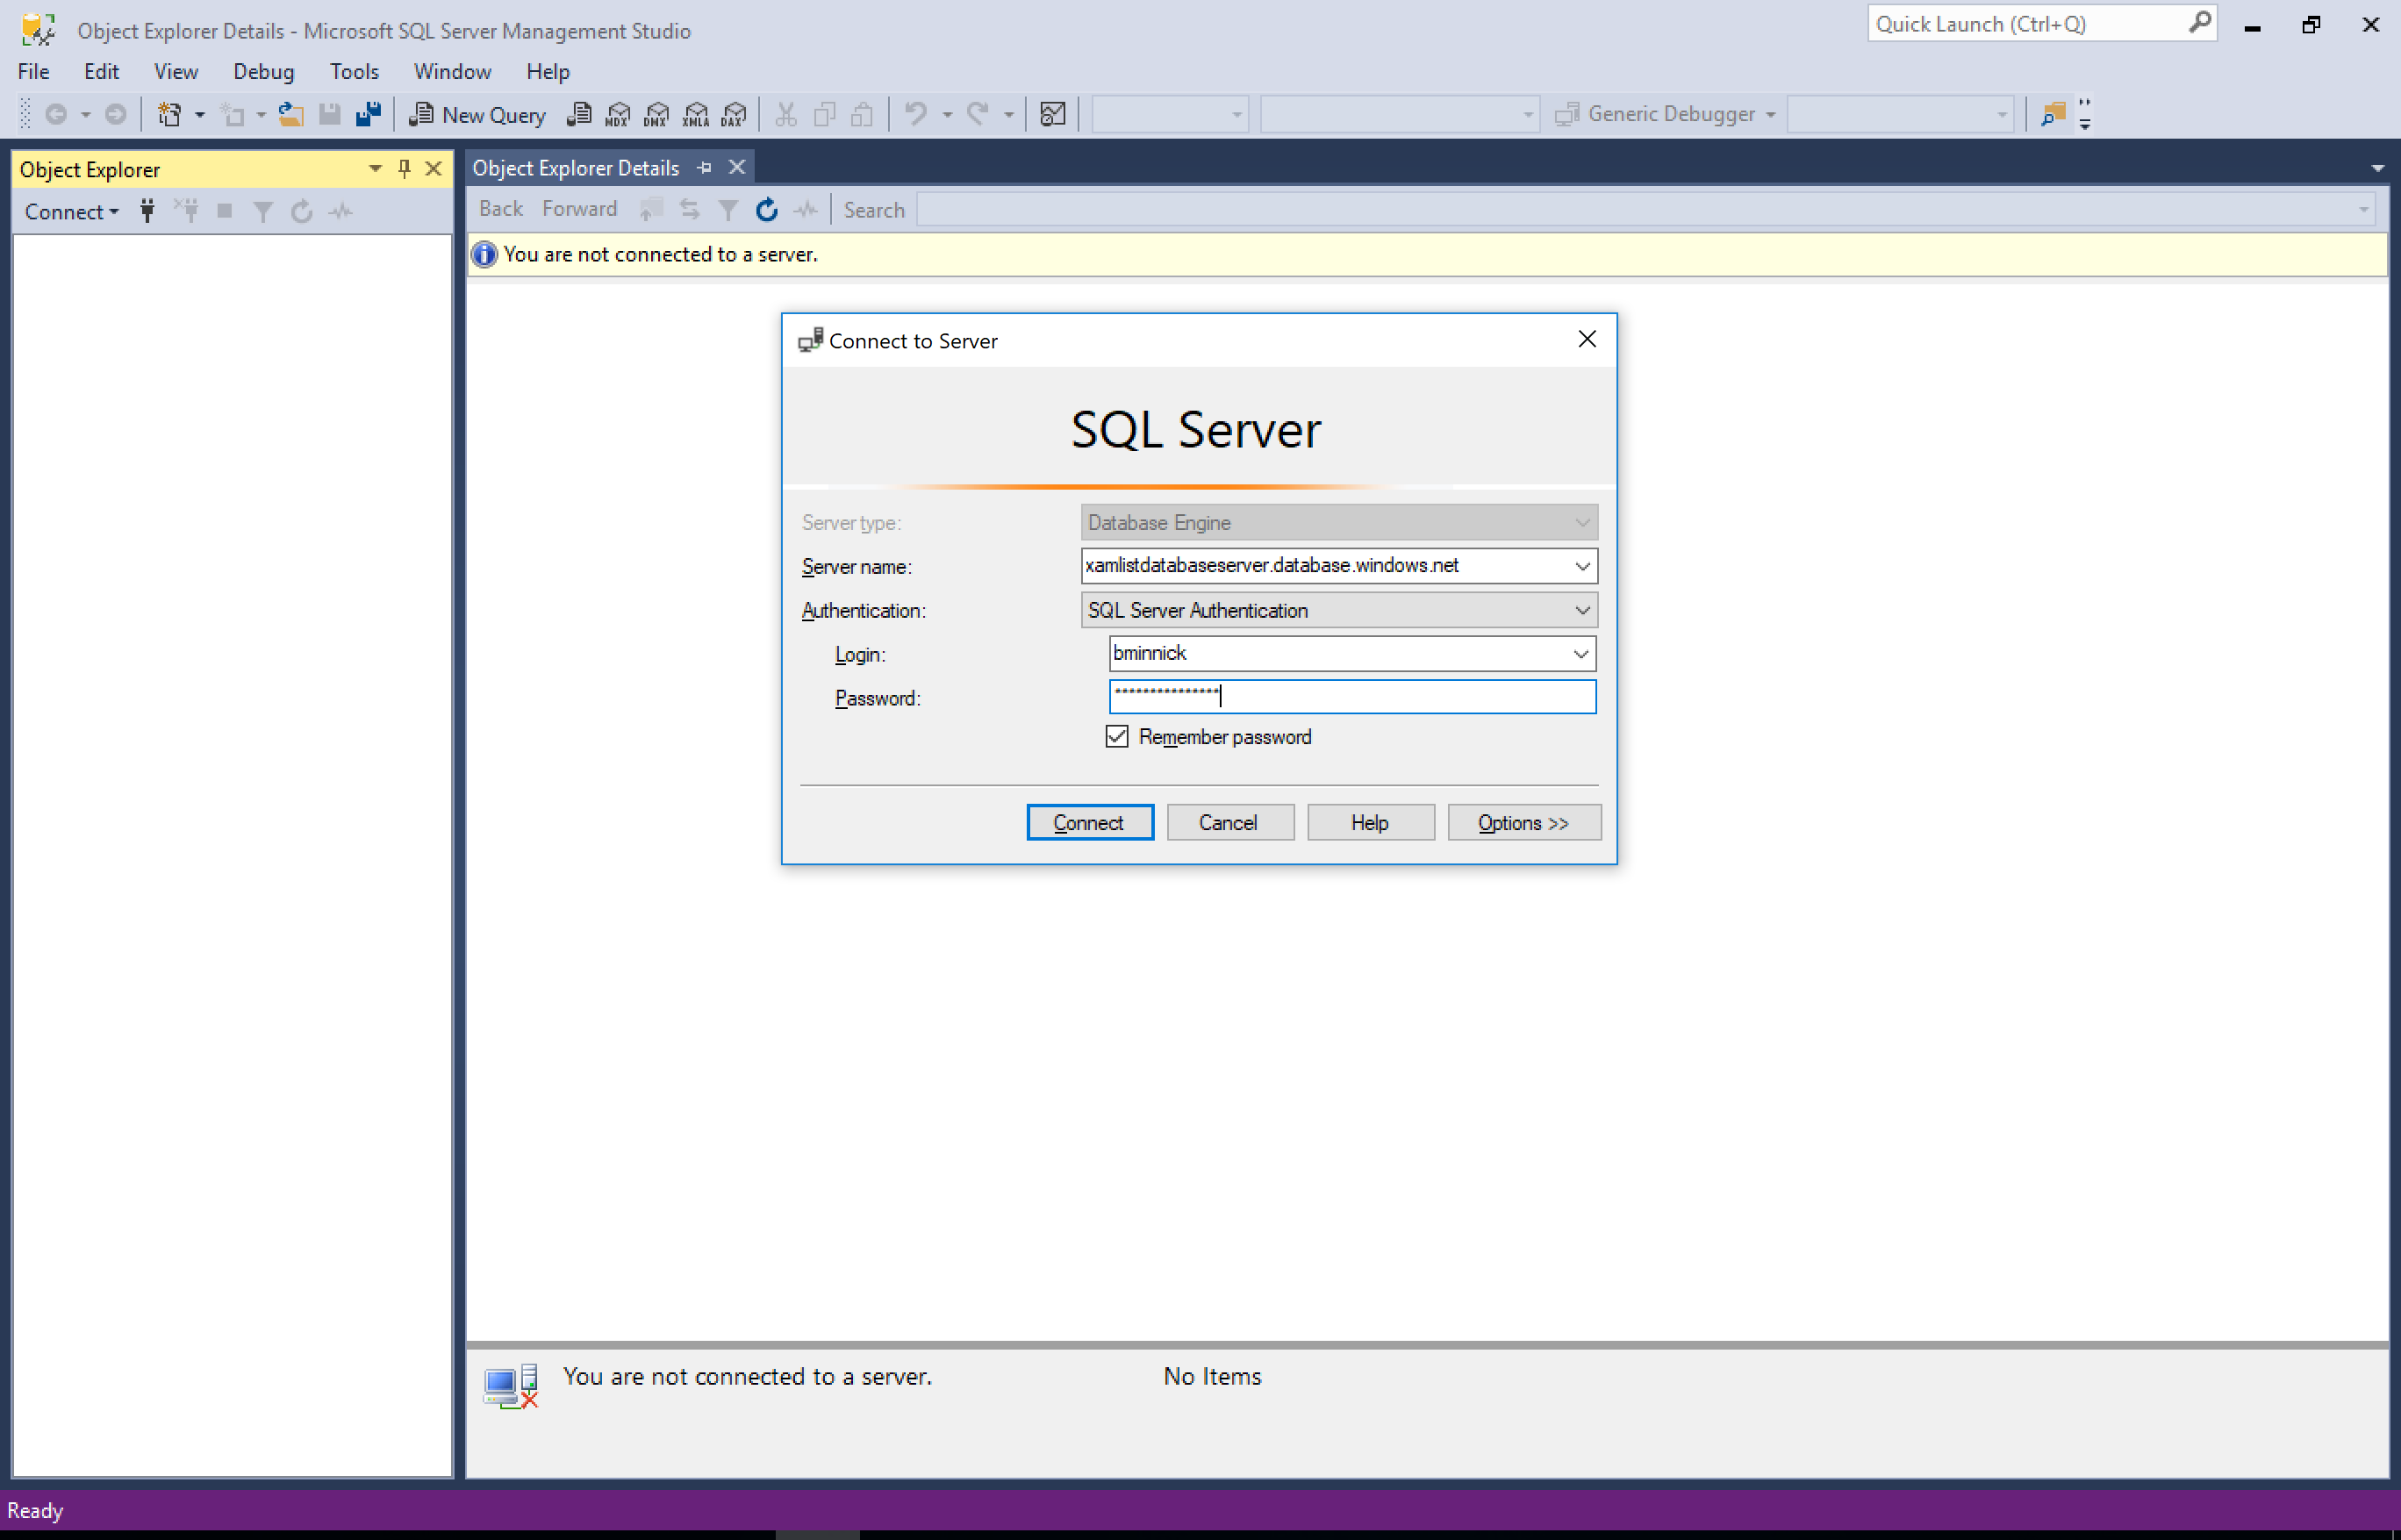
- Open SQL Server Management Studio and enter the following connection information:
- Server Type: Database Engine
- Server Name: [your database server url]
- Mine is xamlistdatabaseserver.database.windows.net
- Authentication: SQL Server Authentication
- User: [your database admin username]
- Password: [your database admin password]
- Click Connect
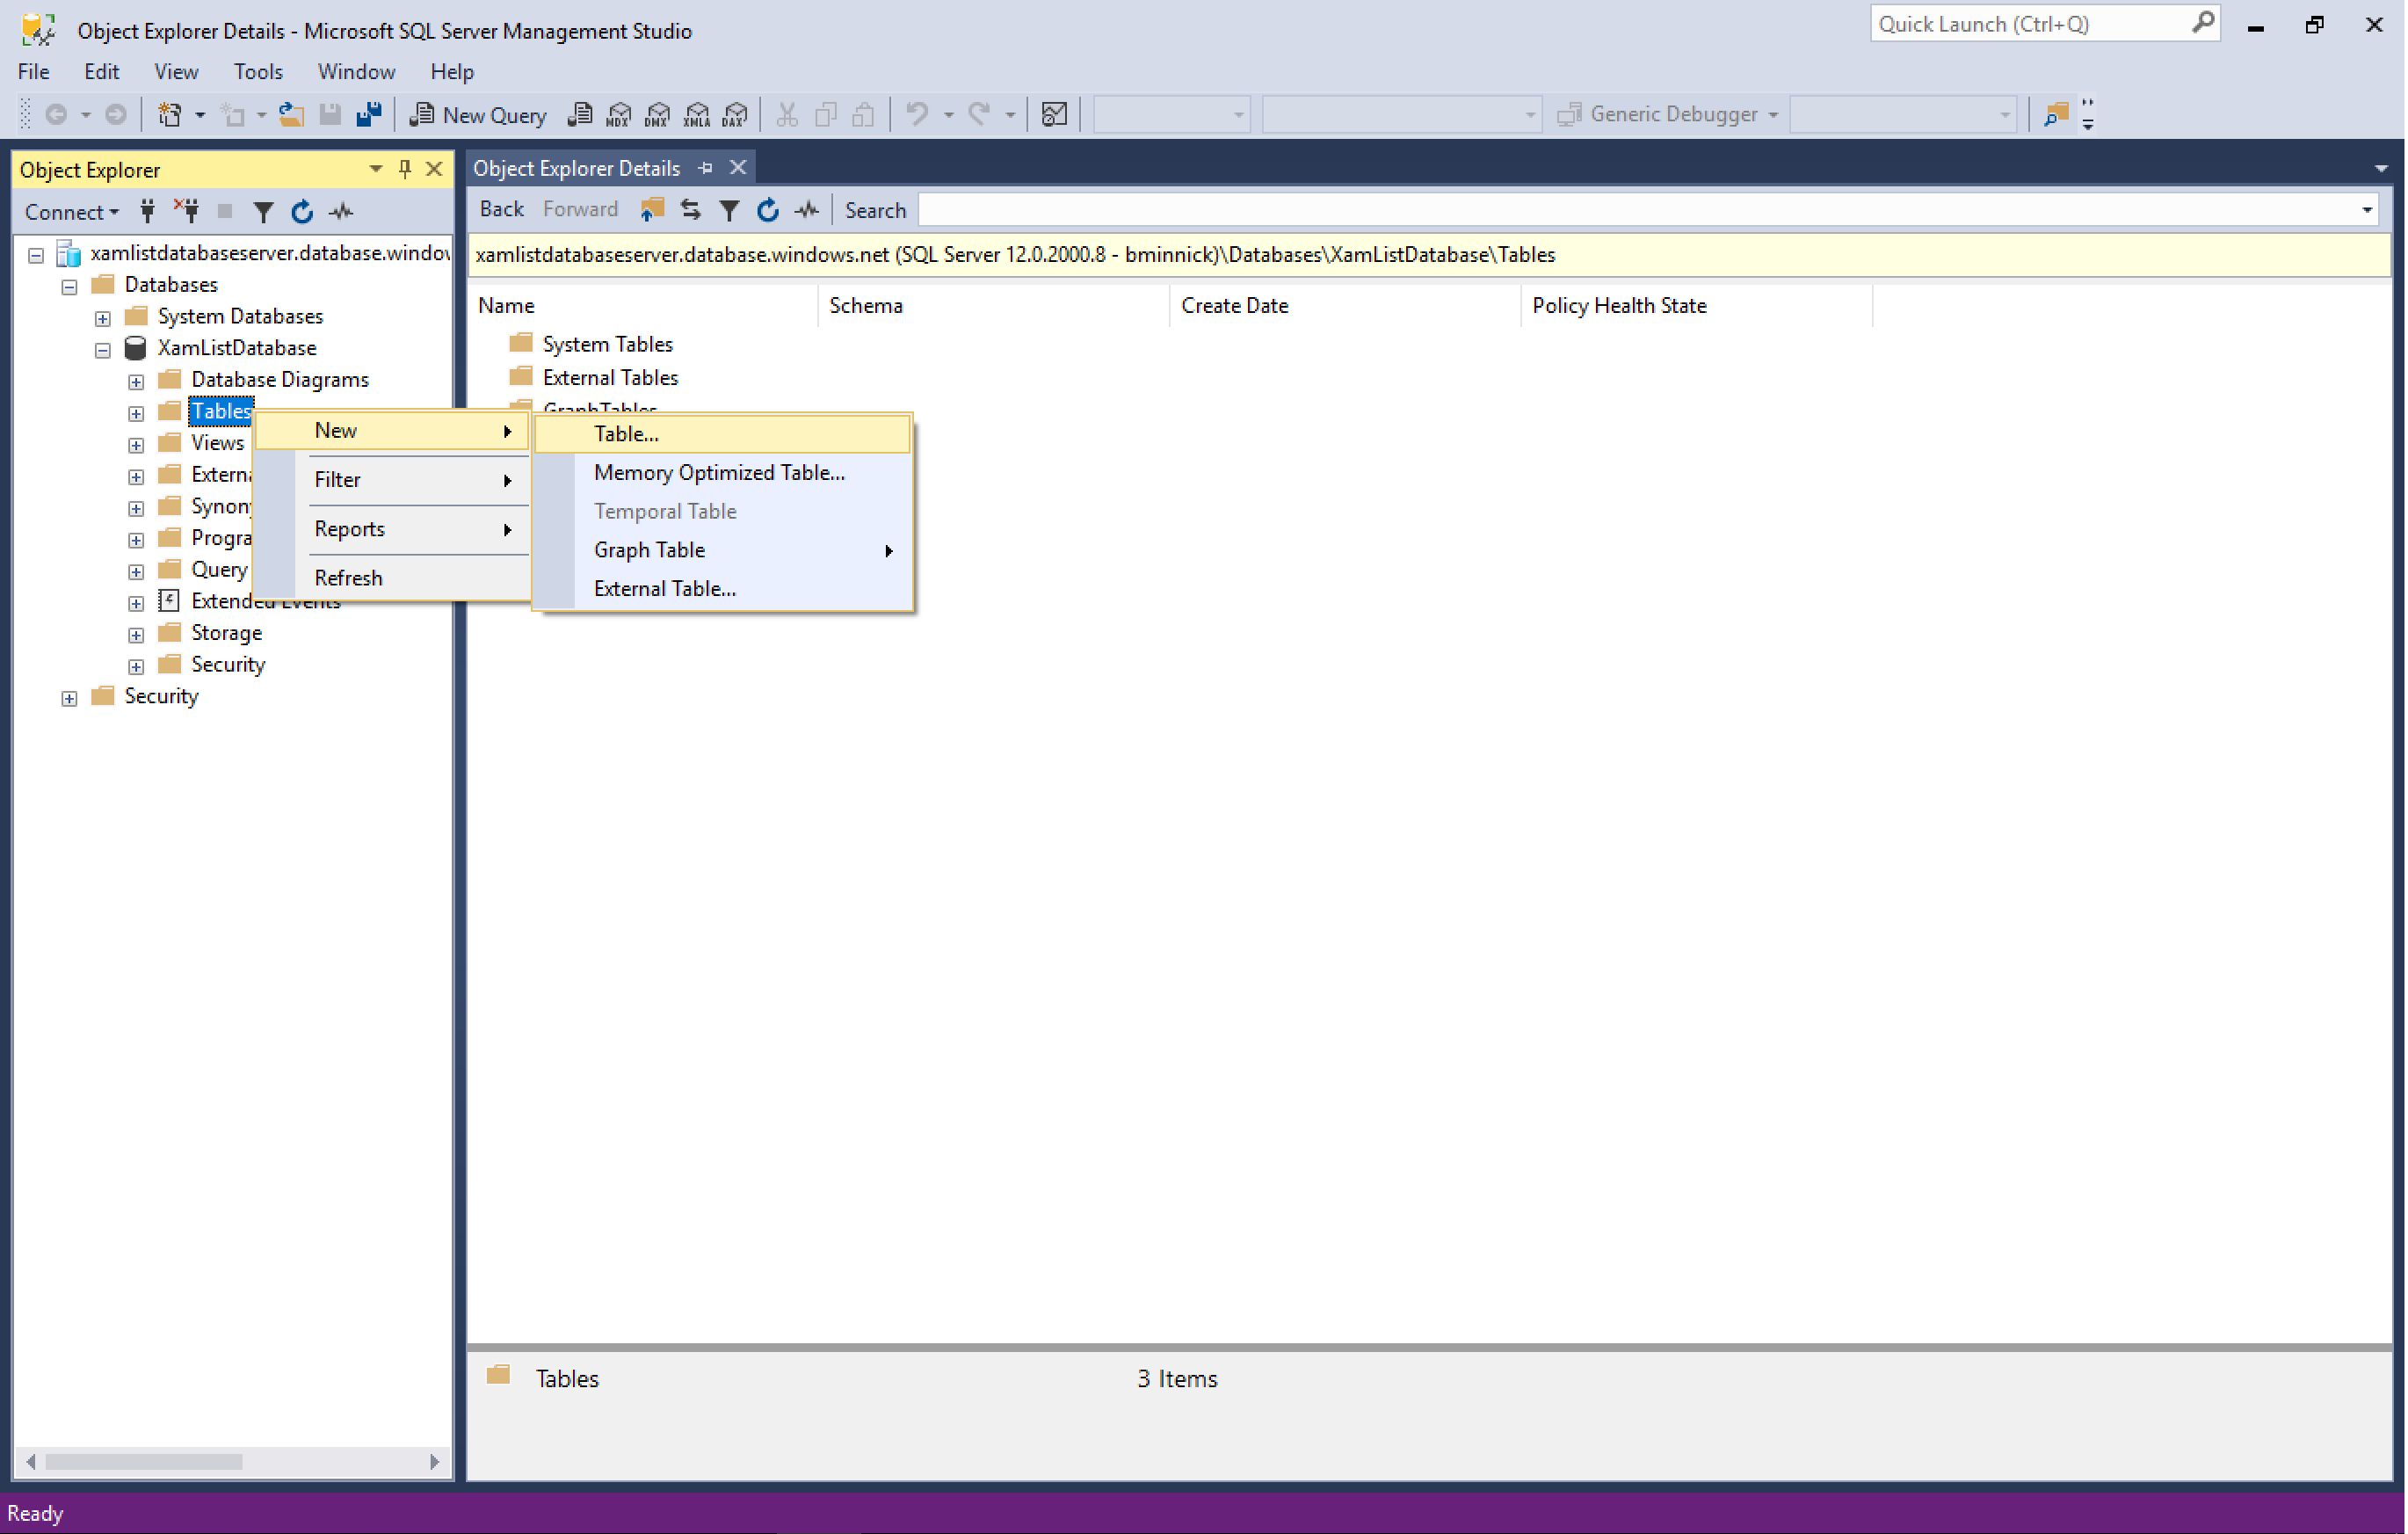
- In SSMS, create a new Table
- In the Object Explorer, navigate to the database we created in a previous step
- Right-click Tables -> New -> Table...

- Create New Columns
- Id -> nvarchar(128) -> False
- FirstName -> nvarchar(128) -> False
- LastName -> nvarchar(128) -> False
- PhoneNumber -> nvarchar(128) -> False
- CreatedAt -> datetimeoffset(7) -> False
- UpdatedAt -> datetimeoffset(7) -> False
- Deleted -> bit -> False

- Create Table Name
- In the Properties window, enter "ContactModels" for the Name
- Click SaveAll
8. Publish API App to Azure

- In Visual Studio, right-click on XamList.API and select Publish

- In the Publish window, choose "Select Existing" -> "Publish"

-
In the App Service window, select the API App we created earlier, and click OK
-
Visual Studio is now publishing the XamList.API code to your Azure API App
9. Publish Function App to Azure
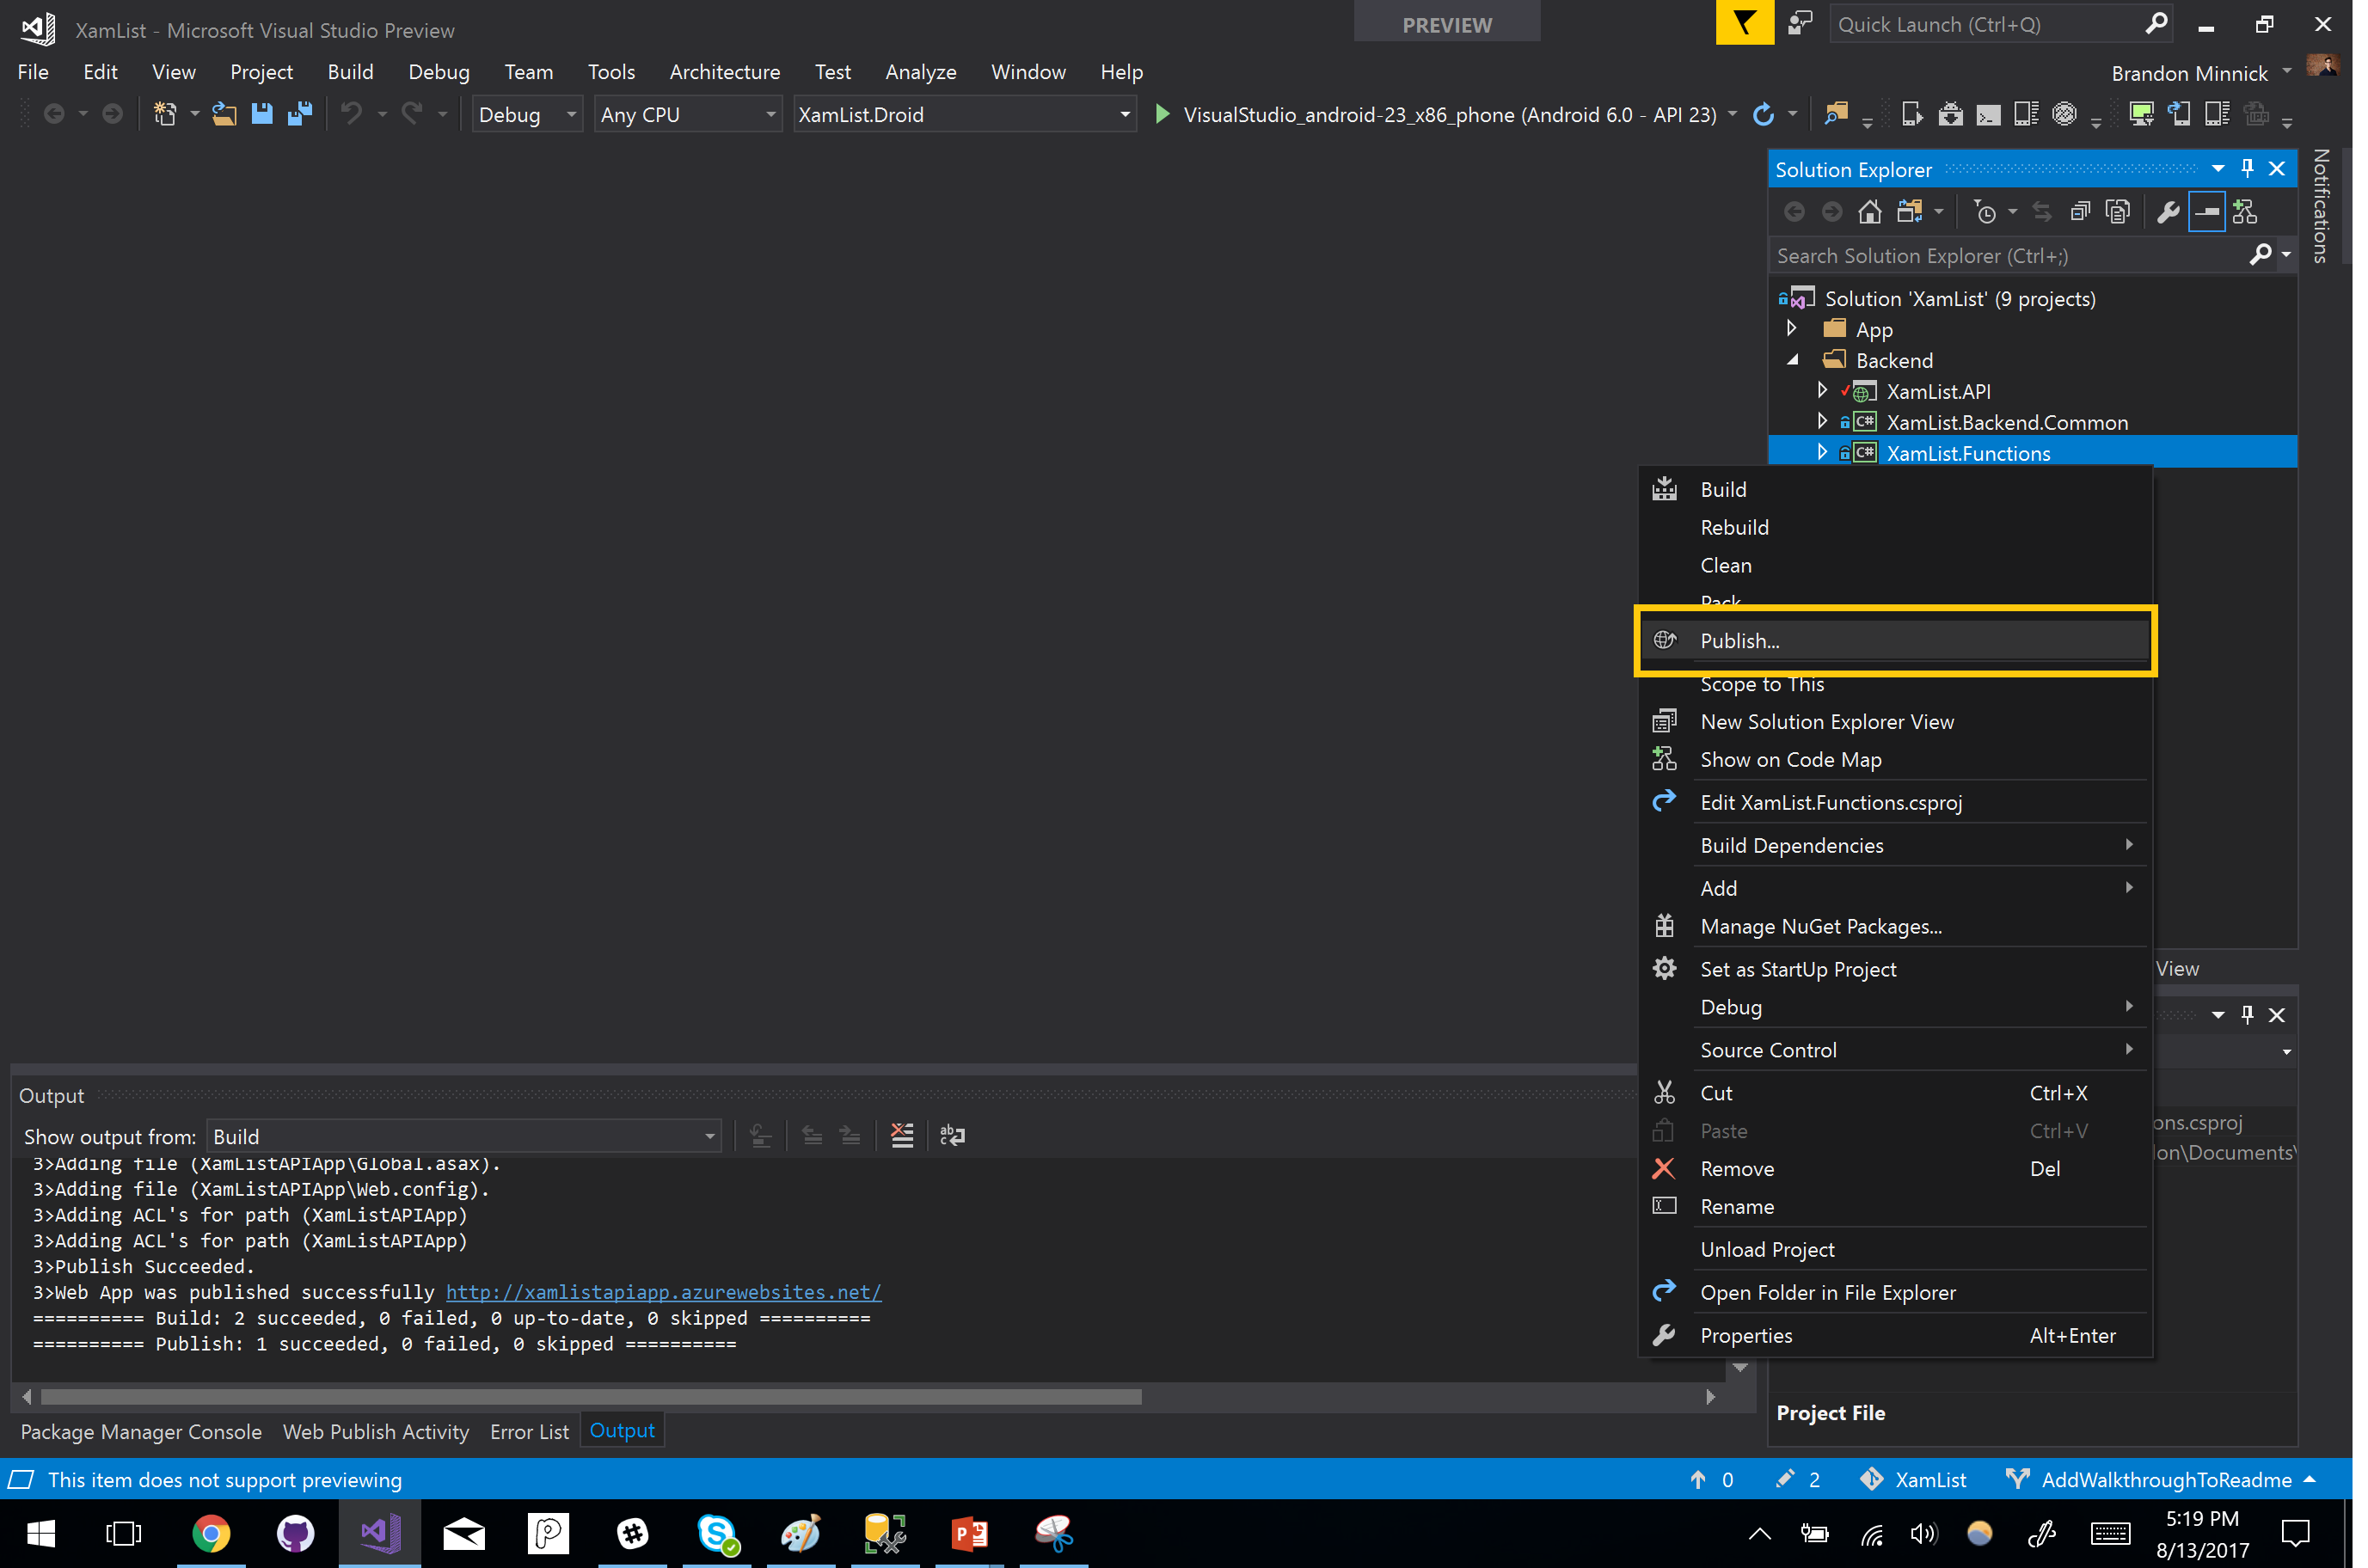
- In Visual Studio, right-click on XamList.Functions and select Publish

- Choose AzureFunctionApp -> Select Existing -> Publish

-
In the App Service window, select the Functions App we created earlier, and click OK
-
Visual Studio is now publishing the XamList.API code to your Azure API App
10. Configure API URL for Mobile App
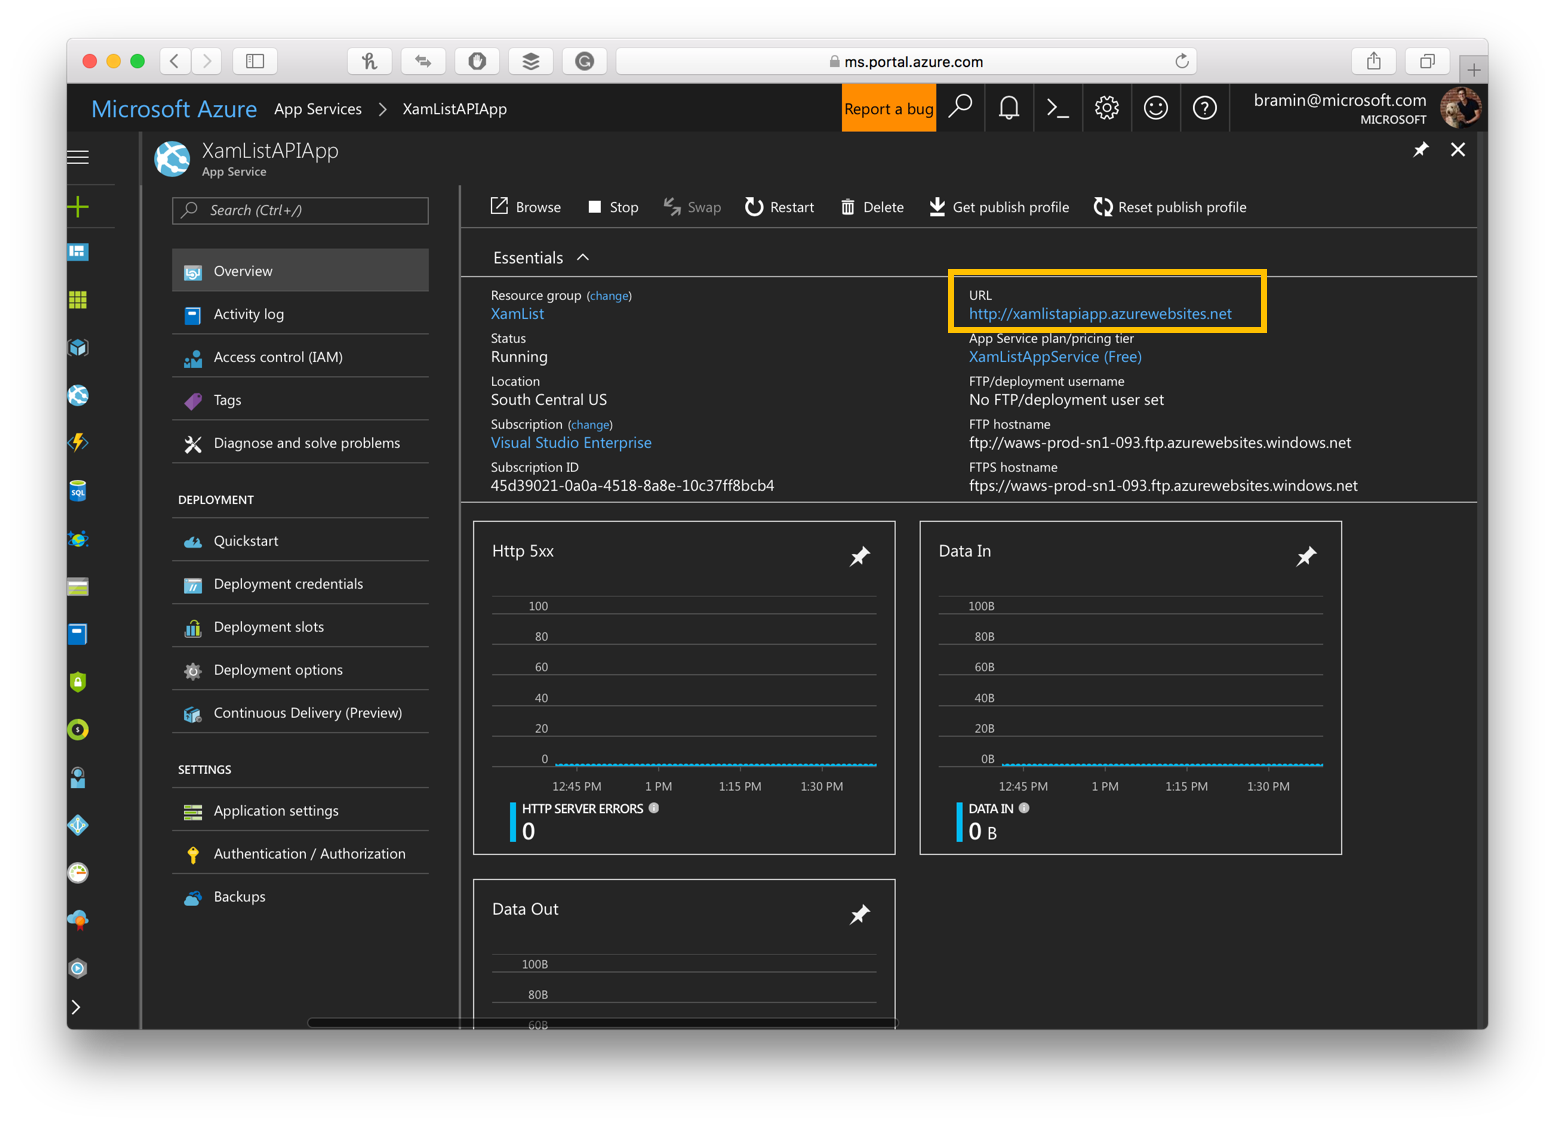
- In BackendConstants.cs, change the value of
AzureAPIUrlto match your Azure API App URL- The address for the one I created in this tutorial is http://xamlistapiapp.azurewebsites.net/
11. Configure Azure Function Url & Keys for Mobile App

- In BackendConstants.cs, change the value of
AzureFunctionUrlto match your Azure Function URL- The address for the one I created in this tutorial is https://xamlistfunctionapp.azurewebsites.net

- In BackendConstants.cs, change the value of
AzureFunctionKey_RemoveItemFromDatabaseto match your Azure Function Key for Remove Item From Database
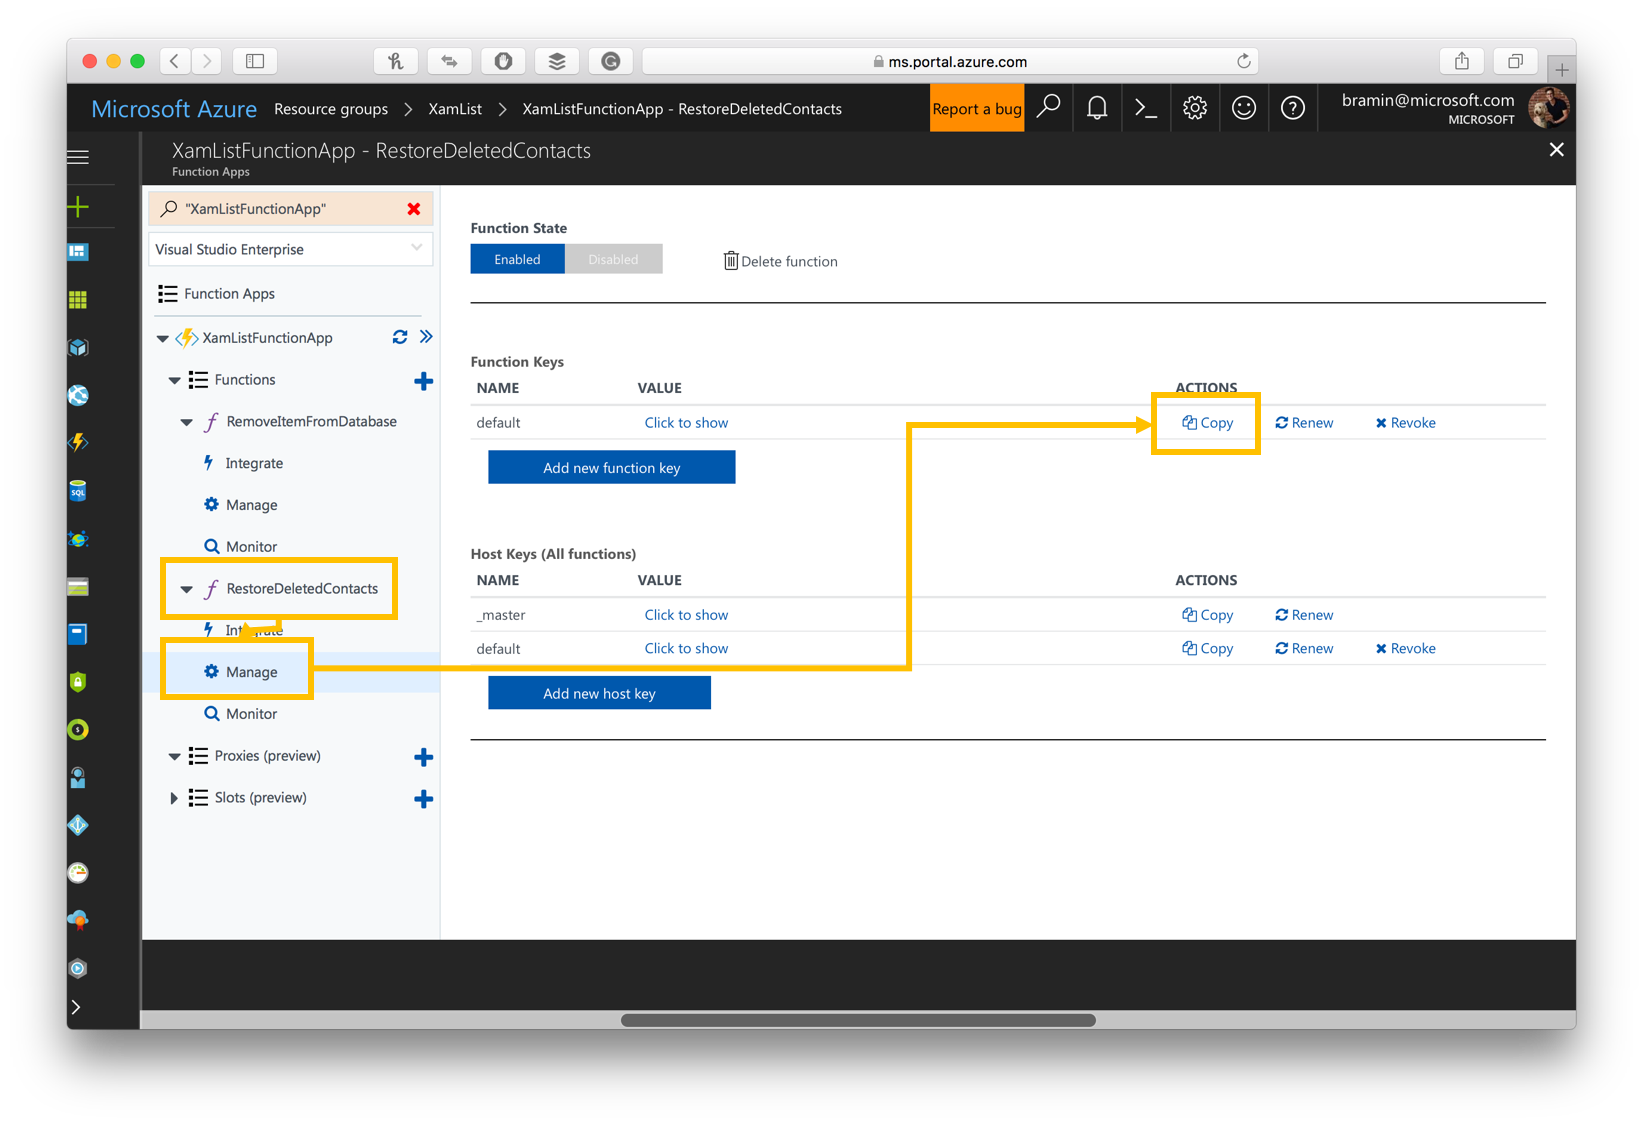
- In BackendConstants.cs, change the value of
AzureFunctionKey_RestoreDeletedContactsto match your Azure Function Key for Restore Deleted Contacts