thanksmister / Android Mqtt Alarm Panel
Programming Languages
Projects that are alternatives of or similar to Android Mqtt Alarm Panel
MQTT Alarm Panel for Home Automation Platforms
This project is a MQTT Alarm Control Panel and has originally been created for use with [Home Assistant's Manual Alarm Control Panel] (https://home-assistant.io/components/alarm_control_panel.manual_mqtt/) component. However, the Alarm Control Panel should work with any home automation platform that supports MQTT messaging such as OpenHab, Node-Red, and SmartThings. Alarm Panel is designed specifically for Android Tablet devices, usually mounted inside your home or business.
Support
For issues, feature requests, comments or questions, use the Github issues tracker. For HASS specific questions, you can join the Home Assistant Community Discussion page, which already has a lot information from the community. You can also join my Discord channel to ask questions or get support.
MQTT Alarm Panel does not support Android versions piror to Android 4.4
- Alarm Panel Video.
- Google Play Store.
- Android Things and Raspbery Pi 3 (Deprecated).
Features
The alarm panel acts as an interface for Home Assistant's Manual MQTT component but adds additional features not directly supported. You can set the alarm state to away, home, night, or custom bypass and you disarm the alarm using a code. In addition it has some nice features such as weather forecast, displaying your alarm sensors, face detection, and screen saver mode.
MQTT allows for communication between the alarm panel application and your home automation platform. The alarm panel interface will reflect the current state of the remote alarm system. This means that it is your home automation platform that is responsible for triggering the alarm when entry is detected and sounding the physical sirens or sending alerts. The alarm panel's role is providing a wall-mounted interface or key pad for your alarm system.
Here are some key features of the application:
- Alarm sensors, display up to four sensors and their states in the alarm screen.
- Stream video, detect motion, detect faces, or read QR Codes.
- Capture and email images, when the alarm is disabled.
- MQTT commands to remotely control the application (speak text, play audio, display notifications, alerts, etc.).
- Device sensor data reporting over MQTT (temperature, light, pressure, battery, etc.).
- Day/Night mode themes based on MQTT sun values or user settings.
- Optional screensaver mode using a digital clock, Imgur images or webpage.
- Three day Weather forecast using MQTT.
- Home Automation Platform webpage support for viewing home automation dashboards.
- Support for Android 4.4 (API level 19) or later.
Hardware & Software
-
Android Device running Android 4.4 (API level 19) or later. It'a also recommended that you use your own screensaver, like Daydream for Android so that your device does not go to sleep. You also want to disable your lock screen. The application will not work if your device sleeps (i.e. you need to unlock your device to open it).
-
There is a known issue with Fire OS devices from Amazon, they usually have a custom OS and may not include Daydream. You will then need to use the built-in screensaver features or you need to install an alternative solution. Some Fire OS devices also lack haptic feedback for key presses and the ability to customize the alarm sound.
-
The WebView shipped with Android 4.4 (KitKat) is based on the same code as Chrome for Android version 30. This WebView does not have full feature parity with Chrome for Android and is given the version number 30.0.0.0.
Screen Shots:


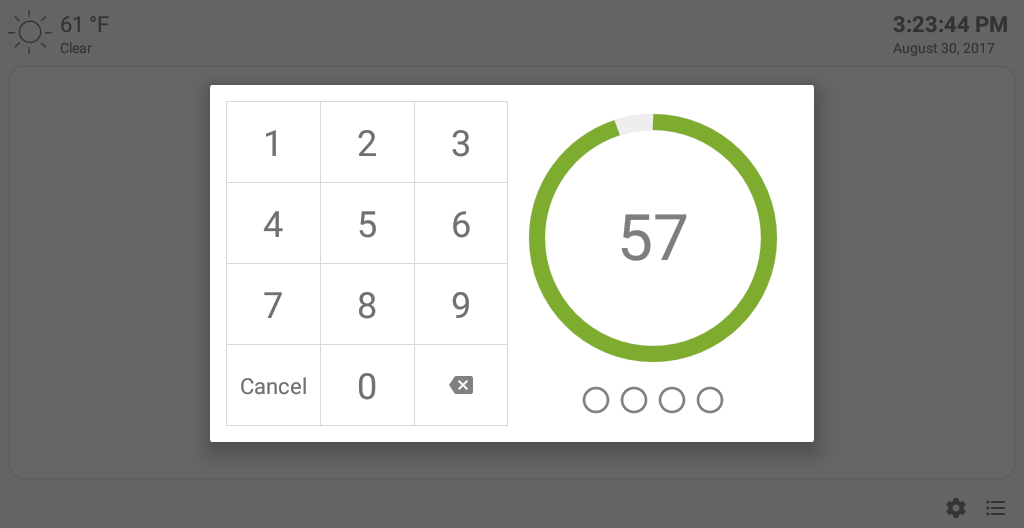

You can also load your home automation platform website by entering the address with port into the settings. It slides from the right on the main screen.

Installation
You can clone the repository and compile the APK using Android Studio, then side load the APK file onto your device. You can also side load the built APK from the [release section] (https://github.com/thanksmister/android-mqtt-alarm-panel/releases) or just install the application from the Google Play Store.
Home Assistant Setup
Alarm Panel should work with any MQTT broker and does not require Home Assistant. If you are using Home Assistant, then you will want to use the Manual MQTT component and the built in MQTT integration for your setup.
- Setup [Home Assistant] (https://home-assistant.io/getting-started/)
- Configure the [MQTT service] (https://home-assistant.io/components/mqtt/), note the broker address and username/password if applicable.
- Add the [MQTT Manual] (https://home-assistant.io/components/alarm_control_panel.manual_mqtt/) Home Assistant component to your configuration with the default settings.
- Add any sensors (like Zwave door sensors or sirens) and configure automations to trigger the alarm.
Example Home Assistant Manual MQTT component:
alarm_control_panel:
  - platform: manual_mqtt
    state_topic: home/alarm
    command_topic: home/alarm/set
    pending_time: 60
    trigger_time: 1800
    disarm_after_trigger: false
    delay_time: 30
    armed_home:
      pending_time: 0
      delay_time: 0
    armed_away:
      pending_time: 60
      delay_time: 30
-- If I set the alarm mode home, the alarm will immediately be on without any pending time. If the alarm is triggered, there will be no pending time before the siren sounds. If the alarm mode is away, I have 60 seconds to leave before the alarm is active and 30 seconds to disarm the alarm when entering.
-- Notice that my trigger_time is 1800 and disarm_after_trigger is false, this means the alarm runs for 1800 seconds until it stops and it doesn't reset after it is triggered.
-- Be sure to change the settings in the Alarm Control Panel application to match these settings. By default the pending_time and delay_time are used for all alarm modes, unless otherwise changed.
MQTT Alarm Setup
Under the settings (gear icon) enter the MQTT information, that you configured in your MQTT service. This might include a username and password. If you are not using SSL, just enter the IP address of your broker like 192.168.1.1. You enter the port and credentials in separate fields. The alarm will try to connect using TCP unless you enter HTTP/HTTPS in front of the IP address like http://192.168.1.1. However, for most MQTT brokers, using TCP is fine.
Supported States and State Topic
Alarm panel subscribes to MQTT state changes published from the remote alarm system. The default state topic is home/alarm and can be changed in the settings. Here is a list of state values and their descriptions that the applicatoin can handle.
| State | Description |
|---|---|
disarmed |
The alarm is disabled/off. |
arming |
The alarm is arming. The alarm will be armed after the delay. |
arm_away |
(Optional) The alarm is armed in away mode. |
armed_home |
The alarm is armed in home mode. |
arm_home |
(Optional) The alarm is arming home. The alarm will be armed after the delay. |
armed_night |
The alarm is armed in night mode. |
arm_night |
(Optional) The alarm is arming night mode. The alarm will be armed after the delay. |
armed_custom_bypass |
The alarm is armed in custom mode. |
arm_custom_bypass |
(Optional) The alarm is arming custom bypass mode. The alarm will be armed after the delay. |
pending |
The alarm is pending. The alarm will be triggered after the delay. |
triggered |
The alarm is triggered. |
- Note not all states are supprted by the HA Manuam MQTTcomponent and would need to manually handled. We can do this by listening to incomming commands from the command topic and sending them back on the state topic. For example, receiving a command
ARM_AWAYfrom one device should send out on the state topicarm_awayso that all devices receive this state change. Sending additional states is optional and the alarm panel will function without the additional statesarm_away, arm_home, arm_night, arm_custom_bypass. These additional states allow for sychronization between multiple devices, each device knows the next state and can display the appropriate view when a state change occurs in another device or in the platform server.
By default, the state topic contains a single payload value for each state disarmed, arming, armed_away, armed_home, armed_night, armged_custom_bypass, pending, triggered, but for states arm_away, arm_home, arm_night, arm_custom_bypass, pending, optionally you can send a JSON payload that contains additional information such as the delay time, the time before the alarm is armed or triggered.
- Example payload on the state topic with a
delay(Consider the scenario where the user sets the alarm toarm_awayand the application displays a countdown of how much time before alarm is armed so the user can exit the home):
{
  "state": "arm_away",
  "delay": 60 # exit delay
}
- Example payload on the state topic with a
delay(Consider the scenario where the user sets the alarm toarm_awayand an entry was detected, the application displays a countdown of the time before the alarm is triggered.):
{
  "state": "pending",
  "delay": 60 # disarm time
}
The payload contains extra information about the alarm state, in this example the delay time is the time before the alarm is set to armed_away or before the alarm state is triggered. If the delay time is 0, send a standard payload and not JSON. Default delay values are also set in the application, receiving the delay with the state will overwrite the stored delay values in the settings.
Supported Commands and Command Topic:
Alarm Panel can send to the server commands for different alarm states. The MQTT Broker listens to these commands to update the state of alarm. The default command topic is home/alarm/set which can be changed in the settings. Here is a list of commands sent from the application to the MQTT broker.
| Command | Description |
|---|---|
ARM_AWAY |
Arm the alarm in mode armed_away. |
ARMED_HOME |
Arm the alarm in mode armed_home. |
ARM_NIGHT |
Arm the alarm in mode armed_night. |
ARM_CUSTOM_BYPASS |
Arm the alarm in mode armed_custom_bypass. |
DISARM |
Disarm the alarm. |
PANIC |
Alarm panic button pressed. |
- Note not all commands are supported by the Home Asssistant Manual MQTT component. You will need listen to the incoming command and handle the command manually using an automotion or blueprint to handle modes
ARM_NIGHT, ARM_CUSTOM_BYPASS, PANIC.
By default, alarm commands send a single payload on the command topic:
Command topic: home/alarm/set
Command payloads: ARM_AWAY
However, if you want to send the alarm code with a command, the alarm panel will send the payload as JSON, which you will need to listen for and manually handle to parse out the command and the code value:
{
  "command": "<my command>",
  "code": "<my pin>"
}
Supported Event and Event Topic
Alarm Panel can subscribe to an event topic to receive additional information from the remote alarm system. For example, he event topic will notify the application of alarm errors such as invalid codes and the inablity to activate the alarm due to oen sensors. The default topic for event is home/alarm/event and can be changed in the settings. Here is a list of event payloads that Alarm Panel can handle, not that the payload using JSON.
| Event | Description |
|---|---|
invalid_code_provided |
The code to disarm or arm the alarm is incorrect. |
no_code_provided |
The code to disarm or arm the alarm is required but missing. |
failed_to_arm |
The alarm could not be armed due to open sensors. |
system_disabled |
The alarm state could not be changed because the system was unresponsive or unavailable. |
unknown |
The alarm state could not be changed due to an unknown error, check your setup. |
{
  "event": "invalid_code_provided"
}
Alarm Security and Remote Code
Under the settings, you can update the default security code, it is 1234 on first instalation. The security code is used to access the alarm settings and disarm the alarm from the alarm control panel application. You can choose to use the security code to disarm or arm the system. The security code is not sent over MQTT, it is only used from the application to control the alarm.
There is an option called Remote Code that will send both the alarm state and the code entered when arming or optionally disarming the alarm to your MQTT broker. The payload will be sent as JSON. This requires extra work on your part to parse the code and command paylaod from the JSON paylaod using your available platform tools. Here is an example JSON payload of an alarm command with the code:
{
  "command": "<my command>",
  "code": "<my pin>"
}
When choosing to use this feature, the security code you set within the application settings is only used to access the settings, is is no longer used to arm or disarm the system. When entering a code to arm or disarm your system, the code will now be sent to the remote server along with the command as a JSON payload.
The server must respond with either a alert message or return the new alarm state. You must validate the alarm code on the server and either update the alarm state or return an alert message that the code is invalid.
Alarm Sensors
Under the Alarm Sensors option in the settings, you can add up to four sensors devices to display on the alarm interface. For each sensor, you must specificy the topic and active state of the sensor, such as closed for a door or off for motion. The active state shows as green in the interface and red for any other reported state. The topic should include the entity id or name of your sensor and the current state. Here is a sample automation for a Home Assistant platform automation.
alias: MQTT Inside Motion
description: ''
trigger:
  - entity_id: sensor.inside_motion
    platform: state
condition: []
action:
  - data:
      topic: home/sensor/inside_motion
      payload_template: '{{states("sensor.inside_motion")}}'
      retain: true
    service: mqtt.publish
mode: single
Create an automation like this for each of the four components, sending the topic with the entity id and using a payload template to send the current state. The resulting payload for a door sensor might look like this for a closed door sensor:
Command topic: /home/sensor/inside_motion
Command payloads: no
And this when the door sensor is open:
Command topic: /home/sensor/inside_motion
Command payloads: yes
This really depends entirely on your platform and setup. You can configure the alarm sensors to have the topic and state in the settings to match your MQTT setup.
Panic Button
This feature will display a panic button on the main interface that when pressed, will send a command with a single payload, you must handle this command as you want in your home automation platform. This would be like an emergency call or way to silently trigger the alarm.
The alarm panel will send the following command and payload:
Command topic: home/alarm/set
Command payload: PANIC
MQTT Communication
The Alarm Panel application can display and control components using the MQTT protocol. Alarm Panel and Home Assistant work together to control the Home Assistant Alarm Control Panel, display weather data, receive sensor data, control the application Day or Night mode, and send various remote commands to the application.
You can also interact and control the application and device remotely using either MQTT commands, including using your device as an announcer with Google Text-To-Speach. Each device required a unique base topic which you set in the MQTT settings, the default is alarmpanel. This distinguishes your device if you are running multiple devices.
MQTT Weather
![weather] (https://user-images.githubusercontent.com/142340/47173511-a193e200-d2e4-11e8-8cbc-f2d57cdb6346.png)
Update We have deprecated support for Darksky, now you can use any weather integration.
You can also use MQTT to publish the weather to the Alarm Panel application, which it will then display on the main view. To do this you need to setup an automation that publishes a formatted MQTT message on an interval. Then in the application settings, you can use almost any weather integration, as long as it supports the standard attributes. I am using Met.no integration (https://www.home-assistant.io/integrations/met/) for my weather with this automation to send weather data to the application:
alias: MQTT Weather
trigger:
  - minutes: /15
    platform: time_pattern
condition: []
action:
  - data:
      payload_template: >-
        {'weather':{'condition':'{{states.weather.home.state}}','humidity':{{states.weather.home.attributes.humidity}},'temperature':{{states.weather.home.attributes.temperature}},'forecast':{{states.weather.home.attributes.forecast}}}}
      retain: true
      topic: alarmpanel/command
    service: mqtt.publish
mode: single
For alternate way of getting the payload with the current condition, you can use this for the payload_template:
payload_template: >-
        {% set attrs = states.weather.home.attributes %}
        {% set result = dict(attrs, condition = states('weather.home')) %}
        {'weather':{{result}}}
In the developer tools template, you can test out the payload by pasting this:
{''weather'':{''condition'':''{{states.weather.home.state}}'',''humidity'':{{states.weather.home.attributes.humidity}},''temperature'':{{states.weather.home.attributes.temperature}},''forecast'':{{states.weather.home.attributes.forecast}}}}
The output will be this:
{''weather'':{''condition'':''sunny'',''humidity'':61,''temperature'':27.2,''forecast'':[{'condition': 'sunny', 'temperature': 19.8, 'templow': 13.5, 'datetime': '2020-11-30T15:00:00+00:00', 'wind_bearing': 101.4, 'wind_speed': 30.6}, {'condition': 'cloudy', 'precipitation': 1.2, 'temperature': 23.0, 'templow': 16.8, 'datetime': '2020-12-01T15:00:00+00:00', 'wind_bearing': 17.1, 'wind_speed': 24.5}, {'condition': 'partlycloudy', 'temperature': 26.0, 'templow': 20.5, 'datetime': '2020-12-02T15:00:00+00:00', 'wind_bearing': 48.8, 'wind_speed': 14.0}, {'condition': 'partlycloudy', 'precipitation': 0.3, 'temperature': 25.2, 'templow': 19.7, 'datetime': '2020-12-03T15:00:00+00:00', 'wind_bearing': 71.5, 'wind_speed': 22.7}, {'condition': 'partlycloudy', 'temperature': 22.7, 'templow': 18.0, 'datetime': '2020-12-04T15:00:00+00:00', 'wind_bearing': 105.5, 'wind_speed': 33.5}]}}
You can also test this using the "mqtt.publish" service under the Home Assistant Developer Tools:
{
  "payload_template": "{''weather'':{''condition'':''{{states.weather.home.state}}'',''humidity'':{{states.weather.home.attributes.humidity}},''temperature'':{{states.weather.home.attributes.temperature}},''forecast'':{{states.weather.home.attributes.forecast}}}}",
  "retain": true,
  "topic": "alarmpanel/command"
}
Note that many weather sources work. For example, the Accuweather integration has been affirmatively tested. Also note that the template engine has an issue, if you have an entity where a section starts with a digit. This means that, if you have an entity like weather.1234_main_st you will have to use a different template method to access the entity data:
states.weather['1234_main_st'].attributes
MQTT Day/Night Mode
Similar to how weather works, you can control the Voice Panel to display the day or night mode by sending a formatted MQTT message with the sun's position (above or below the horizon). To do this add the [sun component] (https://www.home-assistant.io/components/sun/) to Home Assistant, then setup an automation to publish a MQTT message with an interval:
alias: MQTT Sun
trigger:
- minutes: /30
  platform: time_pattern
condition: []
action:
- data:
    payload_template: '{''sun'':''{{states(''sun.sun'')}}''}'
    retain: true
    topic: alarmpanel/command
  service: mqtt.publish
The resulting payload will look like this:
{
  "payload": "{'sun':'below_horizon'}",
  "topic": "alarmpanel/command"
}
You can also test this using the "mqtt.publish" service under the Home Assistant Developer Tools:
{
  "payload_template": "{'sun':'{{states('sun.sun')}}'}",
  "topic": "alarmpanel/command"
}
If you wish, you can use an offset to change the day or night mode values or send a MQTT message at the desired time with "above_horizon" to show day mode or "below_horizon" to show night mode. If you wish to use always the night mode, you need only to send one MQTT message with "below_horizon" and the app will not switch back to day mode. Be sure to turn on the Day/Night mode under the Display settings in the application.
MQTT Alarm Commands with Mosquitto
Sending commands to your MQTT Broker to arm or disarm the alarm, include your MQTT Broker IP address, port, and optionally the username and password if needed. The "-d" is to get the debug information.
mosquitto_pub -h 192.168.1.2  -t home/alarm/set -m "ARM_HOME" -d -p 1883 -u username -P password
mosquitto_pub -h 192.168.1.2 -t home/alarm/set -m "DISARM" -d -p 1883 -u username -P password
Publish a message from your MQTT Broker to your MQTT client (the Android application). You may need to add -h localhost, but you shouldn't, since you are publishing directly from your MQTT broker.
mosquitto_pub -t home/alarm -m "armed_home"
mosquitto_pub -t home/alarm -m "disarmed"
Note that the application, when sending a command, expects a MQTT response. If you use the application to set the alarm to be armed home, the MQTT Broker should respond with the message that the alarm was set to armed home. The application is just an interface for the MQTT service, its not the alarm system. The alarm system is your server, either Home Assistant or your MQTT Broker and server.
MQTT Commands
| Key | Value | Example Payload | Description |
|---|---|---|---|
| audio | URL | {"audio": "http://<url>"} |
Play the audio specified by the URL immediately |
| wake | true | {"wake": true} |
Wakes the screen, if it is asleep |
| speak | data | {"speak": "Hello!"} |
Uses the devices TTS to speak the message |
| alert | data | {"alert": "Hello!"} |
Displays an alert dialog within the application |
| notification | data | {"notification": "Hello!"} |
Displays a system notification on the device |
| sun | data | {"sun": "above_horizon"} |
Changes the application day or night mode based on sun value (above_horizon, below_horizon) |
- The base topic value (default is "alarmpanel") should be unique to each device running the application, unless you want all devices to receive the same command. The base topic can be changed in the application settings.
- Commands are constructed via valid JSON. It is possible to concatenate multiple commands:
- eg,
{"clearCache":true, "relaunch":true}
- eg,
- MQTT
- WallPanel subscribes to topic
[alarmpanel]/command- Default Topic:
alarmpanel/command
- Default Topic:
- Publish a JSON payload to this topic (be mindful of quotes in JSON should be single quotes not double)
- WallPanel subscribes to topic
Google Text-To-Speach Command
You can send a command using either HTTP or MQTT to have the device speak a message using Google's Text-To-Speach. Note, that the device must be running Android Lollipop or above.
Example format for the message topic and payload:
{"topic":"alarmpanel/command", "payload":"{'speak':'Hello!'}"}
MQTT Sensor and State Data
If MQTT is enabled in the settings and properly configured, the application can publish data and states for various device sensors, camera detections, and application states. Each device required a unique base topic, which you set in the MQTT settings, the default is "alarmpanel". This distinguishes your device, if you are running multiple devices.
Device Sensors
The application will post device sensors data per the API description and Sensor Reading Frequency. Currently device sensors for Pressure, Temperature, Light and Battery Level are published.
Sensor Data
| Sensor | Keys | Example | Notes |
|---|---|---|---|
| battery | unit, value, charging, acPlugged, usbPlugged | {"unit":"%", "value":"39", "acPlugged":false, "usbPlugged":true, "charging":true} |
|
| light | unit, value | {"unit":"lx", "value":"920"} |
|
| magneticField | unit, value | {"unit":"uT", "value":"-1780.699951171875"} |
|
| pressure | unit, value | {"unit":"hPa", "value":"1011.584716796875"} |
|
| temperature | unit, value | {"unit":"°C", "value":"24"} |
NOTE: Sensor values are device specific. Not all devices will publish all sensor values.
- Sensor values are constructued as JSON per the above table
- For MQTT
- WallPanel publishes all sensors to MQTT under
[alarmpanel]/sensor - Each sensor publishes to a subtopic based on the type of sensor
- Example:
alarmpanel/sensor/battery
- Example:
- WallPanel publishes all sensors to MQTT under
Home Assistant Examples
sensor:
  - platform: mqtt
    state_topic: "alarmpanel/sensor/battery"
    name: "Alarm Panel Battery Level"
    unit_of_measurement: "%"
    value_template: '{{ value_json.value }}'

 - platform: mqtt
    state_topic: "alarmpanel/sensor/temperature"
    name: "WallPanel Temperature"
    unit_of_measurement: "°C"
    value_template: '{{ value_json.value }}'

  - platform: mqtt
    state_topic: "alarmpanel/sensor/light"
    name: "Alarm Panel Light Level"
    unit_of_measurement: "lx"
    value_template: '{{ value_json.value }}'

  - platform: mqtt
    state_topic: "alarmpanel/sensor/magneticField"
    name: "Alarm Panel Magnetic Field"
    unit_of_measurement: "uT"
    value_template: '{{ value_json.value }}'

  - platform: mqtt
    state_topic: "alarmpanel/sensor/pressure"
    name: "Alarm Panel Pressure"
    unit_of_measurement: "hPa"
    value_template: '{{ value_json.value }}'
Camera Motion, Face, and QR Codes Detections
In addition to device sensor data publishing, the application can also publish states for Motion detection and Face detection, as well as the data from QR Codes, derived from the device camera.
| Detection | Keys | Example | Notes |
|---|---|---|---|
| motion | value | {"value": false} |
Published immediately when motion detected |
| face | value | {"value": false} |
Published immediately when face detected |
| qrcode | value | {"value": data} |
Published immediately when QR Code scanned |
- MQTT
- WallPanel publishes all sensors to MQTT under
[alarmpanel]/sensor - Each sensor publishes to a subtopic based on the type of sensor
- Example:
alarmpanel/sensor/motion
- Example:
- WallPanel publishes all sensors to MQTT under
Home Assistant Examples
binary_sensor:
  - platform: mqtt
    state_topic: "alarmpanel/sensor/motion"
    name: "Motion"
    payload_on: '{"value":true}'
    payload_off: '{"value":false}'
    device_class: motion

binary_sensor:
  - platform: mqtt
    state_topic: "alarmpanel/sensor/face"
    name: "Face Detected"
    payload_on: '{"value":true}'
    payload_off: '{"value":false}'
    device_class: motion

sensor:
  - platform: mqtt
    state_topic: "alarmpanel/sensor/qrcode"
    name: "QR Code"
    value_template: '{{ value_json.value }}'
Application State Data
The application can also publish state data about the application such as the current dashboard url loaded or the screen state.
| Key | Value | Example | Description |
|---|---|---|---|
| currentUrl | URL String | {"currentUrl":"http://hasbian:8123/states"} |
Current URL the Dashboard is displaying |
| screenOn | true/false | {"screenOn":true} |
If the screen is currently on |
- State values are presented together as a JSON block
- eg,
{"currentUrl":"http://hasbian:8123/states","screenOn":true}
- eg,
- MQTT
- WallPanel publishes state to topic
[alarmpanel]/state- Default Topic:
alarmpanel/state
- Default Topic:
- WallPanel publishes state to topic
Capture Images (Telegram/Mailgun)
If you would like to capture and email images, when the alarm is deactivated then you need to setup a Mailgun account. You will need to enter the domain address and API key from your Mailgun account into the application settings screen, along with other information.
You may also use Telegram to recieve a notification with the image when the alarm is deactivated. To use Telegram you need a chat Id and a Telegram Bot API token. Follow the [Telegram guide on Home Assistant] (https://home-assistant.io/components/notify.telegram/) to setup Telegram. Enter the chat Id and token into the application settings screen.
The camera only captures images, when activated in the settings and MailGun is setup properly. Images are captured each time the alarm is deactivated. You may use either Mailgun, Telegram, or both to send notifications.
Screensaver, Unsplash, Clock, Webpage
Since the applicaiton was designed to run as a full-screen dedicated wall panel application, it is important that you have a screensaver enabled. You can use Android's built-in DayDream which does a nice job dimming the screen. However, on some devices like the Fire OS tablets, this is not an option. Instead, activate the screensaver feature under the Display Settings section. The default screen saver will display the current time, and if you are sending weather data, the current weather conditions. You can change this to display a webpage of your choosing, even with animation or you can display one from Unsplash. Performance may vary depending on your device.
Platform Screen or Webpage View
You can load your Home Assistant (or any web page) as alternative view by entering your Home Assistant address. The address should be in the format http://192.168.1.1:8123 and include the port number. You can use HADashboard or Home Assistant kiosk mode as well. This feature uses an Android web view component and may not work on older SDK versions.
MJPEG Video Streaming
Use the device camera as a live MJPEG stream. Just connect to the stream using the device IP address and end point. Be sure to turn on the camera streaming options in the settings and set the number of allowed streams and HTTP port number. Note that performance depends upon your device (older devices will be slow).
Browser Example:
http://192.168.1.1:2971/camera/stream
Home Assistant Example:
camera:
  - platform: mjpeg
    mjpeg_url: http://192.168.1.1:2971/camera/stream
    name: Alarm Panel Camera
Notes
- To use TTS and the Camera you will need Android Lollipop SDK or greater, as well as camera permissions. Older versions of Android are currently not supported. The application is locked into the landscape mode for usability. It is meant to run on dedicated tablets or large screen devices that will be used mainly for an alarm control panel.
Acknowledgements
Special thanks to Colin O'Dell who's work on the Home Assistant Manual Alarm Control Panel component and his [MQTT Alarm Panel] (https://github.com/colinodell/mqtt-control-panel) help to make this project possible. Thanks to [Juan Manuel Vioque] (https://github.com/tremebundo) for Spanish translations and [Gerben Bol] (https://gerbenbol.com/) for Dutch translations, [Jorge Assunção] (https://github.com/jorgeassuncao) for Portuguese, [electricJP] (https://github.com/electricJP) and [jncanches] (https://github.com/jncanches) for French translations.
Contributors
Sergio Viudes for Fingerprint unlock support and his [Home-Assistant-WebView] (https://github.com/sjvc/Home-Assistant-WebView) component.