![]()


Share:


BoxDetect is a Python package based on OpenCV which allows you to easily detect rectangular shapes like character or checkbox boxes on scanned forms.
Main purpose of this library is to provide helpful functions for processing document images like bank forms, applications, etc. and extract regions where character boxes or tick/check boxes are present.
Features
boxdetect.pipelines.get_boxes- basic pipeline for boxes extractionboxdetect.pipelines.get_checkboxes- pipeline which returns only the checkboxes with simple estimation of the state (checked/unchecked)boxdetect.config.PipelinesConfig- advanced config class used to run pipelinesboxdetect.config.PipelinesConfig.save_yaml/load_yaml- allows to save and load configs into and from yaml filesboxdetect.config.PipelinesConfig.autoconfigure- simple mechanism to automatically set config based on box sizes list you're looking forboxdetect.config.PipelinesConfig.autoconfigure_from_vott- automatically sets up config based on ground truth/annotation json files from VoTTboxdetect.img_procandboxdetect.rect_proc- utility functions which can be used to build custom pipelines
Getting Started
Checkout usage examples below to get a better understanding of how it works or go to get-started-pipelines.ipynb and get-started-autoconfig.ipynb notebooks which holds step by step examples for using BoxDetect with premade boxdetect.pipelines functions.
Installation
BoxDetect can be installed directly from this repo using pip:
pip install git+https://github.com/karolzak/boxdetect
or through PyPI
pip install boxdetect
Usage examples
You can use BoxDetect either by leveraging one of the pre-made pipelines or by treating BoxDetect functions as your toolbox to compose your own pipelines that fits your needs perfectly.
- Using pre-made pipelines
- Detecting boxes and grouping them together with
boxdetect.pipelines.get_boxes - Changing
group_size_rangeparam to highlight checkboxes - Using
boxdetect.pipelines.get_checkboxesto retrieve checkboxes and their values - Using
boxdetect.config.PipelinesConfig.autoconfigureto setup a config params based on the box sizes list - Using
boxdetect.config.PipelinesConfig.autoconfigure_from_vottto setup a config params based on the annotated ground truth - Saving and loading configuration to and from
yamlfiles
- Detecting boxes and grouping them together with
Using boxdetect.pipelines
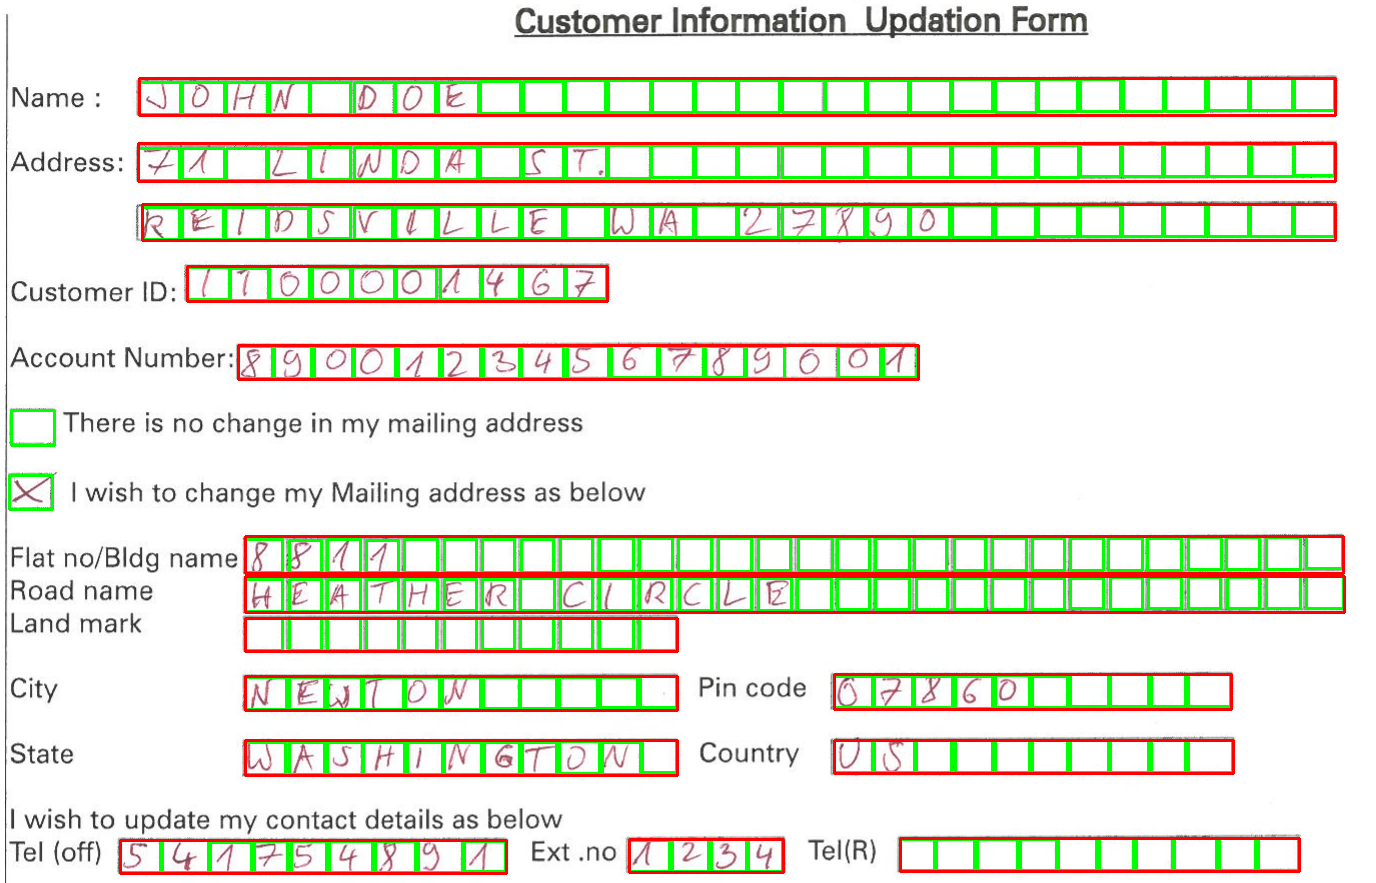
Detect character boxes and group them together
Start with getting the default PipelinesConfig and adjusting it for your requirements and data:
from boxdetect import config

file_name = 'form_example1.png'

cfg = config.PipelinesConfig()

# important to adjust these values to match the size of boxes on your image
cfg.width_range = (30,55)
cfg.height_range = (25,40)

# the more scaling factors the more accurate the results but also it takes more time to processing
# too small scaling factor may cause false positives
# too big scaling factor will take a lot of processing time
cfg.scaling_factors = [0.7]

# w/h ratio range for boxes/rectangles filtering
cfg.wh_ratio_range = (0.5, 1.7)

# group_size_range starting from 2 will skip all the groups
# with a single box detected inside (like checkboxes)
cfg.group_size_range = (2, 100)

# num of iterations when running dilation tranformation (to engance the image)
cfg.dilation_iterations = 0
As a second step simply run:
from boxdetect.pipelines import get_boxes

rects, grouping_rects, image, output_image = get_boxes(
    file_name, cfg=cfg, plot=False)
Each of the returned elements in grouping_rects are rectangular bounding boxes representing grouped character boxes (x, y, w, h)
print(grouping_rects)

OUT:
# (x, y, w, h)
[(276, 276, 1221, 33),
 (324, 466, 430, 33),
 (384, 884, 442, 33),
 (985, 952, 410, 32),
 (779, 1052, 156, 33),
 (253, 1256, 445, 33)]
Display output image with bounding rectangles drawn on it
import matplotlib.pyplot as plt

plt.figure(figsize=(20,20))
plt.imshow(output_image)
plt.show()
Highlighting just the checkboxes
And if you would like to highlight only the checkboxes you just need to change a single parameter:
# limit down the grouping algorithm to just singular boxes (e.g. checkboxes)
cfg.group_size_range = (1, 1)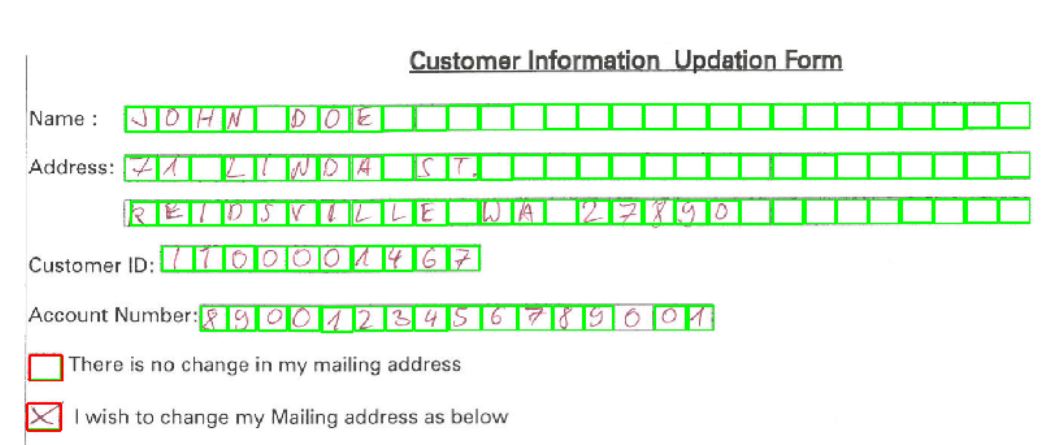
Using boxdetect.pipelines.get_checkboxes to retrieve and recognize just the checkboxes
Assuming we're using the same image and config is already adjusted (look above) we just need to run:
from boxdetect.pipelines import get_checkboxes

checkboxes = get_checkboxes(
    file_path, cfg=cfg, px_threshold=0.1, plot=False, verbose=True)
If verbose=True it will print out bunch of details of checkboxes being detected and estimation being made about their state:
Processing file:  ../images/form_example1.png
----------------------------------
nonzero_px_count:  3
all_px_count:  858
nonzero_px_count / all_px_count =  0.0034965034965034965
----------------------------------
----------------------------------
nonzero_px_count:  363
all_px_count:  858
nonzero_px_count / all_px_count =  0.4230769230769231
----------------------------------
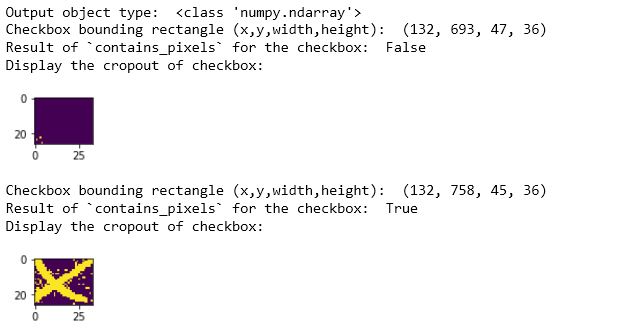
Now looking into the details of our results:
print("Output object type: ", type(checkboxes))
for checkbox in checkboxes:
    print("Checkbox bounding rectangle (x,y,width,height): ", checkbox[0])
    print("Result of `contains_pixels` for the checkbox: ", checkbox[1])
    print("Display the cropout of checkbox:")
    plt.figure(figsize=(1,1))
    plt.imshow(checkbox[2])
    plt.show()
We should see the following:
Using boxdetect.config.PipelinesConfig.autoconfigure to quickly and easily setup a config params based on the box sizes list
BoxDetect allows you to provide a list of sizes (h, w) of boxes which you are interested in and based on that list it would automatically set up the config to detect those.
from boxdetect import config

cfg = config.PipelinesConfig()

# The values I'm providing below is a list of box sizes I'm interested in and want to focus on
# [(h, w), (h, w), ...]
cfg.autoconfigure([(46, 46), (44, 43)])
And after doing that you can use any of the boxdetect.pipelines functions as bellow:
from boxdetect.pipelines import get_checkboxes

checkboxes = get_checkboxes(file_path, cfg=cfg, plot=False)
Using boxdetect.config.PipelinesConfig.autoconfigure_from_vott to quickly and easily setup a config params based on the annotated ground truth
Another option is to use ground truth annotations from VoTT.
Check VoTT repo and docs on how to create a new project and start labelling your data: https://github.com/microsoft/VoTT
For this example I used VoTT to label my input image and my VoTT project looks somewhat like that:
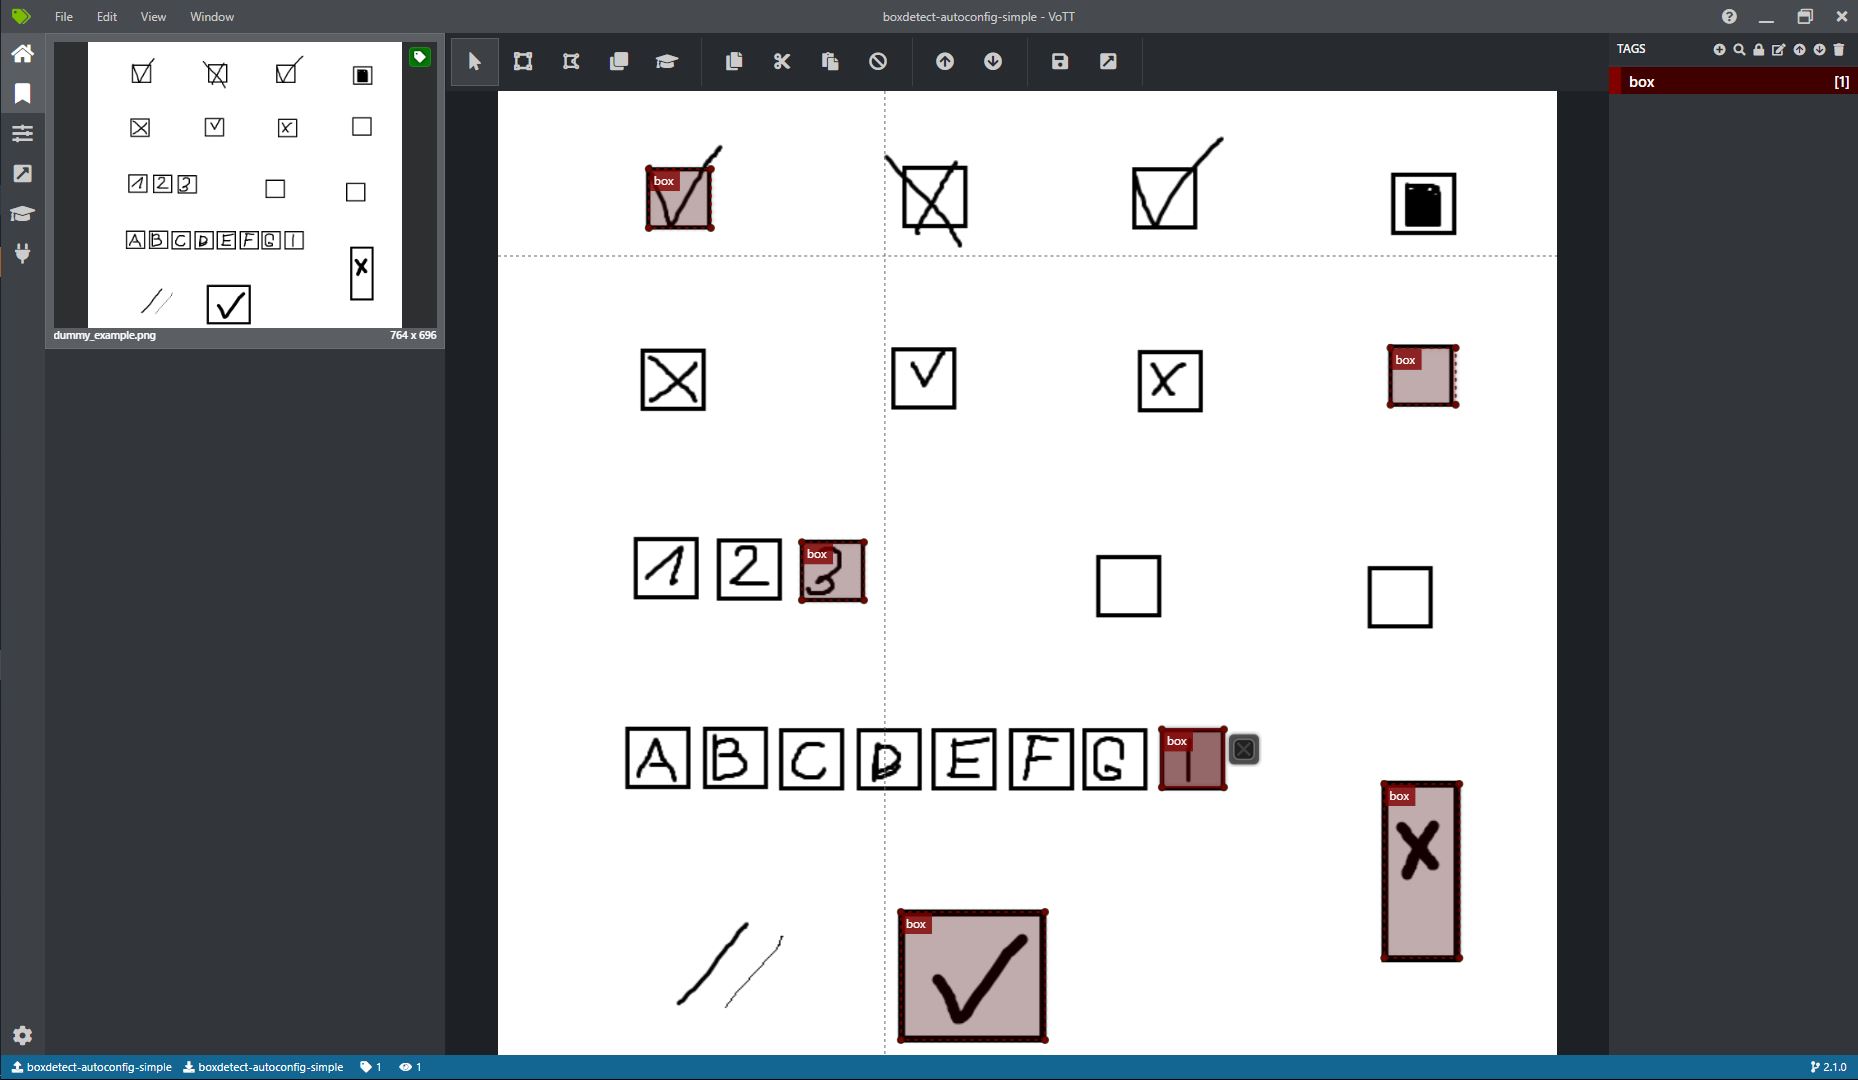
In principle you only need to mark a single box for each different size however the more boxes you will annotate - the more accurate the results should be.
from boxdetect import config

cfg = config.PipelinesConfig()

cfg.autoconfigure_from_vott(
    vott_dir="../tests/data/autoconfig_simple", class_tags=["box"])
And after doing that you can use any of the boxdetect.pipelines functions as bellow:
from boxdetect.pipelines import get_checkboxes

checkboxes = get_checkboxes(file_path, cfg=cfg, plot=False)
Saving and loading configuration to and from yaml files
If you want to save a specific configuration for later reusability or automation purposes you can do so by using PipelinesConfig functions: save_yaml and load_yaml like below:
from boxdetect import config

cfg = config.PipelinesConfig()
cfg.morph_kernels_thickness = 10
cfg.save_yaml('test_cfg.yaml')

cfg2.load_yaml('test_cfg.yaml')