flyyer-ruby
The AI-powered preview system built from your website (no effort required).
This gem is agnostic to any Ruby framework.
Index
Get started (5 minutes)
Haven't registered your website yet? Go to Flyyer.io and create a project (e.g. website-com).
1. Install the library
Add this line to your application's Gemfile:
gem 'flyyer'And then execute:
bundle installOr install it yourself as:
gem install flyyer2. Get your Flyyer.io smart image link
In your website code (e.g. your landing or product/post view file), set the following:
flyyer = Flyyer::Flyyer.create do |f|
  # Your project slug
  f.project = 'website-com'
  # The current path of your website
  f.path = '/path/to/product' # In Ruby on Rails you can use `request.env['PATH_INFO']`
  # (Optional, Recommended) Default or main image for each page
  f.default="/static/image-1.png" # or https://your-site.com/static/image-1.png
end

# Check:
puts flyyer.href
# > https://cdn.flyyer.io/v2/website-com/_/__v=1618281823&_def=%2Fstatic%2Fimage-1.png/path/to/product
3. Put your smart image link in your <head> tags
You'll get the best results like this:
# .haml
%meta{ property: 'og:image', content: flyyer.href }
%meta{ name: 'twitter:image', content: flyyer.href }
%meta{ name: 'twitter:card', content: 'summary_large_image' }

# .erb
<meta property="og:image" content='<%= flyyer.href %>'>
<meta name="twitter:image" content='<%= flyyer.href %>'>
<meta name="twitter:card" content="summary_large_image">

# IMPORTANT: if you're using Ruby on Rails, please use `flyyer.href.html_safe` to prevent double serialization
4. Create a rule for your project
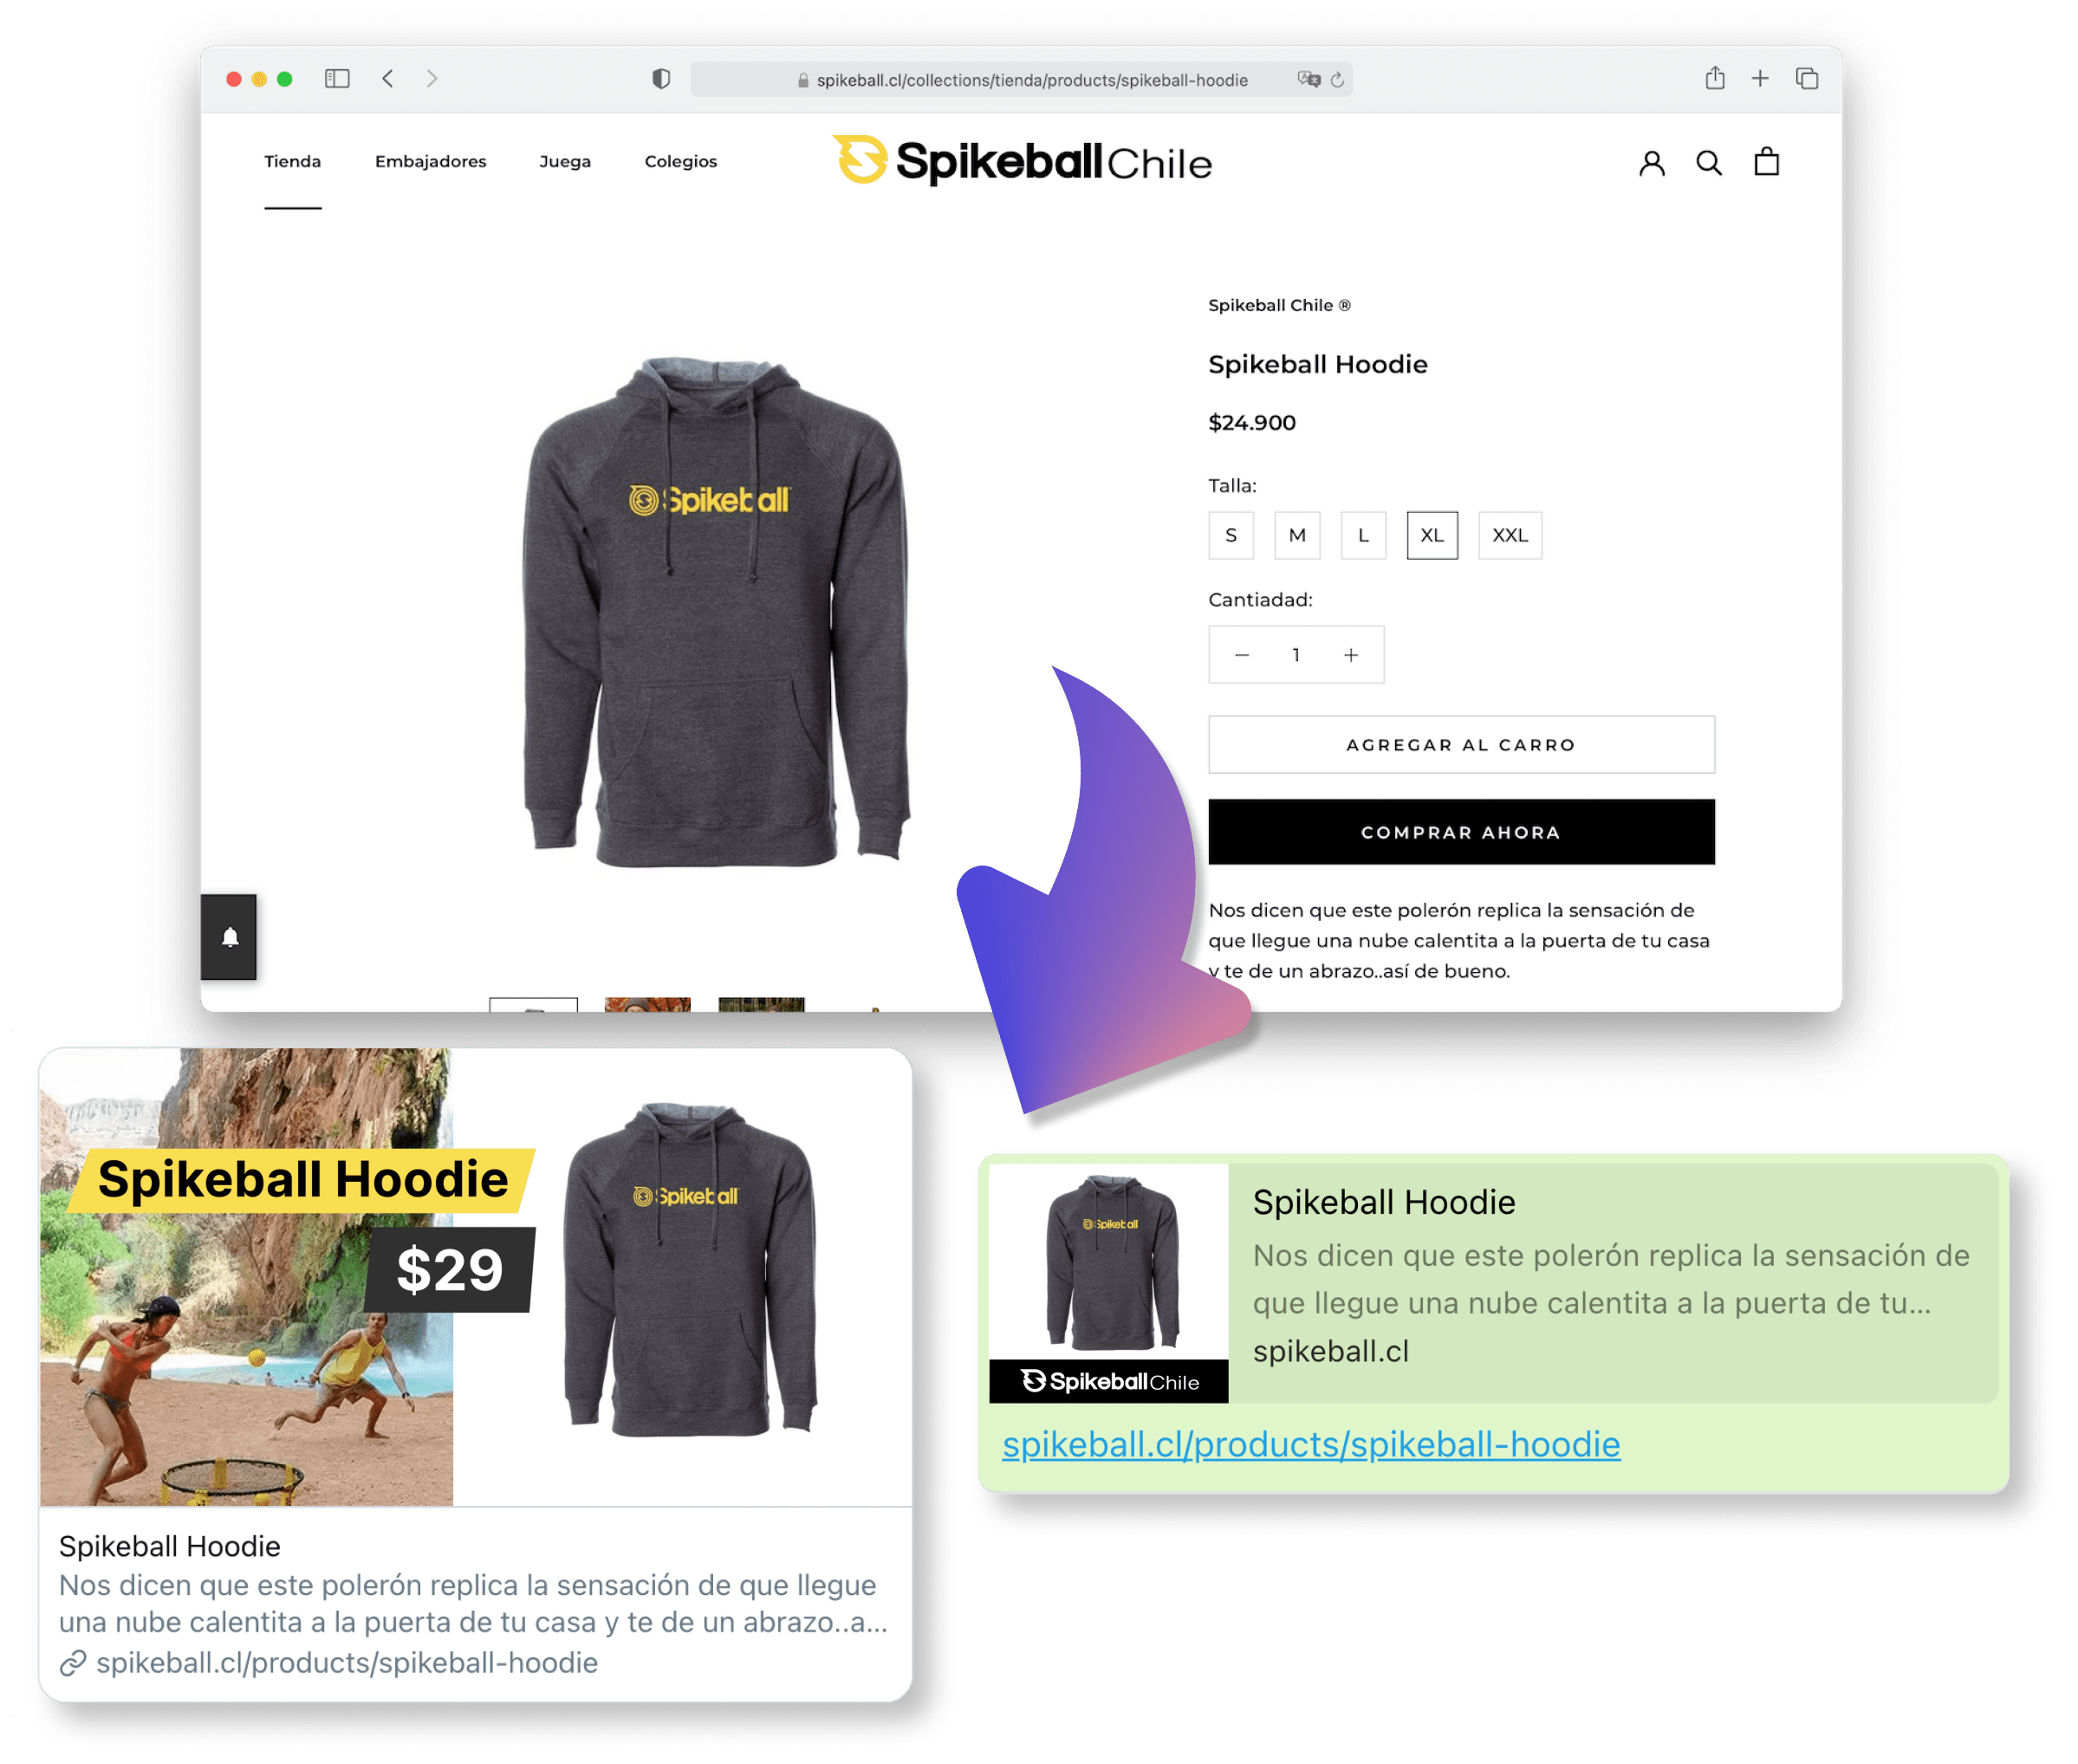
Go to your dashboard here and create a rule like the following:

Voilà!
Advanced usage
Advanced features include:
- Custom variables: additional information for your preview that is not present in your website. [Note: if you need customization you should take a look at Flyyer Render]
- Custom metadata: set custom width, height, resolution, and more (see example).
- Signed URLs.
Here you have a detailed full example for project website-com and path /path/to/product.
flyyer = Flyyer::Flyyer.create do |f|
  # [Required] Your project slug, find it in your dashboard https://www.flyyer.io/dashboard/_/projects/_/integrate.
  f.project = 'website-com'
  # [Recommended] The current path of your website (by default it's `/`).
  f.path = '/path/to/product'
  # [Optional] In case you want to provide information that is not present in your page set it here.
  f.variables = {
    'title': 'Product name',
    'img': 'https://flyyer.io/img/marketplace/flyyer-banner.png',
  }
  # [Optional] Custom metadata for rendering the image. ID is recommended so we provide you with better statistics.
  f.meta = {
    'id': 'jeans-123', # recommended for better stats
    'v': '12369420123', # specific handler version, by default it's a random number to circumvent platforms' cache,
    'width': 1200,
    'height': 600,
    'resolution': 0.9, # from 0.0 to 1.0
    'agent': 'whatsapp', # force dimensions for specific platform
  }
end

# Use this image in your <head/> tags (og:image & twitter:image)
puts flyyer.href
# > https://cdn.flyyer.io/v2/website-com/_/__id=jeans-123&__v=1618281823&img=https%3A%2F%2Fflyyer.io%2Fimg%2Fmarketplace%2Fflyyer-banner.png&title=Product+name/path/to/product

# IMPORTANT: if you're using Ruby on Rails, please use `flyyer.href.html_safe` to prevent double serialization
For signed URLs, just provide your secret (find it in Dashboard > Project > Advanced settings) and choose a strategy (HMAC or JWT).
flyyer = Flyyer::Flyyer.create do |f|
  f.project = 'website-com'
  f.path = '/path/to/product'
  f.secret = 'your-secret-key'
  f.strategy = 'JWT' # or 'HMAC'
end

url = flyyer.href
# > https://cdn.flyyer.io/v2/website-com/jwt-eyJ0eXAiOiJKV1QiLCJhbGciOiJIUzI1NiJ9.eyJwYXJhbXMiOnsiX19pZCI6ImplYW5zLTEyMyJ9LCJwYXRoIjoiXC9wYXRoXC90b1wvcHJvZHVjdCJ9.X8Vs5SGEA1-3M6bH-h24jhQnbwH95V_G0f-gPhTBTzE?__v=1618283086

# IMPORTANT: if you're using Ruby on Rails, please prevent double serialization like the following:
url = flyyer.href.html_safe
Flyyer Render
As you probably realized, Flyyer uses the rules defined on your dashboard to decide how to handle every image based on path patterns. It analyses your website to obtain information and then render a content-rich image with no effort. Let's say "Flyyer delivers images based on the content of this route".
Flyyer Render instead requires you to explicitly declare template and variables for the images to render, giving you more control for customization. Let's say "FlyyerRender delivers an image using this template and these explicit variables".
require 'flyyer'

flyyer = Flyyer::FlyyerRender.create do |f|
  f.tenant = 'tenant'
  f.deck = 'deck'
  f.template = 'template'
  f.variables = {
      title: 'Hello world!'
  }
end

# Use this image in your <head/> tags
url = flyyer.href
# > https://cdn.flyyer.io/render/v2/tenant/deck/template.jpeg?__v=1596906866&title=Hello+world%21

# IMPORTANT: if you're using Ruby on Rails, please prevent double serialization like the following:
url = flyyer.href.html_safe
Variables can be complex arrays and hashes.
flyyer = Flyyer::FlyyerRender.create do |f|
  # ...
  f.variables = {
      items: [
          { text: 'Oranges', count: 12 },
          { text: 'Apples', count: 14 },
      ],
  }
  f.meta = {
    id: 'slug-or-id', # To identify the resource in our analytics report
  }
end
IMPORTANT: variables must be serializable.
To decode the URL for debugging purposes:
print(CGI.unescape(url))
# > https://cdn.flyyer.io/render/v2/tenant/deck/template.jpeg?title=Hello+world!&__v=123
Development
After checking out the repo, run bin/setup to install dependencies. Then, run rake spec to run the tests. You can also run bin/console for an interactive prompt that will allow you to experiment.
To install this gem onto your local machine, run bundle exec rake install. To release a new version, update the version number in version.rb, and then run bundle exec rake release, which will create a git tag for the version, push git commits and tags, and push the .gem file to rubygems.org.
Test
Run Rake tests with:
rake spec