Genetalks / Gtz
Labels
Projects that are alternatives of or similar to Gtz
GTX.Zip Professional Version (Latest Version GTZ 3.0.0)
中文说明.
QQ group(s): 934492381
|
WeChat group(s):
|
Powered by GTXLab of Genetalks.
Index
- What is GTX.Zip?
- Product Series
- Supported Bioinformatic Analysis Softwares
- Feature
- Environment Requirements
- How to Install?
- Let's Do It!
- How to use?
- Usage
- GTZ Ecology Softwares
- Change Log
- FAQ
- Contact Us
- License
What is GTX.Zip?
GTX.Zip (GTZ for short) is a high performance lossless compression tool for arbitrary files, and has a particularly high compression rate for genetic data which can compress the FASTQ to 2% ( almost 1/6 ~1/8 of fastq.gz ) of the original size even at the speed of 1100MB/s for fastq file. GTX.Zip also support to recompress fastq.gz file directly.
Product Series
| Product | Version | Description | How to Get |
|---|---|---|---|
| GTX.Zip Professional | V3.0.0 | Companies, Institutions and individual users that with large local sequencing data | Install |
| GTX.Zip Enterprise | V1.0.1 | Large-scale enterprises and data centers that with PB-level sequencing data and require distributed compression by their own computing clusters | Contact Us |
| GTX.Zip Cloud | V1.0.1 | Companies that with large amounts of sequencing data distribution and storage in the cloud | http://gtz.io |
Supported Bioinformatic Analysis Softwares
-
BWA 0.7 for GTX.Zip is the the most widely used software package for mapping DNA sequences that can input XXX.gtz file directly. It consists of two softwares : bwa 0.7 and bwa-opt 0.7.
- bwa-opt 0.7 is the optimized version that is about 30% faster than standard bwa, and its mapping results are completely consistent with those of standard bwa.
-
BOWTIE / BOWTIE2 for GTX.Zip is an ultrafast and memory-efficient tool for aligning sequencing reads to long reference sequences. It can input XXX.gtz file directly, and You can use this tool as if you are using the official version.
- BOWTIE for GTX.Zip based on BOWTIE 1.2.2 version.
- BOWTIE2 for GTX.Zip based on BOWTIE2 2.3.4.3 version.
Feature
GTX.Zip compressor system features:
- High Compression Ratio: The system implements Context Model compression technology, with a variety of optimized predicting model, and balancing the system concurrent and memory resources consumption, thus achieving a extreme high compression rate. For FASTQ files, GTX.Zip is capable to compress the original fastq file to 2.53%. The compression rate of GTX.Zip is about 3-6 times of gzip compressor which could save up to 80% storage space and transfer costs.
| Data List | Compression rate of GTX.Zip | Compression rate of Fastq.gz |
|---|---|---|
| Nova_wes_1.fq | 2.53% | 17.15% |
| Nova_wes_2.fq | 3.45% | 18.34% |
| nova_wgs_1.fq | 3.18% | 17.55% |
| nova_wgs_2.fq | 3.93% | 18.66% |
| nova_rna_1.fq | 4.56% | 17.70% |
| nova_rna_2.fq | 5.39% | 18.94% |
-
High Performance: GTX.Zip fully exploits the concurrency of the CPU, the new Haswell CPU architecture, and the computing power of the new instructions such as AVX2, BMI2, which makes GTX.Zip gain high compression speed even on a ordinary computing server, with the throughput of 1100MB/s for a single compression node. GTX.Zip Enterprise supports large-scale distributed compression.
-
Safety Guarantee: Thanks to its high speed, during the process of GTX.Zip compression, the data decompression and restore test is performed. The compression process will be done only after the data has been confirmed exactly the same as the source data. MD5 validation is performed to ensure data integrity as well.
-
Software Ecology: GTX.Zip provides command line and GUI decompression software for Linux, Mac OSX and Windows. It also provides SDK interfaces in languages such as Python, C, C++, etc. which is convenient for third-party developers to read and write gtz file (GTX.Zip compression format) directly. For example, gtz version of bcl2fastq, fastp and BWA are supported by community now.
If you want to get these softwares, please go to -GTZ Ecology Softwares-. -
Nirvana Plan:
As an enterprise-level software, GTX.Zip has developed a nirvana program for high-availability requirements to ensure that users can decompress compressed data into original data under the extreme condition. The nirvana plan's dual availability protection strategy is as follows:- GTX.Zip is multi-site hosted. http://gtz.io website, GitHub and other sites will permanently host all versions of GTX.Zip, to make sure that it is available to the entire network all the time and free of charge at any time.
- To ensure that compressed data can be restored to original file under any conditions, pre-embedded micro decompression programs could be extract from compressed data first, and then be used to decompress the file.
- Please click -here- for usage.
System Environment Requirements
-
64-bit Linux system (CentOS >= 6.1;Ubuntu >= 12.04, < 18.04)
-
On the linux operating system,to achieve good performance, the computing server with 32-core 64GB memory is recommended, or that has the same configuration with the AWS C4.8xlarge machine)
-
64-bit Windows system (Win7,Win10)
How to Install (Linux)
- Mode 1: Install directly from the command line(recommended installation method)
Install for ALL USERS:
sudo curl -SL https://gtz.io/gtz_latest.run -o /tmp/gtz.run && sudo sh /tmp/gtz.run
Once installed, a GTZ executable and a license file are placed in /usr/local/GTZ directory, GTZ's softlink is created to /usr/bin
Only install for CURRENT USER:
curl -SL https://gtz.io/gtz_latest.run -o /tmp/gtz.run && sh /tmp/gtz.run && source ~/.bashrc
Once installed, a GTZ executable and a license file are placed in the current user's ~/.config/GTZ directory, GTZ's alias is added to ~/.bashrc
- Mode 2: First download the software and then install it.
First download the software from -GTX.Zip Professional-.
Commercially authorized users get from [email protected] .
Install for ALL USERS:
sudo sh gtz_latest.run
Once installed, a GTZ executable and a license file are placed in /usr/local/GTZ directory, GTZ's softlink is created to /usr/bin
Only install for CURRENT USER:
sh gtz_latest.run && source ~/.bashrc
Once installed, a GTZ executable and a license file are placed in the current user's ~/.config/GTZ directory, GTZ's alias is added to ~/.bashrc
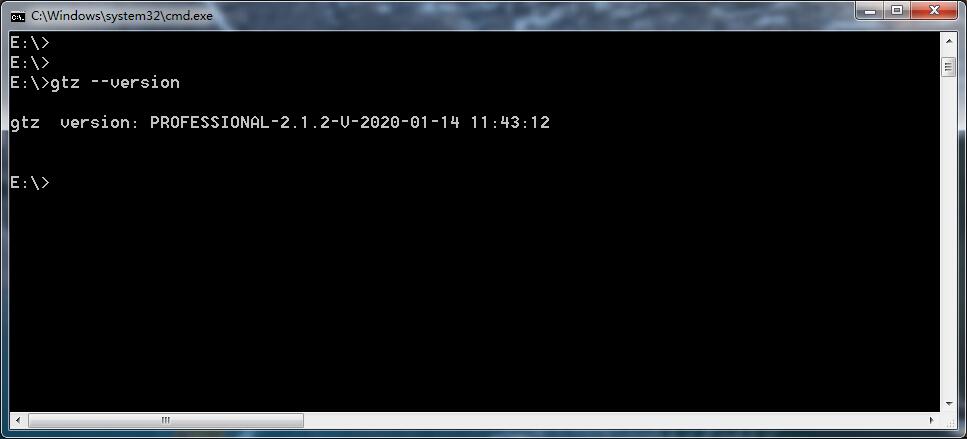
- Verify that the installation was successful
Running the following command, the corresponding software version information appears, indicates that the installation was successful
gtz --version
How to Install (Windows)
-
Install
The download links of Installation package https://gtz.io/gtz-2.1.4-x64-setup.exe
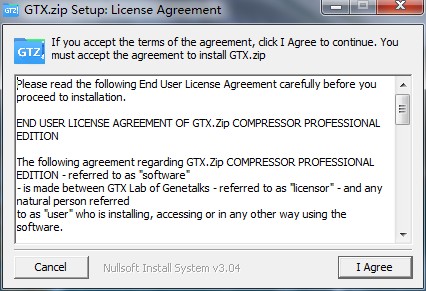
Double-click on gtz-X.X.X-x64-setup.exe to start the installation:
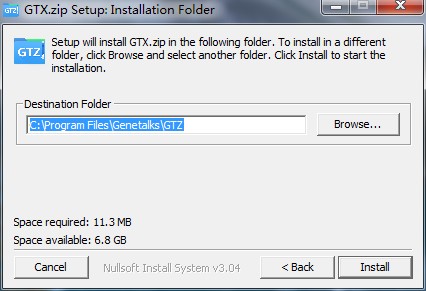
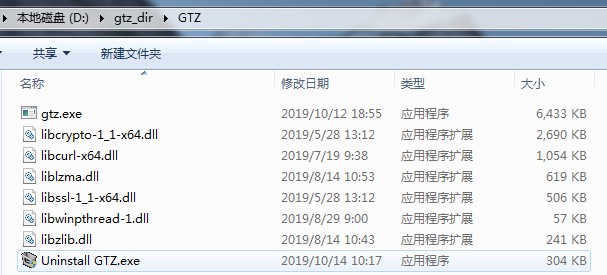
Select the installation directory:
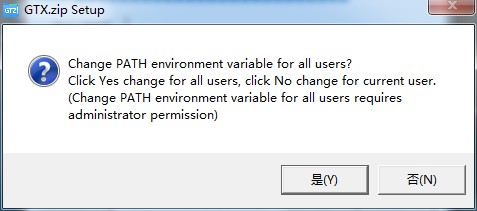
Select "Yes" to complete the configuration of the PATH environment variable, then you can execute the gtz program on any path:
The installation is completed:
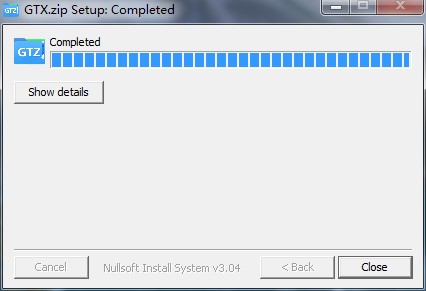
After the installation is complete, open the cmd command window to see if it has been successfully installed; and use it by entering the command line:
-
Uninstall
Open the windows system shortcut menu and select Uninstall GTZ:
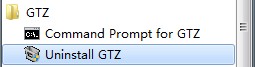
Or enter the installation directory,run Uninstall GTX.exe :
How to Install (MacOS)
-
Install
The download links of Installation package https://gtz.io/gtz-2.1.4-x64-setup.pkg
Double-click on gtz-2.1.4-x64-setup.pkg to start the installation:
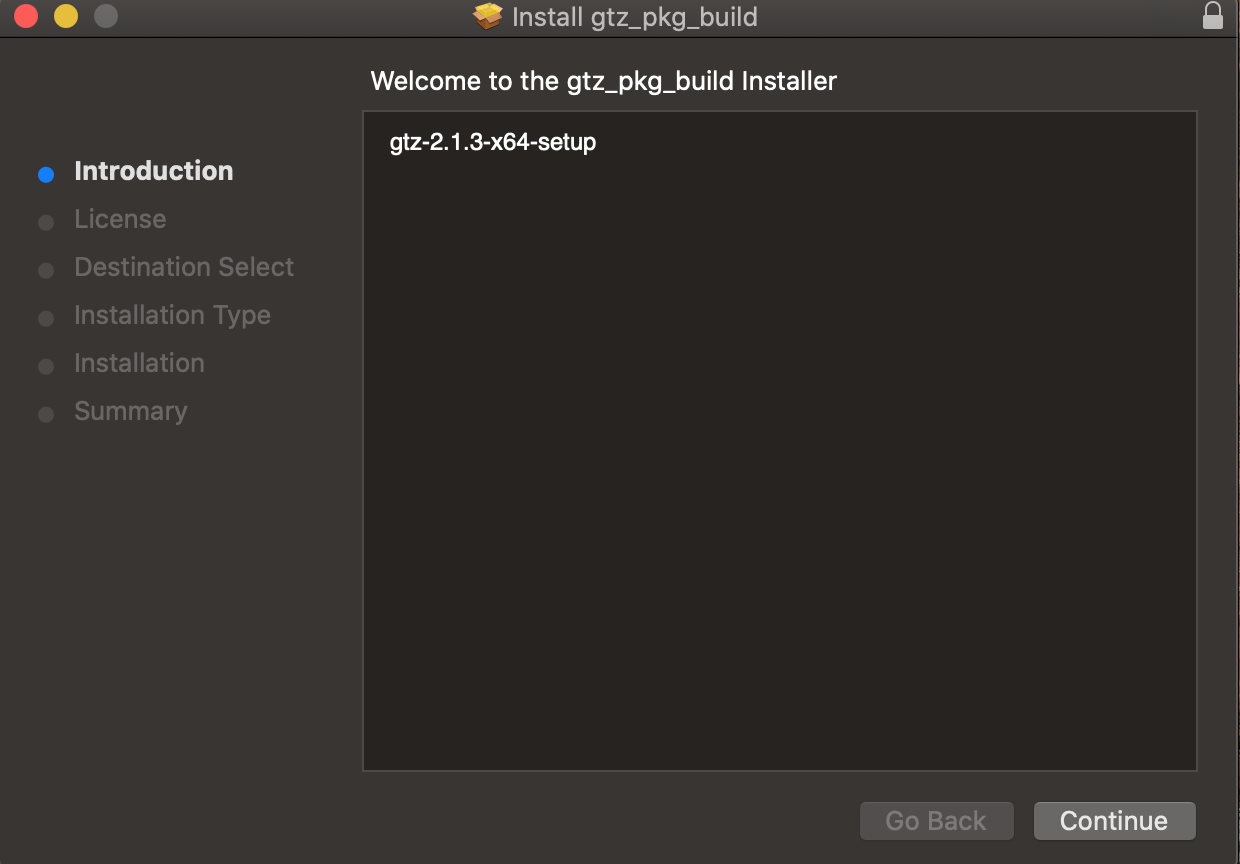
Select “Continue”:
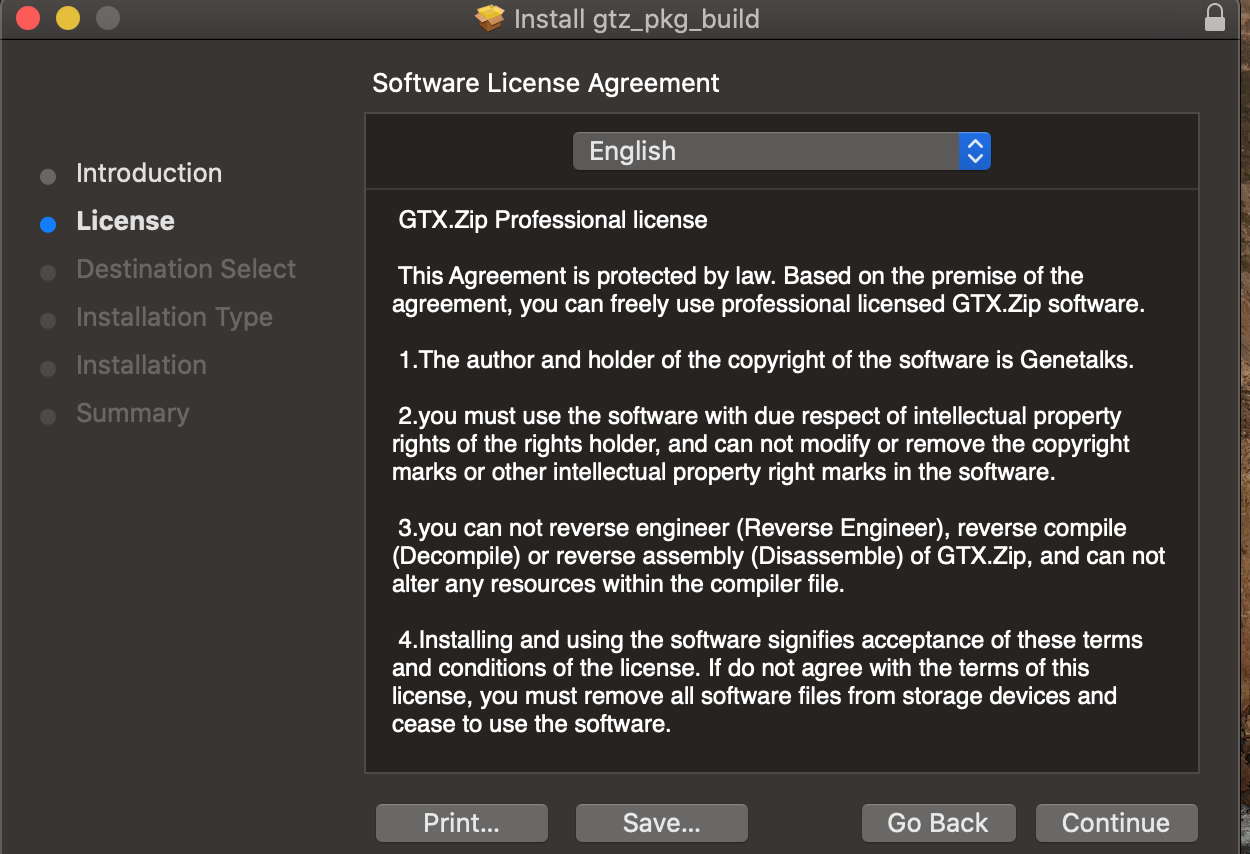
Select “Continue”:
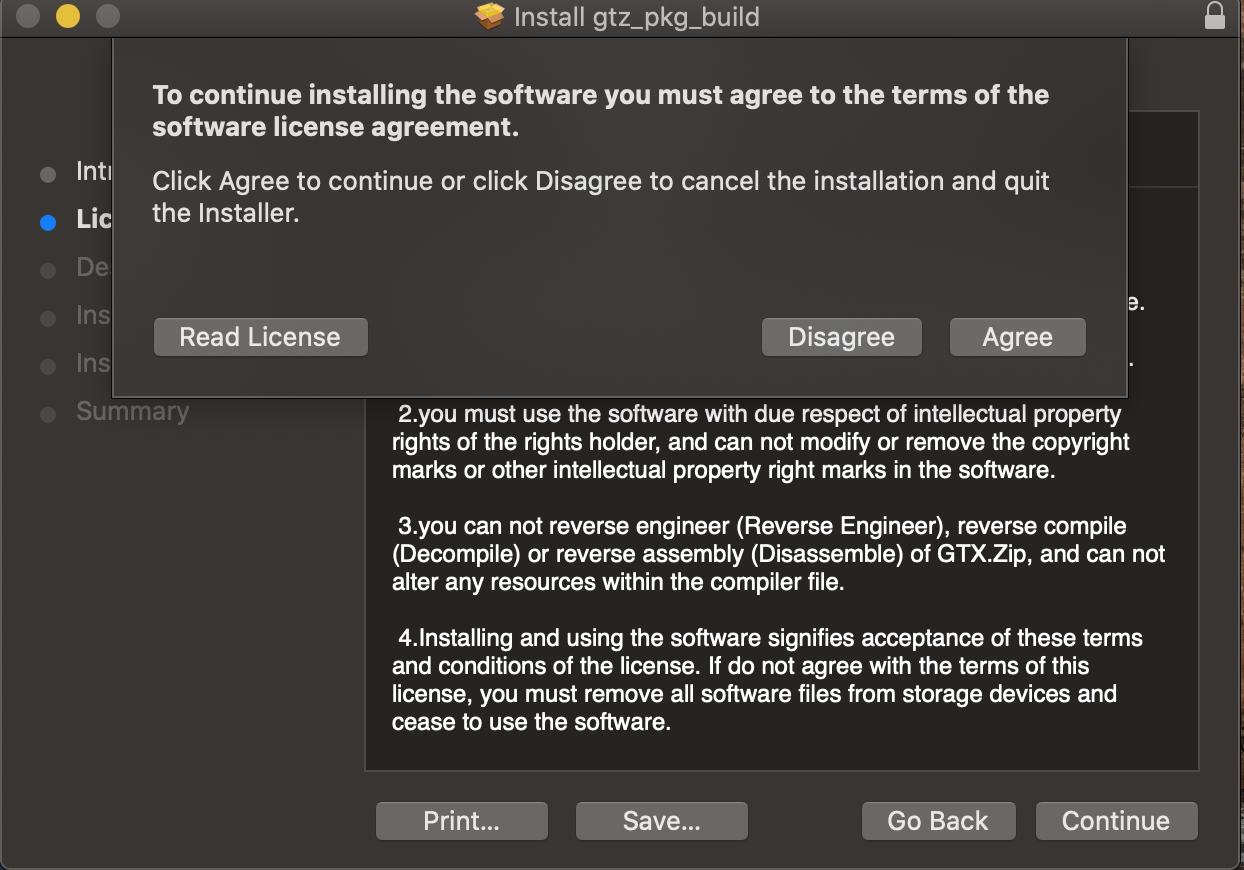
Select “Agree”:
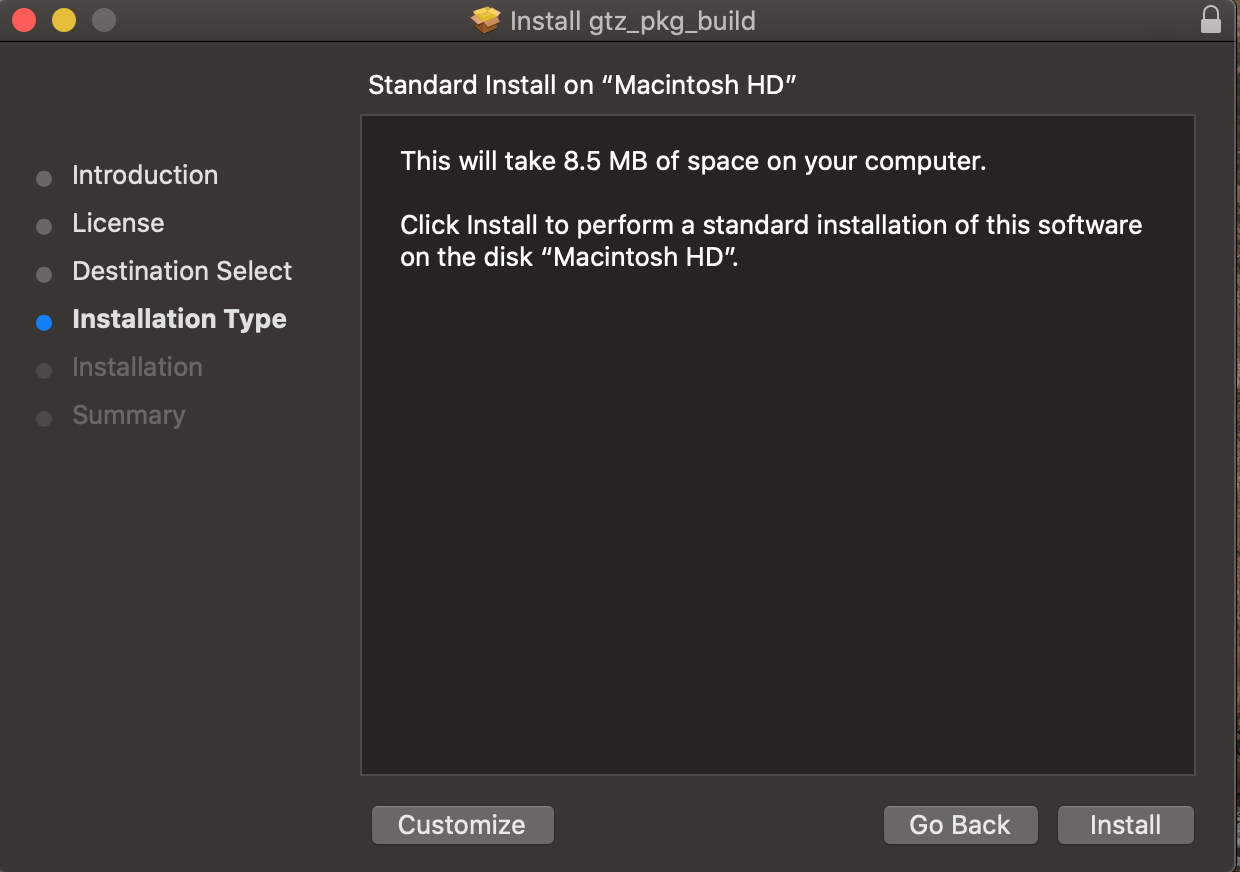
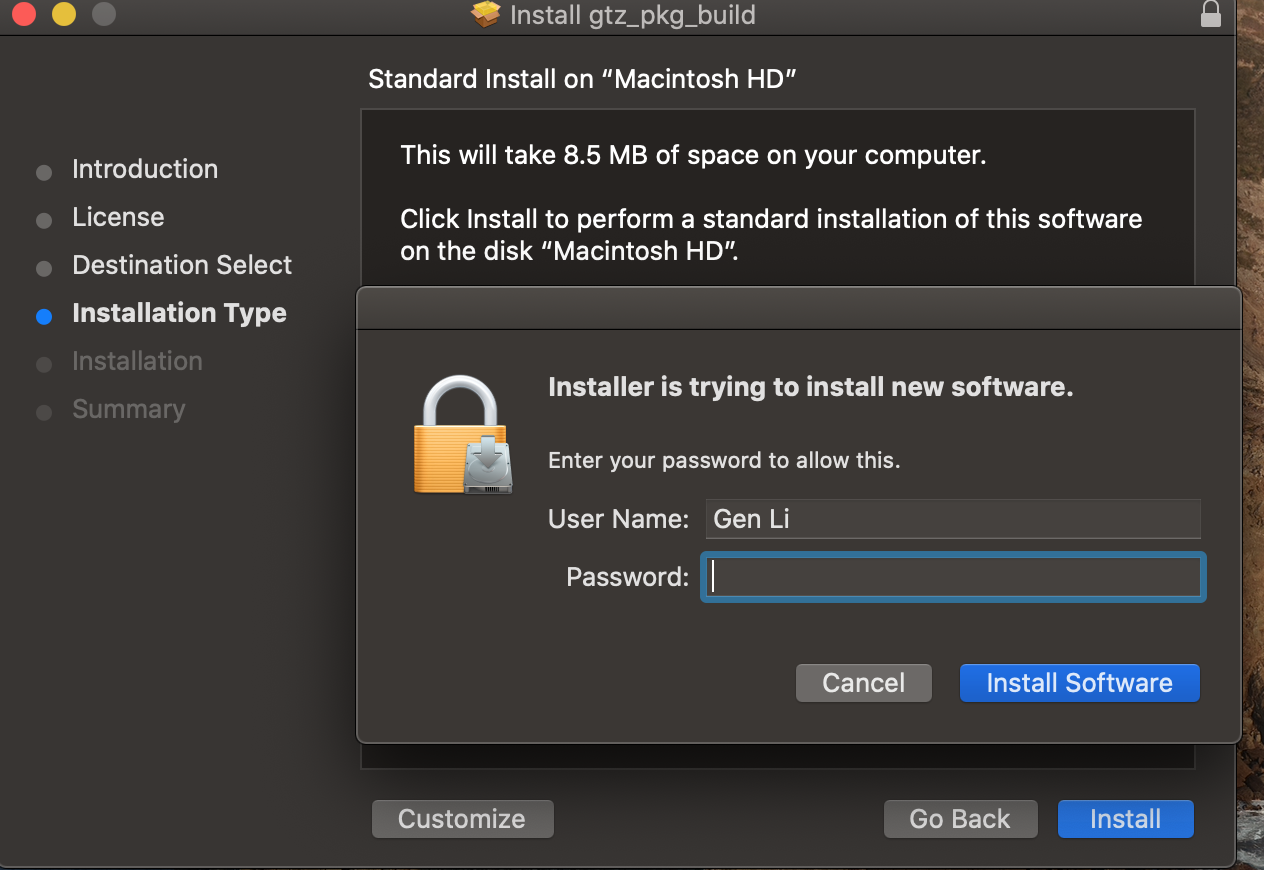
Select “Install”, then enter your user name and password, click "Install Software":
Installation is successful, click "Close":
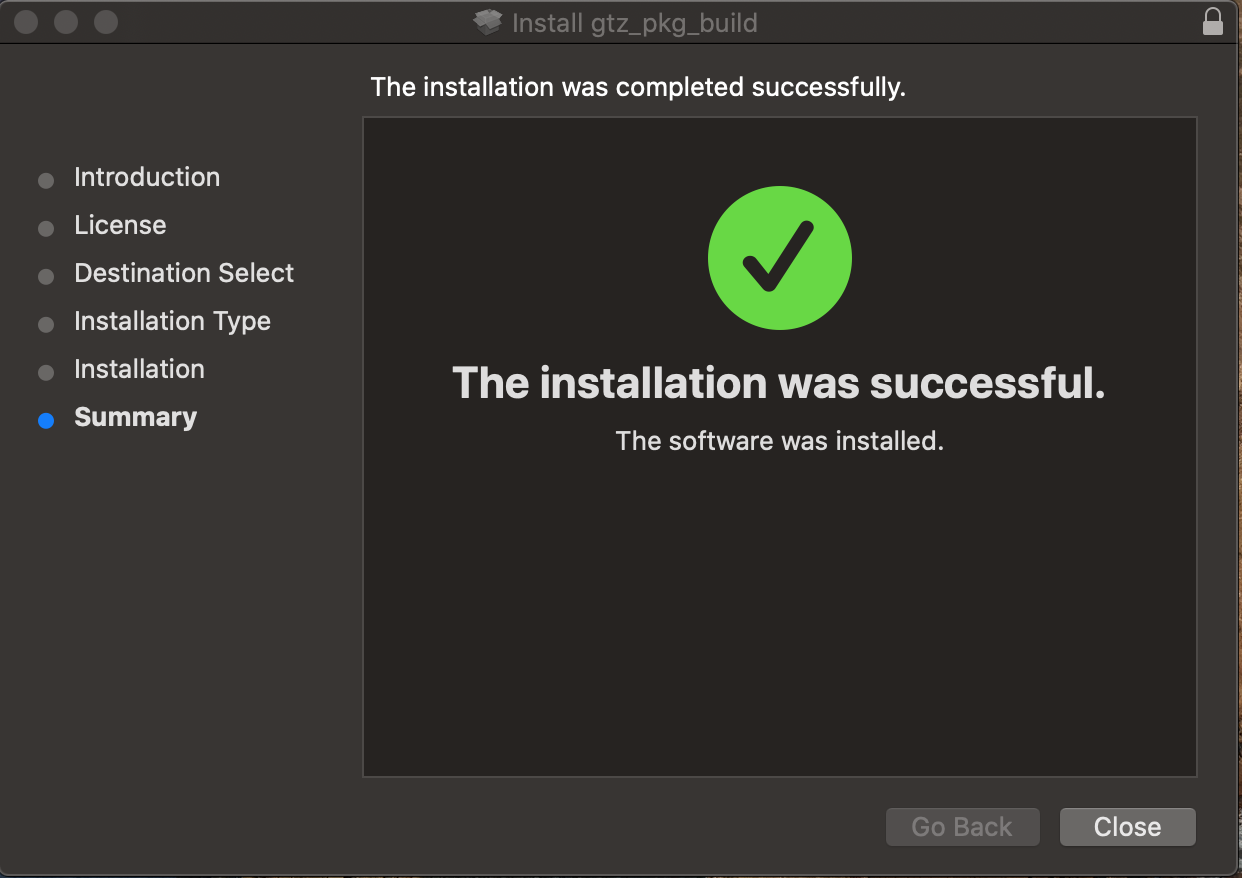
-
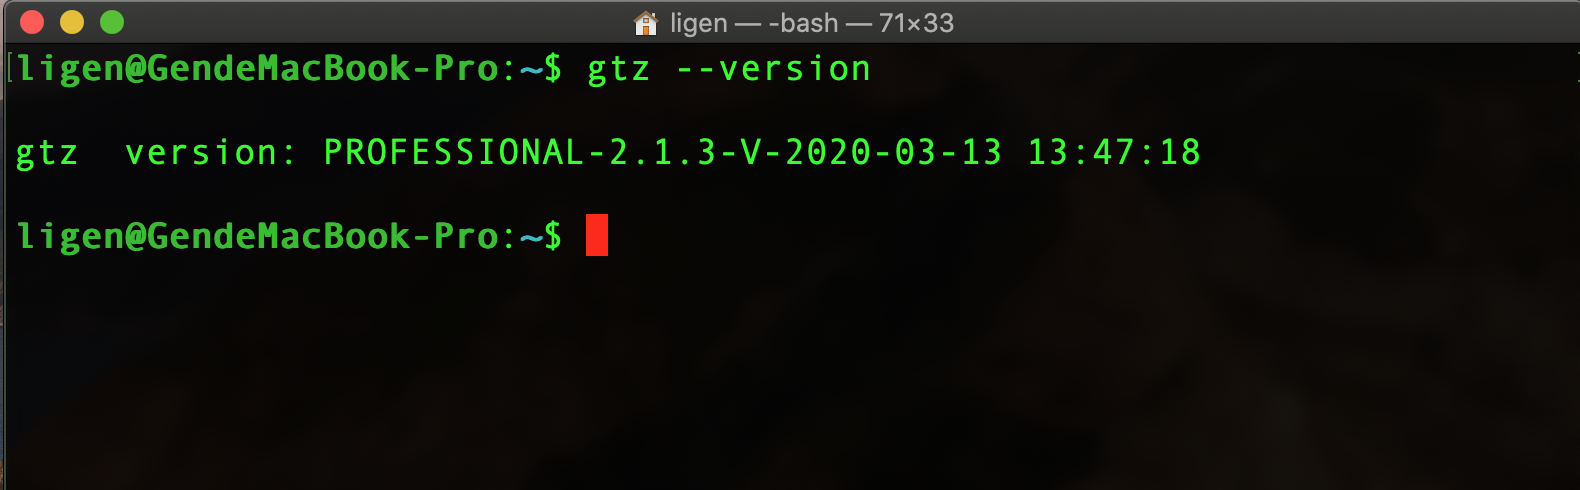
Verify that the installation was successful
Open the terminal and run the following command. If the corresponding software version information appears, the installation is successful. After the installation is successful, you can use the gtz program through the command line in the terminal::
Quick Start (Linux)
GTX.Zip Professional needs to be installed on the current machine. If not, please see -How to Install- .
1. Download samples file to be compressed
Sample Download: -sample.fq-* 2GB fastq file, extracted from a real WES data produced by Novaseq
Reference genome Download: -GCF_000001405.37_GRCh38.p11_genomic.fna.gz-
2. Start compression
gtz sample.fq --ref GCF_000001405.37_GRCh38.p11_genomic.fna.gz* gtz can also directly compress fastq.gz file
3、decompress
gtz -d sample.fq.gtzQuick Start (Windows)
GTX.Zip Professional needs to be installed on the current machine. If not, please see -How to Install- .
1. Download samples file to be compressed
Sample Download: -sample.fq-* 2GB fastq file, extracted from a real WES data produced by Novaseq
Reference genome Download: -GCF_000001405.37_GRCh38.p11_genomic.fna.gz-
2. Open Windows command window
gtz --version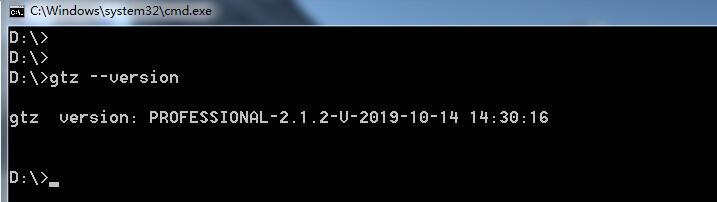
3. Start compression
gtz sample.fq --ref GCF_000001405.37_GRCh38.p11_genomic.fna.gz* gtz can also directly compress fastq.gz file
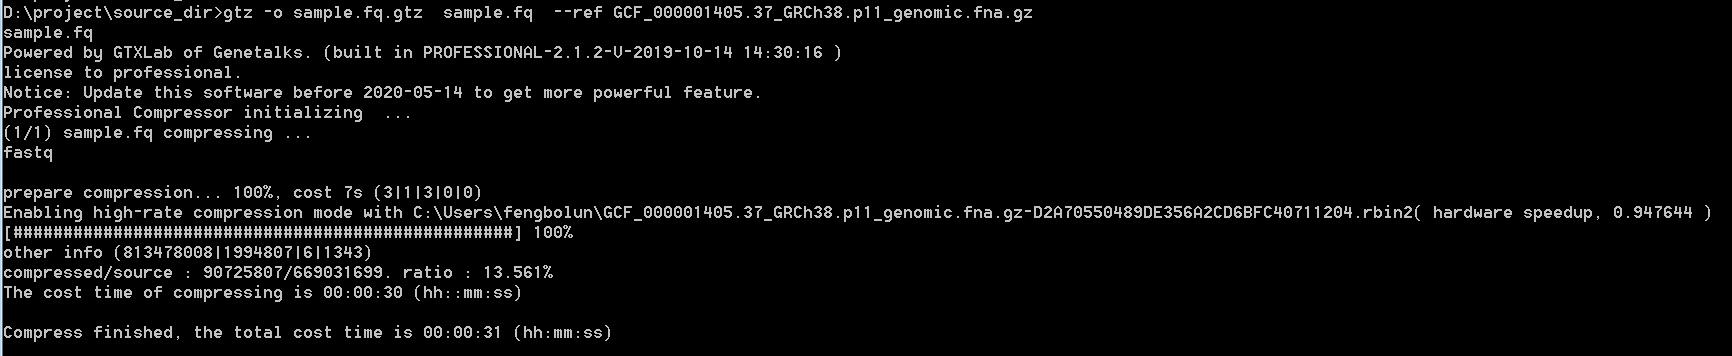
4、decompress
gtz -d sample.fq.gtz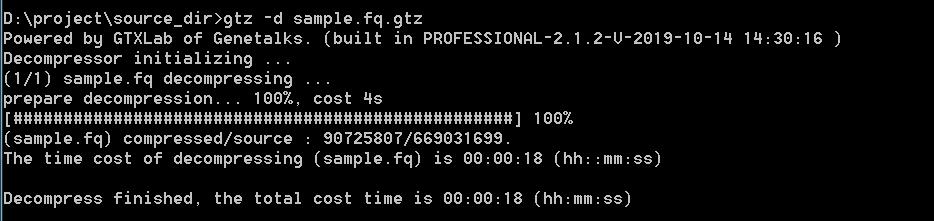
How to use
Command navigation:
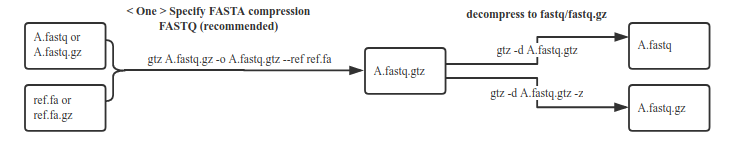
high compression rate with fasta, Decompress without using fasta anymore(recommended)
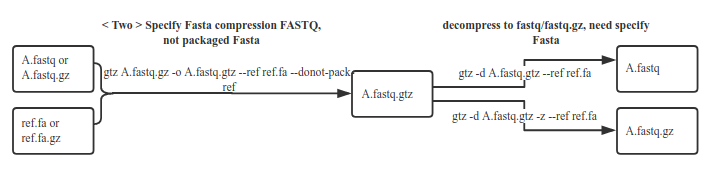
Higher compression rate, Decompress use the fasta exactly the same as compressing (Note: You and your client must properly store the fasta file for decompression in future)
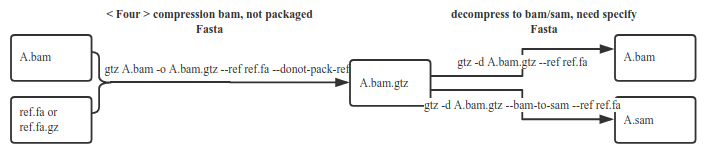
compress BAM, Decompress without using fasta anymore(recommended)

Decompress use the fasta exactly the same as compressing (Note: You and your client must properly store the fasta file for decompression in future)
Lower compression rate than above, but can compress arbitrary files

Usage example:
1. Compression fastq/fastq.gz (high-power compression)
1.1 Default compression mode for fastq
gtz /data/nova.fastq.gz --ref /fasta/genomic.fna(.gz)The ref parameter is used to specify the reference genome fasta file for the nova.fastq.gz corresponding species, and the fasta file also supports the gz format.Note: After compression, and the fasta file is no longer needed when decompress.
1.2 Default compression mode for bam
gtz /data/nova.bam --ref /fasta/genomic.fna(.gz)The ref parameter is used to specify the reference genome fasta file for the nova.bam corresponding species, and it's necessary. After compression, and the fasta file is no longer needed when decompress.
1.3 Specify the output file name
gtz /data/nova.fastq.gz --ref /fasta/genomic.fna -o /out/nova.gtz-o parameter specifies the output file name, note that the lowercase letter o
1.4 Decompression and Check after Compression Completion
gtz /data/nova.fastq.gz --ref /fasta/genomic.fna --verifyAfter the data compression is completed, GTX.Zip will decompress it again to verify data MD5 and ensure that data can be fully restored. When the compressed file is used for archiving, this verify parameter isrecommended to be added. It is not necessary to add this parameter in peacetime.
1.5 Fast compression
gtz /data/nova.fastq.gz --ref /fasta/genomic.fna -l 1-l Parametric specified compression level. 1-5 is a fast compression mode. The current compression algorithm used in 1-5 is the same, here is mainly for future expansion. The same compression algorithm used in 6-9, which is also for future expansion. 6 is the default compression level, that is, the highest compression algorithm.
1.6 Limit compressed threads
gtz /data/nova.fastq.gz --ref /fasta/genomic.fna -p 4-p parameter specifies the number of threads used for compression,Here -p 4 means that only 4 threads will be used in the entire compression process, which is very useful when there are not enough computing resources.
1.7 Modify the default cache path
gtz /data/nova.fastq.gz --ref /fasta/genomic.fna --cache-path /path/cache/When using -- ref to specify fasta, GTZ converts FASTA to the corresponding binary file and caches it to the default path (/ home / user /. config / gtz), so that when the same FASTA is specified for the next compression, GTZ can read data directly from the cache path, which is relatively fast. You can use this parameter if you need it (for example, / home/user does not have enough space)
1.8 Do not package fasta files
gtz /data/nova.fastq.gz --ref /fasta/genomic.fna --donot-pack-refUsing the-donot-pack-ref option, the resulting target gtz file is smaller, but the corresponding fasta needs to be specified when unzipping. We do not recommend using this option because without this option, the compression ratio has little effectcompared to this option, but if you use this option, you need to specify the appropriate fasta when unzipping and you have to ensure the fasta is properly saved in safe disk.
2. Ordinary compression
2.1 compression fastq/fastq.gz
gtz /data/nova.fastq.gzWhen not using --ref to specify fasta, GTZ compresses the fastq file normally, and the compression rate of common compression is much lower than that of high compression in most cases.
2.2 Compression of non-fastq/fastq.gz files
gtz /data/test.bamGTZ can compress any file
3. Decompression
3.1 Decompress the fastq.gtz file with FASTA compression without FASTA
gtz -d nova.fastq.gtzUnzipping gtz files with fasta compression by default does not require fasta files, which is a feature of gtz2.x.x
3.2 Decompress the bam.gtz file with FASTA compression without FASTA
gtz -d nova.bam.gtzgtz -d nova.bam.gtz --bam-to-samdefault, bam.gtz is unzip to bam, if want to unzip to sam, add paramters --bam-to-sam
3.3 Unzip the gtz file with fasta compression. You need to specify fasta
gtz -d nova.fastq.gtz --ref /fasta/genomic.fna(.gz)If the compression takes fasta, and uses the-donot-pack-ref parameter, you need to specify the fasta to be used when decompressing.
3.3 Decompress to terminal
gtz -d nova.fastq.gtz -c 2>/dev/null-C parameter represents decompression to the terminal. 2>/dev/null means that other prints are removed and only the extracted fastq content is printed.
3.4 Unzip to the specified path
gtz -d nova.fastq.gtz -O /path/out/-O parameter specifies the output directory of the decompressed file. Note that the capital letter O
3.5 Limit decompression threads
gtz -d nova.fastq.gtz -p 4The -P parameter is also suitable for decompression, here the -P 4 means that only four threads are used for decompression.
3.6 Unzip low version gtz files with bin compression
gtz -d nova.fastq.old.gtz -r Homo_sapiens_bcacac9064331276504f27c6cf40e580.rbinThe -r parameter is used for compatibility with GTZ version, which is lower than 2.0.0. Version 2.0 can compress any GTZ file in the old version. When the old version of GTZ compresses fastq text and uses the -b parameter to specify the corresponding bin file, then version 2.0.0 can use - r to specify the corresponding RBIN file to decompress the old version of GTZ file.
Parameter description:
--ref <string> @ compress : specifies Fasta corresponding to the compressed file, which results in a higher compression rate @ decompress : if compression uses Fasta and parameter --donot-pack-ref is used, the corresponding Fasta needs to be specified by this parameter when decompressing --bam-to-sam @ compress : do not use @ decompress : decompress bam to sam, it's valid only for BAM, otherwise bam decompressed to bam -z, --fastq-to-fastq-gz @ compress : do not use @ decompress : decompress fastq to fastq.gz, it's valid only for FASTQ --cache-path <string> @ compress : when Fasta is specified by --ref, GTZ converts the Fasta to the corresponding binary file and then caches it to the default path, so that when the same Fasta is specified for compression, GTZ can read directly data from cache path, which is relatively fast. default cache path is /home/xuxl/.config/gtz, you can use this parameter to change it @ decompress : same as compress --donot-pack-ref @ compress : this option is not recommended. By default, when compression uses Fasta, GTZ extracts data from the Fasta and then compresses it to the GTZ file, so that the resulting GTZ file is no longer required Fasta when decompressed. use this option or not, the compression rate has a low impact, but if you use this option, you need to specify the corresponding Fasta when decompressing @ decompress : do not use --verify @ compress : after data compression, decompress the generated GTZ file again to ensure that the generated GTZ file must be decompressed. Usually it's not necessary, but if it's used for archiving, you can use this parameter. @ decompress : do not use -l <number>, --level <number> @ compress : [1-5] is fast compress mode, at present, 1-5 compression algorithm is same, here is for later expansion. 6 is default. [6-9] is best compress level, compression algorithm is also the same, here is for later expansion @ decompress : when the gtz in FASTQ format is decompressed to fastq.gz, the compression level of gz can be changed by -l/--level, ranging from 0-9, and default level is 4 -r <string>, --rbin-path <string> @ compress : do not use @ decompress : use only for version less than 2.0.0, mainly for compatibility with older versions. when compression specifies the BIN file, You can use this parameter to specify the corresponding RBIN file or the directory in which the RBIN file is located to decompress. -O <string>, --out-dir <string> @ compress : do not use @ decompress : specify the save directory of decompression file -f, --force @ compress : force overwrite of output file @ decompress : same as compress -c, --stdout @ compress : do not use @ decompress : decompression output to terminal -d, --decompress @ compress : do not use @ decompress : specify the GTZ file to decompress -p <number>, --parallel <number> @ compress : specify parallel number, default is CPU logical cores @ decompress : same as compress -o <string>, --out <string> @ compress : specify output GTZ file name @ decompress : do not use -e, --no-keep @ compress : don't keep input files @ decompress : do not use --version Displays version information and exits. -h, --help Displays usage information and exits. <file name> input file name GTX Lab CompressorEcology Softwares
- 1、BWA for GTZ
- 2、BCL2FASTQ for GTZ
- 3、STAR for GTZ
- 4、BOWTIE for GTZ
- 5、BOWTIE2 for GTZ
- 6、TOPHAT for GTZ
- 7、HISAT2 for GTZ
- 8、MEGAHIT for GTZ
- 9、FASTQC for GTZ
- 10、FASTP for GTZ
- 11、MINIMAP2 for GTZ
- 12、WTDBG2 for GTZ
- 13、BWA-MEM2 for GTZ
1、BWA for GTZ (support gtz 2.x.x version)
-
How to Install?
Mode 1: Install directly from the command line(recommended installation method)
Install for ALL USERS:
sudo curl -SL https://gtz.io/bwagtz_latest.run -o /tmp/bwagtz.run && sudo sh /tmp/bwagtz.runOnce installed, bwa-gtz and bwa-opt-gtz executable file are placed in /usr/local/bwa-gtz directory, bwa-gtz's and bwa-opt-gtz's softlink is created to /usr/bin
Only install for CURRENT USER:
curl -SL https://gtz.io/bwagtz_latest.run -o /tmp/bwagtz.run && sh /tmp/bwagtz.run && source ~/.bashrcOnce installed, bwa-gtz and bwa-opt-gtz executable file are placed in the current user's ~/.config/bwa-gtz directory, bwa-gtz's and bwa-opt-gtz's alias is added to ~/.bashrc
Mode 2: First download the software and then install it.
First download the software from -GTX.Zip Professional-.
Commercially authorized users get from [email protected] .
Install for ALL USERS:
sudo sh bwagtz_latest.runOnce installed, bwa-gtz and bwa-opt-gtz executable file are placed in /usr/local/bwa-gtz directory, bwa-gtz's and bwa-opt-gtz'2 softlink is created to /usr/bin
Only install for CURRENT USER:
sh bwagtz_latest.run && source ~/.bashrcOnce installed, bwa-gtz and bwa-opt-gtz executable file are placed in the current user's ~/.config/bwa-gtz directory, bwa-gtz's and bwa-opt-gtz's alias is added to ~/.bashrc
-
How to Use?
GTX.Zip's support package for BWA includes bwa-gtz and bwa-opt-gtz, both of which are based on version 0.7.17 of bwa. Among them: the two versions have added the ability to read GTZ files directly, and the functions are completely consistent with the main code functions of bwa. bwa-opt-gtz also optimizes the structure of BWA lookup table, which can save more than one third of the time without changing the results of comparison. Due to some changes in the data structure of the lookup table, bwa-opt-gtz is incompatible with the index file data generated by the original bwa. According to the standard steps of bwa, first regenerate the index file, and then compare it with bwa-opt-gtz.
The difference between bwa-gtz and bwa-opt-gtz is as follows:
(1) bwa-gtz can directly use index produced by official website BWA, and its performance is consistent with official website BWA.
(2) bwa-opt-gtz can not directly use the index produced by BWA on official website. index needs to be reproduced by bwa-opt-gtz, but its performance will be improved by 1/3 than that of BWA on official website.
Use examples
Step one: Skip this step if the decompression read.gtz does not require a reference file, otherwise specify the corresponding reference as follows
export GTZ_RBIN_PATH=/path/rbin/(Suitable for gtx1.x.x version, specify the rbin file path for unzip, it's recommended but not required, when not specified gtz will download automatically, will consume a certain amount of time)export GTZ_RBIN_PATH=/path/fasta/xxx.fa(Suitable for gtx2.x.x version, specifies the corresponding fasta file for decompression, must)Step two: execution comparison
bwa-opt-gtz mem ref.fa read1.fq.gtz read2.fq.gtz -t 4 -o aln-pe.sambwa-opt-gtz
Step one: Remake index (must)
bwa-opt-gtz index ref.faStep two: execution comparison,if the decompression requires a specified reference file, refer to bwa-gtz using the example step one
bwa-opt-gtz mem ref.fa read1.fq.gtz read2.fq.gtz -t 4 -o aln-pe.sam -
performance
In the case of sufficient server resources, the performance of bwa-opt-gtz is 1/3 better than that of official bwa. The following is a set of test data in the same environment (the number of specified threads is 4):
Test command
bwa mem ref.fa read1.fq.gz read2.fq.gz -t 4 -o aln-pe.sambwa-gtz mem ref.fa read1.fq.gtz read2.fq.gtz -t 4 -o aln-pe.sambwa-opt-gtz mem ref.fa read1.fq.gtz read2.fq.gtz -t 4 -o aln-pe.samTest environment
Server configuration: 16 core CPU, 64G memory; file size: read1.fq.gz(1.8G), read2.fq.gz(1.8G), read1.fq.gtz(0.3G), read2.fq.gtz(0.3G)
performance data
Software bwa bwa-gtz bwa-opt-gtz Time consumption 50m14.06s 51m37.67s 39m18.86s Memory consumption 5.888G 10.56G 19.84G
2、BCL2FASTQ for GTZ (support gtz 3.0.1)
-
How to Install?
Mode one: Install to the current user, no sudo permissions required
For installation you can (recommended)
curl -SL https://gtz.io/bcl2fastq_gtz_latest.run -o /tmp/bcl2fastqgtz.run && sh /tmp/bcl2fastqgtz.runAfter the first installation, you need to perform a source ~/.bashrc or exit to log back in, and then you can execute bcl2fastq-gtz in any directory
or
download installation files:-GTX.Zip bcl2fastq-gtz-,then install
sh bcl2fastq_gtz_latest.runSimilarly, after the first installation, you need to perform a source ~/.bashrc or exit and log back in again
Mode two: Install to all users, need sudo permissions
For installation you can (recommended)
sudo curl -SL https://gtz.io/bcl2fastq_gtz_latest.run -o /tmp/bcl2fastqgtz.run && sudo sh /tmp/bcl2fastqgtz.runor
download installation files:-GTX.Zip bcl2fastq-gtz-,then install
sudo sh bcl2fastq_gtz_latest.runAfter the installation is complete, you can perform bcl2fastq-gtz in any directory
-
How to Use?
Gtx. Zip's support package for bcl2fastq, based on the v2.20.0.422 version of bcl2fastq.
Default output gtz format, output gz format when command use --no-bgtzf-compression parameter
Example 1. by default, the output result file is in gtz format, taking normal compression(The fastq file generated by bcl2fastq has not passed the quality control, so we can try to use ordinary compression, because the effect of ordinary compression may be better than that of reference genome compression for the fastq file with low quality, which can be selected after comparison)
bcl2fastq-gtz -i ./data/BaseCalls -R ./outdir/run --interop-dir ./outdir/interop -o ./outdir/result --ignore-missing-bcls --ignore-missing-filter --ignore-missing-positions --barcode-mismatches 0 --use-bases-mask y*,i7,i7,y* >./outdir/bcl2fastq.log 2>&1 || touch bcl2fastq.errExample 2. output result file is gtz format, go high compression, specify Fasta file by --ref, also you can use --donot-pack-ref
bcl2fastq-gtz -i ./data/BaseCalls -R ./outdir/run --interop-dir ./outdir/interop -o ./outdir/result --ignore-missing-bcls --ignore-missing-filter --ignore-missing-positions --barcode-mismatches 0 --use-bases-mask y*,i7,i7,y* --ref /GCF_000001405.37_GRCh38.p11_genomic.fna.gz >./outdir/bcl2fastq.log 2>&1 || touch bcl2fastq.errExample 3. output result file is gz format, use --no-bgtzf-compression parameter
bcl2fastq-gtz -i ./data/BaseCalls -R ./outdir/run --interop-dir ./outdir/interop -o ./outdir/result --ignore-missing-bcls --ignore-missing-filter --ignore-missing-positions --barcode-mismatches 0 --use-bases-mask y*,i7,i7,y* --no-bgtzf-compression >./outdir/bcl2fastq.log 2>&1 || touch bcl2fastq.err -
performance
Test command
bcl2fastq -i ./data/BaseCalls -R ./outdir/run --interop-dir ./outdir/interop -o ./outdir/result --ignore-missing-bcls --ignore-missing-filter --ignore-missing-positions --barcode-mismatches 0 --use-bases-mask y*,i7,i7,y* >./outdir/bcl2fastq.log 2>&1 || touch bcl2fastq.errbcl2fastq-gtz -i ./data/BaseCalls -R ./outdir/run --interop-dir ./outdir/interop -o ./outdir/result --ignore-missing-bcls --ignore-missing-filter --ignore-missing-positions --barcode-mismatches 0 --use-bases-mask y*,i7,i7,y* >./outdir/bcl2fastq.log 2>&1 || touch bcl2fastq.errTesting environment
Server configuration: 16 core CPU, 64G memory; file size: ./data/BaseCalls total size 40G
Performance data
bcl2fastq output destination folder total size 40G,bcl2fastq-gtz output destination folder total size 16G
3、STAR for GTZ (support gtz version < 2.x.x)
The official website STAR directly supports the GTZ format, after the installation of GTZ and STAR,
-
First step
make the index file with STAR
STAR --runMode genomeGenerate --genomeDir /path/to/genomeDir --genomeFastaFiles /path/xxx.fastaDetailed reference to the official website documents:
https://github.com/alexdobin/STAR/blob/master/doc/STARmanual.pdf
-
Second Step
perform the mapping operation. an example as follows:
method one
export GTZ_RBIN_PATH=/path/rbin/
STAR --genomeDir /path/to/genomeDir --readFilesIn read1.fq.gtz read2.fq.gtz --readFilesCommand gtz -c -d
* In this example, the path of the RBIN file is specified by the environment variable GTZ_RBIN_PATH, where "export GTZ_RBIN_PATH=/path/rbin/" is not necessary, but if you know the path of rbin, you are advised to specify it, which can speed up GTZ processing. Because when GTZ needs RBIN file and cannot find the RBIN file under the default path ~/.config/gtz, it will be downloaded through the network, and the download process will consume time.
method two
STAR --genomeDir /path/to/genomeDir --readFilesIn read1.fq.gtz read2.fq.gtz --readFilesCommand gtz -r /path/to/gtz_rbin_dir/ -c -d
* In this example, the directory where the RBIN file is located is specified by -r, it's same as method one.
4、BOWTIE for GTZ (support gtz 2.x.x version)
-
How to Install?
Mode 1: Install directly from the command line(recommended installation method)
Install for ALL USERS:
sudo curl -SL https://gtz.io/bowtiegtz_latest.run -o /tmp/bowtiegtz.run && sudo sh /tmp/bowtiegtz.runOnce installed, bowtie-gtz's and bowtie-build-gtz's and bowtie-inspect-gtz's executable file are placed in /usr/local/bowtie-gtz directory, theirs softlink is created to /usr/bin
Only install for CURRENT USER:
curl -SL https://gtz.io/bowtiegtz_latest.run -o /tmp/bowtiegtz.run && sh /tmp/bowtiegtz.run && source ~/.bashrcOnce installed, bowtie-gtz's and bowtie-build-gtz's and bowtie-inspect-gtz's executable file are placed in the current user's ~/.config/bowtie-gtz directory, theirs alias is added to ~/.bashrc
Mode 2: First download the software and then install it.
First download the software from -GTX.Zip Professional-.
Commercially authorized users get from [email protected] .
Install for ALL USERS:
sudo sh bowtiegtz_latest.runOnce installed, bowtie-gtz's and bowtie-build-gtz's and bowtie-inspect-gtz's executable file are placed in /usr/local/bowtie-gtz directory, theirs softlink is created to /usr/bin
Only install for CURRENT USER:
sh bowtiegtz_latest.run && source ~/.bashrcOnce installed, bowtie-gtz's and bowtie-build-gtz's and bowtie-inspect-gtz's executable file are placed in the current user's ~/.config/bowtie-gtz directory, theirs alias is added to ~/.bashrc
-
How to Use?
After installation, three executable programs of bowtie-gtz, bowtie-build-gtz and bowtie-inspect-gtz will be generated. If y is selected when installing "create a soft link to /usr/bin", the above executable program can be run directly in any directory; Otherwise, you need to switch to the installation directory and run with ./bowtie-gtz.
GTX.Zip's support package for bowtie based on 1.2.2 version. Bowtie-gtz can directly use the index produced by bowtie on the official website. You can use bowtie-build or bowtie-build-gtz to make the index. Of course, bowtie-inspect-gtz and bowtie-inspect functions are exactly the same.
Use examples
Step one: make index
bowtie-build-gtz ref.fa ref_indexStep two: execution comparison
1) Skip this step if the decompression reads.fq.gtz does not require a reference file, otherwise specify the corresponding reference as follows
export GTZ_RBIN_PATH=/path/rbin/(Suitable for gtx1.x.x version, specify the rbin file path for unzip, it's recommended but not required, when not specified gtz will download automatically, will consume a certain amount of time)export GTZ_RBIN_PATH=/path/fasta/xxx.fa(Suitable for gtx2.x.x version, specifies the corresponding fasta file for decompression, must)2) execution command
bowtie-gtz -S ref_index reads.fq.gtz eg.sam -
performance
5、BOWTIE2 for GTZ (support gtz 2.x.x version)
-
How to Install?
Mode 1: Install directly from the command line(recommended installation method)
Install for ALL USERS:
sudo curl -SL https://gtz.io/bowtie2gtz_latest.run -o /tmp/bowtie2gtz.run && sudo sh /tmp/bowtie2gtz.runOnce installed, bowtie2-gtz's and bowtie2-build-gtz's and bowtie2-inspect-gtz's executable file are placed in /usr/local/bowtie2-gtz directory, theirs softlink is created to /usr/bin
Only install for CURRENT USER:
curl -SL https://gtz.io/bowtie2gtz_latest.run -o /tmp/bowtie2gtz.run && sh /tmp/bowtie2gtz.run && source ~/.bashrcOnce installed, bowtie2-gtz's and bowtie2-build-gtz's and bowtie2-inspect-gtz's executable file are placed in the current user's ~/.config/bowtie2-gtz directory, theirs alias is added to ~/.bashrc
Mode 2: First download the software and then install it.
First download the software from -GTX.Zip Professional-.
Commercially authorized users get from [email protected] .
Install for ALL USERS:
sudo sh bowtie2gtz_latest.runOnce installed, bowtie2-gtz's and bowtie2-build-gtz's and bowtie2-inspect-gtz's executable file are placed in /usr/local/bowtie2-gtz directory, theirs softlink is created to /usr/bin
Only install for CURRENT USER:
sh bowtie2gtz_latest.run && source ~/.bashrcOnce installed, bowtie2-gtz's and bowtie2-build-gtz's and bowtie2-inspect-gtz's executable file are placed in the current user's ~/.config/bowtie2-gtz directory, theirs alias is added to ~/.bashrc
-
How to Use?
After installation, three executable programs of bowtie2-gtz, bowtie2-build-gtz and bowtie2-inspect-gtz will be generated. If y is selected when installing "create a soft link to /usr/bin", the above executable program can be run directly in any directory; Otherwise, you need to switch to the installation directory and run with ./bowtie2-gtz.
GTX.Zip's support package for bowtie2 based on 2.3.4.3 version. Bowtie2-gtz can directly use the index produced by bowtie2 on the official website. You can use bowtie2-build or bowtie2-build-gtz to make the index. Of course, bowtie2-inspect-gtz and bowtie2-inspect functions are exactly the same.
Use examples
Step one: make index
bowtie2-build-gtz ref.fa ref_indexStep two: execution comparison
1) Skip this step if the decompression read1.fq.gtz and read2.fq.gtz does not require a reference file, otherwise specify the corresponding reference as follows
export GTZ_RBIN_PATH=/path/rbin/(Suitable for gtx1.x.x version, specify the rbin file path for unzip, it's recommended but not required, when not specified gtz will download automatically, will consume a certain amount of time)export GTZ_RBIN_PATH=/path/fasta/xxx.fa(Suitable for gtx2.x.x version, specifies the corresponding fasta file for decompression, must)2) execution command
bowtie2-gtz -x ref_index -1 reads_1.fq.gtz -2 reads_2.fq.gtz -S eg2.sam -p 4 --reorder -
performance
Test command
bowtie2 -x ref_index -1 reads_1.fq.gz -2 reads_2.fq.gz -S eg2.sam -p 4 --reorderbowtie2-gtz -x ref_index -1 reads_1.fq.gtz -2 reads_2.fq.gtz -S eg2.sam -p 4 --reorderTest environment
Server configuration: 16 core CPU, 64G memory; file size: read1.fq.gz(1.55G), read2.fq.gz(1.78G), read1.fq.gtz(0.43G), read2.fq.gtz(0.61G)
performance data
Software bowtie2 bowtie2-gtz CPU consumption(average) 400 445 Memory consumption(average) 0.19G 12.92G Time consumption 63m41.06s 61m56.67s
6、TOPHAT for GTZ (support gtz version < 2.x.x)
-
How to Install?
For installation you can (recommended)
sudo curl -SL https://gtz.io/tophatgtz_latest.run -o /tmp/tophatgtz.run && sudo sh /tmp/tophatgtz.runor
download installation files:-GTX.Zip tophat-gtz-
Run commands in the installation file directorysudo sh tophatgtz_latest.run
complete installation according to prompt. -
How to Use?
After installation, you can run tophat-gtz directly without any other dependencies.(If bowtie/bowtie2 is not installed in the environment, it will be installed automatically when tophat installing.)
If y is selected when installing "create a soft link to /usr/bin", you can run tophat-gtz in any directory; Otherwise, you need to switch to the installation directory and run with ./tophat-gtz.
GTX.Zip's support package for tophat based on 2.1.2 version. Among them: the ability to read GTZ files directly is added, and all functions are completely consistent with the main code function of tophat.
Use examples
Step one: use bowtie/bowtie2 (bowtie2-gtz) to make index.
bowtie2-build ref.fa ref_index* Note: It is recommended that bowtie 2/bowtie 2-gtz be used to produce index, because for bowtie, tophat can only use bowtie 1.1.2 and previous versions.
Step two: execution comparison
export GTZ_RBIN_PATH=/path/rbin/tophat-gtz -o report_dir ref_index reads_1.fq.gtz reads_2.fq.gtz* In this example, the path of the RBIN file is specified by the environment variable GTZ_RBIN_PATH, where "export GTZ_RBIN_PATH=/path/rbin/" is not necessary, but if you know the path of rbin, you are advised to specify it, which can speed up the processing of tophat-gtz. Because when tophat-gtz needs RBIN file and cannot find the RBIN file under the default path ~/.config/gtz, it will be downloaded through the network, which will consume time.
-
performance
Test command
export GTZ_RBIN_PATH=/path/rbin/tophat -o report_dir -p 4 ref_index reads_1.fq.gz reads_2.fq.gztophat-gtz -o report_dir -p 4 ref_index reads_1.fq.gtz reads_2.fq.gtzTesting environment
Server configuration: 16 core CPU, 64G memory; file size: read1.fq.gz(1.55G), read2.fq.gz(1.78G), read1.fq.gtz(0.43G), read2.fq.gtz(0.61G)
Performance data
Software tophat tophat-gtz Time consumption 133m12.61s 134m43.02s
7、HISAT2 for GTZ (support gtz version < 2.x.x)
-
How to Install?
Mode one: Install to the current user, no sudo permissions required
For installation you can (recommended)
curl -SL https://gtz.io/hisat2gtz_latest.run -o /tmp/hisat2gtz.run && sh /tmp/hisat2gtz.runAfter the first installation, you need to perform a source ~/.bashrc or exit to log back in, and then you can execute minimap2-gtz in any directory.
or
download installation files:-GTX.Zip hisat2-gtz-,then install:
sh hisat2gtz_latest.runSimilarly, after the first installation, you need to perform a source ~/.bashrc or exit and log back in again
Mode two: Install to all users, need sudo permissions
For installation you can (recommended)
sudo curl -SL https://gtz.io/hisat2gtz_latest.run -o /tmp/hisat2gtz.run && sudo sh /tmp/hisat2gtz.runor
download installation files:-GTX.Zip hisat2-gtz-
sudo sh hisat2gtz_latest.runAfter the installation is complete, you can perform hisat2-gtz and hisat2-build in any directory
-
How to Use?
After the installation is complete, the execution program and related scripts will be generated in the installation directory,such as hisat2-gtz,hisat2-build,etc.
GTX.Zip support package for hisat2, based on hisat2 (2.1.0) version, which: Added direct reading capability for gtz files, all functions are exactly the same as hisat2 main code function.
Use examplesgtz
Step one: use hisat2-build to make index.
hisat2-build -p 4 ~/GCF_000001405.37_GRCh38.p11_genomic.fna genomeStep two: execution comparison
export GTZ_RBIN_PATH=/path/rbin/hisat2-gtz -x genome -1 reads_1.fq.gtz -2 reads_2.fq.gtz -S result.sam* In this example, the path of the RBIN file is specified by the environment variable GTZ_RBIN_PATH, where "export GTZ_RBIN_PATH=/path/rbin/" is not necessary, but if you know the path of rbin, you are advised to specify it, which can speed up the processing of hisat2-gtz. Because when hisat2-gtz needs RBIN file and cannot find the RBIN file under the default path ~/.config/gtz, it will be downloaded through the network, which will consume time.
-
performance
Test command
export GTZ_RBIN_PATH=/path/rbin/hisat2 -x genome -1 reads_1.fq.gz -2 reads_2.fq.gz -S gz.sam -p 16 --reorderhisat2-gtz -x genome -1 reads_1.fq.gtz -2 reads_2.fq.gtz -S gtz.sam -p 16 --reorderTesting environment
Server configuration: 16 core CPU, 64G memory; file size: read1.fq.gz(7.3G), read2.fq.gz(7.3G), read1.fq.gtz(1.6G), read2.fq.gtz(1.8G)
Performance data
Software hisat2 hisat2-gtz Time consumption 8m25.845s 10m47.930s
8、MEGAHIT for GTZ (support gtz version < 2.x.x)
-
How to Install?
For installation you can (recommended)
`sudo curl -SL https://gtz.io/megahitgtz_latest.run -o /tmp/megahitgtz.run && sudo sh /tmp/megahitgtz.run`or
download installation files:-GTX.Zip megahit-gtz-
Run commands in the installation file directorysudo sh megahitgtz_latest.run
complete installation according to prompt. -
How to Use?
After installation, megahit-gtz (and megahit_asm_core, megahit_sdbg_build, megahit_toolkit) will be generated.
If y is selected when installing "create a soft link to /usr/bin", you can run megahit-gtz in any directory; Otherwise, you need to switch to the installation directory and run with ./megahit-gtz.
GTX.Zip's support package for megahit based on 1.1.3 version. Among them: the ability to read GTZ files directly is added, and all functions are completely consistent with the main code function of megahit.
Use examples
Example 1: support fq
megahit-gtz -1 pe1.fq -2 pe2.fq -o outExample 2: support gtz
export GTZ_RBIN_PATH=/path/rbin/megahit-gtz -1 pe1.fq.gtz -2 pe2.fq.gtz -o out* In this example, the path of the RBIN file is specified by the environment variable GTZ_RBIN_PATH, where "export GTZ_RBIN_PATH=/path/rbin/" is not necessary, but if you know the path of rbin, you are advised to specify it, which can speed up the processing of megahit-gtz. Because when megahit-gtz needs RBIN file and cannot find the RBIN file under the default path ~/.config/gtz, it will be downloaded through the network, which will consume time.
-
performance
Test command
megahit -t 16 -o out -1 pe1.fq.gz -2 pe2.fq.gzexport GTZ_RBIN_PATH=/path/rbin/megahit-gtz -t 16 -o out -1 pe1.fq.gtz -2 pe2.fq.gtzTesting environment
Server configuration: 16 core CPU, 64G memory; file size: read1.fq.gz(1.55G), read2.fq.gz(1.78G), read1.fq.gtz(0.43G), read2.fq.gtz(0.61G)
Performance data
Software megahit megahit-gtz Time consumption 67m38.381s 66m44.151s
9、FASTQC for GTZ (support gtz version < 2.x.x)
-
How to Install?
Mode one: Install to the current user, no sudo permissions required
For installation you can (recommended)
curl -SL https://gtz.io/fastqc_gtz_latest.run -o /tmp/fastqc2gtz.run && sh /tmp/fastqc2gtz.runAfter the first installation, you need to perform a source ~/.bashrc or exit to log back in, and then you can execute minimap2-gtz in any directory.
or
download installation files:-GTX.Zip fastqc-gtz- ,
then install
sh fastqc_gtz_latest.runSimilarly, after the first installation, you need to perform a source ~/.bashrc or exit and log back in again
Mode two: Install to all users, need sudo permissions
For installation you can (recommended)
sudo curl -SL https://gtz.io/fastqc_gtz_latest.run -o /tmp/fastqc2gtz.run && sudo sh /tmp/fastqc2gtz.runor
download installation files: -GTX.Zip fastqc-gtz- ,then install
sudo sh fastqc_gtz_latest.runAfter the installation is complete, you can perform fastqc-gtz in any directory
-
How to Use?
After the installation is complete, the execution program and related scripts will be generated in the installation directory. GTX.Zip support package for fastqc, based on fastqc (0.11.8) version, which: Added direct reading capability for gtz files, all functions are exactly the same as fastqc main code function.
Use examples
export GTZ_RBIN_PATH=/path/rbin/fastqc-gtz -t 1 reads_1.fq.gtz -o ~/result_directory* In this example, the path of the RBIN file is specified by the environment variable GTZ_RBIN_PATH, where "export GTZ_RBIN_PATH=/path/rbin/" is not necessary, but if you know the path of rbin, you are advised to specify it, which can speed up the processing of fastqc-gtz. Because when fastqc-gtz needs RBIN file and cannot find the RBIN file under the default path ~/.config/gtz, it will be downloaded through the network, which will consume time.
10、FASTP for GTZ (support gtz 2.x.x version)
-
How to Install?
Mode 1: Install directly from the command line(recommended installation method)
Install for ALL USERS:
sudo curl -SL https://gtz.io/fastpgtz_latest.run -o /tmp/fastpgtz.run && sudo sh /tmp/fastpgtz.runOnce installed, fastp-gtz executable file is placed in /usr/local/fastp-gtz directory, fastp-gtz's softlink is created to /usr/bin
Only install for CURRENT USER:
curl -SL https://gtz.io/fastpgtz_latest.run -o /tmp/fastpgtz.run && sh /tmp/fastpgtz.run && source ~/.bashrcOnce installed, fastp-gtz executable file are placed in the current user's ~/.config/fastp-gtz directory, fastp-gtz's alias is added to ~/.bashrc
Mode 2: First download the software and then install it.
First download the software from -GTX.Zip Professional-.
Commercially authorized users get from [email protected] .
Install for ALL USERS:
sudo sh fastpgtz_latest.runOnce installed, fastp-gtz executable file is placed in /usr/local/fastp-gtz directory, fastp-gtz's softlink is created to /usr/bin
Only install for CURRENT USER:
sh fastpgtz_latest.run && source ~/.bashrcOnce installed, fastp-gtz executable file are placed in the current user's ~/.config/fastp-gtz directory, fastp-gtz's alias is added to ~/.bashrc
After the installation is complete, you can perform fastp-gtz in any directory
-
How to Use?
Gtx. Zip to fastp in the support package, based on FASTP version 0.19.5. Both input and output support GTZ and non-GTZ format files, and when the output file name ends with the .gtz, fastp-gtz compresses the output file GTZ
1. Input is not GTZ format
examples:
Output GTZ Format:
fastp-gtz -i in.fq -o out.fq.gtz --ref in.fq.species.fastaOutput non-GTZ format:
fastp-gtz -i in.fq -o out.fqFor --ref use, refer to the following sections for instructions
2. Input is GTZ format
examples:
Step one: Skip this step if the decompression read.gtz does not require a reference file, otherwise specify the corresponding reference as follows
export GTZ_RBIN_PATH=/path/rbin/(Suitable for gtx1.x.x version, specify the rbin file path for unzip, it's recommended but not required, when not specified gtz will download automatically, will consume a certain amount of time)export GTZ_RBIN_PATH=/path/fasta/xxx.fa(Suitable for gtx2.x.x version, specifies the corresponding fasta file for decompression, must)Step two: execution analysis
fastp-gtz -i in.R1.fq.gtz -I in.R2.fq.gtz -o out.R1.fq.gtz -O out.R2.fq.gtz --ref in.fq.species.fastaOther ways to use:
fastp-gtz -i in.R1.fq.gtz -I in.R2.fq.gtz -o out.R1.fq.gtz -O out.R2.fq.gtz --ref in.fq.species.fasta --donot_pack_ref --cache_path /cache/path/Command Description:
- --ref
This parameter is recommended to specify, specifies Fasta corresponding to the compressed file- --donot_pack_ref
if use this parameter, it needs to specify the reference file when unzips, here is in.fq.species.fasta- --cache_path
The default cache path is ~/.config/gtz, you can also use this to specify other pathHow it works:
When entered as a GTZ file, FASTP-GTZ can be briefly described as four procedures:
(A) read into In.gtz-> (B) unzip into In.fq-> (C) processing Data-> (D) compressed into IN.GTZNote
1) Process B
 i. If the in.gtz in process A is the version of the high-multiplier compression file of gtz 1.x.x, then Process B requires the corresponding rbin file, then there are two ways to work:

 Mode one:
     You have the Rbin file locally and specify the path of the file with the following environment variables:

     export GTZ_RBIN_PATH=/path/rbin
     Then the program will complete step b using the local Rbin file
 Mode two:
     You do not have the Rbin file locally, or you do not specify it through an environment variable, in which case the program automatically downloads the rbin from the network, and of course the process consumes a certain amount of time

ii. If the in.gtz in process A is a high-multiplier compressed file version of gtz 2.x.x, then Process B also works in two ways:

Mode one:
	In.gtz is generated using --donot-pack-ref, we must specify the fasta file which is used when compression by the following environment variables:

  export GTZ_RBIN_PATH=/path/fasta/xxx.fa
Mode two:
	in.gtz generation is not used -- donot-pack-ref, then procedure B does not need additional parameters
2) Process C
fastp-gtz Analysis Data3) Process D
Mode one: No FASTA file is specified, out.R1.fq.gtz and out.R2.fq.gtz are generated by ordinary compression Mode two: FASTA file is specified by --ref, out.R1.fq.gtz and out.R2.fq.gtz are generated by High-ratio compressioncompression directly -
performance
Test command
fastp -i in.R1.fq.gz -I in.R2.fq.gz -o out.R1.fq.gz -O out.R2.fq.gzfastp-gtz -i in.R1.fq.gtz -I in.R2.fq.gtz -o out.R1.fq.gtz -O out.R2.fq.gtz --ref in.fq.species.binTesting environment
Server configuration: 16 core CPU, 64G memory; file size: in.R1.fq.gz(1.55G), in.R2.fq.gz(1.78G), in.R1.fq.gtz(0.43G), in.R2.fq.gtz(0.61G)
Performance data
fastp total output file size of R1.fq.gz and out.R2.fq.gz is 3.3G, and the fastp-gtz total output file size of R1.fq.gtz and out.R2.fq.gtz is 1G
11、MINIMAP2 for GTZ (support gtz version < 2.x.x)
-
How to Install?
Mode one: Install to the current user, no sudo permissions required
For installation you can (recommended)
curl -SL https://gtz.io/minimap2_gtz_latest.run -o /tmp/minimap2_gtz_latest.run && sh /tmp/minimap2_gtz_latest.runAfter the first installation, you need to perform a source ~/.bashrc or exit to log back in, and then you can execute minimap2-gtz in any directory
or
download installation files:-GTX.Zip minimap2-gtz-,then install
sh minimap2_gtz_latest.runSimilarly, after the first installation, you need to perform a source ~/.bashrc or exit and log back in again
Mode two: Install to all users, need sudo permissions
For installation you can (recommended)
sudo curl -SL https://gtz.io/minimap2_gtz_latest.run -o /tmp/minimap2_gtz_latest.run && sudo sh /tmp/minimap2_gtz_latest.runor
download installation files:-GTX.Zip minimap2-gtz-,then install
sudo sh minimap2_gtz_latest.runAfter the installation is complete, you can perform minimap2-gtz in any directory
- How to Use?
After installation, minimap2-gtz will be generated.
Use examples
export GTZ_RBIN_PATH=/path/rbin/minimap2-gtz -ax asm20 ref.fa pacbio-ccs.fq.gtz > aln.sam* In this example, the path of the RBIN file is specified by the environment variable GTZ_RBIN_PATH, where "export GTZ_RBIN_PATH=/path/rbin/" is not necessary, but if you know the path of rbin, you are advised to specify it, which can speed up the processing of minimap2-gtz. Because when minimap2-gtz needs RBIN file and cannot find the RBIN file under the default path ~/.config/gtz, it will be downloaded through the network, which will consume time.
Test command
minimap2 -t 16 -a Arab.mmi Arab_E822-R02-I_good_1.fq.gz > Arab_p.samexport GTZ_RBIN_PATH=/path/rbin/minimap2-gtz -t 16 -a Arab.mmi Arab_E822-R02-I_good_1.fq.gz.gtz > Arab_gtz_p.samTesting environment
Server configuration: 16 core CPU, 64G memory;
Performance data
Software minimap2 minimap2-gtz Time consumption 2m57s 3m57.151s
12、WTDBG2 for GTZ (support gtz version < 2.x.x)
-
How to Install?
Mode one: Install to the current user, no sudo permissions required
For installation you can (recommended)
curl -SL https://gtz.io/wtdbg2_gtz_latest.run -o /tmp/wtdbg2_gtz_latest.run && sh /tmp/wtdbg2_gtz_latest.runAfter the first installation, you need to perform a source ~/.bashrc or exit to log back in, and then you can execute wtdbg2-gtz in any directory
or
download installation files:-GTX.Zip wtdbg2-gtz-,then install
sh wtdbg2_gtz_latest.runSimilarly, after the first installation, you need to perform a source ~/.bashrc or exit and log back in again
Mode two: Install to all users, need sudo permissions
For installation you can (recommended)
sudo curl -SL https://gtz.io/wtdbg2_gtz_latest.run -o /tmp/wtdbg2_gtz_latest.run && sudo sh /tmp/wtdbg2_gtz_latest.runor
download installation files:-GTX.Zip wtdbg2-gtz-,then install
sudo sh wtdbg2_gtz_latest.runAfter the installation is complete, you can perform wtdbg2-gtz in any directory
- How to Use?
After installation, wtdbg2-gtz will be generated.
Use examples
export GTZ_RBIN_PATH=/path/rbin/wtdbg2-gtz -x rs -g 4.6m -t 16 -i wtdbg2_test.fastq.gtz -fo prefixwtpoa-cns -t 16 -i prefix.ctg.lay.gz -fo prefix.ctg.fa* In this example, the path of the RBIN file is specified by the environment variable GTZ_RBIN_PATH, where "export GTZ_RBIN_PATH=/path/rbin/" is not necessary, but if you know the path of rbin, you are advised to specify it, which can speed up the processing of wtdbg2-gtz. Because when wtdbg2-gtz needs RBIN file and cannot find the RBIN file under the default path ~/.config/gtz, it will be downloaded through the network, which will consume time.
13、BWA-MEM2 for GTZ (support gtz version 3.0.1)
-
How to Install?
Mode one: Install to the current user, no sudo permissions required
For installation you can (recommended)
curl -SL https://gtz.io/bwamem2-gtz_latest.run -o /tmp/bwamem2gtz.run && sh /tmp/bwamem2gtz.runAfter the first installation, you need to perform a source ~/.bashrc or exit to log back in, and then you can execute bwa-mem2-gtz in any directory
or
download installation files:-GTX.Zip bwa-mem2-gtz-,then install
sh bwamem2-gtz_latest.runSimilarly, after the first installation, you need to perform a source ~/.bashrc or exit and log back in again
Mode two: Install to all users, need sudo permissions
For installation you can (recommended)
sudo curl -SL https://gtz.io/bwamem2-gtz_latest.run -o /tmp/bwamem2gtz.run && sh /tmp/bwamem2gtz.runor
download installation files:-GTX.Zip bwa-mem2-gtz-,then install
sudo sh bwamem2-gtz_latest.runAfter the installation is complete, you can perform bwa-mem2-gtz in any directory
- How to Use?
GTX.Zip support package for bwa-mem2 is based on release 2.1 of bwa-mem2.
It is used in the same way as the original bwa-mem2, except that the compressed file in GTZ format is added
Step 1: make index
bwa-mem2-gtz index ref.fastaStep 2: do mapping
In case 1, the input file is fq/fq.gz Format, direct mapping
bwa-mem2-gtz mem ref.fasta read.fq.gz -t 20 > out.samIn case 2, the input file is in GTZ format
Step one: Skip this step if the decompression read.gtz does not require a reference file, otherwise specify the corresponding reference as follows
export GTZ_RBIN_PATH=/path/rbin/(Suitable for gtx1.x.x version, specify the rbin file path for unzip, it's recommended but not required, when not specified gtz will download automatically, will consume a certain amount of time)export GTZ_RBIN_PATH=/path/fasta/xxx.fa(Suitable for gtz3.0.1 version, specifies the corresponding fasta file for decompression, must)Step two: do mapping
bwa-mem2-gtz mem ref.fasta read.gtz -t 20 > out.samset the decompression thread to 4 of read.gtz to execute mapping (the default decompression thread is 1 if it is not set)
export GTZ_CONCURRENC=4 && bwa-mem2-gtz mem ref.fasta read.gtz -t 20 > out.sam -
performance
Change Log
Current Latest Version:gtz-3.0.0 [2020/12/15]
historical version: -Change Log-
FAQ
Frequently Asked Questions are intended to help newcomers to understand how we work! -Click here!-
Contact Us
If you have any questions, feel free to contact: [email protected], or create a new GitHub issue .
License
See LICENSE for details.
-