HistoGAN: Controlling Colors of GAN-Generated and Real Images via Color Histograms
Mahmoud Afifi, Marcus A. Brubaker, and Michael S. Brown
York University
Paper | Supplementary Materials | Video | Poster | PPT
Reference code for the paper HistoGAN: Controlling Colors of GAN-Generated and Real Images via Color Histograms. Mahmoud Afifi, Marcus A. Brubaker, and Michael S. Brown. In CVPR, 2021. If you use this code or our datasets, please cite our paper:
@inproceedings{afifi2021histogan,
  title={HistoGAN: Controlling Colors of GAN-Generated and Real Images via Color Histograms},
  author={Afifi, Mahmoud and Brubaker, Marcus A. and Brown, Michael S.},
  booktitle={Proceedings of the IEEE Conference on Computer Vision and Pattern Recognition},
  year={2021}
}
Abstract
In this paper, we present HistoGAN, a color histogram-based method for controlling GAN-generated images' colors. We focus on color histograms as they provide an intuitive way to describe image color while remaining decoupled from domain-specific semantics. Specifically, we introduce an effective modification of the recent StyleGAN architecture to control the colors of GAN-generated images specified by a target color histogram feature. We then describe how to expand HistoGAN to recolor real images. For image recoloring, we jointly train an encoder network along with HistoGAN. The recoloring model, ReHistoGAN, is an unsupervised approach trained to encourage the network to keep the original image's content while changing the colors based on the given target histogram. We show that this histogram-based approach offers a better way to control GAN-generated and real images' colors while producing more compelling results compared to existing alternative strategies.
Code
Prerequisite
- Pytorch
- numpy
- tqdm
- pillow
- linear-attention-transformer (optional)
- vector-quantize-pytorch (optional)
- torch-optimizer
- retry
- dlib (optional)
Conda & pip commands:
conda create -n histoGAN python=3.6 numpy=1.13.3 scipy
conda activate histoGAN
conda install pytorch torchvision -c python
conda install -c conda-forge tqdm
conda install -c anaconda pillow
pip install CMake
pip install dlib
pip install linear-attention-transformer
pip install vector-quantize-pytorch
pip install torch-optimizer
pip install retry
You may face some problems in installing dlib on Windows via pip. It is required only for the face pre-processing option (see below for more details). In order to install dlib for Windows, please follow this link. If couldn't install dlib, you can comment this line and do not use the --face_extraction option for reHistoGAN.
Histogram loss
We provide a Colab notebook example code to compute our histogram loss. This histogram loss is differentiable and can be easily integrated into any deep learning optimization.
In the Colab tutorial, we provide different versions of the histogram class to compute the histogram loss for different color spaces: RGB-uv, rg-chroma, and CIE Lab. For CIE Lab, input images are supposed to be already in the CIE LAB space before computing the histogram loss. The code of these histogram classes is also provided in ./histogram_classes. In HistoGAN and ReHistoGAN, we trained using RGB-uv histogram features. To use rg-chroma or CIE Lab, you can simply replace from histogram_classes.RGBuvHistBlock import RGBuvHistBlock with from histogram_classes.X import X as RGBuvHistBlock, where X is the name of the histogram class (i.e., rgChromaHistBlock or LabHistBlock). This change should be applied to all source code files that use the histogram feature. Note that for the CIE LAB histograms, you need to first convert loaded images into the CIE LAB space in the Dataset class in both histoGAN and ReHistoGAN codes. That also requires converting the generated images back to sRGB space before saving them.
If you faced issues with memory, please check this issue for potential solutions.
HistoGAN
To train/test a histoGAN model, use histoGAN.py. Trained models should be located in the models directory (can be changed from --models_dir) and each trained model's name should be a subdirectory in the models directory. For example, to test a model named test_histoGAN, you should have models/test_histoGAN/model_X.pt exists (where X refers to the last epoch number).
Training
To train a histoGAN model on a dataset located at ./datasets/faces/, use the following command:
python histoGAN.py --name histoGAN_model --data ./datasets/faces/ --num_train_steps XX --gpu 0
XX should be replaced with the number of iterations. There is no ideal number of training iterations. You may need to keep training until finds the model started to generate degraded images.
During training, you can watch example samples generated by the generator network in the results directory (specified by --results_dir). Each column in the generated sample images shares the same training histogram feature. Shown below is the training progress of a HistoGAN trained on the FFHQ dataset using --network_capacity 16 and --image_size 256.

There is no clear criterion to stop training, so watching generated samples will help to detect when the generator network starts diverging. Also reporting the FID score after each checkpoint may help.
You may need to increase the number of training steps (specified by --num_train_steps), if the generator didn't diverge by the end of training. If the network starts generating degraded results after a short period of training, you may need to apply some data augmentation by using --aug_prob X and --dataset_aug_prob Y, where X is a float number representing the probability of discriminator augmentation and Y float number to set the probability of dataset augmentation.
Shown below is the training progress of HistoGAN when trained on portrait images with and without augmentation applied. As shown, the generator starts to generate degraded images after a short period of training, while it keeps generating reasonable results when data augmentation is applied (here, we use --aug_prob 0.5).

Testing
Here is an example of how to generate new samples of a trained histoGAN models named Faces_histoGAN:
python histoGAN.py --name Faces_histoGAN --generate True --target_his ./target_images/2.jpg --gpu 0
The shown figure below illustrates what this command does. First, we generate a histogram feature of this input image. Then, this feature is fed into our HistoGAN to generate face image samples.

Generated samples will be located in ./results_HistoGAN/Faces_histoGAN.
Another example is given below, where we use a fixed input noise and style vectors for the first blocks of the generator network, while we change the input histograms. In this example, we first use --save_noise_latent = True to save the noise and latent data for the first blocks. Then, we load the saved noise and latent files, using --target_noise_file and --target_latent_file, to generate the same samples but with different color histograms.
python histoGAN.py --name Faces_histoGAN --generate True --target_his ./target_images/1.jpg --save_noise_latent True --gpu 0
python histoGAN.py --name Faces_histoGAN --generate True --target_his ./target_images/ --target_noise_file ./temp/Face_histoGAN/noise.py --target_latent_file ./temp/Faces_histoGAN/latents.npy --gpu 0

Additional useful parameters are given below.
Parameters
--name: Model name.--models_dir: Models directory (to save or load models).--data: Dataset directory (for training).--new: Set toTrueto train a new model. If--new = False, it will start training/evaluation from the last saved model.--image_size: Output image size (should be a power of 2).--batch_sizeand--gradient_accumulate_every: To control the size of mini-batch and the accumulation in computing the gradient.--network_capacity: To control network capacity.--attn_layers: To add a self-attention to the designated layer(s) of the discriminator. For example, if you would like to add a self-attention layer after the output of the 1st and 2nd layers, use--attn_layers 1,2. In our training, we did not use any attention layers, but it could improve the results if added.--results_dir: Results directory (for testing and evaluation during training).--target_hist: Target histogram (image, npy file of target histogram, or directory of either images or histogram files). To generate a histogram of images, check create_hist_sample.py.--generate: Set toTruefor testing.--save_noise_latent: To save the noise and latent of current generated samples intempdirectory (for testing).--target_noise_file: To load noise from a saved file (for testing)--target_latent_file: To load latent from a saved file (for testing).--num_image_tiles: Number of image tiles to generate.--gpu: CUDA device ID.--aug_types: Options include:translation,cutout, andcolor. Example:--aug_types translation cutout.--dataset_aug_prob: Probability of dataset augmentation: applies random cropping--aug_prob: Probability of discriminator augmentation. It applies operations specified in--aug_types. Note that if you use--aug_prob > 0.0to train the model, you should use--aug_prob > 0.0in testing as well to work properly.--hist_bin: Number of bins in the histogram feature.--hist_insz: Maximum size of the image before computing the histogram feature.--hist_method: "Counting" method used to construct histograms. Options include:inverse-quadratickernel,RBFkernel, orthresholding.--hist_resizing: If--hist_inszdoesn't match the input image size, the image is resized based on the resizing method. Resizing options are:interpolationorsampling.--hist_sigma: If one of the kernel methods used to compute the histogram feature (specified in--hist_method), this is the kernel sigma parameter.--alpha: Histogram loss scale factor (training).
Projection
Recoloring a given input image could be achieved if we can find a matching input, in the latent feature space, that can produce a similar image to the given input image. That is, we can optimize the input to our generator network, such that the generated image looks similar to the given input image. Once we have that done, we can manipulate this image by feeding our network a different histogram feature.

Here, we provide two options for this instance-optimization: (1) optimizing input Gaussian style vectors and (2) optimizing style vectors after the "to_latent" projection. The figure below shows the details of HistoGAN's first and last two blocks. The first optimization option optimizes input noise style vectors that feed the first blocks of HistoGAN from the left side. This optimization aims to minimize the differences between generated and the given input images (i.e., target image), while the second optimization option optimizes the style input in the latent space of each of the first blocks in HistoGAN. In both options, we do not touch the style input of the last two blocks of HistoGAN as these blocks get their input from the histogram feature, which is generated from the target image's colors.

The provided code allows you also to optimize input noise (non-style noise), that feeds the right part of each block in the shown figure above, either in Gaussian space or in the latent space (i.e., after the "to_latent" projection).
Let's suppose that our input image is ./input_images/41.jpg and our pre-trained HistoGAN models for faces is named histoGAN_model.
To optimize input Gaussian style vectors, use the following command:
python projection_gaussian.py --name histoGAN_model --input_image ./input_images/41.jpg --gpu 0

The final projected image and optimized style will be saved in XX/histoGAN_model/41, where XX is the result directory specified by --results_dir. To recolor the image after optimization with the colors of the image in ./target_images/1.jpg, you can use this command:
python projection_gaussian.py --name histoGAN_model --input_image ./input_images/41.jpg --generate True --target_hist ./target_images/1.jpg --gpu 0

The generated image share a similar appearance with the input image, but it is for a different person! We can apply a simple post-processing upsampling step to pass the colors from the generated image to our input image:
python projection_gaussian.py --name histoGAN_model --input_image ./input_images/41.jpg --generate True --target_hist ./target_images/1.jpg --upsampling_output True --gpu 0

To adjust other styles than image colors (for example, the style vector of the fourth and fifth block in the generator), use this command:
python projection_gaussian.py --name histoGAN_model --input_image ./input_images/41.jpg --generate True --target_hist ./target_images/1.jpg --random_styles 4 5 --gpu 0

To optimize after the "to_latent" projection, use:
python projection_to_latent.py --name histoGAN_model --input_image ./input_images/41.jpg --gpu 0

Similarly, the final projected image and optimized style will be saved in XX/histoGAN_model/41, where XX is the result directory specified by --results_dir. For recoloring, use:
python projection_to_latent.py --name histoGAN_model --input_image ./input_images/41.jpg --generate True --target_hist ./target_images/1.jpg --upsampling_output True --gpu 0

To apply a post-processing upsampling, use this command:
python projection_to_latent.py --name histoGAN_model --input_image ./input_images/41.jpg --generate True --target_hist ./target_images/1.jpg --upsampling_output True --gpu 0

To adjust other styles than image colors (for example, the style vector of the fifth block in the generator), use this command:
python projection_to_latent.py --name histoGAN_model --input_image ./input_images/41.jpg --generate True --target_hist ./target_images/1.jpg --random_styles 5 --gpu 0

Here we randomize new styles for the fourth and fifth blocks in the generator network:
python projection_to_latent.py --name histoGAN_model --input_image ./input_images/41.jpg --generate True --target_hist ./target_images/1.jpg --random_styles 4 5 --gpu 0

In addition to HistoGAN parameters mentioned above, there are some additional parameters for the optimization code:
--input_image: Path of the input image to optimize for.--latent_noise: To optimize the input noise (non-style noise) after the "to_latent" projection. The default value isFalse.--optimize_noise: To optimize the input noise (non-style noise) in Gaussian space. At inference time (i.e., after finishing the optimization step), you can set this parameter toTrue(even if wasn't used during optimization) to load the same input noise used during optimization. The default value isFalse.--pixel_loss: Reconstruction loss; this can be either:L1orL2.--pixel_loss_weight: Scale factor of reconstruction loss to control the contribution of this loss term.--vgg_loss_weight: In addition to the reconstruction loss, you can use VGG loss (AKA perceptual loss) by setting the value of this parameter to any value larger than zero.--generate: To generate an output of the optimized style/noise input. This can be set toTrueonly after finishing the optimization.--target_hist: To use a new target histogram after optimization. This could be: an image, a npy file of the target histogram, or a directory of either images or npy histogram files.--add_noise: At inference time (i.e., with--generate = True), this option to add random noise to the saved/optimized non-style noise. The default value isFalse.--random_styles: A list of histoGAN's blocks that you would like to ignore the values of their optimized style vectors and randomize new style vectors for those blocks. For example, for the first three blocks in the generator network, use--random_styles 1 2 3. This is only used in the testing phase. The default value is[].--style_reg_weight: L2 regularization factor for the optimized style vectors.--noise_reg_weight: If optimizing either Gaussian or theto_latentnon-style noise, this is a scale factor of L2 regularization for the optimized noise.--save_every: To specify number of optimization steps for saving the output of current input during optimization.--post_recoloring: To apply a post-processing color transfer that maps colors of the original input image to those in the generated image. Here, we use the colour transfer algorithm based on linear Monge-Kantorovitch solution. This option is recommended if the recolored images have some artifacts. Also, this is helpful to get the output image in the same resolution as the input image. Comparing with transferring colors of target histogram colors directly to the input image, this post recoloring was found to give better results as mentioned in the supplementary materials. You can replace the code of this method to use a recent color transfer method.--upsampling_output: If the network produces a low-resolution image, while the input image is a high-resolution one, you may need to upsampling the output image at inference. We have two options for upsampling that can be specified by--upsampling_method.--upsampling_method: If--upsampling_outputis set toTrue, then this argument specifies the upsampling method. We have two options, which are:BGUorpyramid. TheBGUoption applies the bilateral guided upsampling method for upsampling. The Matlab source code of BGU was cloned in this repo in the./upsamplingdirectory. You can either build./upsampling/BGU.mor use the providedBGU.exe, which was built for Windows (make sure that you have Matlab Runtime installed for Matlab 2019b or higher). If you are going to rebuildBGU.exe, make sure to locate the new exe file in the root before selectingBGUas the--upsampling_method. The second option ispyramid, which simply swaps some of the lowest layers of the Laplacian pyramid of input and generated images.--pyramid_levels: If--upsampling_methodispyramid, then this is the number of levels in the Laplacian pyramid.--swapping_levels: The number of lowest levels to swap. For instance, if--swapping_levels 2is used, then the last two layers in the pyramid of input and generated images will get swapped.--level_blending: If--upsampling_methodispyramid, setting--level_blendingtoTruewill blend between the remaining pyramid levels.
Here is a qualitative comparison of using the BGU vs the pyramid swapping.

Note that you may need to play with the optimization settings (e.g., --learning_rate, --style_reg_weight, etc.) to get better results. For face images, it is preferred to use the same settings that were used to prepare the training data (FFHQ). To crop face region, you can use face_preprocessing.py. If the recolored image suffers from artifacts, you may try to use --post_recoloring or use reHistoGAN.
Trained models
As mentioned in the paper, we trained HistoGAN on several datasets. Most of our pre-trained models were trained using --network_capacity = 16 and --image_size = 256 due to hardware limitations. Better results can be achieved by increasing the network capacity and using attention layers (--attn_layers). Here are examples of our trained models (note: these models include both generator and discriminator nets):
- Faces | Google Drive mirror
- Faces_20
- Cars
- Flowers
- Anime
- Landscape
- PortraitFaces
- PortraitFaces_aug
- PortraitFaces_20_aug
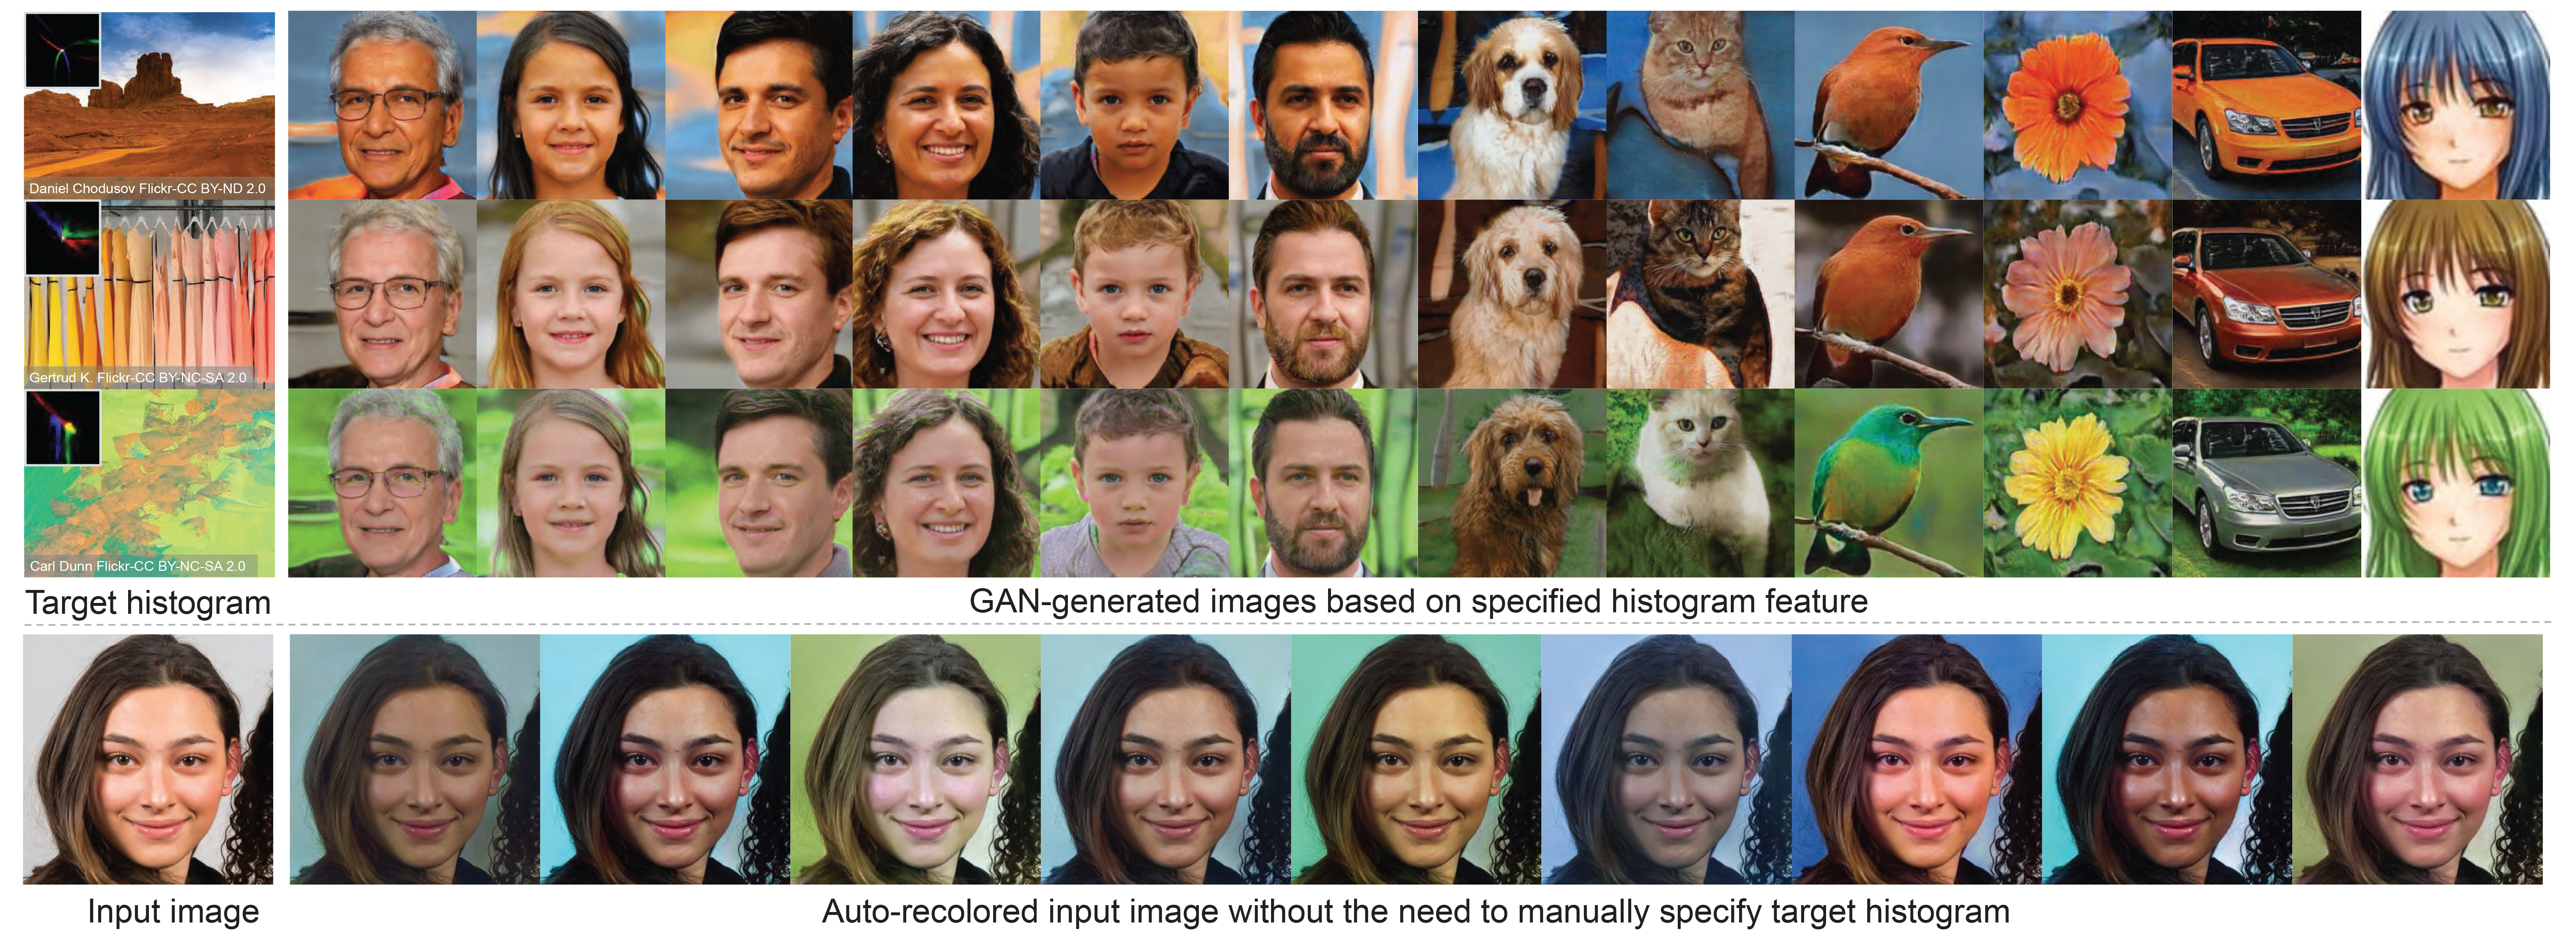
For model names that include _20, use --network_capacity 20 in testing. If the model name includes _aug, make sure to set --aug_prob to any value that is greater than zero. Below are examples of generated samples from each model. Each shown group of generated images share the same histogram feature.

ReHistoGAN
ReHistoGAN is an extension of our HistoGAN to recolor an input image through an encoder-decoder network. This network employs our histoGAN's head (i.e., the last two blocks) in its decoder.

Training
To train a reHistoGAN model on a dataset located at ./datasets/faces/, use the following command:
python rehistoGAN.py --name reHistoGAN_model --data ./datasets/faces/ --num_train_steps XX --gpu 0
XX should be replaced with the number of iterations. There is no ideal number of training iterations. You may need to keep training until the model starts to produce degraded images.
To use the weights of a pre-trained HistoGAN model located in ./models/histoGAN_model to initialize the histoGAN's head in the reHistoGAN model, use the following command:
python rehistoGAN.py --name reHistoGAN_model --data ./datasets/faces/ --num_train_steps XX --histGAN_models_dir ./models --histoGAN_model_name histoGAN_model --load_histoGAN_weights True --gpu 0
During training, you can watch example samples generated by the generator network in the results directory (specified by --results_dir).
Testing
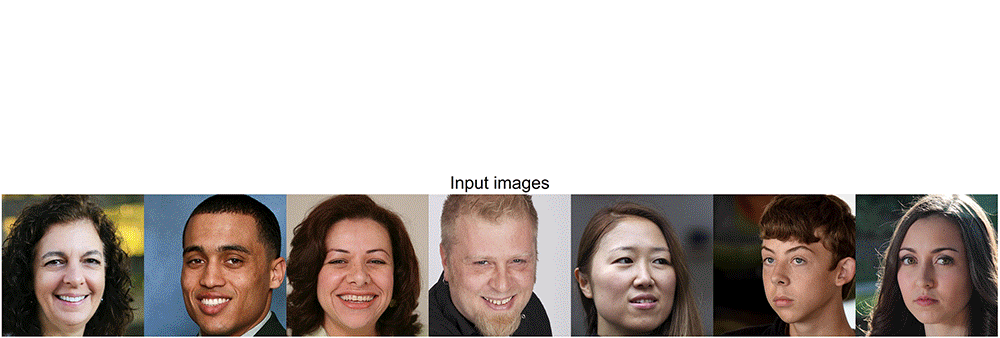
To use a pre-trained reHistoGAN model (named, for example, reHistoGAN_model) to recolor an input image located in ./input_images/1.jpg using the histogram of a target image located in ./target_images/1.jpg, use the following command:
python rehistoGAN.py --name reHistoGAN_model --generate True --input_image ./input_images/1.jpg --target_hist ./target_images/1.jpg --gpu 0
Note that you can specify a target histogram feature instead of the image itself by first generating the histogram feature using create_hist_sample.py, then you can set --target_hist to the path of the generated histogram feature.
To get an output image in the same resolution as the input image, we provide two options for upsampling (see the below parameters for more information). Here is an example of using the post-processing upsampling:
python rehistoGAN.py --name reHistoGAN_model --generate True --input_image ./input_images/1.jpg --target_hist ./target_images/1.jpg --upsampling_output True --gpu 0

Instead of processing a single input image, you can process all images located in a directory. Let's assume input images are located in ./input_images, use the following command to process all images in this directory.
python rehistoGAN.py --name reHistoGAN_model --generate True --input_image ./input_images/ --target_hist ./target_images/1.jpg --upsampling_output True --gpu 0
Similarly, you can specify a directory of target images (or npy histogram files) as shown below:
python rehistoGAN.py --name reHistoGAN_model --generate True --input_image ./input_images/ --target_hist ./target_images/ --upsampling_output True --gpu 0

For auto recoloring, you should first generate the target histogram set to sample from. This can be done using create_hist_data.py.py, which generate this set for you from all images located in ./histogram_data/. Then, to generate new recolored images of an input image located in ./input_images/55.jpg, for example, use this command:
python rehistoGAN.py --name reHistoGAN_model --generate True --input_image ./input_images/55.jpg --upsampling_output True --sampling True --gpu 0
This will generate XX recolored images for you, where XX can be specify using --target_number.

For face images, it is preferred to use the same settings that were used to prepare the training data (FFHQ). To crop face region, you can use --face_extraction True.
Universal ReHistoGAN
As the case of most GAN methods, our reHistoGAN targets a specific object domain to achieve the image recoloring task. This restriction may hinder the generalization
of our method to deal with images taken from arbitrary domains. To deal with that, we collected images from a different domain, aiming to represent the "universal" object
domain (see the supplemental materials for more details). To train our reHistoGAN on this "universal" object domain, we used --network_capacity 18 without any further changes in the original architecture.
To test one of our pre-trained "universal" reHistoGAN models (for example, Universal_rehistoGAN_v0), use the following command:
python rehistoGAN.py --name Universal_rehistoGAN_v0 --generate True --input_image ./input_images/other-objects/ --target_hist ./target_images/ --upsampling_output True --network_capacity 18 --gpu 0

Again, you can either recolor all images in a directory or apply the recoloring to a single image. You also can recolor input image(s) with a single target image (or a histogram feature) or apply auto recoloring by sampling from a pre-defined set of histograms.
If recolored images by any model have undesirable artifacts or color bleeding, you can try the --post_recoloring option to mitigate such artifacts.
Parameters
ReHistoGAN shares the same parameters of HistoGAN in addition to some extra parameters, such as:
--load_histoGAN_weights: To use pre-trained HistoGAN weights instead of training from scratch. This is only for the weights of the histoGAN's head.--histoGAN_model_name: If--load_histoGAN_weightsisTrue, then this is the name of the pre-trained HistoGAN model.--histGAN_models_dir: If a pre-trained weights used for the histoGAN's head, then this is the directory of the pre-trained HistoGAN model.--sampling: To auto recolor input image(s). If--samplingis set toTrue, make sure to set--target_histtoNone. Then, it is supposed to have a pre-computed set of target histograms to sample from. This set should be located inhistogram_data/histograms.npy. To generate this histogram set from a new image set, copy your images into./histogram_data, then run create_hist_data.py.py.--target_number: If--samplingisTrue, then this is the number of output recolored images for each single input image.--alpha: Histogram loss scale factor (training).--beta: Reconstruction loss scale factor (training).--gamma: Discriminator loss scale factor (training).--change_hyperparameters: To change the value of--alpha,--beta,--gammaafterXtraining steps, whereXcan be specified using--change_hyperparameters_after. If--change_hyperparametersisTrue, the new values of--alpha,--beta,--gamma(after the firstXtraining steps) can be specificed from here.--rec_loss: Reconstruction loss options, which includes:sobelorlaplacian(default).--variance_loss: To use variance loss (Equation 9 in the paper).--internal_hist: Internal histogram injection. This was an ablation on a different design of reHistoGAN, but we did not use it the official reHistoGAN. The default value isFalse.--skip_conn_to_GAN: To use skip connections in reHistoGAN (see Figures 4 and 6 in the paper). The default value isTrue.--fixed_gan_weights: To not update the weights of the histoGAN's head during training. The default value isFalse.--initialize_gan: To initialize weights of reHistoGAN. This does not affect loading pre-trained histoGAN's weights if--load_histoGAN_weightsisTrue.--post_recoloring: To apply a post-processing color transfer that maps colors of the original input image to those in the recolored image. Here, we use the colour transfer algorithm based on linear Monge-Kantorovitch solution. This option is recommended if the recolored images have some artifacts. Also, this is helpful to get the output image in the same resolution as the input image. Comparing with transferring colors of target histogram colors directly to the input image, this post recoloring was found to give better results as mentioned in the supplementary materials. You can replace the code of this method to use a recent color transfer method.--upsampling_output: If the network produces a low-resolution image, while the input image is a high-resolution one, you may need to upsampling the output image at inference. We have two options for upsampling that can be specified by--upsampling_method.--upsampling_method: If--upsampling_outputis set toTrue, then this argument specifies the upsampling method. We have two options, which are:BGUorpyramid. TheBGUoption applies the bilateral guided upsampling method for upsampling. The Matlab source code of BGU was cloned in this repo in the./upsamplingdirectory. You can either build./upsampling/BGU.mor use the providedBGU.exe, which was built for Windows (make sure that you have Matlab Runtime installed for Matlab 2019b or higher). If you are going to rebuildBGU.exe, make sure to locate the new exe file in the root before selectingBGUas the--upsampling_method. The second option ispyramid, which simply swaps some of the lowest layers of the Laplacian pyramid of input and generated images.--pyramid_levels: If--upsampling_methodispyramid, then this is the number of levels in the Laplacian pyramid.--swapping_levels: The number of lowest levels to swap. For instance, if--swapping_levels 2is used, then the last two layers in the pyramid of input and generated images will get swapped.--level_blending: If--upsampling_methodispyramid, setting--level_blendingtoTruewill blend between the remaining pyramid levels.--face_extraction: In testing, to pre-process input face images in the same way used to prepare the training data (FFHQ), use--face_extraction True. Make sure thatdlibis successfully installed.
Here are some useful parameters similar to those for HistoGAN:
--models_dir: Directory to save rehistoGAN models.--new: Set toTrueto train a new model. If--new = False, it will start training/evaluation from the last saved model.--target_hist: Target histogram (image, npy file of target histogram, or directory of either images or histogram files). To generate a histogram of images, check create_hist_sample.py.--attn_layers: To add a self-attention to the designated layer(s) of the discriminator. For example, if you would like to add a self-attention layer after the output of the 1st and 2nd layers, use--attn_layers 1,2. In our training, we did not use any attention layers, but it could improve the results if added.--generate: Set toTruefor recoloring input image(s).--network_capacity: To control network capacity. In our pre-trained models, we used--network_capacity 16. For "universal" reHistoGAN models, we used--network_capacity 18. The default value is 16.--image_size: Image size (should be a power of 2).
Trained models
Here are some of our pre-trained models for face image recoloring in addition to our universal reHistoGAN. As it is totally subjective, we provide different versions of our trained models (each of which was either trained using a different number of iterations, different loss weights, or --rec_loss options).
- Faces model-0
- Faces model-1
- Faces model-2
- Faces model-3
- Universal model-0
- Universal model-1
- Universal model-2
Here we show qualitative comparisons between recoloring results of Faces model-0 and Faces model-1. As shown, Faces model-0 tends to produce less artifacts compared to Faces model-1, but Faces model-1 catches the colors in the target histogram in a better way than Faces model-0.

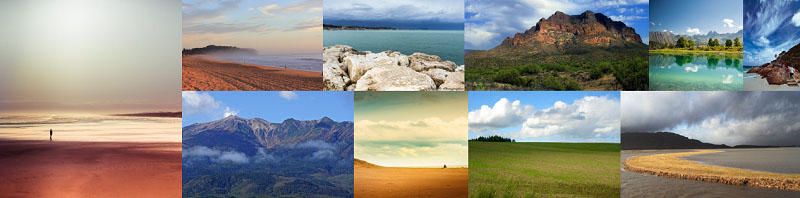
Landscape Dataset
Our collected set of 4K landscape images is available here.
Portrait Dataset
We have extracted ~7,000 portrait face images from the WikiArt dataset. You can download this portrait set from here. If you use this dataset, please cite our paper in addition to the WikiArt dataset. This set is provided only for non-commercial research purpose. The images in the WikiArt dataset were obtained from WikiArt.org. By using this set, you agree to obey the terms and conditions of WikiArt.org.

Acknowledgement
A significant part of this code was was built on top of the PyTorch implementation of StyleGAN by Phil Wang.
Related Research Projects
- Image Recoloring Based on Object Color Distributions: A method to perform automatic image recoloring based on the distribution of colors associated with objects present in an image.
- CAMS: A color-aware multi-style transfer method.