led-speech-edison
Speech-activated LEDs using Intel Edison, SparkFun blocks, Python, and CMU Sphinx.
Take a look at this video to see it in action.
Supplies
- Intel Edison
- USB headset with microphone (and a micro USB OTG adapter)
- SparkFun Base Block
- SparkFun GPIO Block (solder headers, either male or female, to use the pins)
- 4 LEDs (red, green, yellow, white)
- 4 330Ω resistors
- 4 1kΩ resistors
- 4 NPN transistors
- Plenty of jumper wires
About the SparkFun blocks
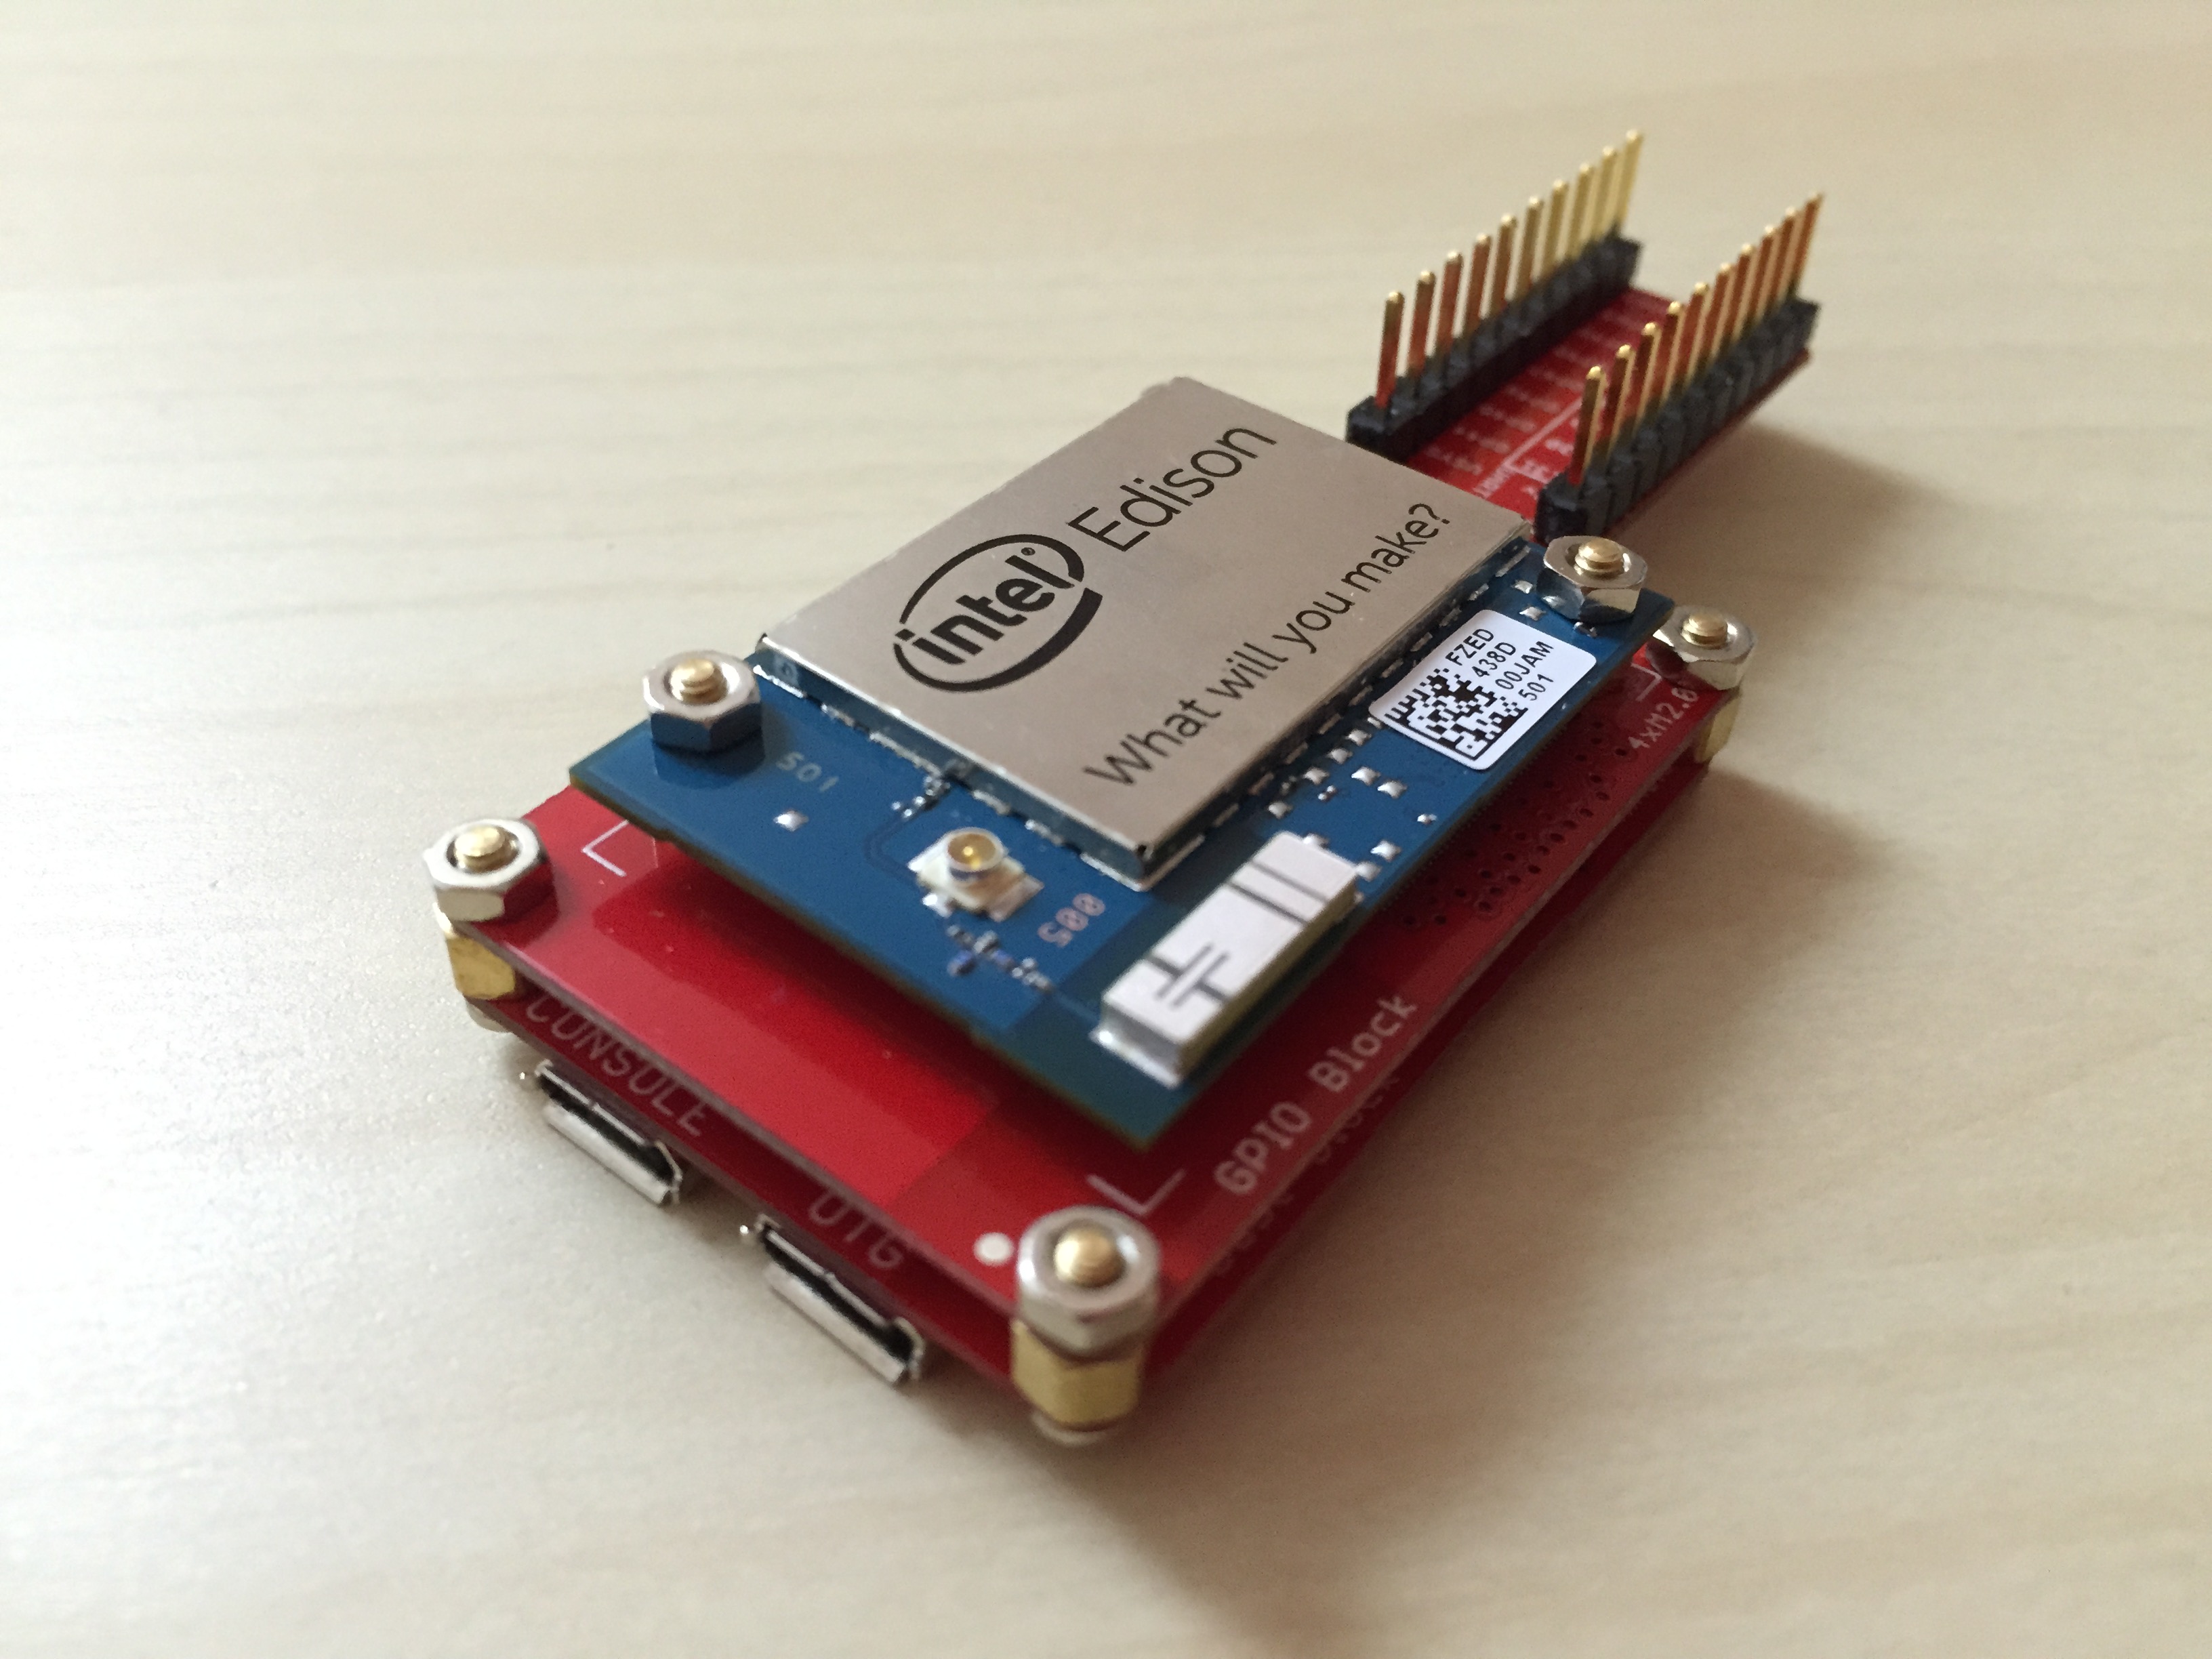
The SparkFun blocks for Intel Edison provide an easy way to extend functionality. The boards can be stacked and Edison just snaps into place. This will allow us to power Edison via USB, connect a USB headset, and have access to the GPIO pins for our circuit while retaining Edison's small form factor.
Here is a picture of Edison stacked on top of the Base and GPIO blocks:
Setting up Edison
If you haven't already, follow the Getting Started instructions from Intel, then return to these instructions.
Package manager configuration
Add AlexT's unofficial opkg repository. It contains many precompiled packages that can be installed by simply typing opkg install <package name>.
To configure the repository, add the following lines to /etc/opkg/base-feeds.conf:
src/gz all http://repo.opkg.net/edison/repo/all
src/gz edison http://repo.opkg.net/edison/repo/edison
src/gz core2-32 http://repo.opkg.net/edison/repo/core2-32
Update the package manager and install the first package we need:
opkg update
opkg install git
With git installed, we can now clone this repository onto Edison.
Edison helper scripts
edison-scripts provides a set of scripts for simplifying some things on Edison. To use it, do the following:
git clone https://github.com/drejkim/edison-scripts.git ~/edison-scripts

# Add ~/edison-scripts to PATH
echo 'export PATH=$PATH:~/edison-scripts' >> ~/.profile
source ~/.profile
Then, run the following scripts:
# Resize /boot -- we need the extra space to add an additional kernel
resizeBoot.sh

# Install pip, Python's package manager
installPip.sh

# Install MRAA, the low level skeleton library for IO communication on Galileo, Edison, and other platforms
installMraa.sh
Configuring Edison for sound
Install the modules for USB devices, including USB webcams, mic, and speakers:
opkg install kernel-modulesConnect the USB headset to the OTG port on the Base block. You may need a micro USB OTG adapter. Check to make sure that Edison sees the headset:
root@edison:~# lsusb
Bus 001 Device 002: ID 046d:0a44 Logitech, Inc. # <<< This is our device
Bus 001 Device 001: ID 1d6b:0002 Linux Foundation 2.0 root hub
Bus 002 Device 001: ID 1d6b:0003 Linux Foundation 3.0 root hub
Install ALSA, along with dependencies we need later for the speech processing library:
opkg install alsa-utils libportaudio2 libasound2 bison espeak alsa-lib-dev alsa-utils-dev alsa-dev python-numpyCheck that ALSA is able to see the headset:
root@edison:~# aplay -Ll
null
    Discard all samples (playback) or generate zero samples (capture)
sysdefault:CARD=Loopback
    Loopback, Loopback PCM
    Default Audio Device
sysdefault:CARD=Headset
    Logitech USB Headset, USB Audio
    Default Audio Device
**** List of PLAYBACK Hardware Devices ****
card 0: Loopback [Loopback], device 0: Loopback PCM [Loopback PCM]
  Subdevices: 8/8
  Subdevice #0: subdevice #0
  Subdevice #1: subdevice #1
  Subdevice #2: subdevice #2
  Subdevice #3: subdevice #3
  Subdevice #4: subdevice #4
  Subdevice #5: subdevice #5
  Subdevice #6: subdevice #6
  Subdevice #7: subdevice #7
card 0: Loopback [Loopback], device 1: Loopback PCM [Loopback PCM]
  Subdevices: 8/8
  Subdevice #0: subdevice #0
  Subdevice #1: subdevice #1
  Subdevice #2: subdevice #2
  Subdevice #3: subdevice #3
  Subdevice #4: subdevice #4
  Subdevice #5: subdevice #5
  Subdevice #6: subdevice #6
  Subdevice #7: subdevice #7
card 1: Headset [Logitech USB Headset], device 0: USB Audio [USB Audio]
  Subdevices: 1/1
  Subdevice #0: subdevice #0
In our case, the headset is shown under sysdefault:CARD=Headset.
Create a ~/.asoundrc file and add the following line to configure the headset:
pcm.!default sysdefault:HeadsetThe part after the colon must be what ALSA has as the name for your device (Headset in our case).
Play something with aplay to test the headset:
aplay /usr/share/sounds/alsa/Front_Center.wavYou should hear the words, "Front center".
Similarly, record something to test the microphone:
# Record a test file
arecord ~/test.wav

# CTRL+C to quit, then play the file
aplay ~/test.wav
Installing packages for speech recognition
We will be using pocketsphinx, a lightweight version of CMU's Sphinx for doing natural language processing offline.
To get this up and running, navigate to led-speech-edison/bin and run the commands below. We recommend that you run them one at a time, as some of them take a long time to execute:
# Install cython... this one takes a really long time!
pip install cython

# Install sphinxbase
./installSphinxbase.sh

# Add the following paths to ~/.profile
echo 'export LD_LIBRARY_PATH=/usr/local/lib' >> ~/.profile
echo 'export PKG_CONFIG_PATH=/usr/local/lib/pkgconfig' >> ~/.profile
source ~/.profile

# Install pocketsphinx
./installPocketsphinx.sh

# Install PyAudio... the install process may give errors, but it should still work fine
./installPyAudio.sh
The circuit
SparkFun recommends using transistors to fully (and safely) light LEDs. To learn more about using transistors as switches, see this tutorial.
Note: You can use the Edison Mini or Arduino Breakout boards. However, the pin mappings in the Python files will differ. For more details, see this tutorial from SparkFun.
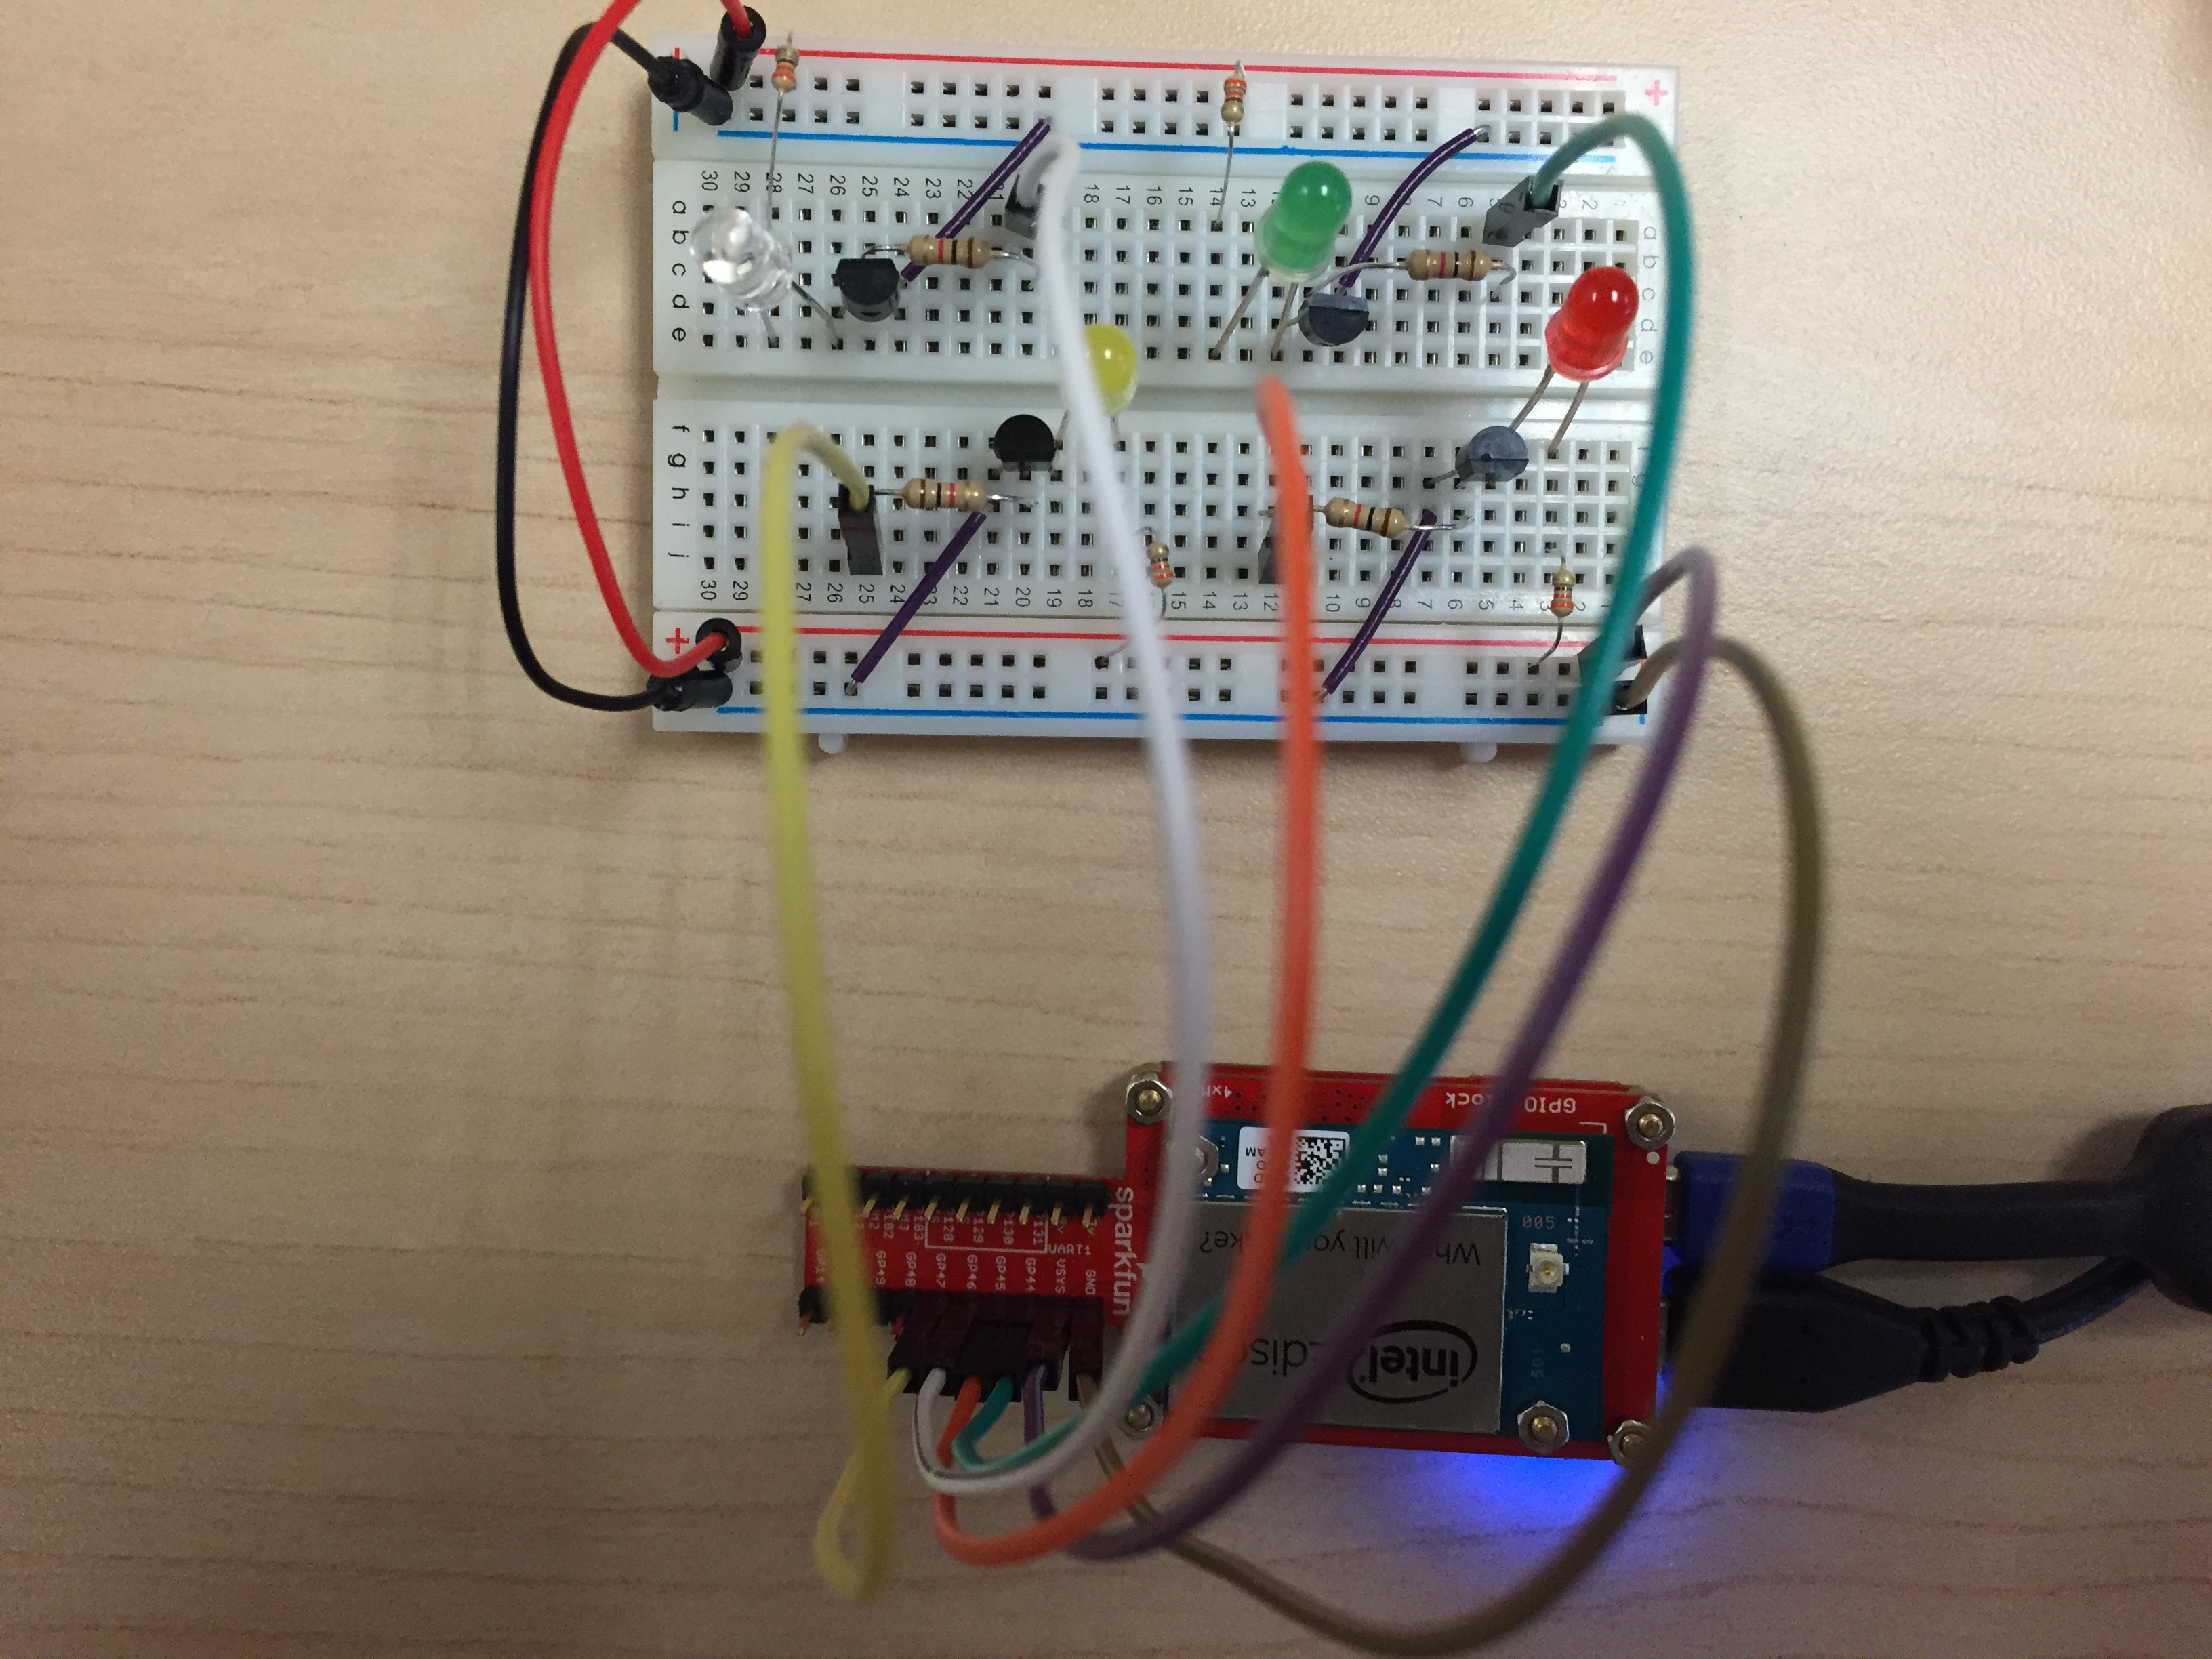
Wiring up the circuit
Shut down Edison and unplug it from power. Connect the LEDs to the GPIO block as shown:
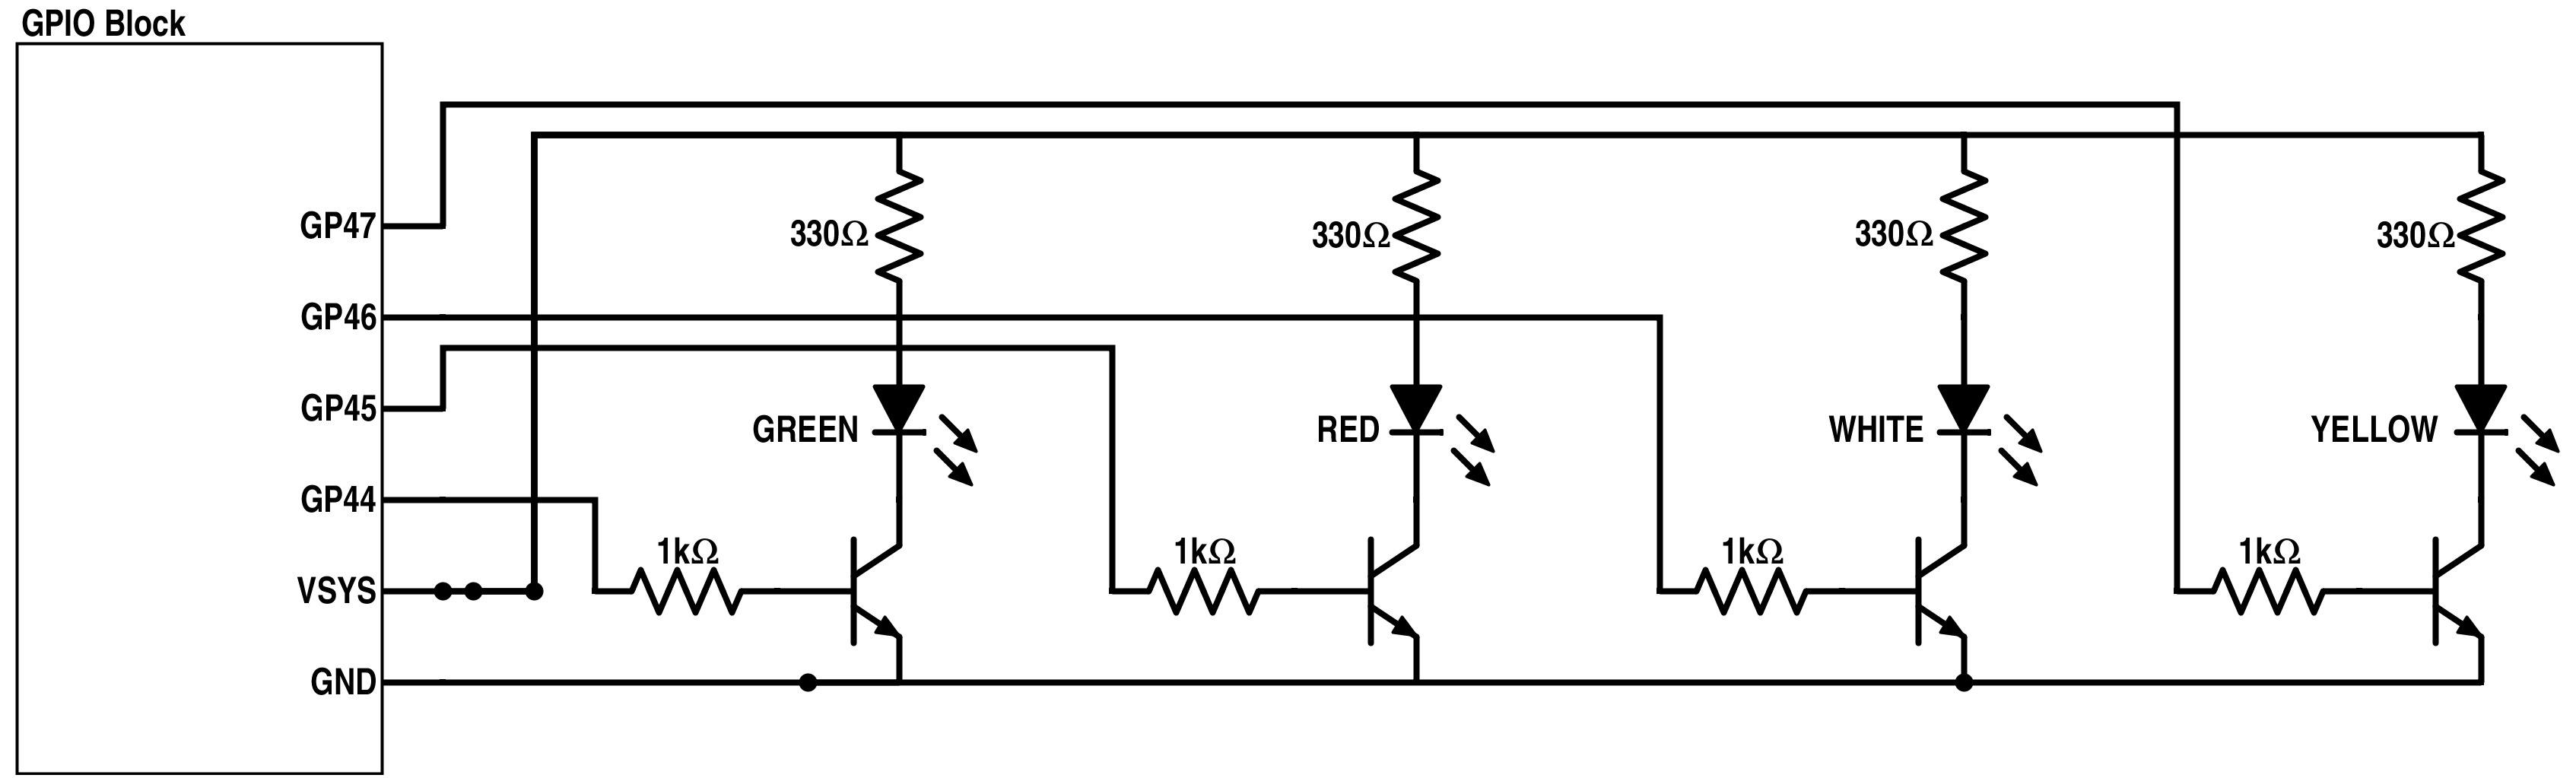
Important: The direction of the LEDs and the transistors matter! For the LEDs, the anode (longer leg) connects to a 330Ω resistor, while the cathode (shorter leg) connects to the collector of the transistor. When the flat edge of a transistor is facing you, the order of the pins from left to right are as follows: emitter, base, and collector.
Testing the circuit
To see if the LEDs are configured correctly, power on Edison and run either (or both) of the following Python programs:
# All the LEDs turn on and off at the same time... CTRL+C to quit
python blink.py

# Cycles through the LEDs, one at a time starting with green... CTRL+C to quit
python cycle.py
Check out the videos of the blinking and cycling LEDs to see the programs in action.
Speech-activated LEDs
speech.py contains the code for activating the LEDs with speech. In main(), the program continually records 2-second audio clips, decodes the speech using pocketsphinx, then triggers the appropriate LED action. It also plays back the recognized word(s) through the headset.
See triggerLeds() to see which words correspond to a LED action. Currently, the action words are:
- RED
- GREEN
- WHITE
- YELLOW
- ALL
- TORONTO
- CANADA
(The latter two words are a shout out to FITC Toronto!)
Run the program:
# CTRL+C to quit
python speech.py
Speak into the mic of the USB headset and say any of the trigger words. The corresponding LED action should happen!
Note: The language model files are located in lm/. To create your own set of commands, replace the words in lm/corpus.txt and use the Sphinx Knowledge Base Tool to generate a new language model (.lm) and dictionary (.dic). You will then need to replace the filenames in speech.py and modify triggerLeds() to suit your needs.