LGSideMenuController
iOS view controller which manages left and right side views.


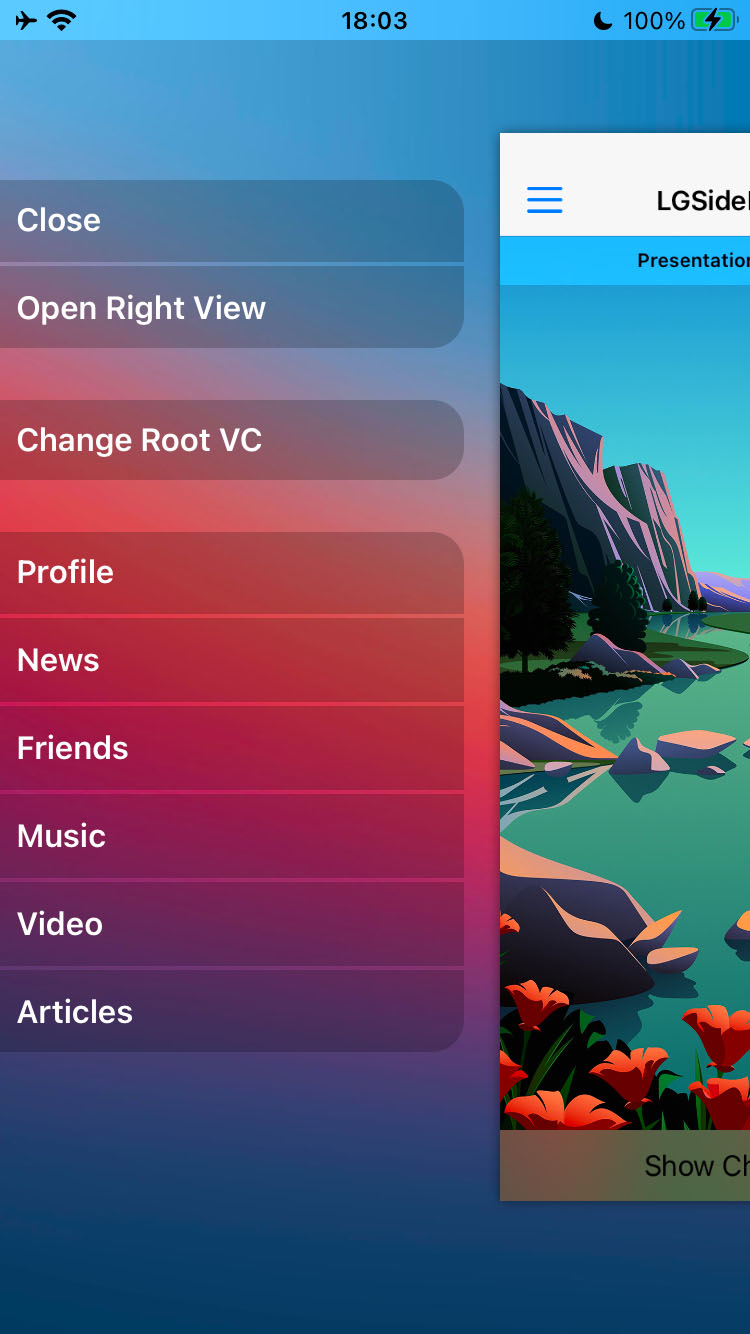
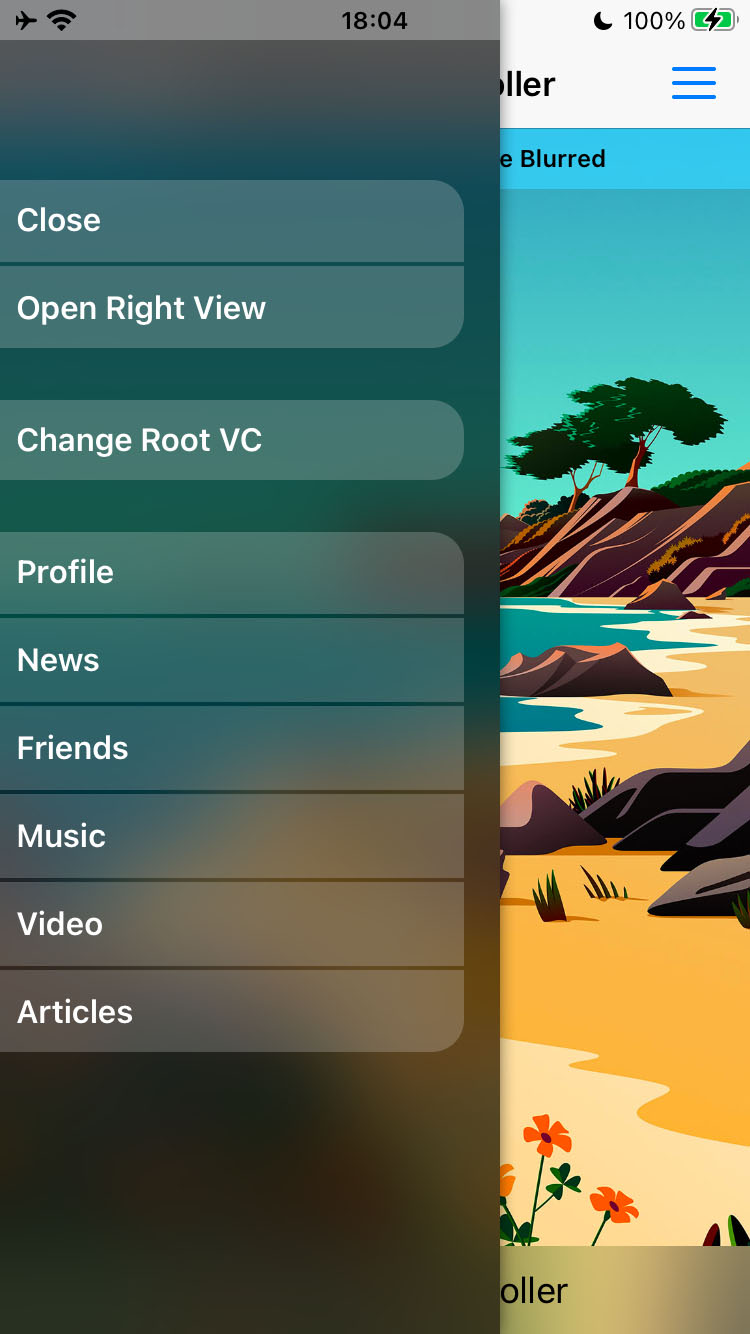
Preview
Presentation Style: Scale From Big

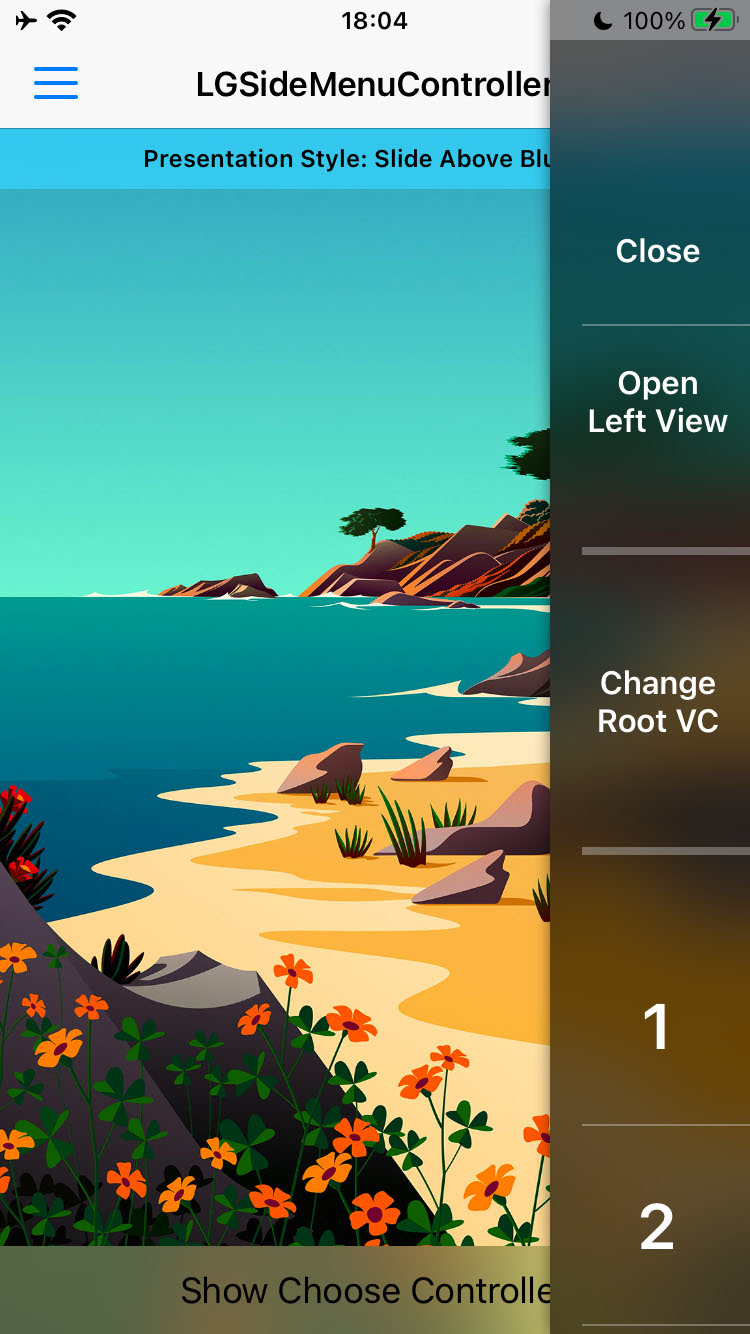
Presentation Style: Slide Above Blurred
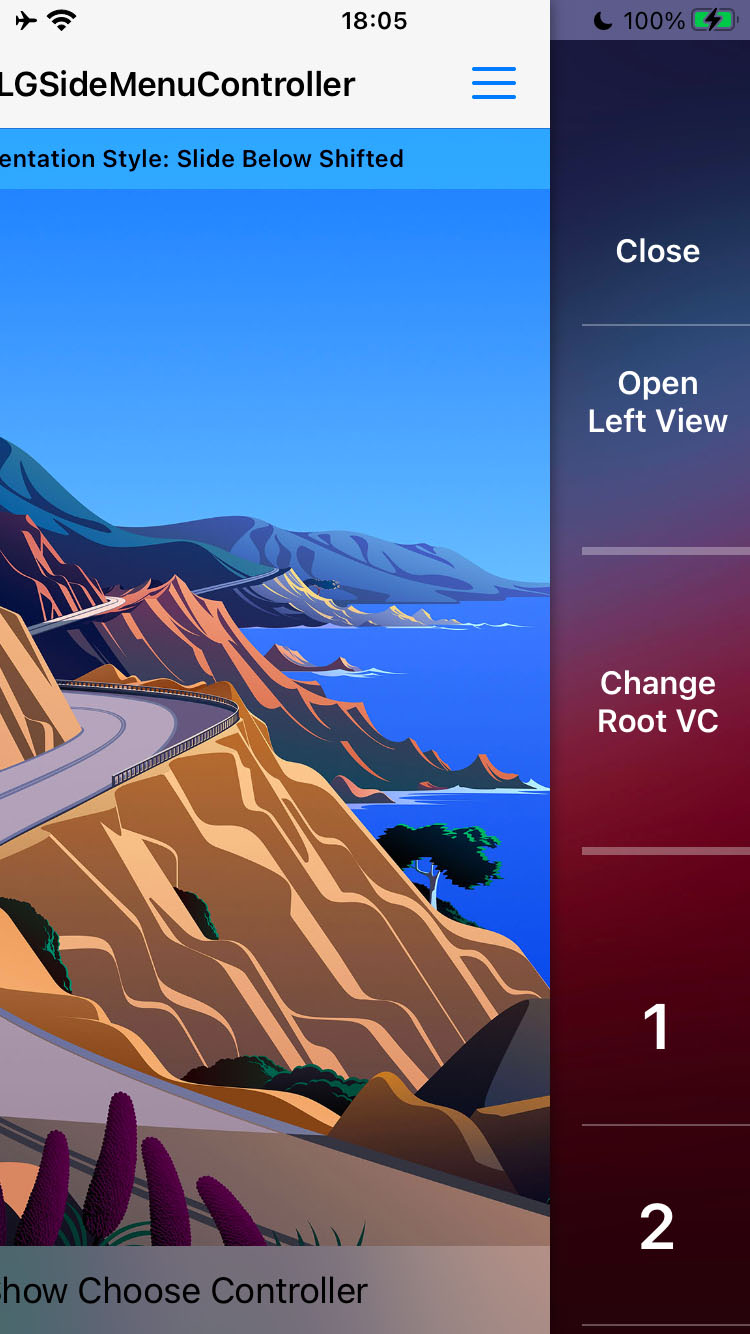
Presentation Style: Slide Below Shifted


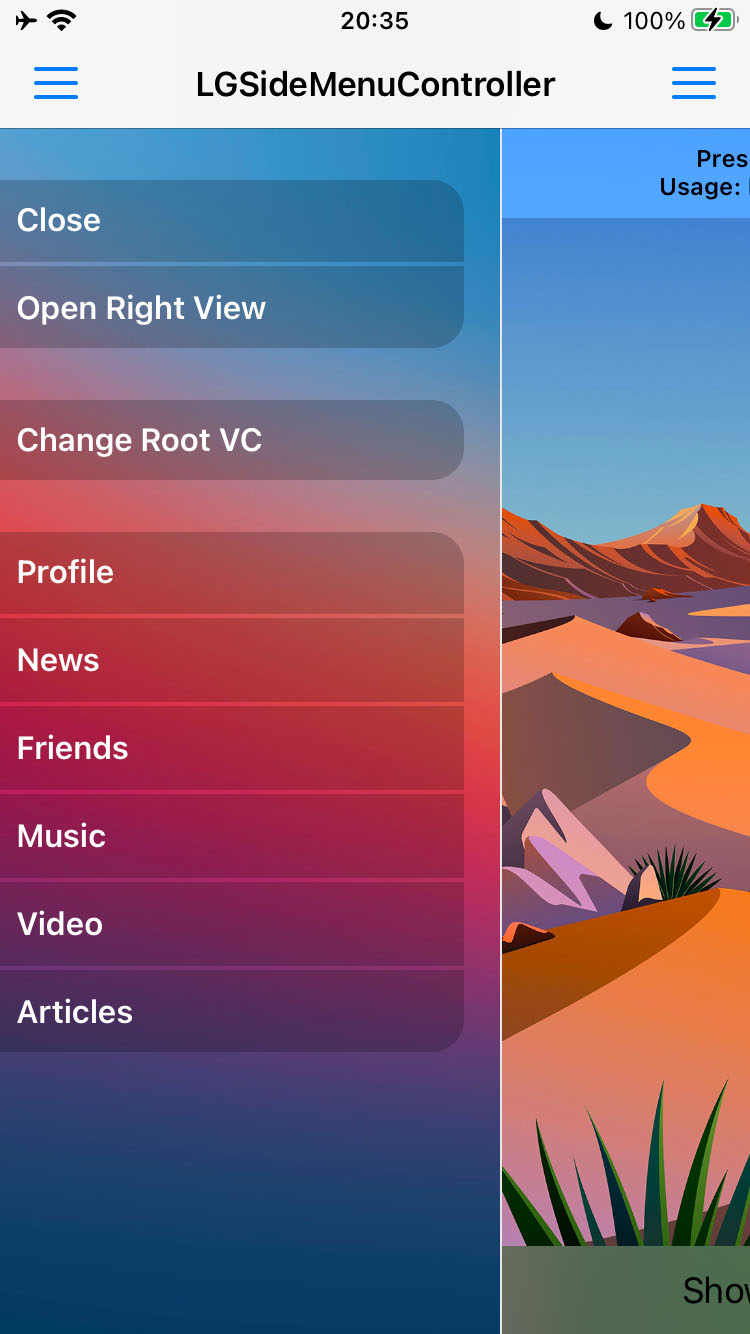
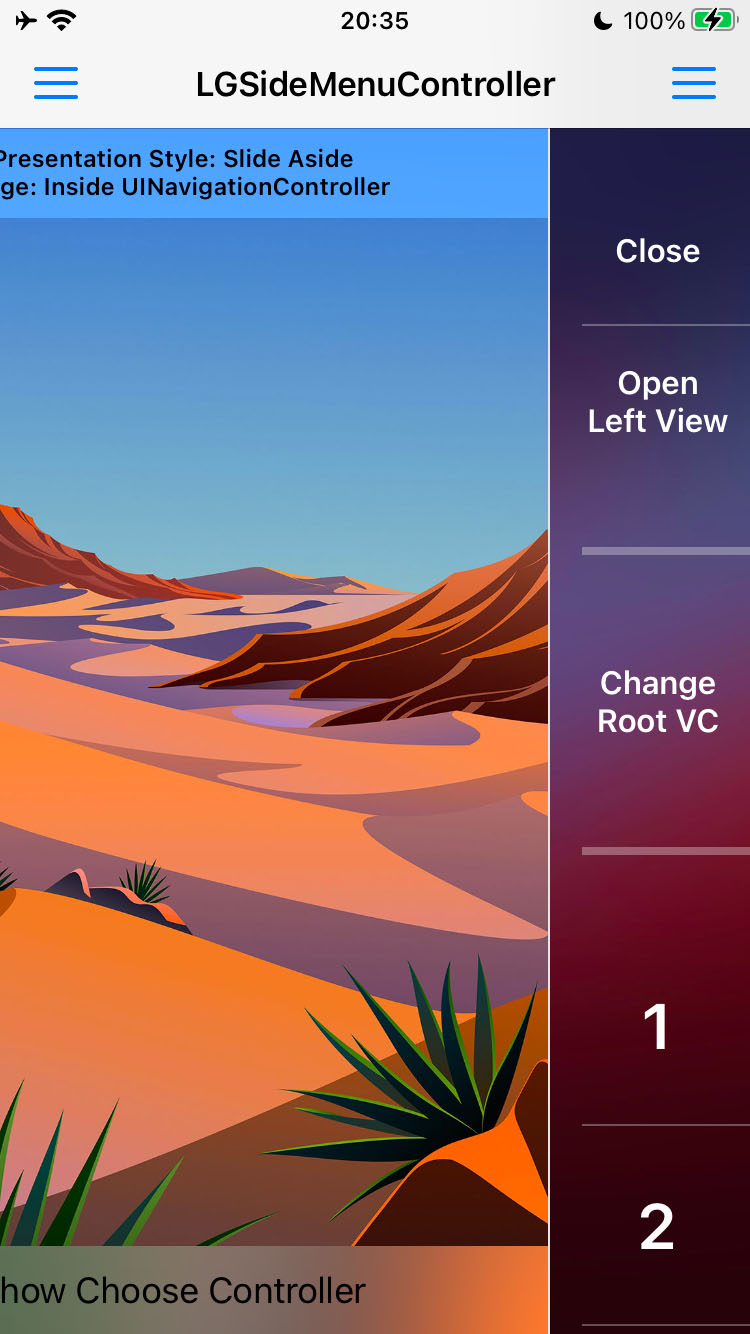
Presentation Style: Slide Aside + Usage: Inside UINavigationController

Other presentation styles and examples of usage you can try in included demo projects. Also you can make your very own style, as they are highly customizable.
Installation
| LGSideMenuController Version | Min iOS Version | Language |
|---|---|---|
| 1.0.0 - 1.0.10 | 6.0 | Objective-C |
| 1.1.0 - 2.2.0 | 8.0 | Objective-C |
| 2.3.0 | 9.0 | Objective-C |
| 3.0.0 | 9.0 | Swift |
With Source Code
- Download repository
- Add LGSideMenuController directory to your project
- Enjoy!
With Swift Package Manager
Starting with Xcode 9.0 you can use built-in swift package manager, follow apple documentation.
First supported version is 2.3.0.
With CocoaPods
CocoaPods is a dependency manager for Objective-C, which automates and simplifies the process of using 3rd-party libraries in your projects. To install with CocoaPods, follow the "Get Started" section on CocoaPods.
Podfile
platform :ios, '9.0'
use_frameworks!
pod 'LGSideMenuController'
Then import framework where you need to use the library:
import LGSideMenuControllerWith Carthage
Carthage is a lightweight dependency manager for Swift and Objective-C. It leverages CocoaTouch modules and is less invasive than CocoaPods. To install with carthage, follow instructions on Carthage.
Cartfile
github "Friend-LGA/LGSideMenuController"Then import framework where you need to use the library:
import LGSideMenuControllerUsage
LGSideMenuController is inherited from UIViewController, so you can use it the same way as any other UIViewController.
First, you need to provide basic view controllers or views, which will be used to show root, left and right views.
rootViewControllerorrootView. This view controller or view will be used as the root view.leftViewControllerorleftView. This view controller or view will be used as the left side view.rightViewControllerorrightView. This view controller or view will be used as the right side view.
// You don't have to assign both: left and right side views.
// Just one is enough, but you can use both if you want.
// UIViewController() and UIView() here are just as an example.
// Use any UIViewController or UIView to assign, as you wish.

let sideMenuController =
    LGSideMenuController(rootViewController: UIViewController(),
                         leftViewController: UIViewController(),
                         rightViewController: UIViewController())

// ===== OR =====

let sideMenuController =
    LGSideMenuController(rootView: UIView(),
                         leftView: UIView(),
                         rightView: UIView())

// ===== OR =====

let sideMenuController = LGSideMenuController()
sideMenuController.rootViewController = UIViewController()
sideMenuController.leftViewController = UIViewController()
sideMenuController.rightViewController = UIViewController()

// ===== OR =====

let sideMenuController = LGSideMenuController()
sideMenuController.rootView = UIView()
sideMenuController.leftView = UIView()
sideMenuController.rightView = UIView()
Second, you probably want to choose presentation style, there are a few:
scaleFromBig. Side view is located below the root view and when appearing is changing its scale from large to normal. Root view also is going to be minimized and moved aside.scaleFromLittle. Side view is located below the root view and when appearing is changing its scale from small to normal. Root view also is going to be minimized and moved aside.slideAbove. Side view is located above the root view and when appearing is sliding from a side. Root view is staying still.slideAboveBlurred. Side view is located above the root view and when appearing is sliding from a side. Root view is staying still. Side view has blurred background.slideBelow. Side view is located below the root view. Root view is going to be moved aside.slideBelowShifted. Side view is located below the root view. Root view is going to be moved aside. Also content of the side view has extra shifting.slideAside. Side view is located at the same level as root view and when appearing is sliding from a side. Root view is going to be moved together with the side view.
sideMenuController.leftViewPresentationStyle = .slideAboveBlurred
sideMenuController.rightViewPresentationStyle = .slideBelowShifted
Third, you might want to change width of your side view.
By default it's calculated as smallest side of the screen minus 44.0, then compare it to 320.0 and choose smallest number.
Like so: min(min(UIScreen.main.bounds.width, UIScreen.main.bounds.height) - 44.0, 320.0).
sideMenuController.leftViewWidth = 250.0
sideMenuController.rightViewWidth = 100.0
To show/hide side views just use any of these and similar methods:
// ===== LEFT =====

/// Shows left side view.
func showLeftView()

/// Hides left side view.
func hideLeftView()

/// Toggle (shows/hides) left side view.
func toggleLeftView()

// ===== RIGHT =====

/// Shows right side view.
func showRightView()

/// Hides right side view.
func hideRightView()

/// Toggle (shows/hides) right side view.
func toggleRightView()
Quick Example
You don't have to create both: left and right side views. Just one is enough, but you can use both if you want. We create them here just as an example.
Without Storyboard
- Create root view controller (for example
UINavigationController). - Create left view controller (for example
UITableViewController). - Create right view controller (for example
UITableViewController). - Create instance of LGSideMenuController with these controllers.
- Configure.
// Simple AppDelegate.swift
// Just as an example. Don't take it as a strict approach.

import UIKit
import LGSideMenuController

@main
class AppDelegate: UIResponder, UIApplicationDelegate {

    var window: UIWindow?

    func application(_ application: UIApplication, didFinishLaunchingWithOptions launchOptions: [UIApplication.LaunchOptionsKey: Any]?) -> Bool {
        // 1. Create root view controller.
        // Here it is just simple `UINavigationController`.
        // Read apple documentation and google to create one:
        // https://developer.apple.com/documentation/uikit/uinavigationcontroller
        // https://google.com/search?q=uinavigationcontroller+example
        let rootNavigationController = UINavigationController(rootViewController: UIViewController())

        // 2. Create left and right view controllers.
        // Here it is just simple `UITableViewController`.
        // Read apple documentation and google to create one:
        // https://developer.apple.com/documentation/uikit/uitableviewcontroller
        // https://google.com/search?q=uitableviewcontroller+example
        let leftViewController = UITableViewController()
        let rightViewController = UITableViewController()

        // 3. Create instance of LGSideMenuController with above controllers as root and left.
        let sideMenuController = LGSideMenuController(rootViewController: rootNavigationController,
                                                      leftViewController: leftViewController,
                                                      rightViewController: rightViewController)

        // 4. Set presentation style by your taste if you don't like the default one.
        sideMenuController.leftViewPresentationStyle = .slideAboveBlurred
        sideMenuController.rightViewPresentationStyle = .slideBelowShifted

        // 5. Set width for the left view if you don't like the default one.
        sideMenuController.leftViewWidth = 250.0
        sideMenuController.rightViewWidth = 100.0

        // 6. Make it `rootViewController` for your window.
        self.window = UIWindow(frame: UIScreen.main.bounds)
        self.window!.rootViewController = sideMenuController
        self.window!.makeKeyAndVisible()

        // 7. Done!
        return true
    }

}
For deeper examples check NonStoryboard Demo Project.
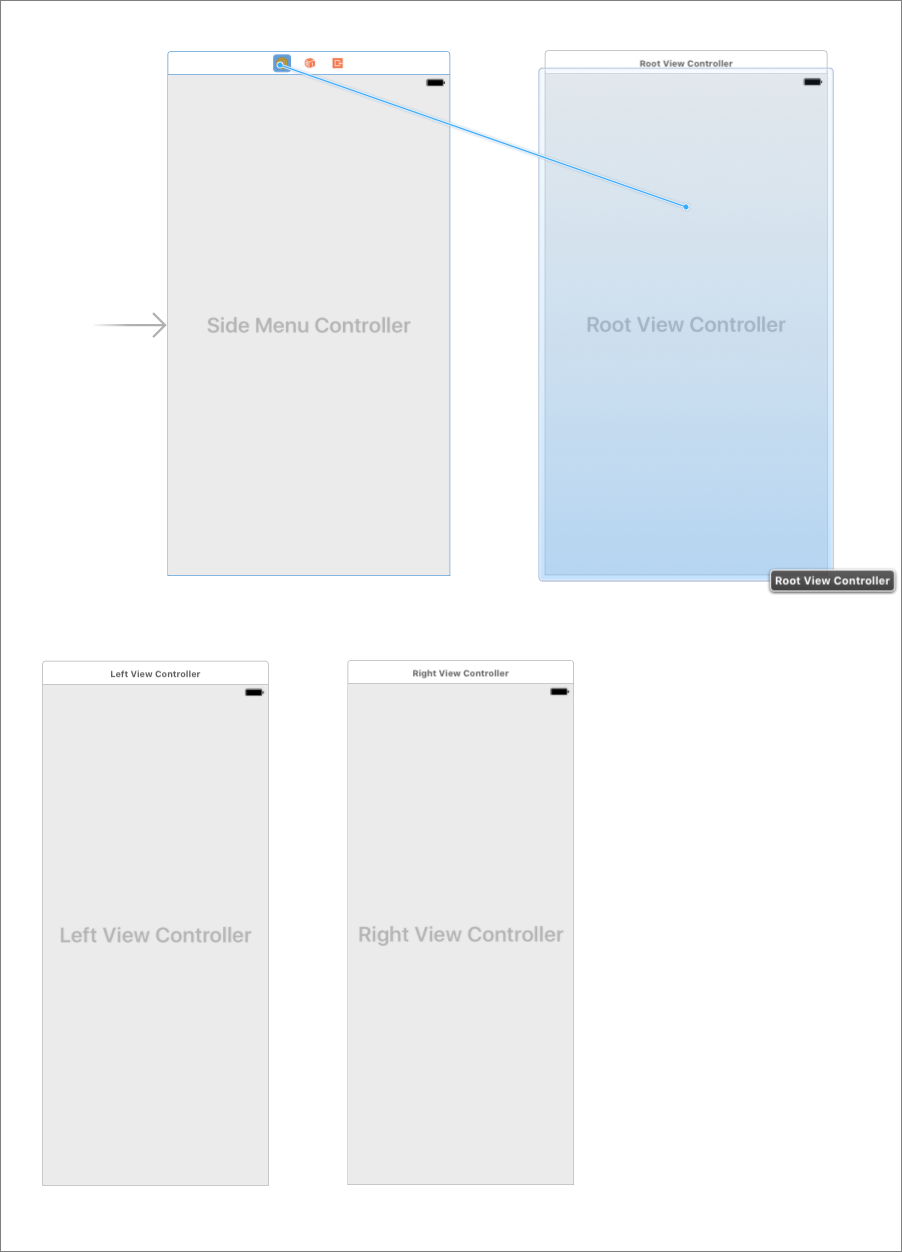
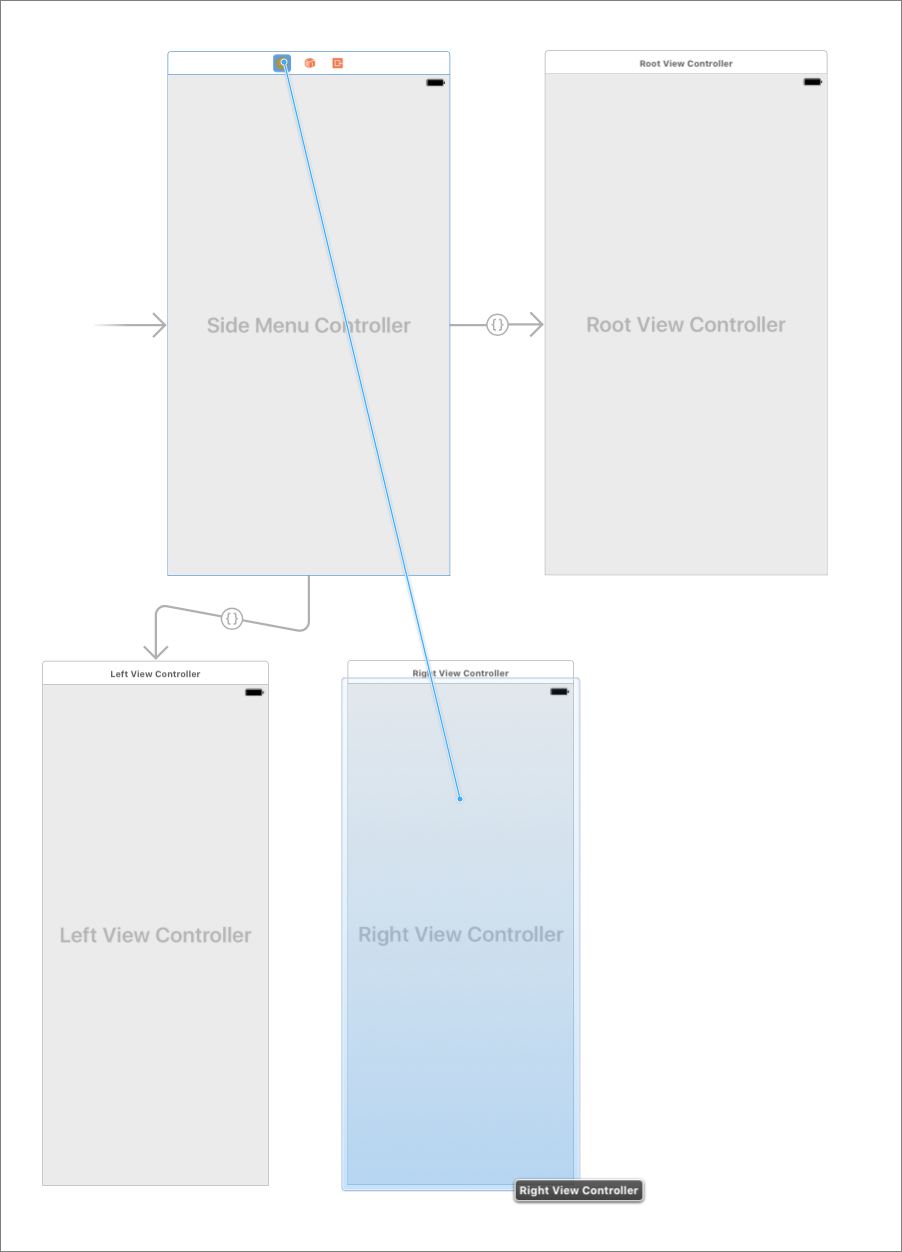
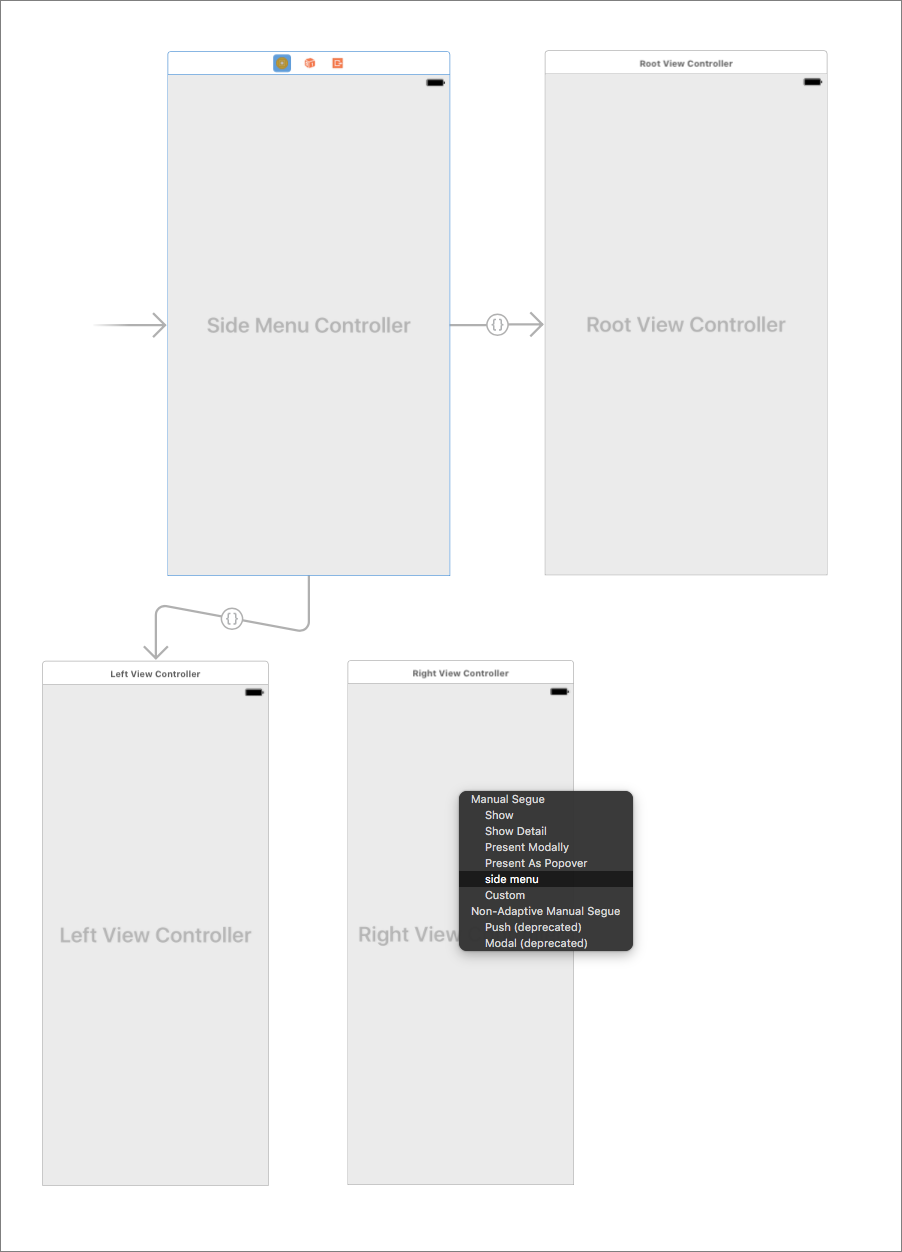
With Storyboard
- Create instance of
LGSideMenuControlleras initial view controller for yourStoryboard. - Create root view controller (for example
UINavigationController). - Create left view controller (for example
UITableViewController). - Create right view controller (for example
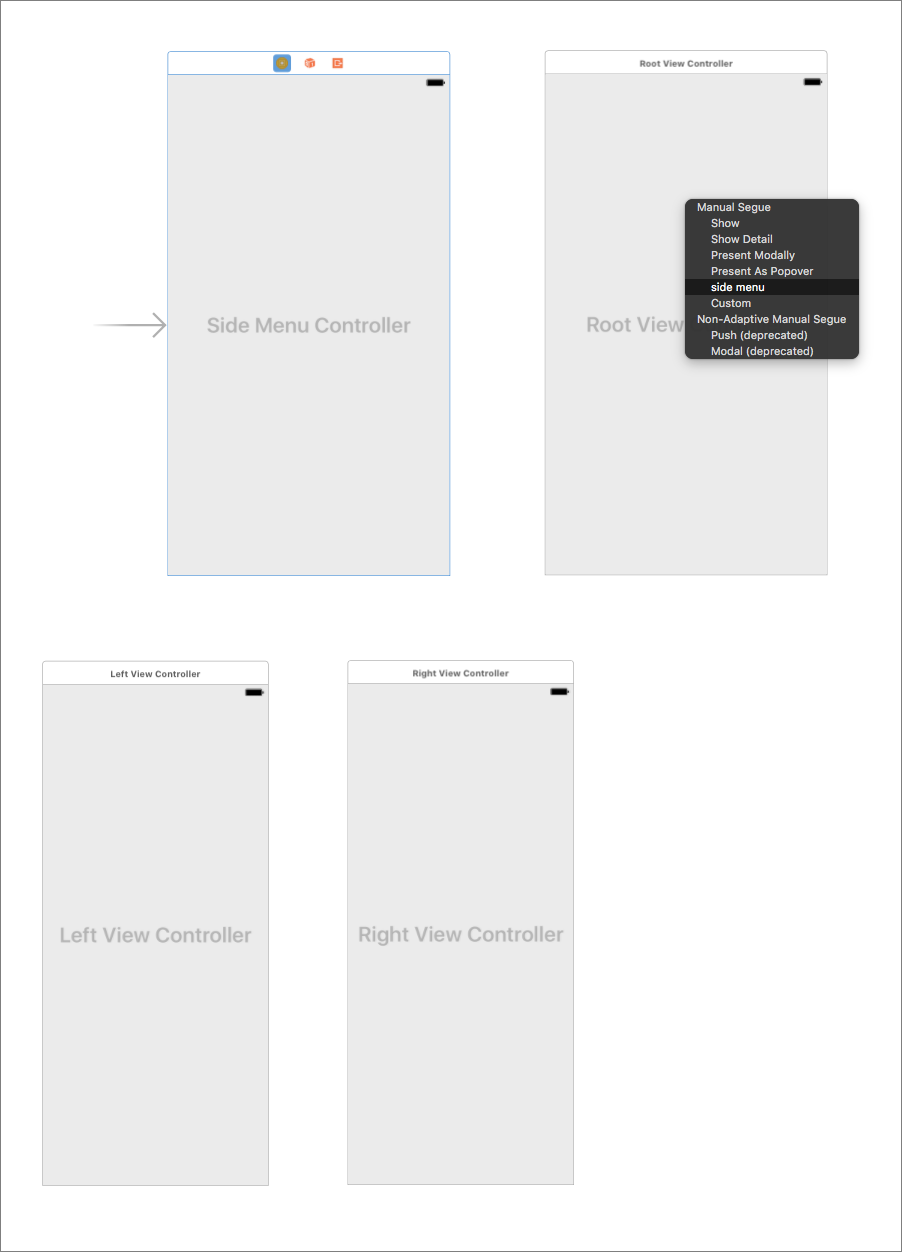
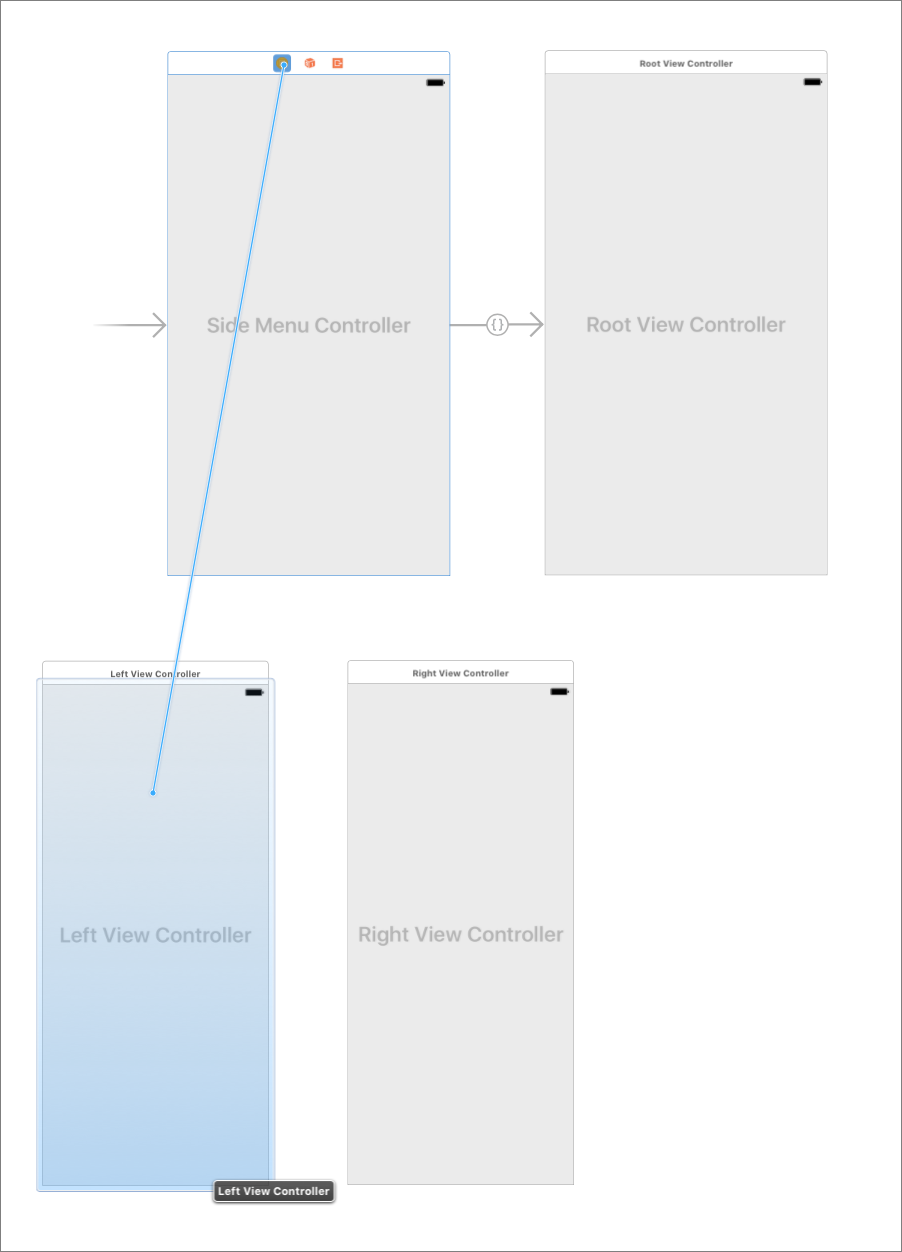
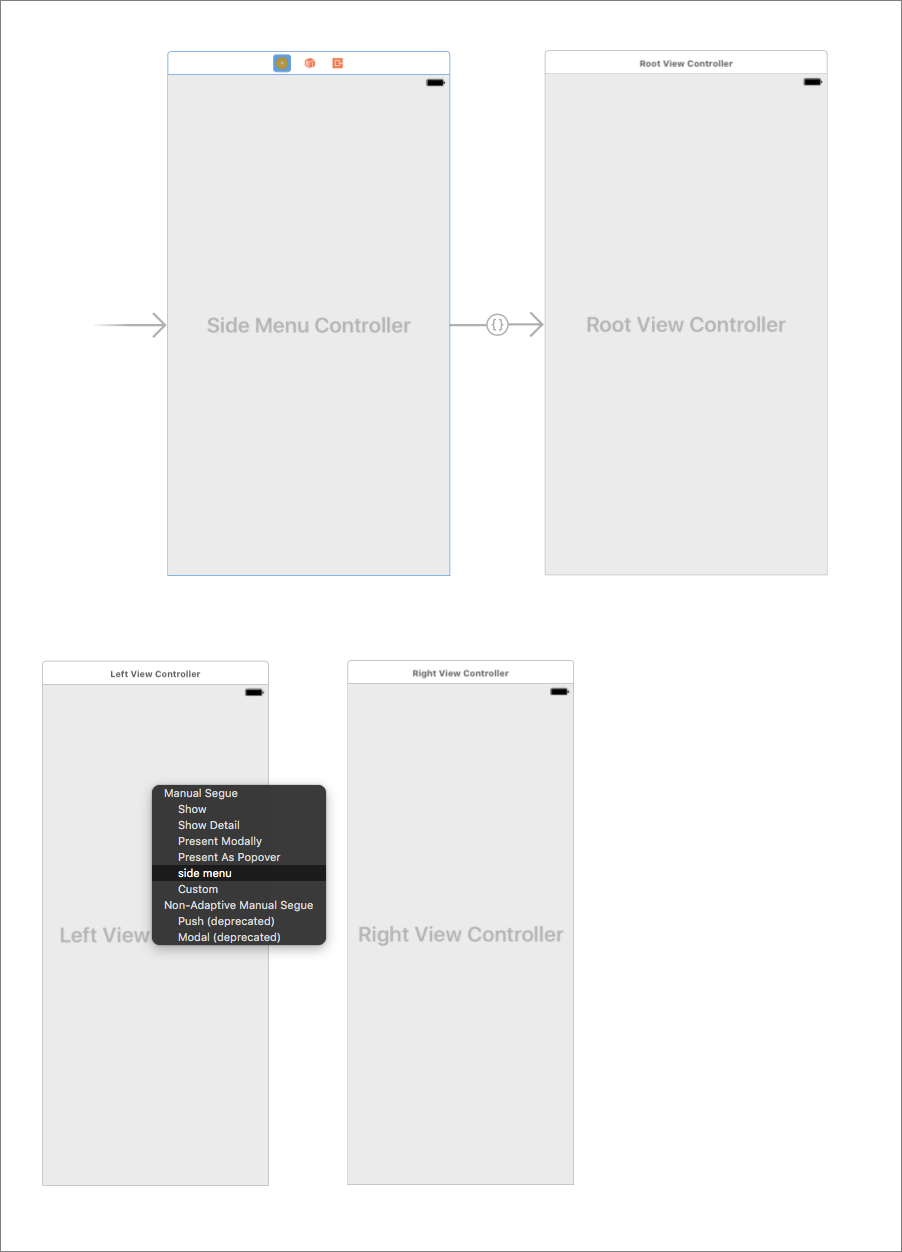
UITableViewController). - Now you need to connect them all using segues of class
LGSideMenuSeguewith identifiers:root,leftandright.


- You can change
leftViewWidth,rightViewWidthand most of the other properties insideLGSideMenuController's attributes inspector.
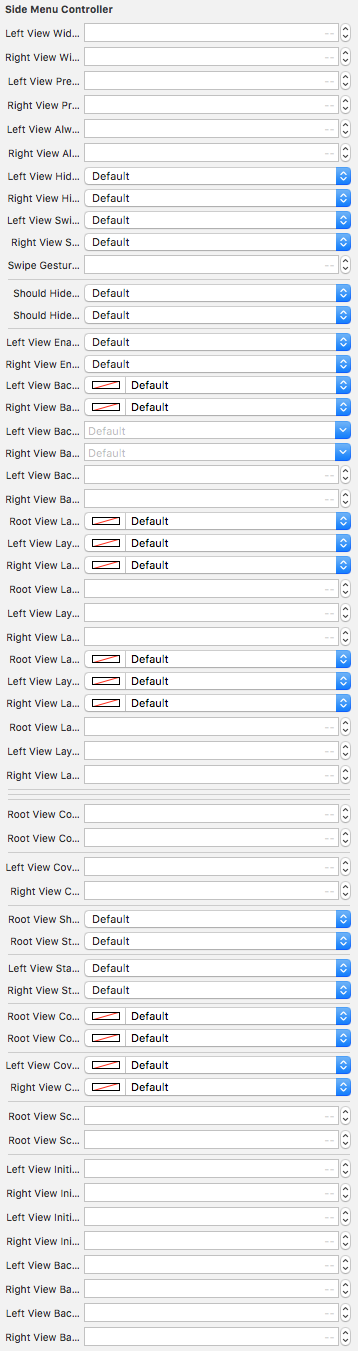
enumproperties are not yet supported (by apple) inside Xcode builder, so to changeleftViewPresentationStyleandrightViewPresentationStyleyou will need to do it programmatically. For this you will need to create counterpart for yourLGSideMenuControllerand change these values inside. This is done by creatingLGSideMenuControllersubclass and assigning this class to your view controller insideStoryboard's custom class section.
// SideMenuController.swift

import UIKit
import LGSideMenuController

class SideMenuController: LGSideMenuController {

    // `viewDidLoad` probably the best place to assign them.
    // But if necessary you can do it in other places as well.
    override func viewDidLoad() {
        super.viewDidLoad()

        leftViewPresentationStyle = .slideAboveBlurred
        rightViewPresentationStyle = .slideBelowShifted
    }

}
For deeper examples check Storyboard Demo Project.
Wiki
If you still have questions, please take a look at the wiki.
More
For more details see files itself and try Xcode demo projects:
Frameworks
If you like LGSideMenuController, check out my other useful libraries:
- LGAlertView Customizable implementation of UIAlertViewController, UIAlertView and UIActionSheet. All in one. You can customize every detail. Make AlertView of your dream! :)
- LGPlusButtonsView Customizable iOS implementation of Floating Action Button (Google Plus Button, fab).
License
LGSideMenuController is released under the MIT license. See LICENSE for details.