geerlingguy / Pi Timelapse
Programming Languages
Projects that are alternatives of or similar to Pi Timelapse
Raspberry Pi Time-Lapse App

There are a ton of different Time-Lapse scripts and apps built for the Raspberry Pi, but I wanted to make a more customized setup for my own needs.
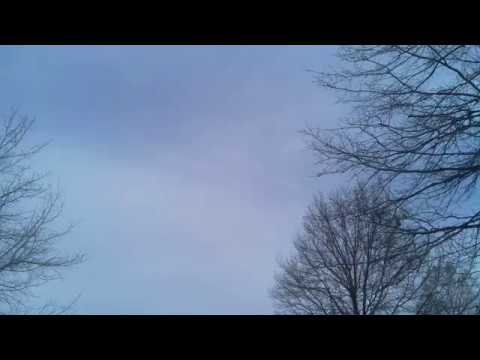
Here's an example time-lapse video I recorded of cirrus clouds in the sky outside my window (click to view on YouTube):
There are many other examples in my Timelapses playlist on YouTube.
Usage
For an in-depth overview, see my blog post Raspberry Pi Zero W as a headless time-lapse camera.
First, make sure the camera interface is enabled—if you don't, you'll see the message Camera is not enabled. Try running 'sudo raspi-config':
- Run
sudo raspi-config - Go to 'Interfacing Options'
- Select 'Camera'
- Select 'Yes' for enabling the camera
- Select 'Finish' in the main menu and then 'Yes' to reboot the Pi
Now, set up this timelapse app on your Raspberry Pi:
- Install dependencies:
sudo apt-get install -y git python-picamera python-yaml - Clone this repository to your Pi:
git clone https://github.com/geerlingguy/pi-timelapse.git - Copy
example.config.ymltoconfig.yml. - Configure the timelapse by modifying values in
config.yml. - In the Terminal,
cdinto this project directory and runpython timelapse.py.
After the capture is completed, the images will be stored in a directory named series-[current date].
Run on Raspberry Pi Startup and manage timelapses via Systemd
This project includes a Systemd unit file that allows the timelapse script to be managed like any other service on the system (e.g. start with systemctl start timelapse, stop with systemctl stop timelapse).
To use this feature, do the following:
- In your
config.yml, set thetotal_imagesvariable to a large number—as large as you want, within Python's limitations. This way you won't start a timelapse and it stops after very few images are taken. - Copy the
timelapse.servicefile into the Systemd unit file location:sudo cp timelapse.service /etc/systemd/system/timelapse.service. - Reload the Systemd daemon (
sudo systemctl daemon-reload) to load in the new unit file. - Choose how you want to manage the
timelapseservice:-
To start a timelapse at system boot:
sudo systemctl enable timelapse(disableto turn off,is-enabledto check current status) -
To start a timelapse at any time:
sudo systemctl start timelapse(if one is not already running) -
To stop a timelapse in progress:
sudo systemctl stop timelapse
-
To start a timelapse at system boot:
Note: You should not try running a timelapse via the Python script directly and via Systemd at the same time. This could do weird things, and is not a typical mode of operation!
Creating animated gifs or videos
Animated gifs
Requirements: You should install ImageMagick (sudo apt-get -y install imagemagick)
If you have create_gif set to True in config.yml, the Pi will also generate an animated gif immediately following the conclusion of the capture.
Note: Animated gif generation can take a very long time on slower Pis, like the Pi Zero, A+, or original A or B.
Videos
Requirements: You should install FFmpeg (which is actually avconv on Raspbian — sudo apt-get -y install libav-tools)
If you have create_video set to True in config.yml, the Pi will also generate a video immediately following the conclusion of the capture.
Note: Video generation can take a very long time on slower Pis, like the Pi Zero, A+, or original A or B.
Manually Compiling Videos with ffmpeg
You can use ffmpeg on other platforms (or avconv on the Pi) to put together image sequences after the fact. For example, to take a sequence like image00001.jpg to image00248.jpg and generate an MP4 video:
ffmpeg -framerate 20 -i image%05d.jpg -vf format=yuv420p timelapse.mp4
And if you wanted to start the video in the middle of the sequence (e.g. instead of starting at image00001.jpg, start at image00024.jpg), you can pass the -start_number option:
ffmpeg -framerate 20 -start_number 634 -i image%05d.jpg -vf format=yuv420p timelapse.mp4
These commands assume you're inside the folder containing all the images, and output a file named timelapse.mp4 in the same directory.
Manual Settings
For a more pleasing timelapse, it's best to lock in manual settings for exposure and white balance (otherwise the video has a lot of inconsistency from frame to frame). This project allows almost complete control over manual exposure settings through variables in config.yml, and below are listed some rules of thumb for your own settings.
Read more about the Raspberry Pi's Camera hardware.
Resolution
The most common and useful Pi Camera resolutions (assuming a V2 camera module—V1 modules have different optimal resolutions) are listed below:
| Size (width x height) | Aspect | Common name |
|---|---|---|
| 3280 x 2464 | 4:3 | (max resolution) |
| 1920 x 1080 | 16:9 | 1080p |
| 1280 x 720 | 16:9 | 720p (2x2 binning) |
| 640 x 480 | 4:3 | 480p (2x2 binning) |
Binning allows the Pi to sample a grid of four pixels and downsample the average values to one pixel. This makes for a slightly more color-accurate and sharp picture at a lower resolution than if the Pi were to skip pixels when generating the image.
ISO
ISO is basically an indication of 'light sensitivity'. Without getting too deep in the weeds, you should use lower ISO values (60 (V2 camera only), 100, 200) in bright situations, and higher ISO values (400, 800) in dark situations. There's a lot more to it than that, and as you find out creative ways to use shutter speed and ISO together, those rules go out the window, but for starters, you can choose the following manual values to lock in a particular ISO on the Pi Camera:
-
60(not available on V1 camera module) 100200400800
Shutter Speed
Most photographers are familiar with the fractional values for common shutter speeds (1s, 1/10s, 1/30s, 1/60s, etc.), so here's a table to help convert some of the most common shutter speeds into microseconds (the value used in config.yml):
| Fractional Shutter Speed | µs |
|---|---|
| 6 seconds (max) | 6000000 |
| 1 second | 1000000 |
| 1/8 | 125000 |
| 1/15 | 66666 |
| 1/30 | 33333 |
| 1/60 | 16666 |
| 1/125 | 8000 |
| 1/250 | 4000 |
| 1/500 | 2000 |
| 1/500 | 2000 |
| 1/1000 | 1000 |
| 1/2000 | 500 |
White Balance
White balance values on the Raspberry Pi camera are set by adjusting the red and blue gain values—the green value is constant. You need to amplify red and blue certain amounts to set a specific color temperature, and here are some of the settings that worked in specific situations for my camera. Note that you might need to adjust/eyeball things a little better for your own camera, as some unit-to-unit variance is to be expected on such an inexpensive little camera!
| White Balance Setting | Color Temperature (approx) | red_gain | blue_gain |
|---|---|---|---|
| Clear blue sky | 8000K+ | 1.5 | 1.5 |
| Cloudy sky / overcast | 6500K | 1.5 | 1.2 |
| Daylight | 5500K | 1.5 | 1.45 |
| Fluorescent / 'cool' | 4000K | 1.3 | 1.75 |
| Incandescent / 'warm' | 2700K | 1.25 | 1.9 |
| Candle | <2000K | TODO | TODO |
Note: These values will be updated over time as I find more time to calibrate my Pi camera against a few DSLRs and other devices which are much more accurate! Please file an issue if you can help make these mappings better, or find a nicer way to adjust calibrations rather than a red_gain and blue_gain value.
Rotation
Depending on the placement of your camera, the picture taken could be upside down. To correct this, set rotation to a value of 0 (no rotation), or 90, 180 or 270 degrees to rotate the image.
License
MIT License.
Author
This project is maintained by Jeff Geerling, author of Ansible for DevOps.