virtualwiz / Tensorrider_self_driving_car
Projects that are alternatives of or similar to Tensorrider self driving car
TensorRider 自动驾驶车
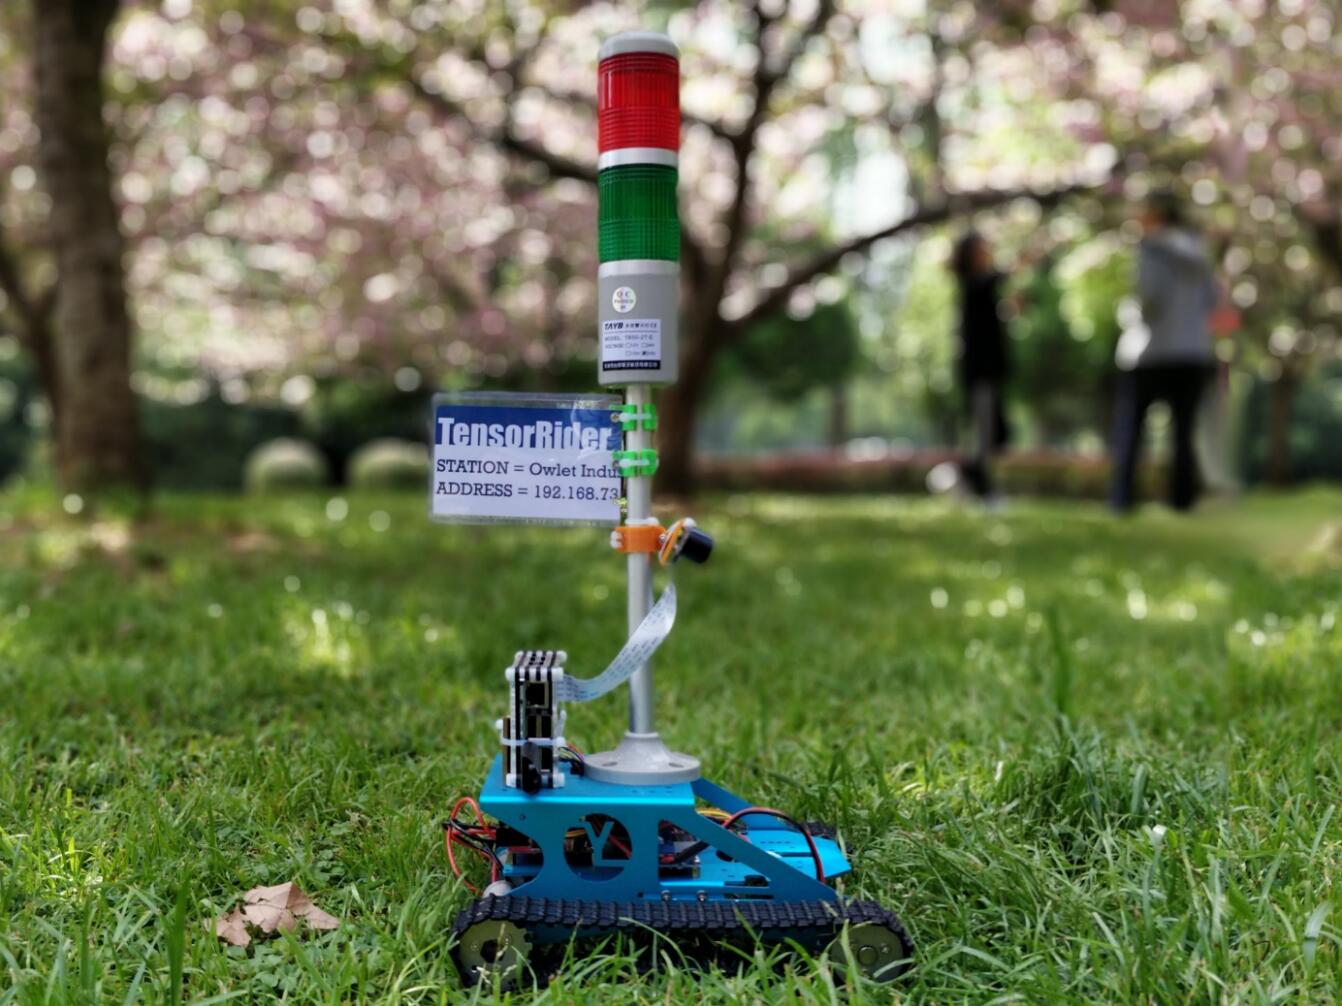
TensorRider是一种基于BP神经网络,对驾驶场景具有学习能力的的简易自动驾驶车模型。目前,TensorRider仅能实现基本的车道保持功能,即在学习了操作者的遥控驾驶行为后,根据经验对类似的场景做出自动驾驶行为。
TensorRider使用Google TensorFlow作为算法框架,可以在CPU或支持CUDA的NVIDIA GPU上进行训练。
完成训练后,可以使用一台计算机(Linux,macOS或Windows)作为TensorRider的计算服务器,令实验小车在线运行,也可以通过在TensorRider的Raspberry Pi上连接Intel Movidius Neural Compute Stick(NCS),实现离线运行。
硬件需求
- TensorRider自动驾驶车模型,包括Raspberry Pi,摄像头,电机驱动电路等
- 运行Linux,Apple macOS 10.12+或Microsoft Windows 7+的计算机
- 带有模拟摇杆的游戏控制器(手柄)
- (非必需)兼容CUDA的NVIDIA GPU,Intel Movidius NCS
- 连接质量良好的无线局域网
使用方法
TensorRider实现基于学习的自动驾驶分为3个阶段:收集数据,建立模型和自动运行。
1.收集数据
在这一步骤中,车辆模型在人工指引下,边行驶边记录摄像头拍摄的图像,同时记录下拍摄图像时车辆模型的转向角度。当收集了足够多的图像-转向角度数据后,即可以这些数据为依据,训练神经网络。
我们假设你已经在计算机上安装好了Python3和Jupyter Notebook。首先在计算机端安装依赖的python软件包。
pip3 install pygame
注:我们假设你已掌握使用pip安装软件包的方法,以及在虚拟环境中安装软件包的方法。例如根据你使用的python环境的不同,你可能需要使用conda install或pip install。
目录Step_1_Data_Collection内包含进行数据采集所需的程序。先使用SFTP或NFS等方式,将copy_to_rpi目录中的文件传输至实验小车端的Raspberry Pi上。在Raspberry Pi上连接一个使用FAT32文件系统的USB闪存盘,并启动Raspberry Pi。
使用SSH登录Raspberry Pi,建立USB闪存盘的挂载点
sudo mkdir /mnt/pdisk
然后运行
sudo mount -o uid=pi,gid=pi /dev/sda1 /mnt/pdisk/
挂载USB闪存盘。
你也可以选择将数据存储在Raspberry Pi的SD卡,甚至内存文件系统中。但是比起使用网络传输采集的大量文件,使用USB闪存盘拷贝是更加快速的方式。如果你希望变更文件的存储位置,可在rpi.py的第161--163行中更改。
挂载完成后运行rpi.py。如果实验小车上安装了状态指示灯,在接收到控制数据之前,红色指示灯每3秒闪烁一次。接着,在计算机上,在transmitter.py的第9行写入小车的局域网IP地址,然后运行transmitter.py。你将看到终端持续打印出读取到的手柄数据。如果与实验小车的连接正常,小车上的指示灯将转为绿色闪烁。
向前轻推控制器的左侧手柄,实验小车开始加速行驶,向后拉左侧手柄可使小车减速。向左、右方向推动右侧手柄,可使实验小车转向。若需要急停,可同时按下L2+R2键,实验小车立即停车。
熟悉实验小车的操控方法后,可在适当的时机按下START键,实验小车开始收集行驶数据。再按一次START停止收集数据。
数据收集建议至少持续30min。在收集数据时,需要使用较慢的恒定速度行驶,因为小车的转弯半径与速度相关。可以同时按下L1+R1键将小车设置为推荐的训练速度。
数据收集完成后,卸载USB闪存盘或安全地关闭Raspberry Pi,将闪存盘中记录的图像移至计算机,作为一个数据集。然后清空闪存盘,重复上述步骤,再收集一些规模较小的数据集,用作测试数据集。
Google公司的TensorFlow项目介绍了一种适用于表示数据集的二进制文件格式TFRecords,我们可将收集到的jpg图像及转向角度,转换为这种格式,便于稍后使用。
将需要转换的数据集目录(内有jpg图片及转向角度txt文件)放在Step_1_Data_Collection目录中,并重命名为dataset,然后运行
python3 convert_to_tfrecords_once.py
程序会要求输出需要转换的图片数量,可以输入总的图片个数,或只转换一部分图像。转换完成后,将生成的record.tfrecords根据需要重命名。下一步中需要两个数据集:1个规模较大(约10000张图像)的训练集,名为train.tfrecords,和1个规模较小(2000-3000张图像左右)的测试集,名为val.tfrecords。
2.建立控制模型
这一步骤将加载数据集,建立BP神经网络,并使用上一步获得的数据集进行训练。
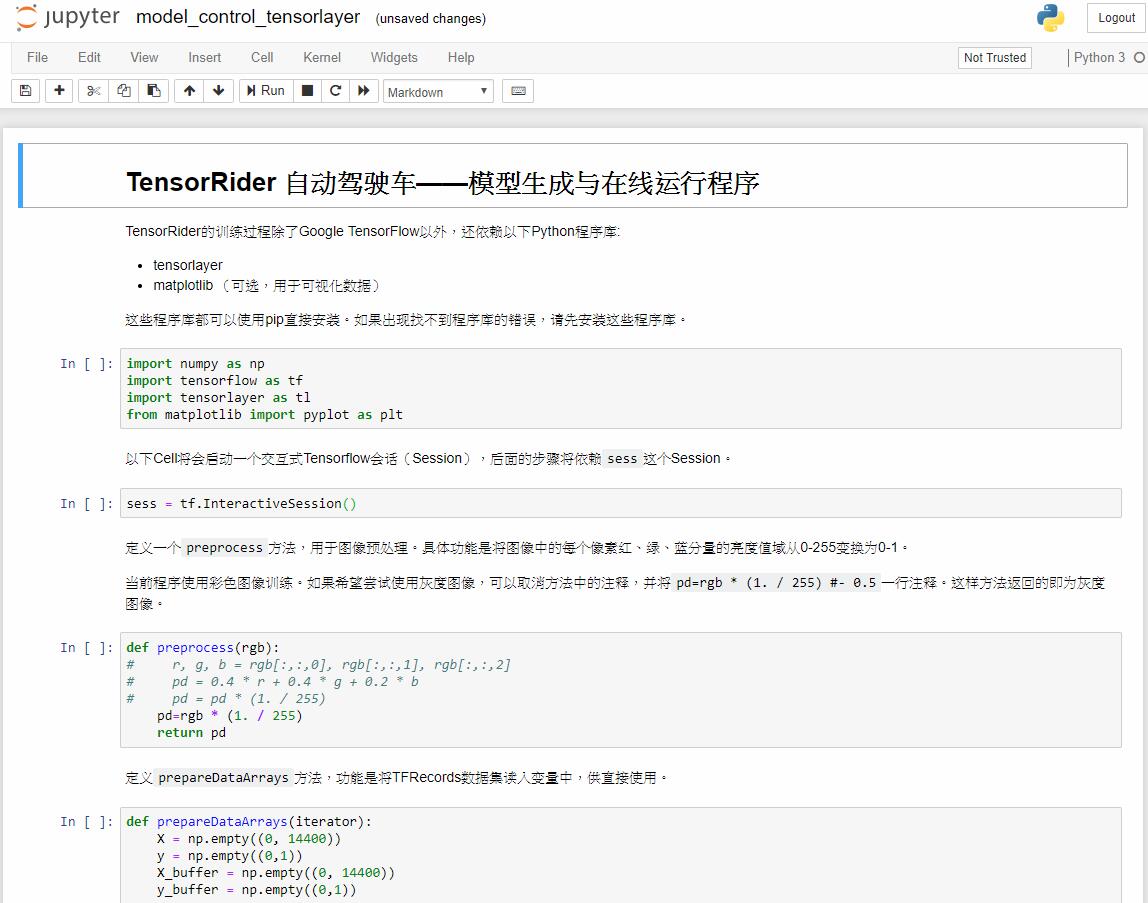
如果需要,先启动安装有TensorFlow的虚拟环境,使用Jupyter Notebook打开Step_2&3a_Train&Run目录中的model_control_tensorlayer.ipynb,按照Jupyter Notebook中的说明执行程序即可。
PS 我使用的是一台游戏型笔记本电脑,装有CUDA并使用NVIDIA Geforce GTX 1050显卡进行神经网络训练。在我的机器上加载40000张图片作为训练集,大约训练20分钟后达到收敛,之后出现了较明显的过拟合现象。希望可以给读者一个大致印象。
当运行完保存模型步骤,你的模型已经生成完成,可以用来控制自动驾驶车了。你可根据需要选择模型保存的格式,在我们的程序中,在线运行和离线运行需要不同的模型描述文件格式。具体可参考Notebook中的说明。
3a.在线运行
在线运行是指,实验小车将拍摄到的图像发至计算机,由计算机执行神经网络计算。完成后将计算结果以遥控指令的形式重新发回实验小车。此过程循环运行,即可实现自动驾驶,驾驶过程中小车与计算机一直保持网络连接。
移至Notebook的开始在线运行部分,安装和导入所需的程序库。
我们需要在Raspberry Pi上安装mjpg-streamer来发送视频流。软件mjpg-streamer是Tom Stoeveken的作品,感谢作者的无私奉献。
使用SSH等方式登录Raspberry Pi终端,运行
sudo apt-get install git cmake libjpeg8-dev
git clone https://github.com/virtualwiz/mjpg-streamer.git
cd mjpg-streamer-experimental
make
sudo make install
将编译和安装mjpg-streamer。
首先在后台启动rpi.py并持续运行。(小车接受遥控指令,指示灯闪烁)
python3 rpi.py&
然后运行以下命令,启动mjpg服务器
./usr/local/bin/mjpg_streamer -o "output_http.so -w ./www" -i "input_raspicam.so -x 80 -y 60 -fps 30"
你可以将此命令写为shell脚本,保存在Raspberry Pi上,以方便使用。
此时,实验小车已建立一个视频流,并等待接收控制命令。返回Jupyter Notebook中,执行预览图像Cell,查看小车传回的实时图像。图像传输应当没有明显可感知的延迟。
一切就绪后,在Jupyter Notebook中启动图像刷新和控制线程(见Notebook内说明),闭合小车电机驱动开关,即可观察自动驾驶控制效果。
3b.离线运行
离线运行是指,在实验小车上安装Intel Movidius神经网络计算棒,实验小车行驶时无需连接计算机作为服务器的运行方式,这也是更加接近现实的运行方式。
根据Intel的说明,要实现离线运行,需要先在Raspberry Pi上安装Intel提供的Movidius SDK 1(legacy),这需要Raspberry Pi使用16GB以上的microSD卡。
可参考 https://movidius.github.io/ncsdk/install.html 中介绍的Raspberry Pi Installation部分,安装该SDK。这里将Intel提供的说明简述如下:
-
运行
sudo nano /etc/dphys-swapfile,编辑配置文件,将CONF_SWAPSIZE参数的值设置为1024以上。这将扩大swapfile,以保证顺利编译。 -
运行
sudo /etc/init.d/dphys-swapfile restart,重新启动swapfile服务。 -
运行以下命令来下载、编译并安装NCSDK 1。
wget https://ncs-forum-uploads.s3.amazonaws.com/ncsdk/ncsdk-01_12_00_01-full/ncsdk-1.12.00.01.tar.gz
tar xvf ncsdk-1.12.00.01.tar.gz
cd ncsdk-1.12.00.01
make install
make examples
PS 我在进行到这一步骤时,等待了很长时间,并遇到了多种奇怪的错误提示。因为Raspberry Pi的性能有限,再加上中国较为复杂的网络环境,一次编译安装NCSDK会耗费数小时的时间,且过程中出现了一些警告和错误。经过数次尝试才成功安装。
安装完成后,即可开始使用Movidius编译器,将模型编译为计算棒可以使用的文件。将Jupyter保存的三个文件:
- *.index
- *.data-00000-of-00001
- *.mnist_model.meta
使用SFTP等方式发送到Raspberry Pi。进入放置这些文件的目录,运行
mvNCCompile filename.meta -s 12 -in x -on bias_add -o ncs.graph
编译完成后,即可得到ncs.graph计算图文件。
要开始离线运行,将Step_3b_Run_with_NCS目录中的rpi_ncs.py发至Raspberry Pi,放置在与ncs.graph同一级目录下,执行
python3 rpi_ncs.py
即可开始离线运行。
后记
此项目是作者大学本科期间完成的作业,时间非常仓促,很多代码写得不够仔细,也有很多地方没有实现性能的最优化,甚至可以说性能很差。如今Google TensorFlow等程序更新迅速,作者难以保证这份程序可以长期与最新的计算机软件保持兼容,但希望能给和我一样喜欢玩电子的同学一个参考,恳请读者多提意见。


