Andrewmika / Xcode Server And Continuous Integration Guide In Chinese
Projects that are alternatives of or similar to Xcode Server And Continuous Integration Guide In Chinese
《Xcode Server and Continuous Integration Guide》中文版
2020更新-最新Xcode Server 教程:
前言
如果要进行iOS持续集成,最流行的大概是Jenkins,Fastlane。但是目前来看这些配置都比较复杂,而最简单的是使用Xcode Server,但是网上资料却比较少。
Xcode Server由苹果开发,与Xcode高度集成,可对代码进行静态分析、单元测试、打包等。对苹果开发来说是最友好的一种方式。
Xcode 9,是Xcode Server的一次转折。在此之前需要安装MacOS Server 在其基础上进行配置,虽然能够实现CI,但Bug比较多。
从Xcode 9开始,Xcode Server就集成到了Xcode中,只需要安装Xcode就能进行CI操作,而且配置操作变得极其简单。得益于Xcode的升级,证书配置也能跟随Xcode自动配置,跟恼人的证书配置说拜拜。
下面就跟我一起一步一步配置好你的持续集成环境:
步骤一 -- 启用Xcode Server
在开始之前,我们需要一台安装了Xcode的Mac来作为打包机,不管是你当前开发的Mac还是独立的一台专用Mac都可以。但是,为了不影响开发,以及性能上的问题,建议使用一台专用Mac作为打包机。
在打包机上,打开打开Xcode -> Preferences -> 选中Server & Bots -> Turn On
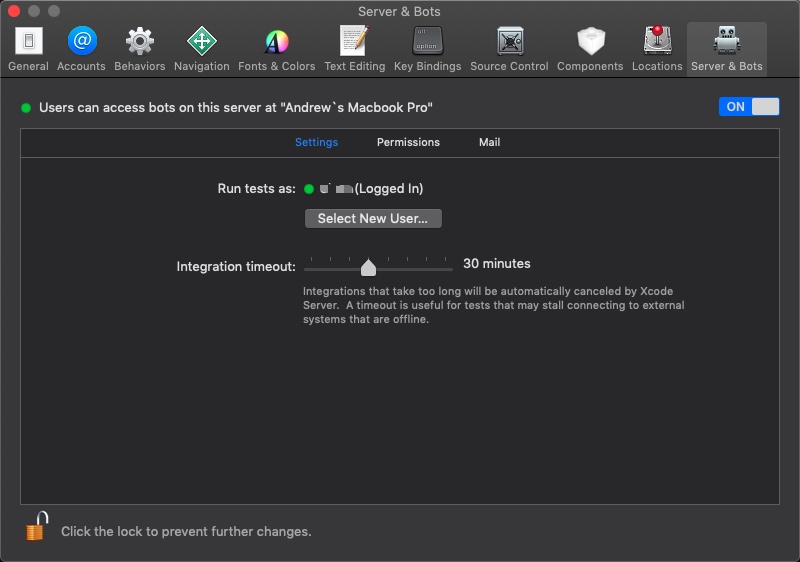
这里有几点需要注意:
- 选择Integration User: 你可以选择当前登录的用户,也可以新建一个专门的用户。如果当前用户会被其他人使用,或者有其他一些服务,那建议新建用户。这样可以保持独立,避免别人文件误删,同时新建独立用户用于持续集成,打包速度上会有提升。这个用户名密码会在下文连接到Xcode Server服务器时用到。
- Integration Timeout的选择:这个时间根据打包机性能进行调整,建议30min-1hr之间。当持续集成的时间超过这个时间时,会自动结束本次集成。
- Permissions可以根据需要设置权限。Mail不好用不建议使用,可以用脚本代替(下文会给出)。这两项比较简单,不再赘述。
步骤二 -- 连接到Xcode Server
添加Xcode Server服务器
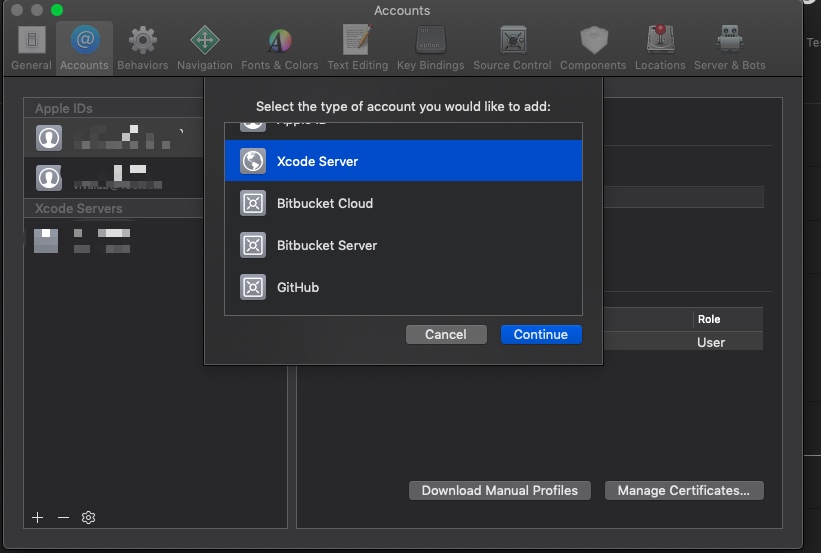
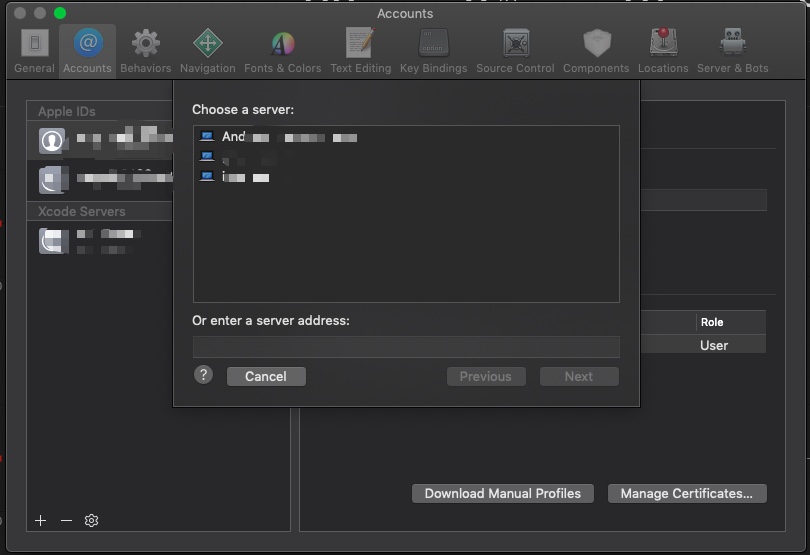
首先需要在你的开发机上添加Xcode Server服务器
打开Xcode -> Preferences -> Accounts -> 添加Xcode Server -> 直接选择对应电脑或者通过IP连接
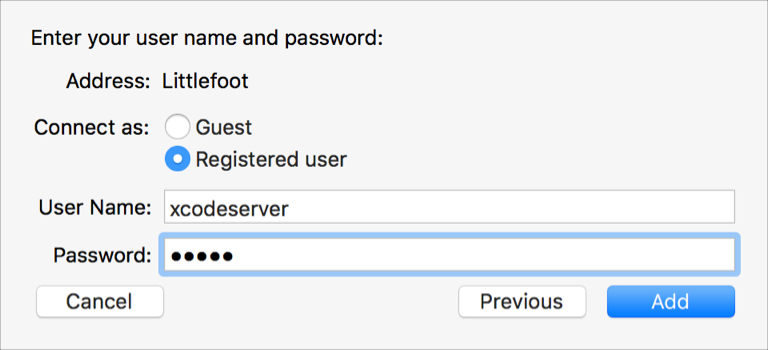 这里的用户名和密码填入上文设置的Integration User的用户名,密码。
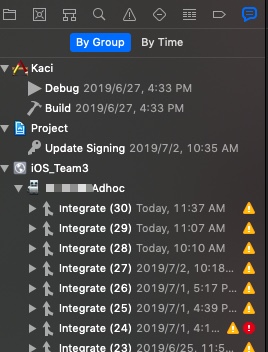
添加成功后将会在Report Navigator中看到添加的服务器。
步骤三 -- 创建Bot
通过前两步,我们已经建了了与Xcode Server的联系。这一步我们就要开启持续集成。
Xcode Server中CI任务由Bot进行管理,每一个工程对应一个Bot。
有两种创建方式。一种通过Product -> Create Bot 创建。另一种在Report Navigator中选中添加的服务器,右键Create Bot.
- 设置Bot名字,eg:XXX-AdHoc,XXX-AppStore
- 选择需要打包的分支
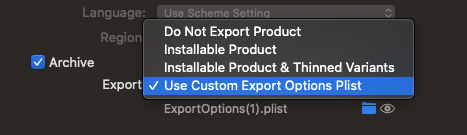
- 配置Scheme、静态分析、测试和打包选项等
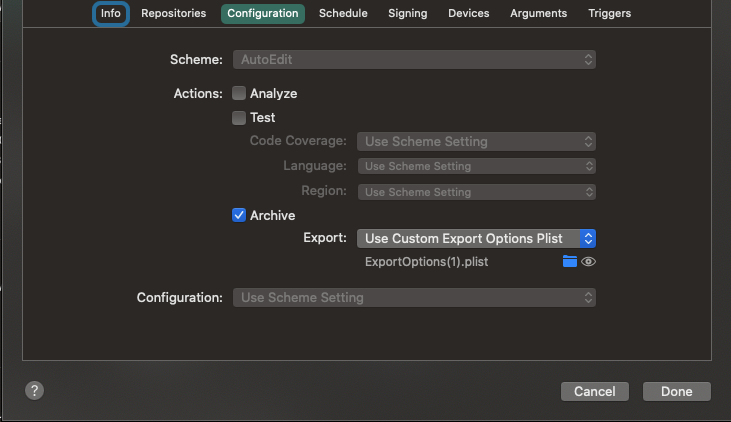
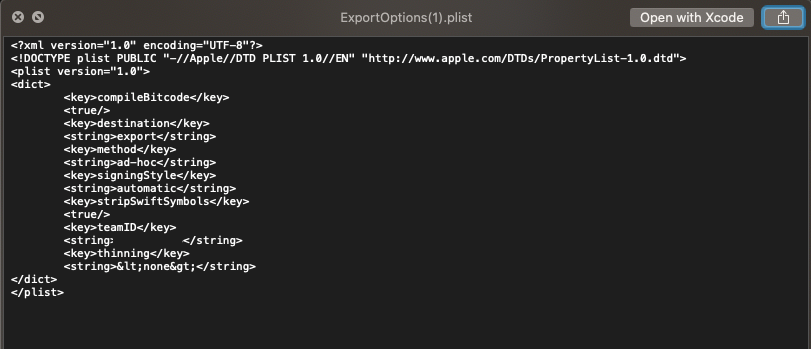
对于导出方式,强烈建议通过ExportOptions.plist文件来进行配置,ExportOptions.plist包含了包类型(adhoc还是appstore),避免打包出错。这个文件可以在手动打包的文件夹中获得对应的类型。如下如所示:
 4. 配置集成频率,有三种选择:定时,每一次commit时或者手动开启
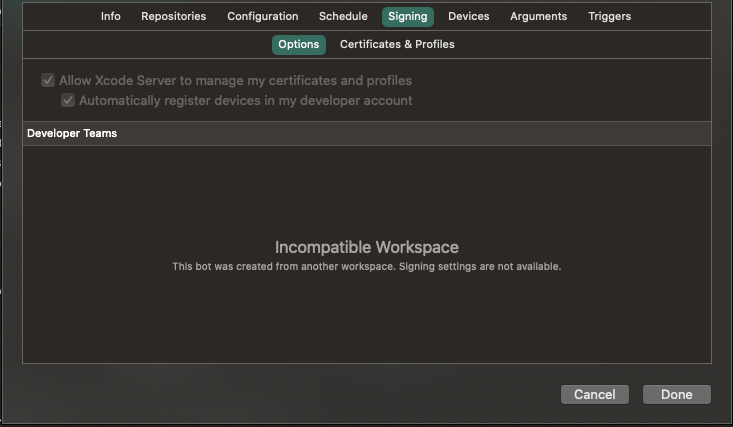
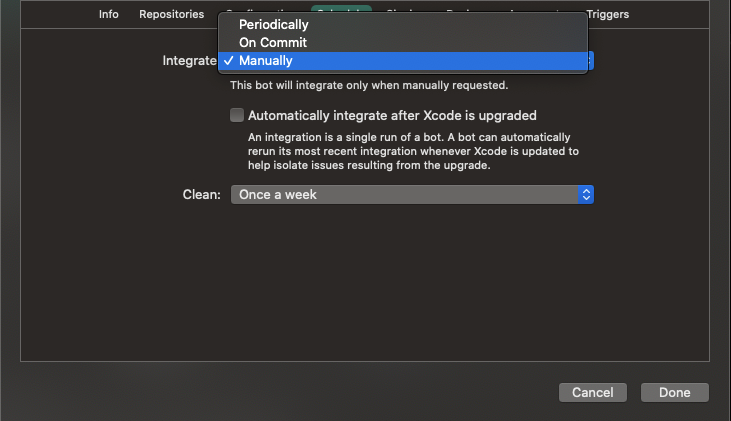 5. 证书配置,得益于Xcode,可以选择自动配置
 6. 配置编译对象和类型。一般选择Build for iOS, iOS Devices。一般不考虑模拟器。
7. 配置环境变量。有需要则配置,无需要则跳过。
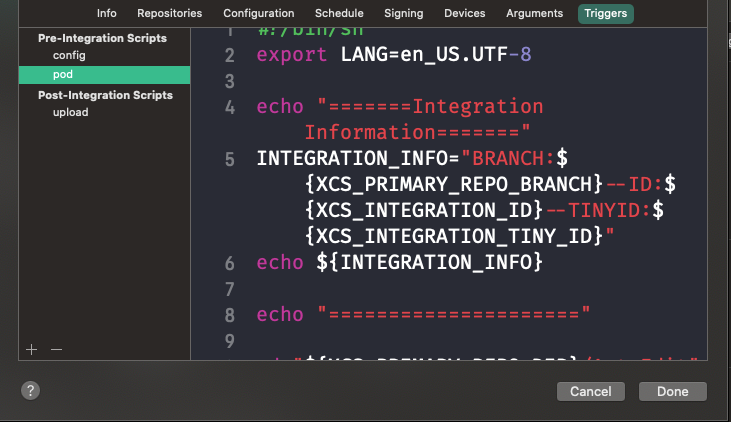
8. 最后最重要的一步,配置触发器。我们可以针对打包前、打包后配置多个不同的脚本。至此就可以打包啦🎉🎊
6. 配置编译对象和类型。一般选择Build for iOS, iOS Devices。一般不考虑模拟器。
7. 配置环境变量。有需要则配置,无需要则跳过。
8. 最后最重要的一步,配置触发器。我们可以针对打包前、打包后配置多个不同的脚本。至此就可以打包啦🎉🎊
脚本
这里给出一些日常使用到的脚本
Pre-Integration Scripts
Pod 相关
#!/bin/sh
export LANG=en_US.UTF-8

cd ${XCS_PRIMARY_REPO_DIR}

pwd

/usr/local/bin/pod repo update
rm -f Podfile.lock
/usr/local/bin/pod install
这里需要注意的时pod 的路径。直接执行pod install可能会提示无法找到pod命令。因此需要直接载入完整路径。
在terminal中执行where pod,找到打包机上的pod路径
$ where pod
/usr/local/bin/pod
Post-Integration Scripts
上传蒲公英并飞书通知
#!/bin/sh

#请根据蒲公英自己的账号,将其中的 _api_key和buildPassword 的值替换为相应的值。
# 将飞书通知链接,替换为在飞书中创建的机器人链接

upload_result=`curl -F "[email protected]${XCS_PRODUCT}" -F '_api_key=你的apiKey' -F "buildInstallType=2" -F "buildPassword=访问密码" http://www.pgyer.com/apiv2/app/upload`

echo '---------'

echo ${upload_result}

function get_json_value() {
local json=$1
local key=$2

if [[ -z "$3" ]]; then
local num=1
else
local num=$3
fi

local value=$(echo "${json}" | awk -F"[,:}]" '{for(i=1;i<=NF;i++){if($i~/'${key}'\042/){print $(i+1)}}}' | tr -d '"' | sed -n ${num}p)

echo ${value}
}

code=`get_json_value "$upload_result" code`
message=`get_json_value "$upload_result" message`

if [ $code == 0 ]; then
# 成功
curl -X POST -H "Content-Type: application/json" -d '{"title": "已上传蒲公英✅", "text": "点击链接安装,如需密码请输入xxx"}' https://open.feishu.cn/open-apis/bot/hook飞书BotID

else
errorMessage="错误信息❗️: ${message}"

p='{"title": "上传蒲公英出错❌", "text": "'${errorMessage}'"}'

curl -X POST -H "Content-Type: application/json" -d "${p}" https://open.feishu.cn/open-apis/bot/hook/飞书BotID


fi
上传Appstore
#!/bin/sh

# 填入你的Apple ID
USERNAME="你的AppleID"
#  需要去Apple ID账户生成 App 专用密码
PASSWORD="App 专用密码"

xcrun altool --validate-app -f ${XCS_PRODUCT} -u ${USERNAME} -p ${PASSWORD}
xcrun altool --upload-app -f ${XCS_PRODUCT} -u ${USERNAME} -p ${PASSWORD}
其他操作
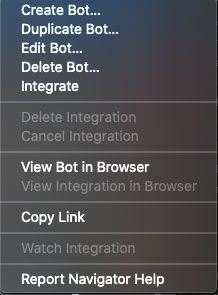
- 我们右键Bot,可以看到多个选择。我们可以对当前的Bot进行编辑更改,也可以复制当前的Bot,在当前的Bot基础上创建新Bot。这些可以留给你自己探索。
- 除了通过Xcode或者网页上启动集成操作,我们还可以通过调用API进行操作。具体参考:Xcode Server API Reference
例如https://your.domain:20343/api/bots/botID/integrations可以开启集成
错误排查
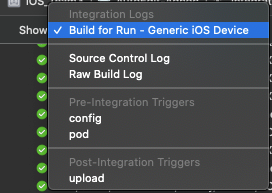
如果打包失败,我们可以通过当前Integration的log进行错误排查 
通过展开show目录,可以查看具体阶段的错误信息,针对性的更改。
OLD VERSION
使用Xcode Server进行持续集成。
前言
最近在使用Xcode Server进行持续集成,因此将官方文档翻译了一下,希望能为大家带来帮助,欢迎阅读。由于翻译功力尚浅,会有一些不完美的地方。有什么不足欢迎提issue和pr。如果对你有帮助,欢迎Star。
目录
- 开始
- 设置Xcode Server
- 管理和监控Bot
- 实践