zulip / Zulip Terminal
Programming Languages
Projects that are alternatives of or similar to Zulip Terminal
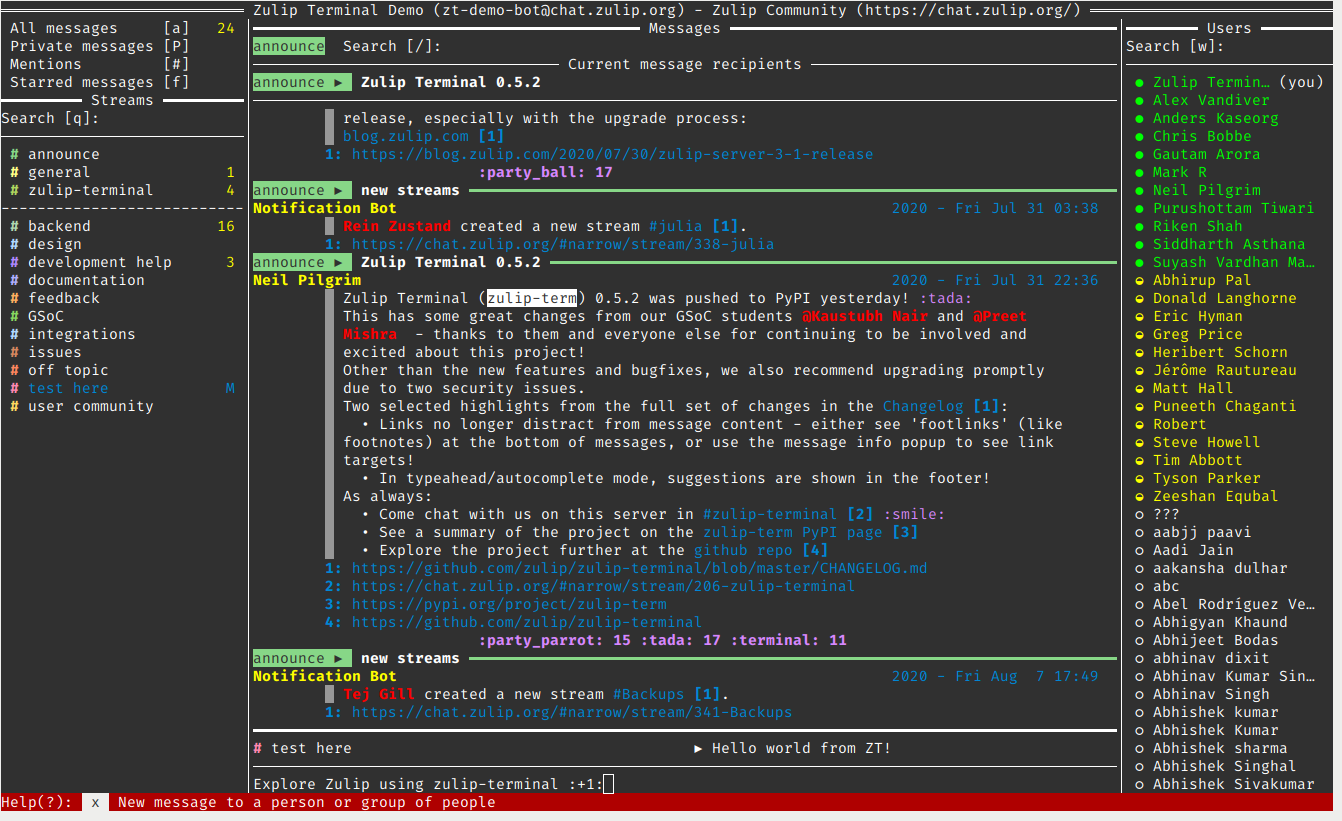
Zulip Terminal - Zulip's official terminal client
Recent changes | Configuration | Hot Keys | FAQs | Development
![]()


![]()

![]()
About
Zulip Terminal is the official terminal client for Zulip, providing a text-based user interface (TUI).
Specific aims include:
- Providing a broadly similar user experience to the Zulip web client, ultimately supporting all of its features
- Enabling all actions to be achieved through the keyboard (see Hot keys)
- Exploring alternative user interface designs suited to the display and input constraints
- Supporting a wide range of platforms and terminal emulators
Feature status
We consider the client to already provide a fairly stable moderately-featureful everyday-user experience.
The current development focus is on improving aspects of everyday usage which are more commonly used - to reduce the need for users to temporarily switch to another client for a particular feature.
Current limitations which we expect to only resolve over the long term include support for:
- All operations performed by users with extra privileges (owners/admins)
- Accessing and updating all settings
- Using a mouse/pointer to achieve all actions
- An internationalized UI
For queries on missing feature support please take a look at the Frequently Asked Questions (FAQs), our open Issues, or sign up on https://chat.zulip.org and chat with users and developers in the #zulip-terminal stream!
Supported platforms
- Linux
- OSX
- WSL (On Windows)
Supported Server Versions
The minimum server version that Zulip Terminal supports is 2.1.0. It may still work with earlier versions.
Installation
We recommend installing in a dedicated python virtual environment (see below) or using an automated option such as pipx
-
Stable - Numbered stable releases are available on PyPI as the package zulip-term
To install, run a command like:
pip3 install zulip-term -
Latest - The latest development version can be installed from the main git repository
To install, run a command like:
pip3 install git+https://github.com/zulip/[email protected]
We also provide some sample Dockerfiles to build docker images in docker/.
Installing into an isolated Python virtual environment
With the python 3.6+ required for running, the following should work on most systems:
-
python3 -m venv zt_venv(creates a virtual environment namedzt_venvin the current directory) -
source zt_venv/bin/activate(activates the virtual environment; this assumes a bash-like shell) - Run one of the install commands above,
If you open a different terminal window (or log-off/restart your computer), you'll need to run step 2 of the above list again before running zulip-term, since that activates that virtual environment. You can read more about virtual environments in the Python 3 library venv documentation.
Running for the first time
Upon first running zulip-term it looks for a zuliprc file, by default in your home directory, which contains the details to log into a Zulip server.
If it doesn't find this file, you have two options:
-
zulip-termwill prompt you for your server, email and password, and create azuliprcfile for you in that locationNOTE: If you use Google, Github or another external authentication to access your Zulip organization then you likely won't have a password set and currently need to create one to use zulip-terminal. If your organization is on Zulip cloud, you can visit https://zulip.com/accounts/go?next=/accounts/password/reset to create a new password for your account. For self-hosted servers please go to your
<Organization URL>/accounts/password/reset/(eg: https://chat.zulip.org/accounts/password/reset/) to create a new password for your account. -
Each time you run
zulip-term, you can specify the path to an alternativezuliprcfile using the-cor--config-fileoptions, eg.$ zulip-term -c /path/to/zuliprcYour personal zuliprc file can be obtained from Zulip servers in your account settings in the web application, which gives you all the permissions you have there. Bot zuliprc files can be downloaded from a similar area for each bot, and will have more limited permissions.
NOTE: If your server uses self-signed certificates or an insecure connection, you will need to add extra options to the zuliprc file manually - see the documentation for the Zulip python module.
We suggest running zulip-term using the -e or --explore option (in explore mode) when you are trying Zulip Terminal for the first time, where we intentionally do not mark messages as read.
Configuration
The zuliprc file contains information to connect to your chat server in the [api] section, but also optional configuration for zulip-term in the [zterm] section:
[api]
[email protected]
key=xxxxxxxxxxxxxxxxxxxxxxxxxxxxxxxx
site=https://realm.zulipchat.com

[zterm]
# Alternative themes are gruvbox, light and blue
theme=default
# Autohide defaults to 'no_autohide', but can be set to 'autohide' to hide the left & right panels except when focused.
autohide=autohide
# Footlinks default to 'enabled', but can be set to 'disabled' to hide footlinks.
# disabled won't show any footlinks.
# enabled will show the first 3 per message.
footlinks=disabled
# If you need more flexibility, use maximum-footlinks.
# Maximum footlinks to be shown, defaults to 3, but can be set to any value 0 or greater.
# This option cannot be used with the footlinks option; use one or the other.
maximum-footlinks=3
# Notify defaults to 'disabled', but can be set to 'enabled' to display notifications (see next section).
notify=enabled
# Color depth defaults to 256, but can be set to 1 (for monochrome) or 16.
color-depth=256
Notifications
Note that notifications are not currently supported on WSL; see #767.
Linux
The following command installs notify-send on Debian based systems, similar
commands can be found for other linux systems as well.
sudo apt-get install libnotify-bin
OSX
No additional package is required to enable notifications in OS X. However to have a notification sound, set the following variable (based on your type of shell). The sound value (here Ping) can be any one of the .aiff files found at /System/Library/Sounds or ~/Library/Sounds.
Bash
echo 'export ZT_NOTIFICATION_SOUND=Ping' >> ~/.bash_profile
source ~/.bash_profile
ZSH
echo 'export ZT_NOTIFICATION_SOUND=Ping' >> ~/.zshenv
source ~/.zshenv
Contributor Guidelines
Zulip Terminal is being built by the awesome Zulip community.
To be a part of it and to contribute to the code, feel free to work on any issue or propose your idea on #zulip-terminal.
Please read our commit message guidelines and git guide. NOTE Due to the difference in project scale, git commit titles in the Zulip Terminal project read slightly differently - please review our recent git log for examples and see the GitLint section below for more guidelines.
A simple tutorial is available for implementing the typing indicator.
Follow it to understand the how to implement a new feature for zulip-terminal.
You can of course browse the source on GitHub & in the source tree you download, and check the source file overview for ideas of whow files are currently arranged.
Urwid
Zulip Terminal uses urwid to render the UI components in terminal. Urwid is an awesome library through which you can render a decent terminal UI just using python. Urwid's Tutorial is a great place to start for new contributors.
Setting up a development environment
Various options are available; we are exploring the benefits of each and would appreciate feedback on which you use or feel works best.
Note that the tools used in each case are typically the same, but are called in different ways.
With any option, you first need to clone the zulip/zulip-terminal repository locally (the following will place the repository in the current directory):
$ git clone [email protected]:zulip/zulip-terminal.git
The following commands should be run in the repository directory, which can be achieved with cd zulip-terminal.
Pipenv
- Install pipenv (see the recommended installation notes; pipenv can be installed in a virtual environment, if you wish)
$ pip3 install --user pipenv
- Initialize the pipenv virtual environment for zulip-term (using the default python 3; use eg.
--python 3.6to be more specific)
$ pipenv --three
- Install zulip-term, with the development requirements
$ pipenv install --dev
$ pipenv run pip3 install -e '.[dev]'
Pip
-
Manually create & activate a virtual environment; any method should work, such as that used in the above simple installation
-
python3 -m venv zt_venv(creates a venv namedzt_venvin the current directory) -
source zt_venv/bin/activate(activates the venv; this assumes a bash-like shell)
-
-
Install zulip-term, with the development requirements
$ pip3 install -e '.[dev]'
make/pip
This is the newest and simplest approach, if you have make installed:
-
make(sets up an installed virtual environment inzt_venvin the current directory) -
source zt_venv/bin/activate(activates the venv; this assumes a bash-like shell)
Development tasks
Once you have a development environment set up, you might find the following useful, depending upon your type of environment:
| Task | Make & Pip | Pipenv |
|---|---|---|
| Run normally | zulip-term |
pipenv run zulip-term |
| Run in debug mode | zulip-term -d |
pipenv run zulip-term -d |
| Run with profiling | zulip-term --profile |
pipenv run zulip-term --profile |
| Run all linters | ./tools/lint-all |
pipenv run ./tools/lint-all |
| Run all tests | pytest |
pipenv run pytest |
| Build test coverage report | pytest --cov-report html:cov_html --cov=./ |
pipenv run pytest --cov-report html:cov_html --cov=./ |
If using make with pip, running make will ensure the development environment is up to date with the specified dependencies, useful after fetching from git and rebasing.
NOTE: The linters and pytest are run in CI (GitHub Actions) when you submit a pull request (PR), and we expect them to pass before code is merged. Running them locally can speed your development time, but if you have troubles understanding why the linters or pytest are failing, please do push your code to a branch/PR and we can discuss the problems in the PR or on chat.zulip.org.
If using make with pip, there are corresponding make targets for running linting and testing if you wish to use them (make lint & make test), and before pushing a pull-request (PR) ready for merging you may find it useful to ensure that make check runs successfully (which runs both).
NOTE: The lint script runs a number of separate linters to simplify the development workflow, but each individual linter can be run separately if you find this useful.
GitLint
If you plan to submit git commits in pull-requests (PRs), then we highly suggest installing the gitlint commit-message hook by running gitlint install-hook (or pipenv run gitlint install-hook with pipenv setups). While the content still depends upon your writing skills, this ensures a more consistent formatting structure between commits, including by different authors.
If the hook is installed as described above, then after completing the text for a commit, it will be checked by gitlint against the style we have set up, and will offer advice if there are any issues it notices. If gitlint finds any, it will ask if you wish to commit with the message as it is (y for 'yes'), stop the commit process (n for 'no'), or edit the commit message (e for 'edit').
Other gitlint options are available; for example it is possible to apply it to a range of commits with the --commits option, eg. gitlint --commits HEAD~2..HEAD would apply it to the last few commits.
NOTE Not all style suggestions are identified by gitlint at this time, including:
- If modifying code (not just tests), list modified filenames without extensions between slashes in only one area of the commit title (eg.
run/model/core/README: Some description.) - If modifying tests in addition to code, just note this in the body of the commit after a blank line (eg.
Tests updated.) - If there are multiple areas in the commit title, they are typically used to describe the type of change, which is currently primarily used for a
bugfix,refactorortests(if only modifying tests). - Updates to dependencies have a
requirementsarea only
Generally it is best to refer to the git log to get an idea of the general style to follow, and in particular look for similar types of commits to the ones you are writing.
Tips for working with tests (pytest)
Tests for zulip-terminal are written using pytest. You can read the tests in the /tests folder to learn about writing tests for a new class/function. If you are new to pytest, reading its documentation is definitely recommended.
We currently have thousands of tests which get checked upon running pytest. While it is dependent on your system capability, this should typically take less than one minute to run. However, during debugging you may still wish to limit the scope of your tests, to improve the turnaround time:
- If lots of tests are failing in a very verbose way, you might try the
-xoption (eg.pytest -x) to stop tests after the first failure; due to parametrization of tests and test fixtures, many apparent errors/failures can be resolved with just one fix! (try eg.pytest --maxfail 3for a less-strict version of this) - To avoid running all the successful tests each time, along with the failures, you can run with
--lf(eg.pytest --lf), short for--last-failed(similar useful options may be--failed-firstand--new-first, which may work well with-x) - Since pytest 3.10 there is
--sw(--stepwise), which works through known failures in the same way as--lfand-xcan be used, which can be combined with--stepwise-skipto control which test is the current focus - If you know the names of tests which are failing and/or in a specific location, you might limit tests to a particular location (eg.
pytest tests/model) or use a selected keyword (eg.pytest -k __handle)
When only a subset of tests are running it becomes more practical and useful to use the -v option (--verbose); instead of showing a . (or F, E, x, etc) for each test result, it gives the name (with parameters) of each test being run (eg. pytest -v -k __handle). This option also shows more detail in tests and can be given multiple times (eg. pytest -vv).
For additional help with pytest options see pytest -h, or check out the full pytest documentation.
Debugging Tips
Output using print
The stdout for zulip-terminal is redirected to ./debug.log by default.
If you want to check the value of a variable, or perhaps indicate reaching a certain point in the code, you can simply write
print(variable, flush=True)
and the value of the variable will be printed to ./debug.log.
We suggest the flush=True to ensure it prints straight away.
If you have a bash-like terminal, you can run something like tail -f debug.log in another terminal, to see the output from print as it happens.
Interactive debugging using pudb & telnet
If you want to debug zulip-terminal while it is running, or in a specific state, you can insert
from pudb.remote import set_trace
set_trace()
in the part of the code you want to debug. This will start a telnet connection for you. You can find the IP address and
port of the telnet connection in ./debug.log. Then simply run
$ telnet 127.0.0.1 6899
in another terminal, where 127.0.0.1 is the IP address and 6899 is port you find in ./debug.log.
There's no effect in Zulip Terminal after making local changes!
This likely means that you have installed both normal and development versions of zulip-terminal.
To ensure you run the development version:
- If using pipenv, call
pipenv run zulip-termfrom the cloned/downloadedzulip-terminaldirectory; - If using pip (pip3), ensure you have activated the correct virtual environment (venv); depending on how your shell is configured, the name of the venv may appear in the command prompt. Note that not including the
-ein the pip3 command will also cause this problem.