InnovateAsterisk / Browser Phone
Programming Languages
Projects that are alternatives of or similar to Browser Phone
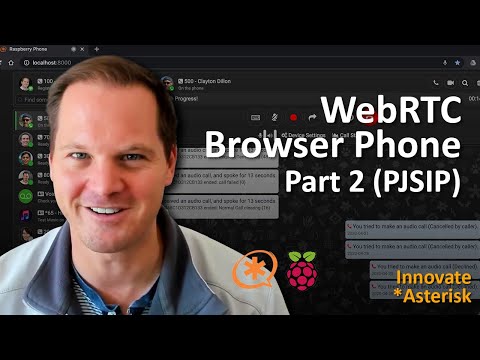
Browser Phone
A fully featured browser based WebRTC SIP phone for Asterisk
Description
This web application is designed to work with Asterisk PBX (v13 & v16). Once loaded application will connect to Asterisk PBX on its web socket, and register an extension. Calls are made between contacts, and a full call detail is saved. Audio Calls can be recorded. Video Calls can be recorded, and can be saved with 5 different recording layouts and 3 different quality settings. This application does not use any cloud systems or services, and is designed to be stand-alone. Additional libraries will be downloaded at run time (but can also be saved to the web server for a complete off-line solution).
Hosted version (contains a welcome screen): https://www.innovateasterisk.com/phone/

Features
- SIP Audio Calling
- SIP Video Calling
- Call Transfer (Both Blind & Attended)
- 3rd Party Conference Call
- Call Detail Records
- Call Recording (Audio & Video)
- Screen Share during Video Call
- Scratchpad Share during Video Call
- Video/Audio File Share during Video Call
- SIP (text/plain) Messaging
- SIP Message Accept Notification (not delivery)
- Buddy (Contact) Management
- Useful debug messages sent to console.
- Works on: Chrome (all features work), Edge (same as Chrome), Opera (same as Chrome), Firefox (Most features work), Safari (Most feature work)
Requires
- Asterisk PBX version 13|16|17 (with Websockets and Text Messaging, chan_sip or chan_pjsip)
JavaScript Dependencies
- sip-0.11.6 : WebRTC and SIP signalling library
- jquery-3.3.1 : JavaScript toolkit
- jquery.md5 : Md5 Hash plug-in (unused)
- Chart-2.7.2 : Graph and Chart UI
- dhtmlx-4 : Windowing & UI Library
- fabric-2.4.6 : Canvas Editing Library
- moment-2.24.0 : Date & Time Library
- croppie-2.6.4 : Profile Picture Crop Library
Note: These files will load automatically from CDN.
StyleSheet Dependencies
- normalize-v8.0.1 : CSS Normalising Stylesheet
- roboto : Roboto Font
- font-awesome-4.7 : Icon Font library
- dhtmlx-4 : For DHTMLX
- croppie-2.6.4 : For Croppie
Note: These files will load automatically from CDN.
Lib Folder Download (Off-line)
You can download the lib folder containing all related library files: https://dtd6jl0d42sve.cloudfront.net/lib/lib.zip
Note: These files are provided "as-is" for your convenience. Each library folder may contain its own licence and terms of use please refer to the original license holder for more details.
Step-by-step Guide
You can follow the How-to video to achieve the outcome for this project:
chan_sip:

chan_pjsip (Part 2):
Or follow these steps.
Preparing the SD Card with Raspbian
Flash the you SD card using the Raspberry Pi Imager from https://www.raspberrypi.org/downloads/.
Write a blank text file named ssh (no extension) to the boot directory of the SD card. On Mac use:
sudo nano /Voumes/boot/ssh
and on Windows, you can just use Notepad and save it as: D:/ssh
Insert the SD Card into your Raspberry Pi, connect a Network Cable and boot up.
Connect to the raspberry pi over the network using Terminal (on Mac), or Putty (on Windows), as:
ssh [email protected]
The default password for raspberry pi is: raspberry
Initial Setup
You have to be root, so:
$ sudo su
Issue and update:
# apt-get update
Install a few essential applications:
# apt-get install samba ntp git
Configure Samba
Add pi username to samba
# smbpasswd -a pi
Edit the smb.conf file and add share:
# nano /etc/samba/smb.conf
Add the following at the bottom of the file
[InnovateAsterisk]
path = /
browseable = yes
writeable = yes
read only = no
create mask = 0755
directory mask = 0755
guest ok = no
security = user
write list = pi
force user = root
Restart samba service:
# service smbd restart
exit su:
# exit
Create a Certificate Authority
Note: The following steps will make both a CA certificate and a server certificate. The CA certificate will be self-signed, so you will need to copy that to your PC, and install (add) it to your Trust root CA certificate store.
Create some folders:
$ mkdir /home/pi/ca
$ mkdir /home/pi/certs
$ mkdir /home/pi/csr
Create a Root CA Key:
$ openssl genrsa -des3 -out /home/pi/ca/InnovateAsterisk-Root-CA.key 4096
(Remember the password you used) Create Root Certificate Authority Certificate:
$ openssl req -x509 -new -nodes -key /home/pi/ca/InnovateAsterisk-Root-CA.key -sha256 -days 3650 -out /home/pi/ca/InnovateAsterisk-Root-CA.crt
Something like this should be fine:
Country Name (2 letter code) [AU]: GB
State or Province Name (full name) [Some-State]: None
Locality Name (eg, city) []: None
Organization Name (eg, company) [Internet Widgits Pty Ltd]: Innovate Asterisk
Organizational Unit Name (eg, section) []: www.innovateasterisk.com
Common Name (e.g. server FQDN or YOUR name) []: Innovate Asterisk Root CA
Email Address []: [email protected]
Generate Certificate Signing Request & Private Key:
$ openssl req -new -sha256 -nodes -out /home/pi/csr/raspberrypi.csr -newkey rsa:2048 -keyout /home/pi/certs/raspberrypi.key
Generate SSL V3 file:
$ nano /home/pi/csr/openssl-v3.cnf
And populate with:
authorityKeyIdentifier=keyid,issuer
basicConstraints=CA:FALSE
keyUsage = digitalSignature, nonRepudiation, keyEncipherment, dataEncipherment
subjectAltName = @alt_names

[alt_names]
DNS.1 = raspberrypi.local
Generate Server Certificate:
$ openssl x509 -req -in /home/pi/csr/raspberrypi.csr -CA /home/pi/ca/InnovateAsterisk-Root-CA.crt -CAkey /home/pi/ca/InnovateAsterisk-Root-CA.key -CAcreateserial -out /home/pi/certs/raspberrypi.crt -days 365 -sha256 -extfile /home/pi/csr/openssl-v3.cnf
Generate PEM Combo Certificate:
$ cat /home/pi/certs/raspberrypi.crt /home/pi/certs/raspberrypi.key > /home/pi/certs/raspberrypi.pem
Set Permission to Key:
$ chmod a+r /home/pi/certs/raspberrypi.key
Install Asterisk from Source Code
Change to root:
$ sudo su
Install Opus dev files:
# apt-get install xmlstarlet libopus-dev libopusfile-dev
Exit root:
# exit
Wget the Asterisk source:
Note: chan_sip works fine on Asterisk 13, but chan_pjsip is rather broken. If you are using chan_pjsip, rather use Asterisk 16, the guide is exactly the same. If you are on an x86 server, you can enable opus in make menuselect, or download it from the github project, otherwise take the opus codec out of the allow= section of the endpoint.
$ wget http://downloads.asterisk.org/pub/telephony/asterisk/asterisk-13-current.tar.gz
or
$ wget http://downloads.asterisk.org/pub/telephony/asterisk/asterisk-16-current.tar.gz
Untar the download:
$ tar -xvf asterisk-[tab]
Change to Asterisk folder
$ cd aster[tab]
Going to install again, so go back to root:
$ sudo su
Install the prerequisites:
# contrib/scripts/install_prereq install
Configure Asterisk:
# ./configure --with-pjproject-bundled
Enter menuselect, and turn off CDR, CEL, and change MOH to WAV:
# make menuselect
Call make
# make
Install the built code:
# make install
Configure Asterisk to start automatically:
# make config
Exit root:
# exit
Configure Asterisk with Github files
Note: this section assumes you are following this guide and don't have any existing configurations in place. If you do, simply open the config files described below, and copy out the settings that you need.
Return to home folder:
$ cd ~
Clone the git project:
$ git clone https://github.com/InnovateAsterisk/Browser-Phone.git
Copy the config files:
$ sudo cp /home/pi/Browser-Phone/config/* /etc/asterisk/
Clear the existing files in static-http:
$ sudo rm /var/lib/asterisk/static-http/*
Copy the web pages:
Note: You can skip this step and simply use the hosted pages at: https://www.innovateasterisk.com/phone/ (contains a welcome screen). This page uses a Let's Encrypt Certificate, but you will still need to have a secure connection to your Asterisk box.
$ sudo cp /home/pi/Browser-Phone/Phone/* /var/lib/asterisk/static-http/
Set the file permissions:
$ sudo chmod 744 /var/lib/asterisk/static-http/*
Setup /etc/asterisk/http.conf with the following:
[general]
enabled=no ; HTTP
tlsenable=yes ; HTTPS
tlsbindaddr=0.0.0.0:443
tlscertfile=/home/pi/certs/raspberrypi.crt
tlsprivatekey=/home/pi/certs/raspberrypi.key
enablestatic=yes
sessionlimit=1000
redirect=/ /static/index.html
Note: If you are running asterisk as root (as this guide does), then you can specify port 443, if you are running as asterisk or something else, you will need to specify a port greater than 1024. You can test that this works by going to https://raspberrypi.local/httpstatus but in order to see this page, you have to download that Root CA certificate that you made earlier to your own PC. To install: On Mac, just double click it, then again double click the certificate, and select Trust Always. On windows you will need to Import it to the Certificate Manager. (If you are using Firefox Browser, you have to again install it to the Firefox Trusted Root certificates.)
Copy the Opus codec to modules:
$ sudo cp /home/pi/Browser-Phone/modules/ast-13/codec_opus_arm.so /usr/lib/asterisk/modules
or
$ sudo cp /home/pi/Browser-Phone/modules/ast-16/codec_opus_arm.so /usr/lib/asterisk/modules
Note: Asterisk 16 will check that the checksum of the .so files in modules folder matches the id gerenated at make menuselect, so you need to update the checksum in codec_opus_arm.so:
$ nano /home/pi/asterisk-16.*.0/include/asterisk/buildopts.h
Take note of the AST_BUILDOPT_SUM (copy the value)
$ sudo sed -i 's/1fb7f5c06d7a2052e38d021b3d8ca151/<value of AST_BUILDOPT_SUM>/g' /usr/lib/asterisk/modules/codec_opus_arm.so
Restart Asterisk and check the modules loaded:
$ sudo service asterisk restart
$ sudo asterisk -r
> [tab]
> exit
chan_sip or chan_pjsip?
The browser phone is compatible with both chan_sip and chan_pjsip. Follow the guide that suits your development. You will not be able to use both chan_sip and chan_pjsip in the same installation.
Note: As of writing, Asterisk 13 chan_pjsip always invites a call with m=video in the SDP (if the endpoint has any video codec) no matter what the SDP of the original inviting call has, this means that all calls appear as video calls and the "Answer with video" appears for both audio and video calls. I'm yet to find a solution.
chan_sip
Configure sip.conf
Open the original /etc/asterisk/sip.conf file and make the following changes:
websocket_enabled=yes
maxcallbitrate=5120
Add anywhere under [general]:
accept_outofcall_message=yes
auth_message_requests=no
outofcall_message_context=textmessages
Add to the bottom of /etc/asterisk/sip.conf:
; == Users

[User1](basic,webrtc)
callerid="Conrad de Wet" <100>
secret=1234

[User2](basic,webrtc)
callerid="User 2" <200>
secret=1234

[User3](basic,phones)
callerid="User 3" <300>
secret=1234
Disable chan_pjsip in /etc/asterisk/modules.conf
Its best to only use one channel driver
noload => res_pjsip.so
noload => res_pjsip_pubsub.so
noload => res_pjsip_session.so
noload => chan_pjsip.so
noload => res_pjsip_exten_state.so
noload => res_pjsip_log_forwarder.so
Configure extensions.conf
Update the /etc/asterisk/extensions.conf to the following:
[general]
static=yes
writeprotect=yes
priorityjumping=no
autofallthrough=no

[globals]
ATTENDED_TRANSFER_COMPLETE_SOUND=beep

[textmessages]
exten => 100,1,Gosub(send-text,s,1,(User1))
exten => 200,1,Gosub(send-text,s,1,(User2))
exten => 300,1,Gosub(send-text,s,1,(User3))
exten => e,1,Hangup()

[subscriptions]
exten => 100,hint,SIP/User1
exten => 200,hint,SIP/User2
exten => 300,hint,SIP/User3

[from-extensions]
; Feature Codes:
exten => *65,1,Gosub(moh,s,1)
; Extensions
exten => 100,1,Gosub(dial-extension,s,1,(User1))
exten => 200,1,Gosub(dial-extension,s,1,(User2))
exten => 300,1,Gosub(dial-extension,s,1,(User3))
; Anything else, Hangup
exten => _[+*0-9].,1,NoOp(You called: ${EXTEN})
exten => _[+*0-9].,n,Hangup(1)
exten => e,1,Hangup()

[moh]
exten => s,1,NoOp(Music On Hold)
exten => s,n,Ringing()
exten => s,n,Wait(2)
exten => s,n,Answer()
exten => s,n,Wait(1)
exten => s,n,MusicOnHold()

[dial-extension]
exten => s,1,NoOp(Calling: ${ARG1})
exten => s,n,Dial(SIP/${ARG1},30)
exten => s,n,Hangup()
exten => e,1,Hangup()

[send-text]
exten => s,1,NoOp(Sending Text To: ${ARG1})
exten => s,n,Set(PEER=${CUT(CUT(CUT(MESSAGE(from),@,1),<,2),:,2)})
exten => s,n,Set(FROM=${SHELL(asterisk -rx 'sip show peer ${PEER}' | grep 'Callerid' | cut -d':' -f2- | 'sed /^\ *//' | tr -d '\n')})
exten => s,n,Set(CALLERID_NUM=${CUT(CUT(FROM,>,1),<,2)})
exten => s,n,Set(FROM_SIP=${STRREPLACE(MESSAGE(from),<sip:${PEER}@,<sip:${CALLERID_NUM}@)})
exten => s,n,MessageSend(sip:${ARG1},${FROM_SIP})
exten => s,n,Hangup()
Restart Asterisk or Reload SIP and Dialplan:
$ sudo asterisk -r
> sip reload
> dialplan reload
chan_pjsip
Configure pjsip.conf
Open the original /etc/asterisk/pjsip.conf file and make the following changes:
; == Users

[User1](basic_endpoint,webrtc_endpoint)
type=endpoint
callerid="Conrad de Wet" <100>
auth=User1
aors=User1
[User1](single_aor)
type=aor
[email protected]
[User1](userpass_auth)
type=auth
username=User1
password=1234

[User2](basic_endpoint,webrtc_endpoint)
type=endpoint
callerid="User Two" <200>
auth=User2
aors=User2
[User2](single_aor)
type=aor
[User2](userpass_auth)
type=auth
username=User2
password=1234

[User3](basic_endpoint,phone_endpoint)
type=endpoint
callerid="User Three" <300>
auth=User3
aors=User3
[User3](single_aor)
type=aor
[User3](userpass_auth)
type=auth
username=User3
password=1234
Disable chan_sip in /etc/asterisk/modules.conf
It's best to only use one channel driver
noload => chan_sip.so
Configure extensions.conf
Update the /etc/asterisk/extensions.conf to the following:
[general]
static=yes
writeprotect=yes
priorityjumping=no
autofallthrough=no

[globals]
ATTENDED_TRANSFER_COMPLETE_SOUND=beep

[textmessages]
exten => 100,1,Gosub(send-text,s,1,(User1))
exten => 200,1,Gosub(send-text,s,1,(User2))
exten => 300,1,Gosub(send-text,s,1,(User3))

[subscriptions]
exten => 100,hint,PJSIP/User1
exten => 200,hint,PJSIP/User2
exten => 300,hint,PJSIP/User3

[from-extensions]
; Feature Codes:
exten => *65,1,Gosub(moh,s,1)
; Extensions
exten => 100,1,Gosub(dial-extension,s,1,(User1))
exten => 200,1,Gosub(dial-extension,s,1,(User2))
exten => 300,1,Gosub(dial-extension,s,1,(User3))
; Anything else, Hangup
exten => _[+*0-9].,1,NoOp(You called: ${EXTEN})
exten => _[+*0-9].,n,Hangup(1)

exten => e,1,Hangup()

[moh]
exten => s,1,NoOp(Music On Hold)
exten => s,n,Ringing()
exten => s,n,Wait(2)
exten => s,n,Answer()
exten => s,n,Wait(1)
exten => s,n,MusicOnHold()

[dial-extension]
exten => s,1,NoOp(Calling: ${ARG1})
exten => s,n,Set(JITTERBUFFER(adaptive)=default)
exten => s,n,Dial(PJSIP/${ARG1},30)
exten => s,n,Hangup()

exten => e,1,Hangup()

[send-text]
exten => s,1,NoOp(Sending Text To: ${ARG1})
exten => s,n,Set(PEER=${CUT(CUT(CUT(MESSAGE(from),@,1),<,2),:,2)})
exten => s,n,Set(FROM=${SHELL(asterisk -rx 'pjsip show endpoint ${PEER}' | grep 'callerid ' | cut -d':' -f2- | sed 's/^\ *//' | tr -d '\n')})
exten => s,n,Set(CALLERID_NUM=${CUT(CUT(FROM,>,1),<,2)})
exten => s,n,Set(FROM_SIP=${STRREPLACE(MESSAGE(from),<sip:${PEER}@,<sip:${CALLERID_NUM}@)})
exten => s,n,MessageSend(pjsip:${ARG1},${FROM_SIP})
exten => s,n,Hangup()
Restart Asterisk or Reload PJSIP and Dialplan:
$ sudo asterisk -r
> module reload res_pjsip.so
> dialplan reload
Screenshots


