AruniRC / Resnet Face Pytorch
Training a ResNet on UMDFaces for face recognition
Stars: ✭ 107
Programming Languages
python
139335 projects - #7 most used programming language
Projects that are alternatives of or similar to Resnet Face Pytorch
PLSC
Paddle Large Scale Classification Tools,supports ArcFace, CosFace, PartialFC, Data Parallel + Model Parallel. Model includes ResNet, ViT, DeiT, FaceViT.
Stars: ✭ 113 (+5.61%)
Mutual labels: face-recognition, resnet
LibtorchTutorials
This is a code repository for pytorch c++ (or libtorch) tutorial.
Stars: ✭ 463 (+332.71%)
Mutual labels: resnet, tutorial-code
Facenet Pytorch
Pretrained Pytorch face detection (MTCNN) and facial recognition (InceptionResnet) models
Stars: ✭ 2,564 (+2296.26%)
Mutual labels: face-recognition, resnet
Look4Face
Demo of Face Recognition web service
Stars: ✭ 23 (-78.5%)
Mutual labels: face-recognition, resnet
Deep Reinforcement Learning With Pytorch
PyTorch implementation of DQN, AC, ACER, A2C, A3C, PG, DDPG, TRPO, PPO, SAC, TD3 and ....
Stars: ✭ 1,345 (+1157.01%)
Mutual labels: resnet
M Pact
A one stop shop for all of your activity recognition needs.
Stars: ✭ 85 (-20.56%)
Mutual labels: resnet
Awesome Face Detection
Compare with various detectors - s3fd, dlib, ocv, ocv-dnn, mtcnn-pytorch, face_recognition
Stars: ✭ 106 (-0.93%)
Mutual labels: face-recognition
Tensorflow2.0 Examples
🙄 Difficult algorithm, Simple code.
Stars: ✭ 1,397 (+1205.61%)
Mutual labels: resnet
Hypernetworks
PyTorch implementation of HyperNetworks (Ha et al., ICLR 2017) for ResNet (Residual Networks)
Stars: ✭ 95 (-11.21%)
Mutual labels: resnet
Keras Resnet
Residual networks implementation using Keras-1.0 functional API
Stars: ✭ 1,286 (+1101.87%)
Mutual labels: resnet
Face recognition crop
Multi-view face recognition, face cropping and saving the cropped faces as new images on videos to create a multi-view face recognition database.
Stars: ✭ 98 (-8.41%)
Mutual labels: face-recognition
Combinedmargin Caffe
caffe implementation of insightface's combined margin method
Stars: ✭ 87 (-18.69%)
Mutual labels: face-recognition
Face Classification
Face model to classify gender and race. Trained on LFWA+ Dataset.
Stars: ✭ 104 (-2.8%)
Mutual labels: face-recognition
100 Plus Python Programming Exercises Extended
100+ python programming exercise problem discussed ,explained and solved in different ways
Stars: ✭ 1,250 (+1068.22%)
Mutual labels: tutorial-code
Pyseeta
python api for SeetaFaceEngine(https://github.com/seetaface/SeetaFaceEngine.git)
Stars: ✭ 93 (-13.08%)
Mutual labels: face-recognition
Repo 2016
R, Python and Mathematica Codes in Machine Learning, Deep Learning, Artificial Intelligence, NLP and Geolocation
Stars: ✭ 103 (-3.74%)
Mutual labels: face-recognition
Hellovision
Vision framework example for my article. https://medium.com/compileswift/swift-world-whats-new-in-ios-11-vision-456ba4156bad
Stars: ✭ 93 (-13.08%)
Mutual labels: face-recognition
Symfony 3 Rest Api Example
Symfony 3 RESTful API Example
Stars: ✭ 90 (-15.89%)
Mutual labels: tutorial-code
This repository shows how to train ResNet models in PyTorch on publicly available face recognition datasets.
Setup
- Install Anaconda if not already installed in the system.
- Create an Anaconda environment:
conda create -n resnet-face python=2.7and activate it:source activate resnet-face. - Install PyTorch and TorchVision inside the Anaconda environment. First add a channel to conda:
conda config --add channels soumith. Then install:conda install pytorch torchvision cuda80 -c soumith. - Install the dependencies using conda:
conda install scipy Pillow tqdm scikit-learn scikit-image numpy matplotlib ipython pyyaml. - Notes:
Contents
PyTorch ResNet on UMD-Face
Demo to train a ResNet-50 model on the UMDFaces dataset.
Dataset preparation
- Download the UMDFaces dataset (the 3 batches of still images), which contains 367,888 face annotations for 8,277 subjects, split into 3 batches.
- The images need to be cropped into 'train' and 'val' folders. Since the UMDFaces dataset does not specify training and validation sets, by default we select two images from every subject for validation.
- The cropping code is in the Python script umd-face/run_crop_face.py. It takes the following command-line arguments:
- --dataset_path (-d)
- --output_path (-o)
- --batch (-b)
- The following shell command does the cropping for each batch in parallel, using default
dataset_pathandoutput_path.for i in {0..2}; python umd-face/run_crop_face -b $i &; done.
🔺 TODO - takes very long, convert into shell+ImageMagick script.
Usage
Training:
- Training script is umd-face/train_resnet_umdface.py
- Multiple GPUs:
- Under section 3 ("Model") of the training script, we specify which GPUs to use in parallel:
model = torch.nn.DataParallel(model, device_ids=[0, 1, 2, 3, 4]).cuda(). Change these numbers depending on the number of available GPUs. - Use
watch -d nvidia-smito constantly monitor the multi-GPU usage from the terminal. - 🔺 TODO - make this into command-line args.
- Under section 3 ("Model") of the training script, we specify which GPUs to use in parallel:
- At the terminal, specify where the cropped face images are saved using an environment variable:
DATASET_PATH=local/path/to/cropped/umd/faces -
config.py lists all the training configurations (i.e. model hyper-parameters) in a numbered Python dict.
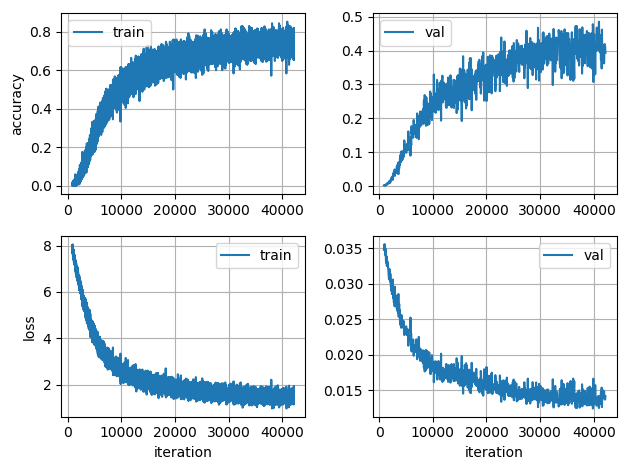
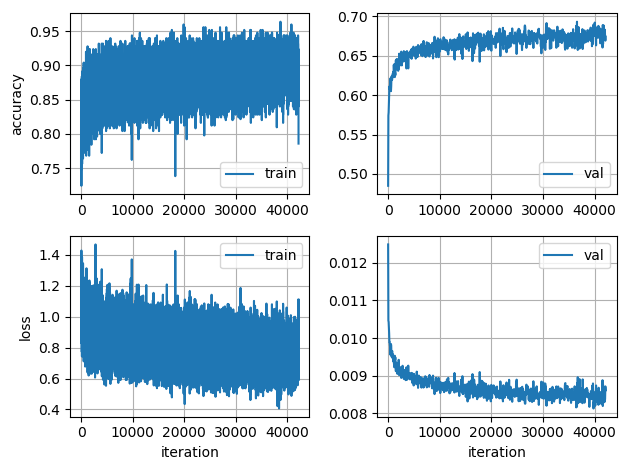
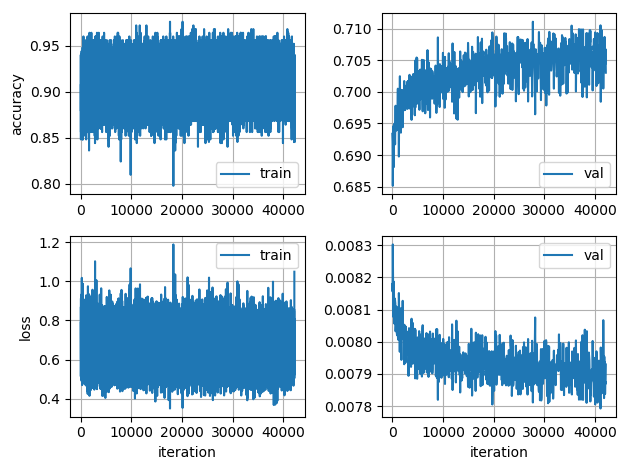
- The training of ResNet-50 was done in 3 stages (configs 4, 5 and 6), each of 30 epochs. For the first stage, we started with the ImageNet-pre-trained model from PyTorch. After the first stage, we started from the saved model of the previous stage (using the
--model_pathor-mcommand-line argument) and divided the learning rate by a factor of 10. - Stage 1 (config-4): train on the full UMDFaces dataset for 30 epochs (42180 iterations with batchsize 250) with a learning rate of 0.001, starting from an ImageNet pre-trained model. These settings are defined in config-4 of config.py, which is selected using the
-c 4flag in the command. Example to train a ResNet-50 on UMDFaces dataset using config-4: runpython umd-face/train_resnet_umdface.py -c 4 -d $DATASET_PATH. - Stage 2 (config-5): use the best model checkpointed from config-4 to initialize the network and train it using config-5
python umd-face/train_resnet_umdface.py -c 5 -m ./umd-face/logs/MODEL-resnet_umdfaces_CFG-004_TIMESTAMP/model_best.pth.tar -d $DATASET_PATHand so on for the subsequent stages.
- The training of ResNet-50 was done in 3 stages (configs 4, 5 and 6), each of 30 epochs. For the first stage, we started with the ImageNet-pre-trained model from PyTorch. After the first stage, we started from the saved model of the previous stage (using the
-
Training logs: Each time the training script is run, a new output folder with a timestamp is created by default under
./umd-face/logs, i.e../umd-face/logs/MODEL-CFG-TIMESTAMP/. Under an experiment's log folder the settings for each experiment can be viewed inconfig.yaml; metrics such as the training and validation losses are updated inlog.csv. Most of the usual settings (data augmentations, learning rates, number of epochs to train, etc.) can be customized by editingconfig.pyandumd-face/train_resnet_umdface.py. -
Plotting CSV logs: The log-file plotting utility function can be called from the command line as shown in the snippet below. The figure is saved under the log folder in the output location of that experiment.
LOG_FILE=umd-face/logs/MODEL-resnet_umdfaces_CFG-004_TIMESTAMP/log.csvpython -c "from utils import plot_log_csv; plot_log_csv('$LOG_FILE')"- If that gives parsing errors:
python -c "from utils import plot_log; plot_log('$LOG_FILE')"
| stage 1 | stage 2 | stage 3 |
|---|---|---|
 |
 |
 |
Pre-trained model:
🔴 TODO - release pre-trained ResNet-50 on UMD-Faces 🚧
Evaluation:
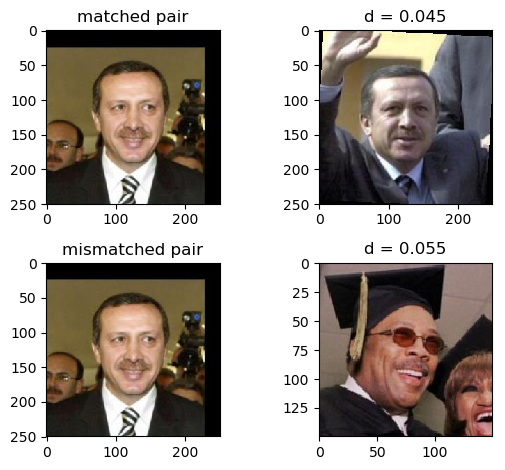
Verification demo: We have a short script, run_resnet_demo.py to demonstrate the usage of the model on a toy face verification example. The visualized output of the demo is saved in the the root directory of the project. The 3 sample images are taken from the LFW dataset.
PyTorch ResNet on VGGFace2
Training a ResNet-50 model in PyTorch on the VGGFace2 dataset.
Dataset preparation
- Register on the VGGFace2 website and download their dataset
- VGGFace2 provides loosely-cropped images. We use crops from the Faster R-CNN face detector, saved as a CSV in
[filename, subject_id, xmin, ymin, width, height]format (the CSV with pre-computed face crops is not yet made available). - The
vgg-face-2/crop_face.shscript is used to crop the face images into a separate output folder. Please look at the settings section in the script to assign correct paths depending on where the VGGFace2 data was downloaded on your local machine. This takes about a day. TODO - multi-process.- Training images are under
OUTPUT_PATH/train-crop - Validation images (2 images per subject) under
OUTPUT_PATH/val-crop
- Training images are under
Training
- We used 7 GeForce GTX 1080Ti GPUs in parallel (PyTorch DataParallel) to train the network, using Batch Normalization, following the training procedure described in the VGGFace2 paper.
- Training settings are defined under configs-20, 21, 22 in config.py.
- Briefly, training is done using SGD optimizer, starting with a learning rate of 0.1, which gets divided by 10 in subsequent stages. A new stage is begun whenever the validation curve flattens.
- First stage training command, starting with a ResNet-50 from scratch:
python vgg-face-2/train_resnet50_vggface_scratch.py -c 20 - Subsequent training stages (with lowered learning rates) would be:
python vgg-face-2/train_resnet50_vggface_scratch.py -c 21 -m PATH_TO_BEST_MODEL_CFG-20python vgg-face-2/train_resnet50_vggface_scratch.py -c 22 -m PATH_TO_BEST_MODEL_CFG-21
Evaluation
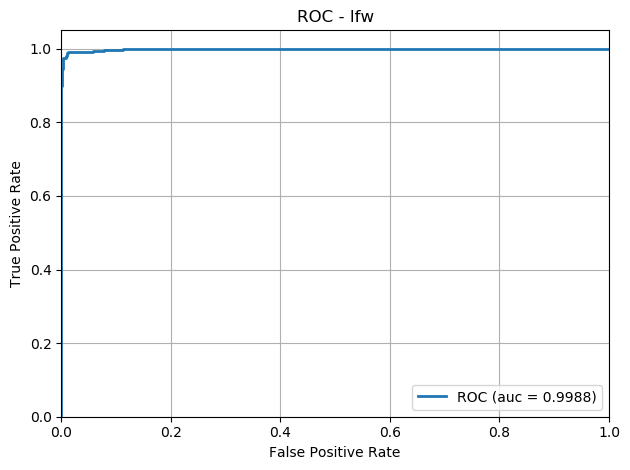
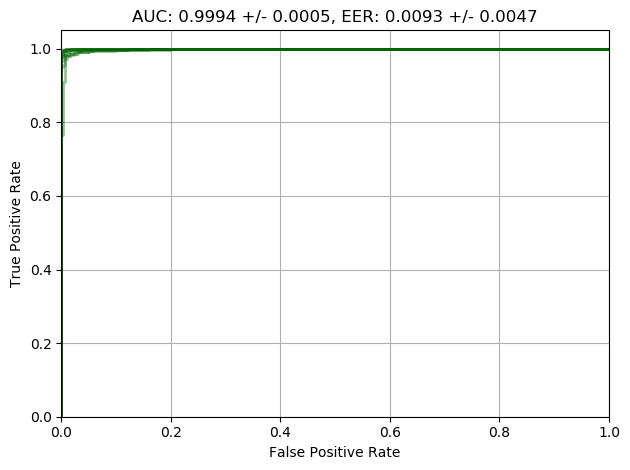
Instructions on how to setup and run the LFW evaluation are at lfw/README.md.
| DevTest | 10 fold |
|---|---|
 |
 |
Note that the project description data, including the texts, logos, images, and/or trademarks,
for each open source project belongs to its rightful owner.
If you wish to add or remove any projects, please contact us at [email protected].

