Serving TensorFlow models with TensorFlow Serving 📙
TensorFlow Serving is a flexible, high-performance serving system for machine learning models, designed for production environments. TensorFlow Serving makes it easy to deploy new algorithms and experiments, while keeping the same server architecture and APIs. TensorFlow Serving provides out-of-the-box integration with TensorFlow models, but can be easily extended to serve other types of models and data.
This repository is a guide on how to train, save, deploy and interact with TensorFlow ML models in production environments for TensorFlow models. Along with this repository, we will prepare and train a custom CNN model for image classification over The Simpsons Characters Dataset, that will be later deployed using TensorFlow Serving.
![]()

🛠️ Requirements
First of all, you need to make sure that you have all the requirements installed, but before proceeding you should keep in mind that TF-Serving is not available for Windows or macOS, which means that if you don't have an Ubuntu VM you will need to proceed with the Docker deployment, that requires you to have Docker installed.
That said, if you didn't jump to the Docker section, now you need to install tensorflow-model-server,
which requires you to add the TF-Serving distribution URI as a package source as it follows:
echo "deb [arch=amd64] http://storage.googleapis.com/tensorflow-serving-apt stable tensorflow-model-server tensorflow-model-server-universal" | sudo tee /etc/apt/sources.list.d/tensorflow-serving.list && \
curl https://storage.googleapis.com/tensorflow-serving-apt/tensorflow-serving.release.pub.gpg | sudo apt-key add -
So that then you can install tensorflow-model-server using APT-GET as it follows:
apt-get update && apt-get install tensorflow-model-server
Finally, for the client side of the deployment you need install the Python package tensorflow-serving-api,
in case you want to use the gRPC API, which is faster than the REST API regarding the latency and inference time.
pip install tensorflow-serving-api==2.5.2
You will also need to install the tensorflow's matching version with the tensorflow-serving-api (we will be using
the latest version on the date that this repository is being published) with the following command:
pip install tensorflow==2.5.1
tensorflow and tensorflow-serving-api. Also the versions have been updated in
this repository due to a Dependabot Alert as it can be seen at https://github.com/advisories/GHSA-cmgw-8vpc-rc59.
Or you can also avoid the manual installation of each requirement and just install them all at once with the
following command, that will install all the requirements specified in the requirements/requirements.txt file:
pip install -r requirements/requirements.txt
If you have any problems regarding the TensorFlow installation, visit Installation | TensorFlow.
📂 Dataset
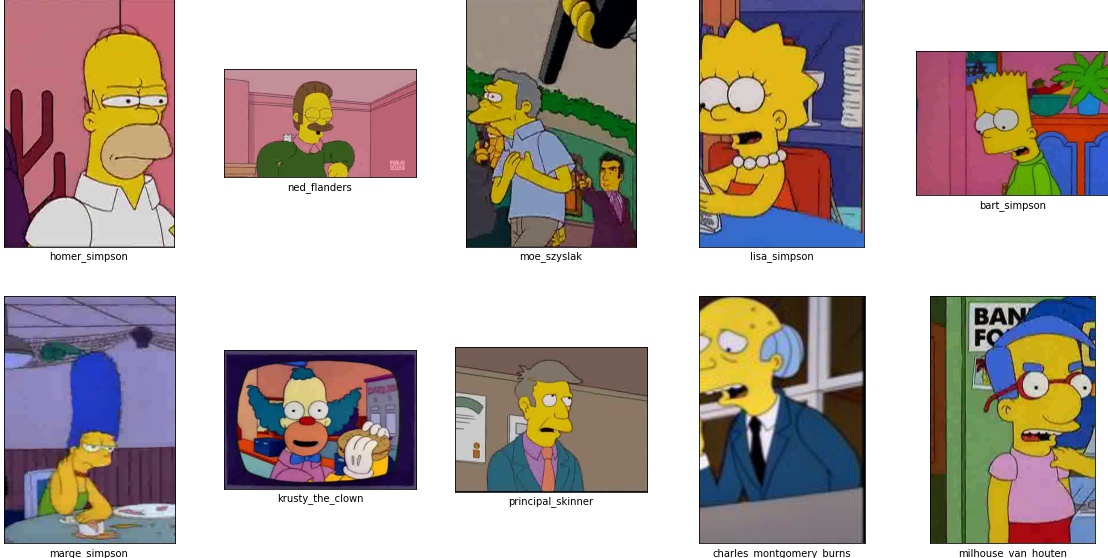
The dataset that is going to be used to train the image classification model is "The Simpsons Characters Data", which is a big Kaggle dataset that contains RGB images of some of the main The Simpsons characters including Homer, Marge, Bart, Lisa, Barney, and much more.
The original dataset contains 42 classes of The Simpsons characters, with an unbalanced number of samples per class, and a total of 20,935 training images and 990 test images in JPG format, and the images in different sizes, but as all of them are small, we will be resizing them to 64x64px when training the model.
Anyway, we will create a custom slice of the original dataset keeping just the training set, and using a random 80/20 train-test split and removing the classes with less than 50 images. So on, we will be have 32 classes, with 13,210 training images, 3,286 validation images, and 4,142 testing images.
Find all the information about the dataset in dataset/README.md.
🤖 Modelling
Once the data has been explored, we are going to proceed with the definition of the ML model, which in this case will be a CNN (Convolutional Neural Network) as we are facing an image classification problem.
The created model architecture consists of an initial Conv2D layer (that also indicates the input_shape of the
net), which is a 2D convolutional layer that produces 16 filters as the output of windows of 3x3 convolutions,
followed by a MaxPooling2D to downsample the Tensor resulting from the previous convolutional layer. Usually,
you will find this layer after two consecutive convolutions, but for the sake of simplicity, here we will be
downsampling the data after each convolution, as this is a simple CNN with a relatively small dataset (less
than 20k images).
Then we will include another combination of Conv2D and MaxPooling2D layers as increasing the number of
convolutional filters means that we will provide more data to the CNN as it is capturing more combinations
of pixel values from the input image Tensor.
After applying the convolutional operations, we will include a Flatten layer to transform the image Tensor into
a 1D Tensor which prepares the data that goes through the CNN to include a few fully connected layers after it.
Finally, we will include some Dense fully connected layers to assign the final weights of the net, and some
Dropout layers to avoid overfitting during the training phase. You also need to take into consideration that
the latest Dense layer contains as many units as the total labels to predict, which in this case is the number
of The Simpsons characters available in the training set.
The trained model has been named SimpsonsNet (this name will be used later while serving the model as its identifier) and its architecture looks like this:
import tensorflow as tf

model = tf.keras.models.Sequential([
    tf.keras.layers.Conv2D(16, (3,3), activation='relu', input_shape=(224, 224, 3)),
    tf.keras.layers.MaxPooling2D(2,2),
    tf.keras.layers.Conv2D(32, (3,3), activation='relu'),
    tf.keras.layers.MaxPooling2D(2,2),
    tf.keras.layers.Flatten(),
    tf.keras.layers.Dense(units=512, activation='relu'),
    tf.keras.layers.Dropout(.2),
    tf.keras.layers.Dense(units=256, activation='relu'),
    tf.keras.layers.Dropout(.1),
    tf.keras.layers.Dense(len(MAP_CHARACTERS), activation='softmax')
])
Finally, once trained we will need to dump the model (not the weights) in SavedModel format, which is the universal serialization
format for the TensorFlow models. This format provides a language-neutral format to save ML models that is recoverable and hermetic.
It enables higher-level systems and tools to produce, consume and transform TensorFlow models.
import tensorflow as tf
import os

save_path = os.path.join("/home/saved_models/saved_model/1/")
tf.saved_model.save(trained_model, save_path)
The resulting SavedModel's directory should look like the following:
assets/
assets.extra/
variables/
    variables.data-?????-of-?????
    variables.index
saved_model.pb
More information regarding the SavedModel format at
TensorFlow SavedModel.
Note: the model has been trained on an NVIDIA GeForce GTX 1070 8GB GPU using CUDA 11. If you want to get your GPU specs,
just use the nvidia-smi command on your console, but make sure that you have your NVIDIA drivers properly installed.
You also need to check that both CUDA and the cuDNN SDK get the GPU training working with TensorFlow. The code
provided below explains how to make sure that the TensorFlow build is detecting and using your GPU.
import tensorflow as tf
tf.config.list_physical_devices('GPU')
tf.test.is_built_with_cuda()
More information available at TensorFlow GPU Install.
Finally, as a personal recommendation you should check/keep an eye on the following courses:
-
🔥 Laurence Moroney's TensorFlow Proffesional Certificate (previously Specialization) at Coursera for learning the basics of TensorFlow as you playaround with some common Deep Learning scenarios like CNNs, Time Series and NLP. So feel free to check it at Coursera | TensorFlow in Practice, and the course's resources at lmoroney/dlaicourse. -
⭐ Daniel Bourke's TensorFlow Zero to Mastery course he is currently developing and it will be completely free including a lot of resources. So feel free to check it at mrdbourke/tensorflow-deep-learning. -
✨ Andrew Ng's CNN course/explanation freely available on YouTube at Convolutional Neural Networks - Course 4 of the Deep Learning Specialization that contains clear explanations on how the convolutional operations work, to help you get introduced to the Computer Vision field.
If you have some TensorFlow free learning material made by you that you want to share, feel free to create a PR including it in this list, and I'll be glad to feature your work!
🚀 Deployment
Once the model has been saved using SavedModel format, it is pretty straightforward to get TF-Serving working,
if the installation succeeded. Unlike TorchServe, serving ML models in TF-Serving
is simpler as you just need to have tensorflow-model-server installed and a model in the specified format.
But regarding the TF-Serving documentation (at least from my point of view) is not that clear, so the deployment process may be tedious and then the usage too. Anyway, the following command is the one you need to use to deploy any TensorFlow's ML model into TF-Serving:
tensorflow_model_server --port=8500 --rest_api_port=8501 \
                        --model_name=simpsonsnet \
                        --model_base_path=/home/saved_models/simpsonsnet
Now, even though the command is clear and self-explanatory, a more detailed explanation of the flags used is presented:
--port: this is the port to listen on for the gRPC API, the default value is 8500, but it's a common practice to still define this flag's value to always know the configuration of the deployed TF-Serving Server.--rest_api_port: this is the REST API port, which is set to zero by default, which means that the REST API will not be deployed/exposed unless you manually set a port. There's no default value, it just needs to be different than the gRPC port, so we will set it to 8501.--model_name: this is the name of the ML model to serve, which is the one that will be exposed in the endpoint.--model_base_path: this is the base path where the ML model that is going to be served is placed in. Note that it's an absolute path, do not use relative paths.
More information about the TF-Serving CLI available at
Train and serve a TensorFlow model with TensorFlow Serving.
Even though the official documenation is not that helpful, you can also check tensorflow_model_server --help.
Once TF-Serving has been successfully deployed, you can send a sample HTTP GET request to the REST API available at http://localhost:8501/v1/models/simpsonsnet; to do so use the following command, which sends this request to the Model Status API that returns the served ML model basic information:
curl http://localhost:8501/v1/models/simpsonsnet
That should output something similar to the following if everything is OK:
{
 "model_version_status": [
  {
   "version": "1",
   "state": "AVAILABLE",
   "status": {
    "error_code": "OK",
    "error_message": ""
   }
  }
 ]
}
There is no way to gracefully stop the server, check this issue for updates,
so you will need to either CTRL+C in the terminal where you launched tensorflow_model_server, kill the running process from
the terminal or just stop the running container.
To look for the PID of the running tensorflow_model_server process and then kill it, you can use the following
set of commands:
ps aux | grep -i "tensorflow_model_server"
kill -9 PID
To look for the running Docker Container ID and then stop it, you can just use the following set of commands:
docker ps # Retrieve the CONTAINER_ID
docker kill CONTAINER_ID
🐋 Docker
In order to reproduce the TF-Serving deployment in an Ubuntu Docker image, you can use the following set of commands:
docker build -t ubuntu-tfserving:latest deployment/
docker run --rm --name tfserving_docker -p8500:8500 -p8501:8501 -d ubuntu-tfserving:latestNote: make sure that you use the -d flag in docker run so that the container runs in the background
and does not block your terminal.
For more information regarding the Docker deployment, you should check TensorFlow's explanation and notes available at TF-Serving with Docker, as it also explains how to use their Docker image (instead of a clear Ubuntu one) and some tips regarding the production deployment of the models using TF-Serving.
Also, if you go through the deployment/Dockerfile you will see that there's a comment per Dockerfile line explaining what is it doing. So that you can also take that Dockerfile as a template, making it easier to prepare the deployment file for your custom model.
🧙♂️ Usage
Along this section we will see how to interact with the deployed APIs (REST and gRPC) via Python, so as to send sample requests to the Prediction APIs to classify images from "The Simpsons Characters Dataset".
Note: as the model is pretty simple the accuracy is not perfect, but that's part of any ML project lifecycle so that the model improves with iterations and retraining processes. Feel free to update/improve the model!

Source: Reddit - r/TheSimpsons
Before proceeding with the Python usage, just to mention that as the mapping between the labels and the predicted Tensor is a future task (see the Future Tasks section), we will be using the following dictionary so as to go from the predicted Tensor highest probability index to the matching label on "The Simpsons Characters Dataset".
{
    0: "abraham_grampa_simpson", 1: "apu_nahasapeemapetilon", 2: "barney_gumble", 3: "bart_simpson",
    4: "carl_carlson", 5: "charles_montgomery_burns", 6: "chief_wiggum", 7: "comic_book_guy",
    8: "disco_stu", 9: "edna_krabappel", 10: "groundskeeper_willie", 11: "homer_simpson",
    12: "kent_brockman", 13: "krusty_the_clown", 14: "lenny_leonard", 15: "lisa_simpson",
    16: "maggie_simpson", 17: "marge_simpson", 18: "martin_prince", 19: "mayor_quimby",
    20: "milhouse_van_houten", 21: "moe_szyslak", 22: "ned_flanders", 23: "nelson_muntz",
    24: "patty_bouvier", 25: "principal_skinner", 26: "professor_john_frink", 27: "ralph_wiggum",
    28: "selma_bouvier", 29: "sideshow_bob", 30: "snake_jailbird", 31: "waylon_smithers"
}
If you want to interact with the deployed API from Python you can either use the tensorflow-serving-api Python package that easily lets you send gRPC requests or otherwise, you can use the requests Python library to send the request to the REST API instead.
REST API requests using requests:
Regarding the REST requests to the deployed TF-Serving Prediction API you need to install the requirements as it follows:
pip install -r requirements/requirements-rest.txt
And then use the following script which will send a sample The Simpsons image to be classified using the deployed model:
import requests

import tensorflow as tf

# Apply the same preprocessing as during training (resize and rescale)
image = tf.io.decode_image(open('../images/sample.jpg', 'rb').read(), channels=3)
image = tf.image.resize(image, [224, 224])
image = image/255.

# Convert the Tensor to a batch of Tensors and then to a list
image_tensor = tf.expand_dims(image, 0)
image_tensor = image_tensor.numpy().tolist()

# Define the endpoint with the format: http://localhost:8501/v1/models/MODEL_NAME:predict
endpoint = "http://localhost:8501/v1/models/simpsonsnet:predict"

# Prepare the data that is going to be sent in the POST request
json_data = {
  "instances": image_tensor
}

# Send the request to the Prediction API
response = requests.post(endpoint, json=json_data)

# Retrieve the highest probablity index of the Tensor (actual prediction)
prediction = tf.argmax(response.json()['predictions'][0])
print(MAP_CHARACTERS[prediction.numpy()])
>>> "homer_simpson"
gRPC API requests using tensorflow-serving-api:
Now, regarding the gRPC requests to the deployed TF-Serving Prediction API you need to install the requirements as it follows:
pip install -r requirements/requirements-grpc.txt
And then use the following script which will send a sample The Simpsons image to be classified using the deployed model:
import grpc

import tensorflow as tf
from tensorflow_serving.apis import predict_pb2, prediction_service_pb2_grpc

# Apply the same preprocessing as during training (resize and rescale)
image = tf.io.decode_image(open('../images/sample.jpg', 'rb').read(), channels=3)
image = tf.image.resize(img, [224, 224])
image = image/255.

# Convert the Tensor to a batch of Tensors and then to a list
image_tensor = tf.expand_dims(image, 0)
image_tensor = image_tensor.numpy().tolist()

# Optional: define a custom message lenght in bytes
MAX_MESSAGE_LENGTH = 20000000

# Optional: define a request timeout in seconds
REQUEST_TIMEOUT = 5

# Open a gRPC insecure channel
channel = grpc.insecure_channel(
    "localhost:8500",
    options=[
        ("grpc.max_send_message_length", MAX_MESSAGE_LENGTH),
        ("grpc.max_receive_message_length", MAX_MESSAGE_LENGTH),
    ],
)

# Create the PredictionServiceStub
stub = prediction_service_pb2_grpc.PredictionServiceStub(channel)

# Create the PredictRequest and set its values
req = predict_pb2.PredictRequest()
req.model_spec.name = 'simpsonsnet'
req.model_spec.signature_name = ''

# Convert to Tensor Proto and send the request
# Note that shape is in NHWC (num_samples x height x width x channels) format
tensor = tf.make_tensor_proto(image_tensor)
req.inputs["conv2d_input"].CopyFrom(tensor)  # Available at /metadata

# Send request
response = stub.Predict(req, REQUEST_TIMEOUT)

# Handle request's response
output_tensor_proto = response.outputs["dense_2"]  # Available at /metadata
shape = tf.TensorShape(output_tensor_proto.tensor_shape)

result = tf.reshape(output_tensor_proto.float_val, shape)
result = tf.argmax(result, 1).numpy()[0]
print(MAP_CHARACTERS[result])
>>> "homer_simpson"
💻 Credits
Credits for the dataset to Alexandre Attia for creating it, as well as the Kaggle community that made it possible, as they included a lot of images to the original dataset (from 20 characters to up to 42).
🔮 Future Tasks
- Include label-prediction mapping using this solution.