jakobzhao / Storymap
Labels
Projects that are alternatives of or similar to Storymap
 Storymap.js is a javascript library for storytelling with web maps. This library aims to enable individuals, especially those who have little web programming background, to effectively create story map applications over the Internet. Three major tasks would be dealt with, including web interface design, map design and storytelling structure. To develop these functions, this library is written in a combination of several web programming languages, like HTML, Cascading Style Sheets (CSS) and Javascript, and builds upon several prerequisite libraries and web services. To make the story map library robust and lightweight, we select as fewer prerequisite libraries as possible, and prioritize the use of open source or free libraries. This library is currently maintained by Cartography and Geovisualization Group at Oregon State University, and has been used in multiple geovisualization related courses (e.g., GEOG 371: Web Mapping, GEOG 571: Advanced Web Mapping, GEOG 472/572: Geovisual Analytics) and projects. In addition, a lot of universities began to choose storymap.js instead of ESRI storymap platform.
A storymap is organically integrated by several scenes. Each scene consists of a web map and a script. You can manipulate the map by zooming, panning, and even adding more thematic layers. This library embodies the concept responsive web design, meaning the storymaps can be shown on either Desktop or mobile devices.
To support open source, buy us a cup of coffee ☕️ 😀 
Features
A story map consists of several scenes. Each scene has two basic components, in terms of the content object and the map object. The content object is usually made up by texts, graphics, and audios and videos. Here are some key features of this library.
1. Scene with fullscreen image or video
2. MiniGlobe
3. Nav Bar
5. Tile Layers
7. Spinned loader,progress line, animated scroll-down arrow and more..
8. 3D thematic map;
9. Bivariate color pallete generator
Templates
1. Basic Template; 2. Script panel on the right; 3. Split the screen in halves; 4. Atlas Front Page 5. Fading out the scripts not being viewed 6. arrow lines
Prerequisite
Required
1. jQuery;
2. Bootstrap 4;
3. Leaflet, (3d Storymap uses Cesium instead of leaflet).
Recommended
1. Font Awesome;
2. Animate;
3. Google Font;
4. Chroma.js;
5. leaflet.ajax.min.js.
Demos
1. Oregon Water Atlas -- made by Garath Baldrica-franklin
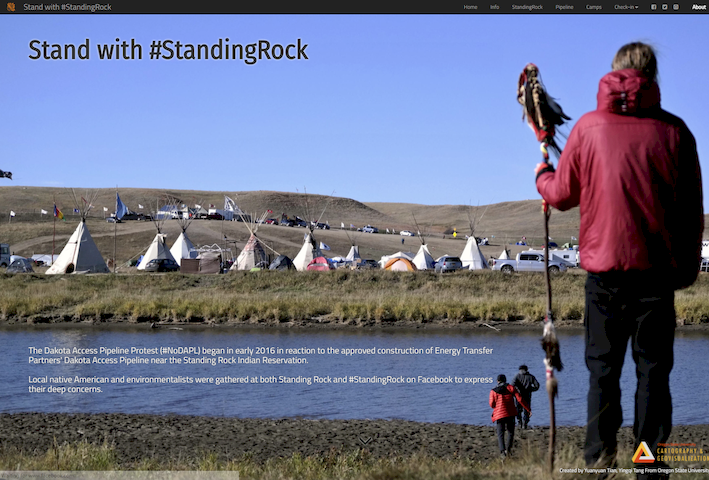
2. Stand With #StandingRock -- made by Yuanyuan Tian and Yingqi Tang
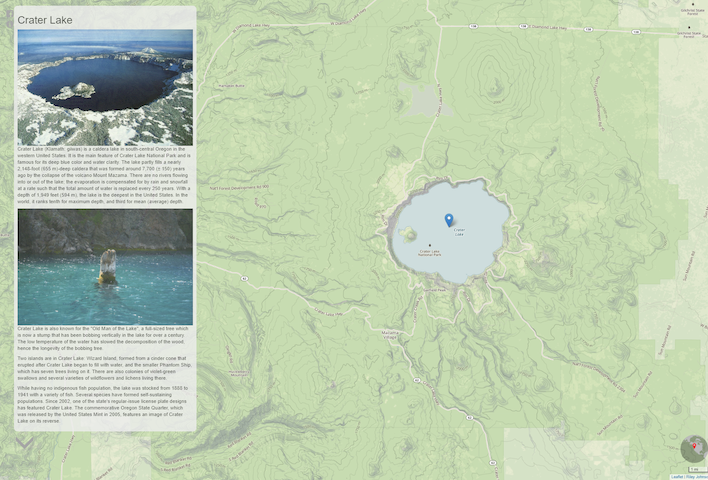
3. Sites in Oregon -- made by Riley Johnson
Tutorial
A story map is organized as a sequence of scenes, and the scenes are associated with maps. Each map are mashed up by layers, and the layers can be any types of layers that leaflet.js or cesium support. Below shows the tree structure of this story map library.
A Story Map
│
├───Scene 1: Setup
│      │──── Script 1 (e.g., text, video, image, audio, etc.)
│      │──── Map 1
│             │
│             │──── Layer 1
│             │──── Layer 2
│             │──── Layer N
├───Scene 2: Confrontation
│... ... ... ... ... ... ...
│... ... ... ... ... ... ...
│... ... ... ... ... ... ...
├───Scene N: Resolution
│      │──── Content 5
│      │──── Map 5
│             │
│             │──── Layer 1
│             │──── Layer 2
│             │──── Layer N
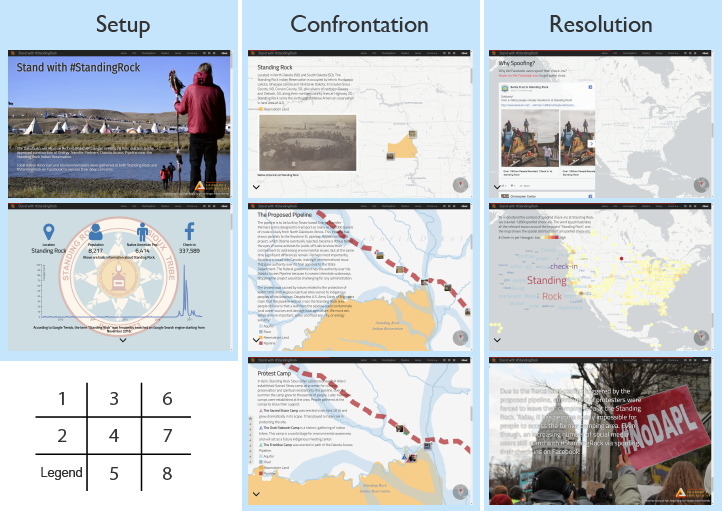
For example, Below is the storytelling structure of a storymap on the standingrock protest at North Dakota, you can see how this story map is organized to embody the setup, the confrontation and then the resolution. The storymap can be found at here.
Here, we will introduce how to make the hello world story map application.
1. Above all, create an empty html page.
<!DOCTYPE html>
<html lang="en">
<head>
    <meta charset="UTF-8">
    <title>Hello World!</title>
</head>
<body>

</body>
</html>
2. In the head element, please include all the required stylesheets and javascript,the storymap stylesheet and library. Please make sure to add stylesheets in front of the javascript libraries.
<head>
    <title>Hello World</title>
    <meta charset="utf-8">
    <meta name="viewport" content="width=device-width, initial-scale=1">
    <!--add required stylesheets-->
    <link rel="stylesheet" href="https://maxcdn.bootstrapcdn.com/bootstrap/4.3.1/css/bootstrap.min.css">
    <!--leaflet css-->
    <link rel="stylesheet" href="https://cdnjs.cloudflare.com/ajax/libs/leaflet/1.4.0/leaflet.css">
    <link rel="stylesheet" href="https://cdnjs.cloudflare.com/ajax/libs/animate.css/3.5.2/animate.min.css">
    <link rel="stylesheet" href="https://fonts.googleapis.com/icon?family=Material+Icons">

    <!--add favicon for the web page-->
    <link rel="shortcut icon" href="../../img/favicon.ico" type="image/x-icon">

    <!--Font-->
    <link href="https://fonts.googleapis.com/css?family=Cairo" rel="stylesheet">

    <link rel="stylesheet" type="text/css" href="../../dist/storymap.2.5.css">

    <!--add required libraries-->
    <script src="https://cdnjs.cloudflare.com/ajax/libs/leaflet/1.4.0/leaflet.js"></script>
    <!--jquery and Popper-->
    <script src="https://cdnjs.cloudflare.com/ajax/libs/jquery/3.2.1/jquery.min.js"></script>
    <script src="https://cdnjs.cloudflare.com/ajax/libs/popper.js/1.14.0/umd/popper.min.js"></script>

    <!--boostrap-->
    <script src="https://maxcdn.bootstrapcdn.com/bootstrap/4.3.1/js/bootstrap.min.js"></script>
    <!--leaflet.ajax for asynchronously adding geojson data-->
    <script src="https://cdnjs.cloudflare.com/ajax/libs/leaflet-ajax/2.1.0/leaflet.ajax.min.js"></script>

    <!--story map plugin-->
    <script src="../../dist/storymap.2.5.js"></script>
</head>
To use this storymap library, two files storymap.2.5.css and storymap.2.5.js are requried to include. Also, this library can be included by download instead of include the source at this repository.
Check storymap.2.5.css and storymap.2.5.js to download.
3. Next, in the body element, please create a div to contain an storymap instance.
<body>
<div id="storymap" class="container-fluid" >
    <div class="row">
        <div class="col-sm-6 col-md-8 storymap-map"></div>
        <div class="col-sm-6 col-md-4 storymap-story"></div>
    </div>
</div>
</body>
A storymap consists of two key components, namely a map and a story, please put two divs in a row div under the container of storymap. Please make sure to append class storymap-map and storymap-story for each div respectively.
4. Several scenes are contained in a storymap-story div. Each scene is held by a section element, and assign a data-scene attribute. This attribute will be used to link the section element to the map component.
<section data-scene="scene1">
    ...
</section>
<section data-scene="scene2">
    ...
</section>
<section data-scene="scene3">
    ...
</section>
5. Each scene holds the content of the scene. various types of multi-media data can be put in the section element.
<section data-scene="scene1">
    <h2>scene 1</h2>
</section>
6. For example, if the data-scene parameter is scene1, the name of the corresponding map object should be scene1as well. In the layer array object, you will need to include the layer names. For example, layer1, layer2. These layers need to be defined before the scenes object. Thescenes` object can be defined in the script as:
    var scenes = {
        scene1: {lat: 44, lng: -123.5, zoom: 7, layers: [layers.layer2], name: "scene 1"},
        scene2: {lat: 44.5701158, lng: -123.2949388, zoom: 10, layers: [layers.layer2], name: "scene 2"},
        scene3: {lat: 44.5701158, lng: -123.2949388, zoom: 12, layers: [layers.layer1, layers.layer2], name: "scene 3"}
    };
Here is the layers array:
var layers = {
    layer1: {
        layer: L.tileLayer('http://server.arcgisonline.com/ArcGIS/rest/services/World_Imagery/MapServer/tile/{z}/{y}/{x}'),
        legend: '<i style="background: black; opacity: 0.5"></i><p><b>legend 1</b></p>'
    },
    layer2: {
        layer: L.geoJson.ajax('http://mapious.ceoas.oregonstate.edu/geoserver/mapious/ows?service=WFS&version=1.0.0&request=GetFeature&typeName=ore_counties&outputFormat=application%2Fjson', {
            color: 'orange',
            weight: 5
        }),
        legend: '<i style="background: orange; opacity: 0.5"></i><p><b>legend 2</b></p>'
    },
    layer3: {
        layer: L.tileLayer('http://cartodb-basemaps-{s}.global.ssl.fastly.net/light_all/{z}/{x}/{y}.png')
    }
};
A storymap has an array of scenes and a scene has an array of layers. The scene and layer is defined as below.
scene = {
    lat: `float number`,  // the latitude of the center point of the scene.
    lng: `float number`,  // the longitude of the center point of the scene.
    zoom: `integer`,      // the zooming levelr of the map scene.
    layers: `array`,      // the array of layers to add on.
    name: `string`        // the name of the scence This name will be used in the navwidget and/or navbar if any
    script: `function`    // the function to execute at the associated scene.
}
layer = {
    layer: `Leaflet Layer`,
    legend: `A legend patch html`
}
7. After defining the layers and scenes, you will create a storymap object to anchor to the storymap div. We can capture that div using $ selector, Here, the selector is $('#storymap').
$('#storymap').storymap({
    scenes: scenes,
    baselayer: layers.layer3,
    legend: true,
    loader: true,
    flyto: false,
    credits:  "Build with <i class='material-icons' style='color: red; font-size: 10px;'>favorite</i> from John Doe",
    scalebar: true,
    scrolldown: true,
    progressline: true,
    navwidget: true,
    createMap: function () {
        var map = L.map($(".storymap-map")[0], {zoomControl: false}).setView([44, -120], 7);
        basemap = this.baselayer.layer.addTo(map);
        return map;
    }
});
Note: To make a storymap, the
scenesandlayersobjects are required. Other options are optional. By default, the library sets thebreakpoint33%from the top of the page, Besides, you can customize your map in thecreateMapfunction.
Here is the data structure of storymap object.
$(element).storymap({
    triggerpos: `a string of percentage`, // A percentage string'33.333%',
    scenes: `an array of scene objects`,
    baselayer: `a layer`,
    legend: `Boolean value`,
    loader: `Boolean value`,
    flyto: `Boolean value`,
    credits: `html content`,
    scalebar: `Boolean value`,
    scrolldown: `Boolean value`,
    progressline: `Boolean value`,
    navwidget: `Boolean value`,
    createMap: function () {}
});
8. To add a geojson data, you will need to include the leaflet.ajax.min.js library in the head element. As shown below.
<!--add ajax based data transmission-->
<script src="https://cdnjs.cloudflare.com/ajax/libs/leaflet-ajax/2.1.0/leaflet.ajax.min.js"></script>
Till now, in the script of the body element, you have the following code snippet.
<script type="text/javascript">

    var layers = {
        layer1: {
            layer: L.tileLayer('http://server.arcgisonline.com/ArcGIS/rest/services/World_Imagery/MapServer/tile/{z}/{y}/{x}'),
            legend: '<i style="background: black; opacity: 0.5"></i><p><b>legend 1</b></p>'
        },
        layer2: {
            layer: L.geoJson.ajax('http://mapious.ceoas.oregonstate.edu/geoserver/mapious/ows?service=WFS&version=1.0.0&request=GetFeature&typeName=ore_counties&outputFormat=application%2Fjson', {
                color: 'orange',
                weight: 5
            }),
            legend: '<i style="background: orange; opacity: 0.5"></i><p><b>legend 2</b></p>'
        },
        layer3: {
            layer: L.tileLayer('http://cartodb-basemaps-{s}.global.ssl.fastly.net/light_all/{z}/{x}/{y}.png')
        }
    };

    var scenes = {
        scene1: {lat: 44, lng: -123.5, zoom: 7, layers: [layers.layer2], name: "scene 1"},
        scene2: {lat: 44.5701158, lng: -123.2949388, zoom: 10, layers: [layers.layer2], name: "scene 2"},
        scene3: {lat: 44.5701158, lng: -123.2949388, zoom: 12, layers: [layers.layer1, layers.layer2], name: "scene 3"}
    };

    $('#storymap').storymap({
        scenes: scenes,
        layers: layers,
        baselayer: layers.layer3,
        legend: true,
        loader: true,
        flyto: false,
        credits: credits:  "Build with <i class='material-icons' style='color: red; font-size: 10px;'>favorite</i> from Bo Zhao",
        scalebar: true,
        scrolldown: false,
        progressline: true,
        navwidget: true,
        createMap: function () {
            var map = L.map($(".storymap-map")[0], {zoomControl: false}).setView([44, -120], 7);
            basemap = this.baselayer.layer.addTo(map);
            return map;
        }
    });
</script>
Okay, now we have walk through how to make a simple storymap. See the full source code at here, and look at this hello world application by clicking here.
Team
Storymap is currently maintained by the Cartography and Geovisualization group at Oregon State University.

-
Bo Zhao (Project Leader)
License
This storymap map library is under the MIT license.


