wepsim / Wepsim
WepSIM: Web Elemental Processor SIMulator
Stars: ✭ 38
Programming Languages
assembly
5116 projects
Projects that are alternatives of or similar to Wepsim
Pxctest
Execute tests in parallel on multiple iOS Simulators
Stars: ✭ 800 (+2005.26%)
Mutual labels: simulator
Sibyl
Platform for backtesting and live-trading intraday Stock/ETF/ELW using recurrent neural networks
Stars: ✭ 32 (-15.79%)
Mutual labels: simulator
Pyncov 19
Pyncov-19: Learn and predict the spread of COVID-19
Stars: ✭ 20 (-47.37%)
Mutual labels: simulator
Satellitesimulator
🚀 A simple Qt/OpenGL satellite orbit simulator
Stars: ✭ 28 (-26.32%)
Mutual labels: simulator
Osim Rl
Reinforcement learning environments with musculoskeletal models
Stars: ✭ 763 (+1907.89%)
Mutual labels: simulator
Sst Elements
SST Architectural Simulation Components and Libraries
Stars: ✭ 36 (-5.26%)
Mutual labels: simulator
Atmsimulator
Used the notion of threads and parallelism to make a ATM Simulator.
Stars: ✭ 11 (-71.05%)
Mutual labels: simulator
Isimulator
iSimulator is a GUI utility to control the Simulator, and manage the app installed on the simulator.
Stars: ✭ 963 (+2434.21%)
Mutual labels: simulator
Tenyr
Simple, orthogonal 32-bit computer architecture and environment
Stars: ✭ 24 (-36.84%)
Mutual labels: simulator
Sesc
Unofficial clone of SESC. Builds with modern C++ compilers.
Stars: ✭ 8 (-78.95%)
Mutual labels: simulator
Syscrack
Virtual Online Crime Simulator (VOCS) written in PHP 7.0
Stars: ✭ 17 (-55.26%)
Mutual labels: simulator
Assembler Simulator
Simple 8-bit Assembler Simulator with Angular.js
Stars: ✭ 792 (+1984.21%)
Mutual labels: simulator
Tko Electronics Sim
A cross-platform app that allows for building and simulating FRC electronics in real time.
Stars: ✭ 28 (-26.32%)
Mutual labels: simulator
Blender Flip Fluids
FLIP Fluids is a powerful liquid simulation plugin that gives you the ability to create high quality fluid effects all within Blender, the free and open source 3D creation suite.
Stars: ✭ 983 (+2486.84%)
Mutual labels: simulator
Azureeventgridsimulator
A simulator that provides endpoints to mimic the functionality of Azure Event Grid topics and subscribers and is compatible with the Microsoft.Azure.EventGrid client library.
Stars: ✭ 29 (-23.68%)
Mutual labels: simulator
WepSIM: Wep Elemental Processor Simulator

![]()
Table of contents
Getting WepSIM
1) Run WepSIM
-
From Web, please:
- Check you have a compatible Web browser:
- Google Chrome 80+, Mozilla Firefox 74+, Microsoft Edge 85+, and Apple Safari 12+
- Open your (compatible) Web browser
- Click on the link https://wepsim.github.io/wepsim
- A nightly build version is also available at https://acaldero.github.io/wepsim
- Check you have a compatible Web browser:
-
From Linux/Unix command line, please:
- Check you have installed Node v10.5.0+, and Bash 4.4.19+:
- sudo apt-get install nodejs npm bash -y
- Get WepSIM by executing:
- wget https://github.com/acaldero/wepsim/releases/download/v2.1.5/wepsim-2.1.5.zip
- unzip wepsim-2.1.5.zip
- cd wepsim-2.1.5
- npm install terser jq jshint yargs clear inquirer fuzzy inquirer-command-prompt inquirer-autocomplete-prompt
- Execute wepsim.sh with the help flag in order to show the available command switches:
- ./wepsim.sh -h
- Check you have installed Node v10.5.0+, and Bash 4.4.19+:
2) Install WepSIM (iOS, Android, Windows, Linux, etc.)
- WepSIM can be installed on Android 5.0+ from the Goole Play Store at https://play.google.com/store/apps/details?id=es.uc3m.inf.arcos.wepsim
- For other platforms, please follow those steps in order to install WepSIM as a Progressive Web Application (PWA):
| Step | iOS | Android | Action to perform |
|---|---|---|---|
| 1 | 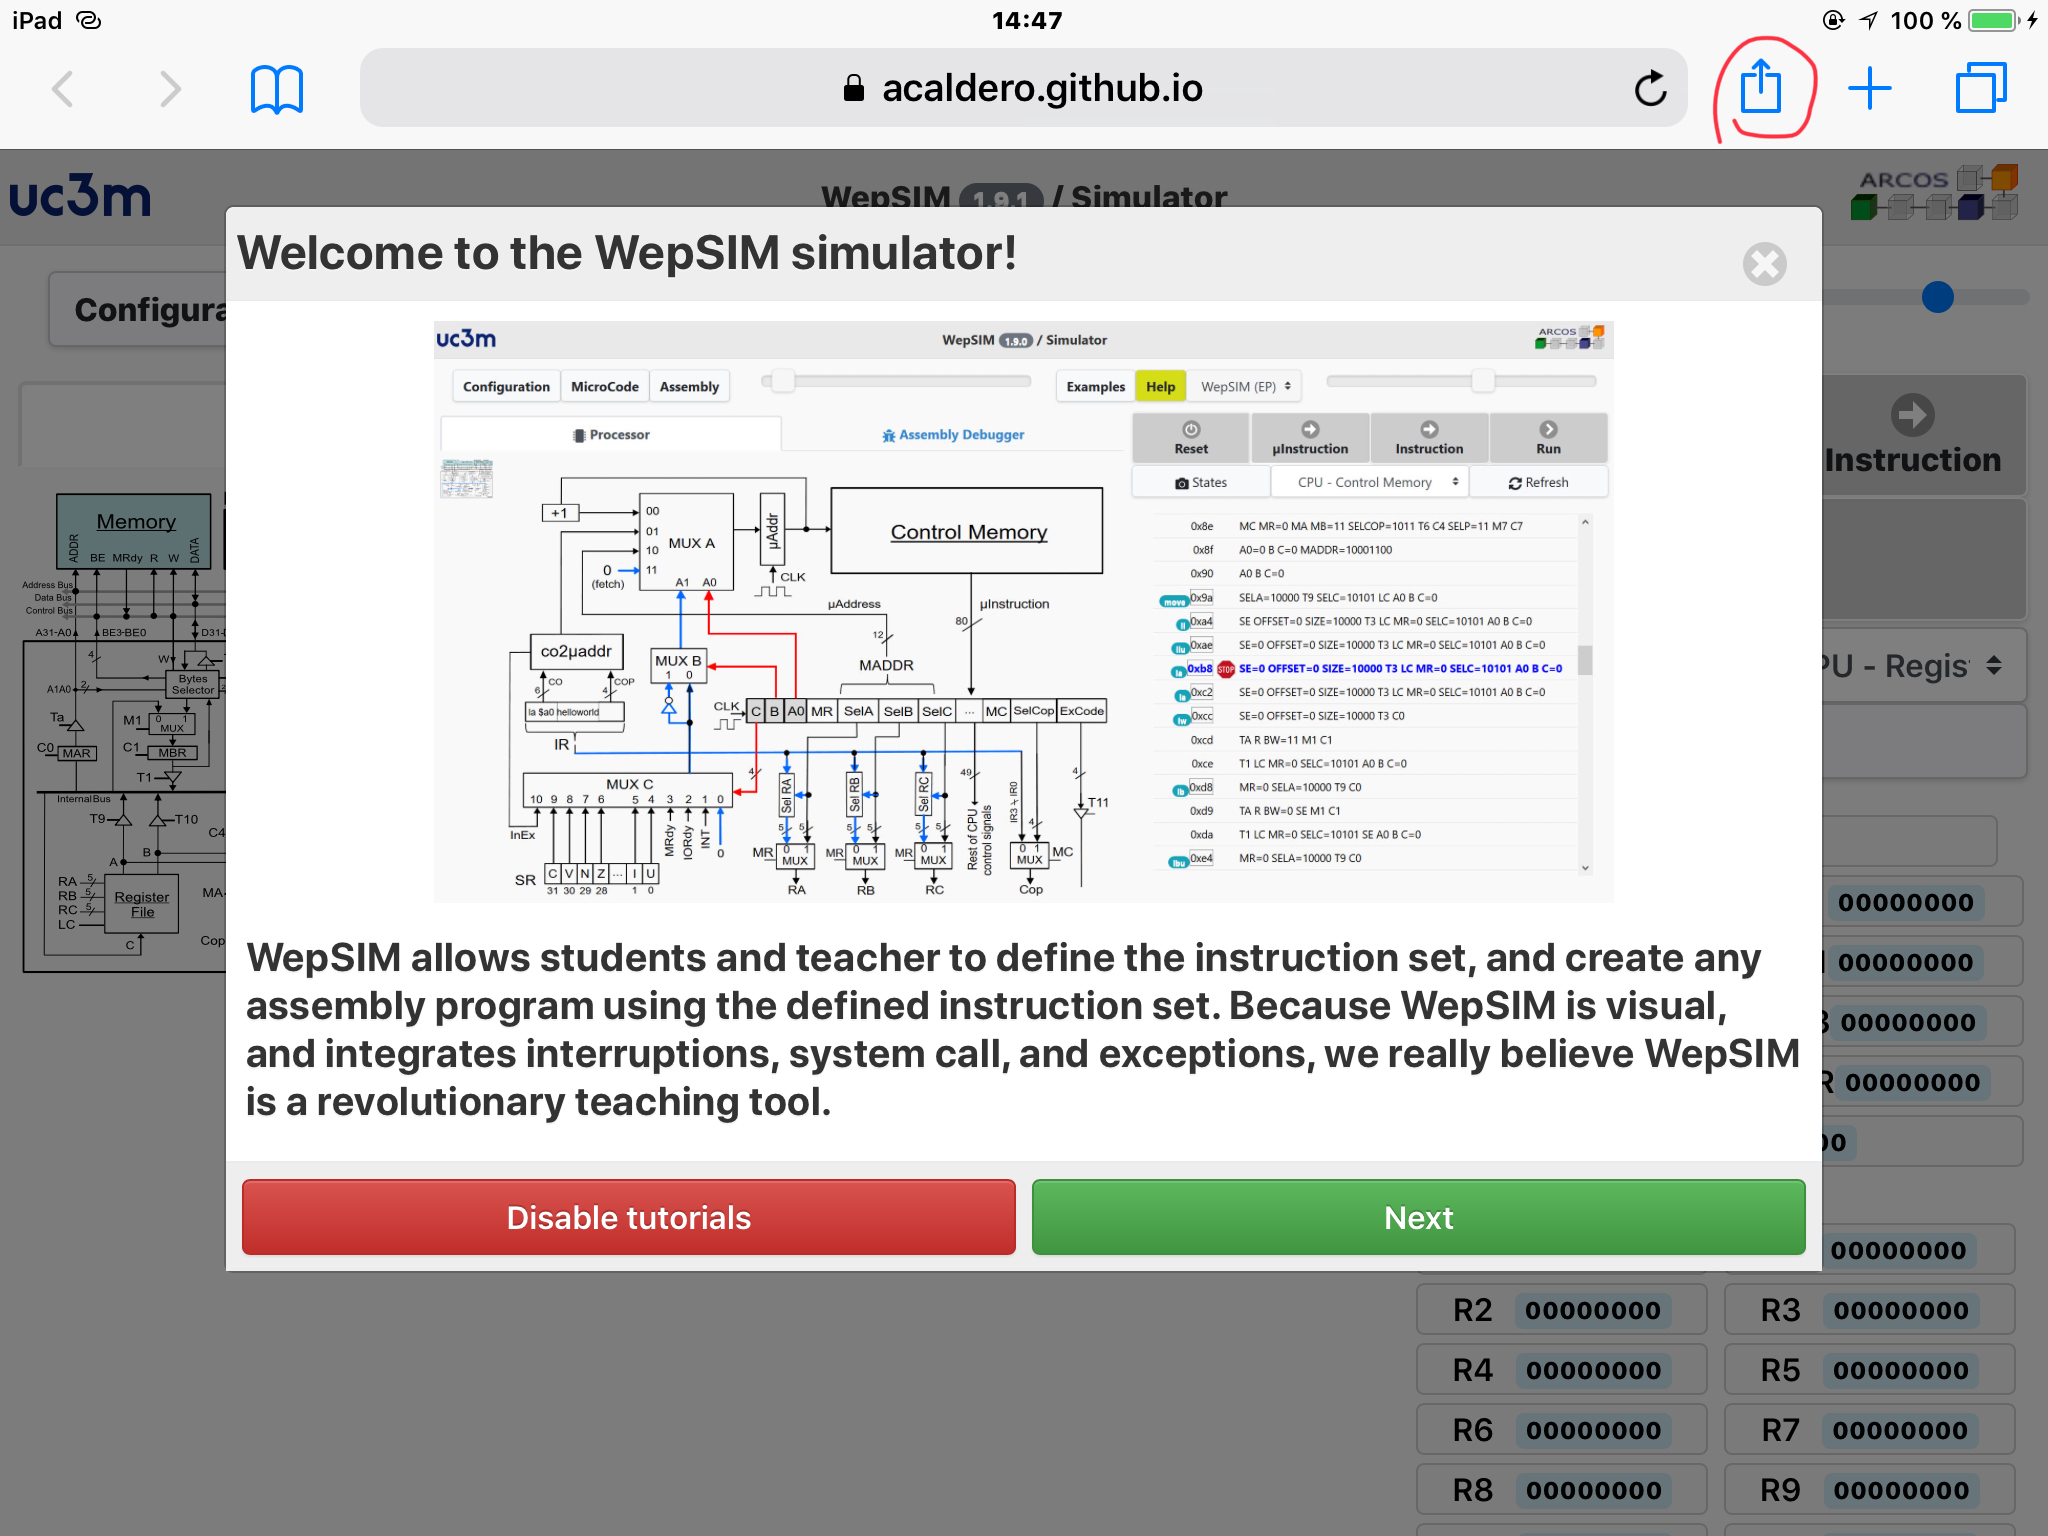 |
 |
First, open Safari (iOS, MacOS) or Chrome (Android, Windows, Linux) and load https://wepsim.github.io/wepsim. From the top-right corner tap on the share icon (Safari) or the menu icon (Chrome). |
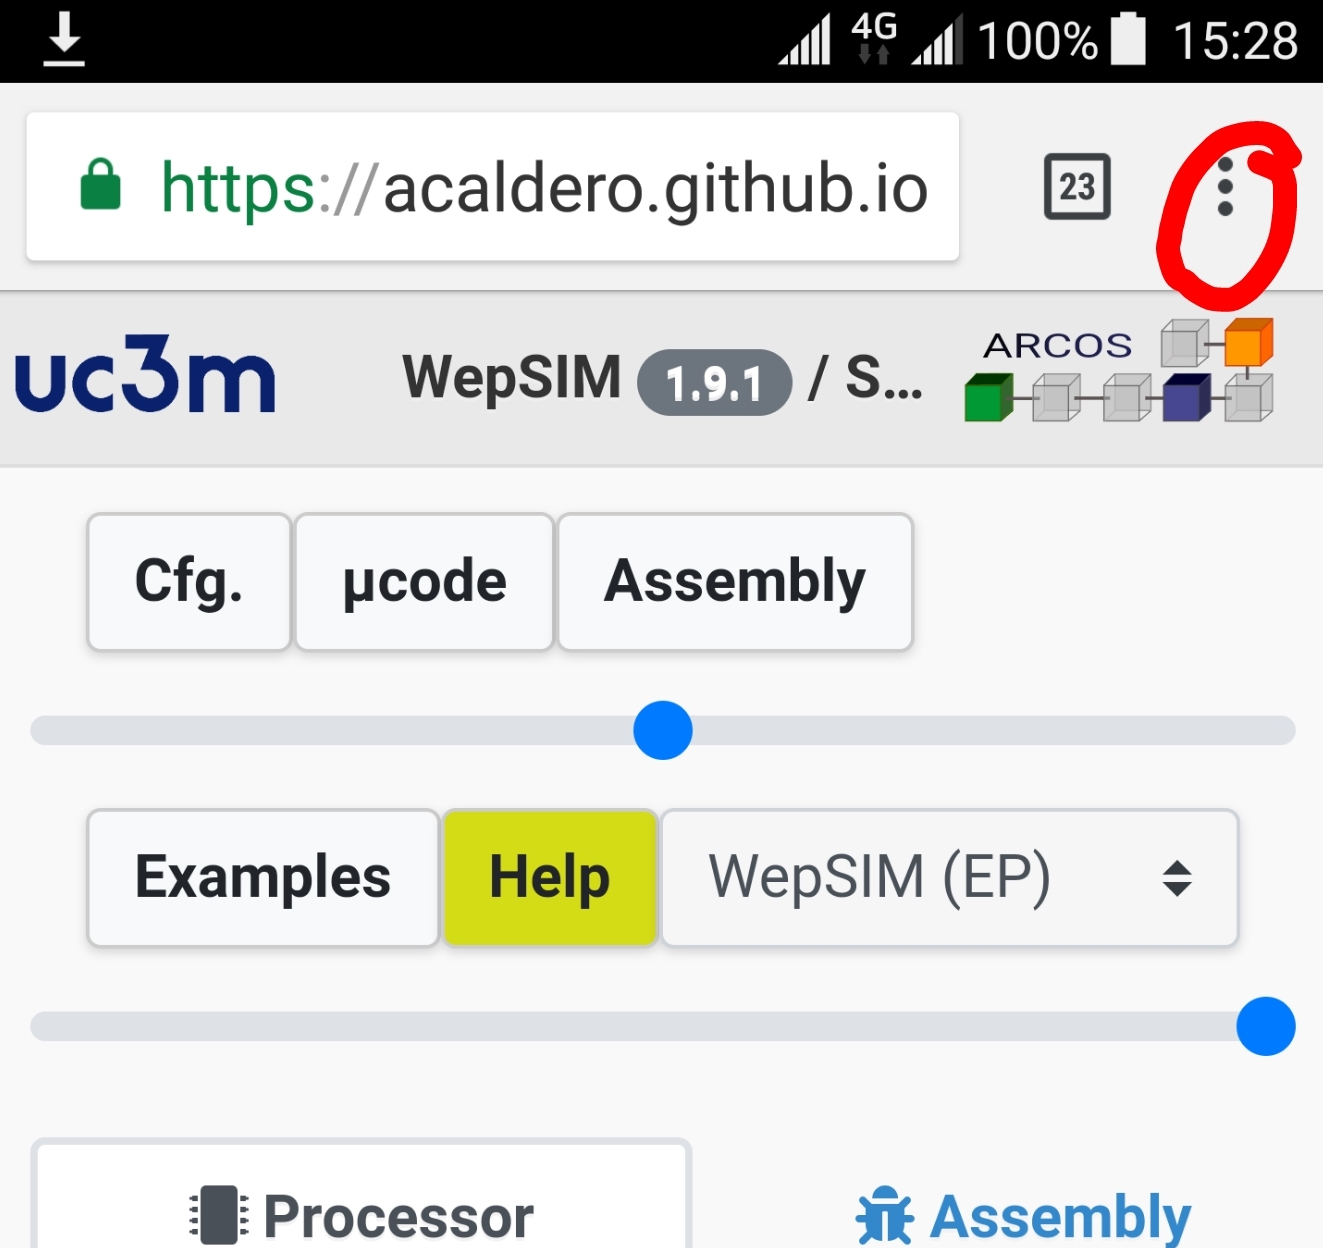
| 2 | 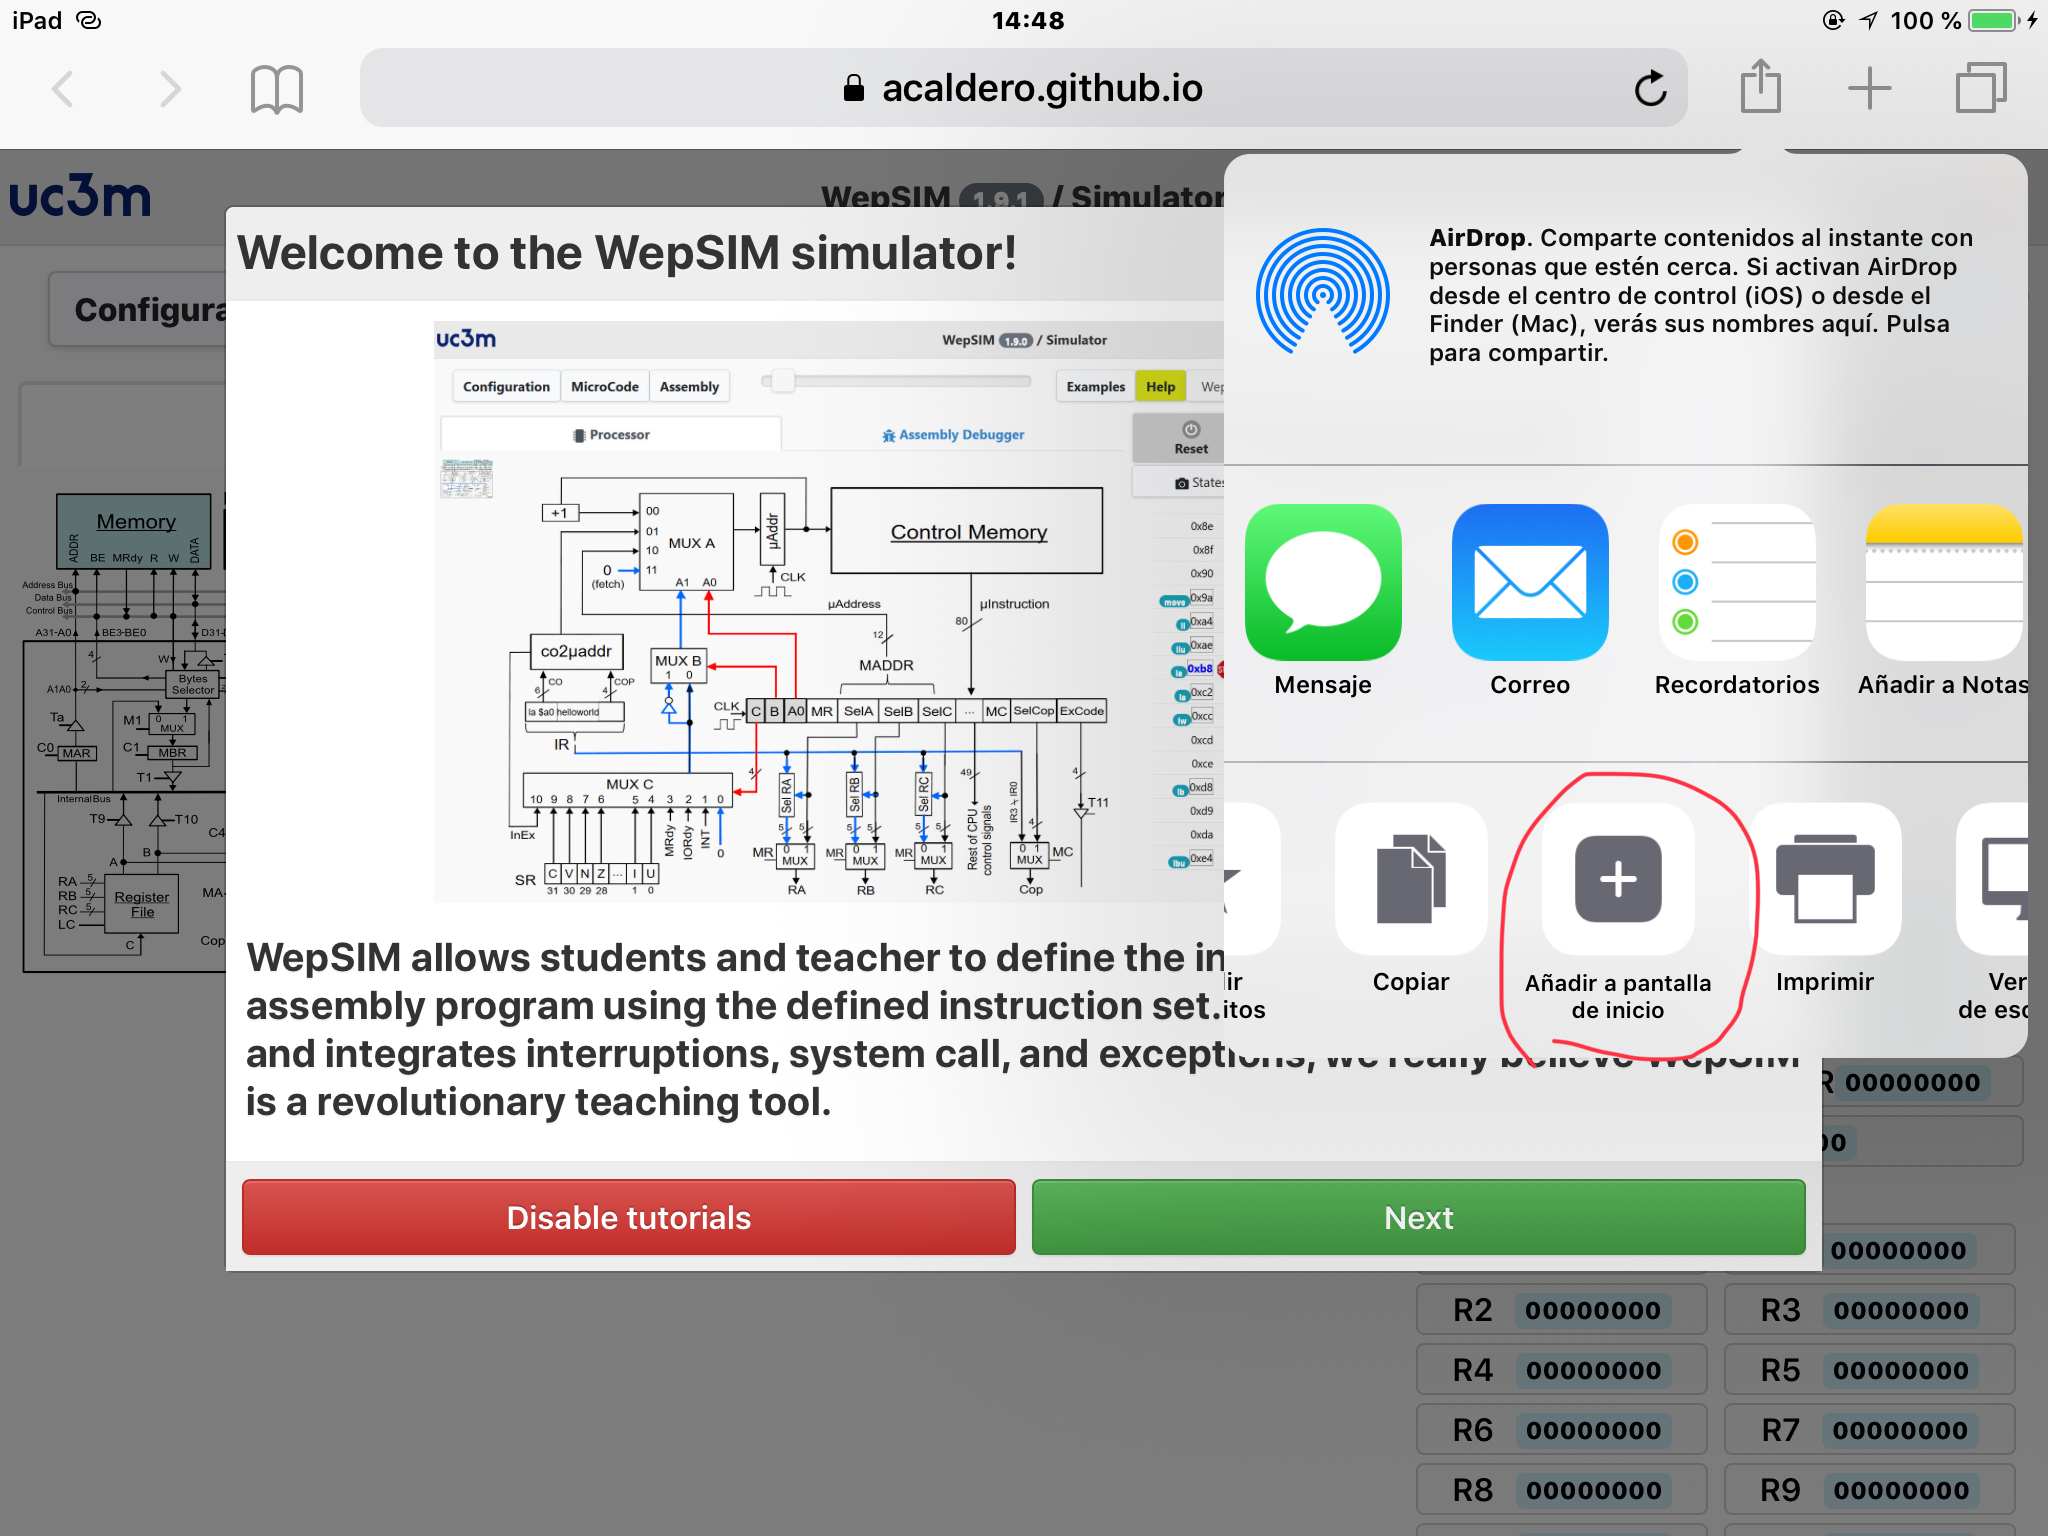 |
 |
Move within share options until 'add to home screen' option and click on it. |
| 3 | 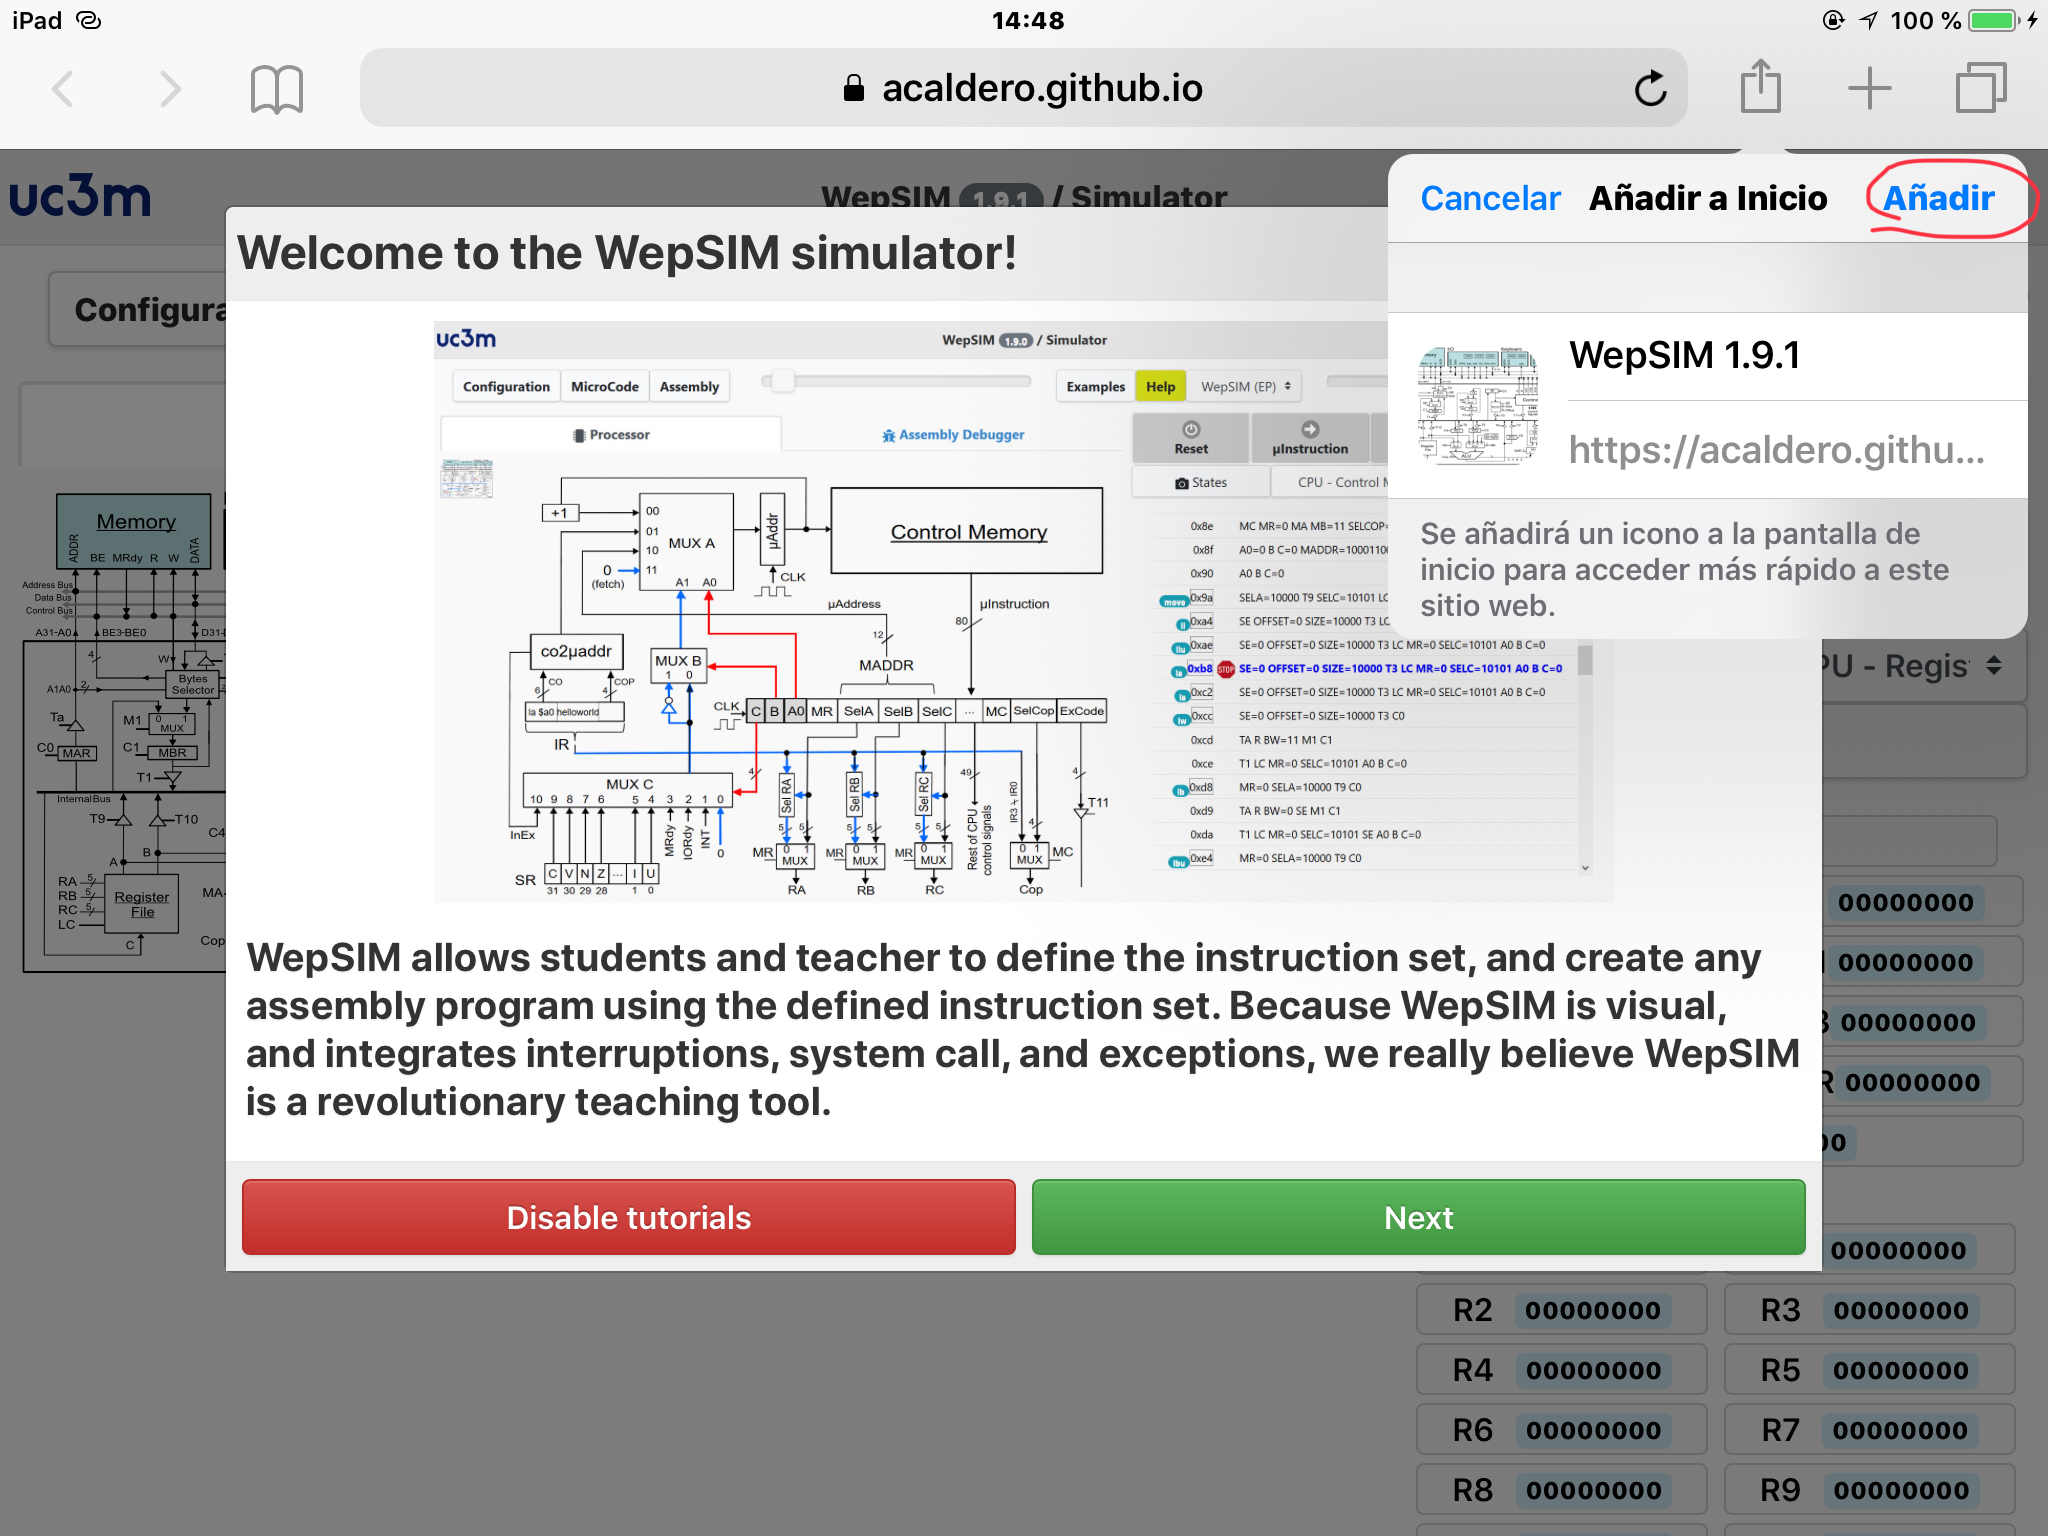 |
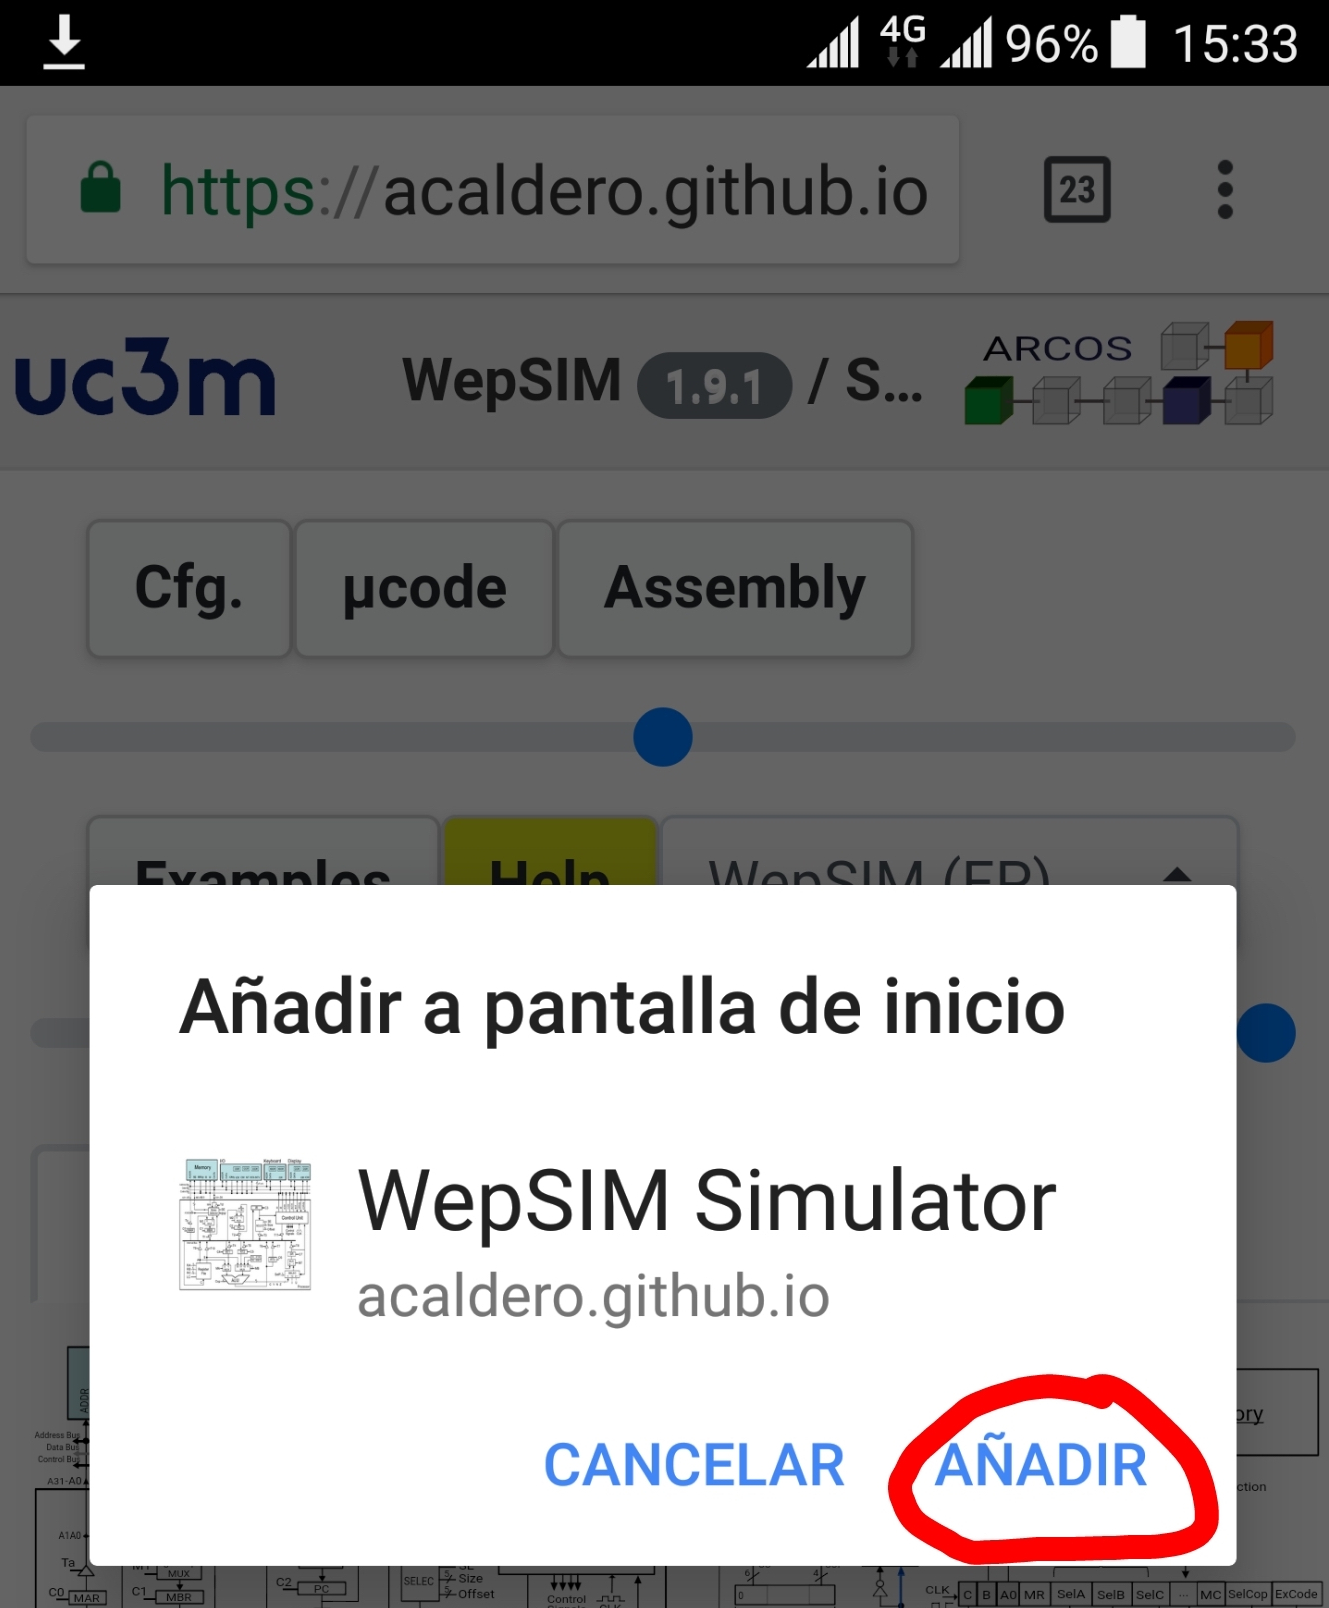 |
Finally, click in the 'add' option. |
| 4 | 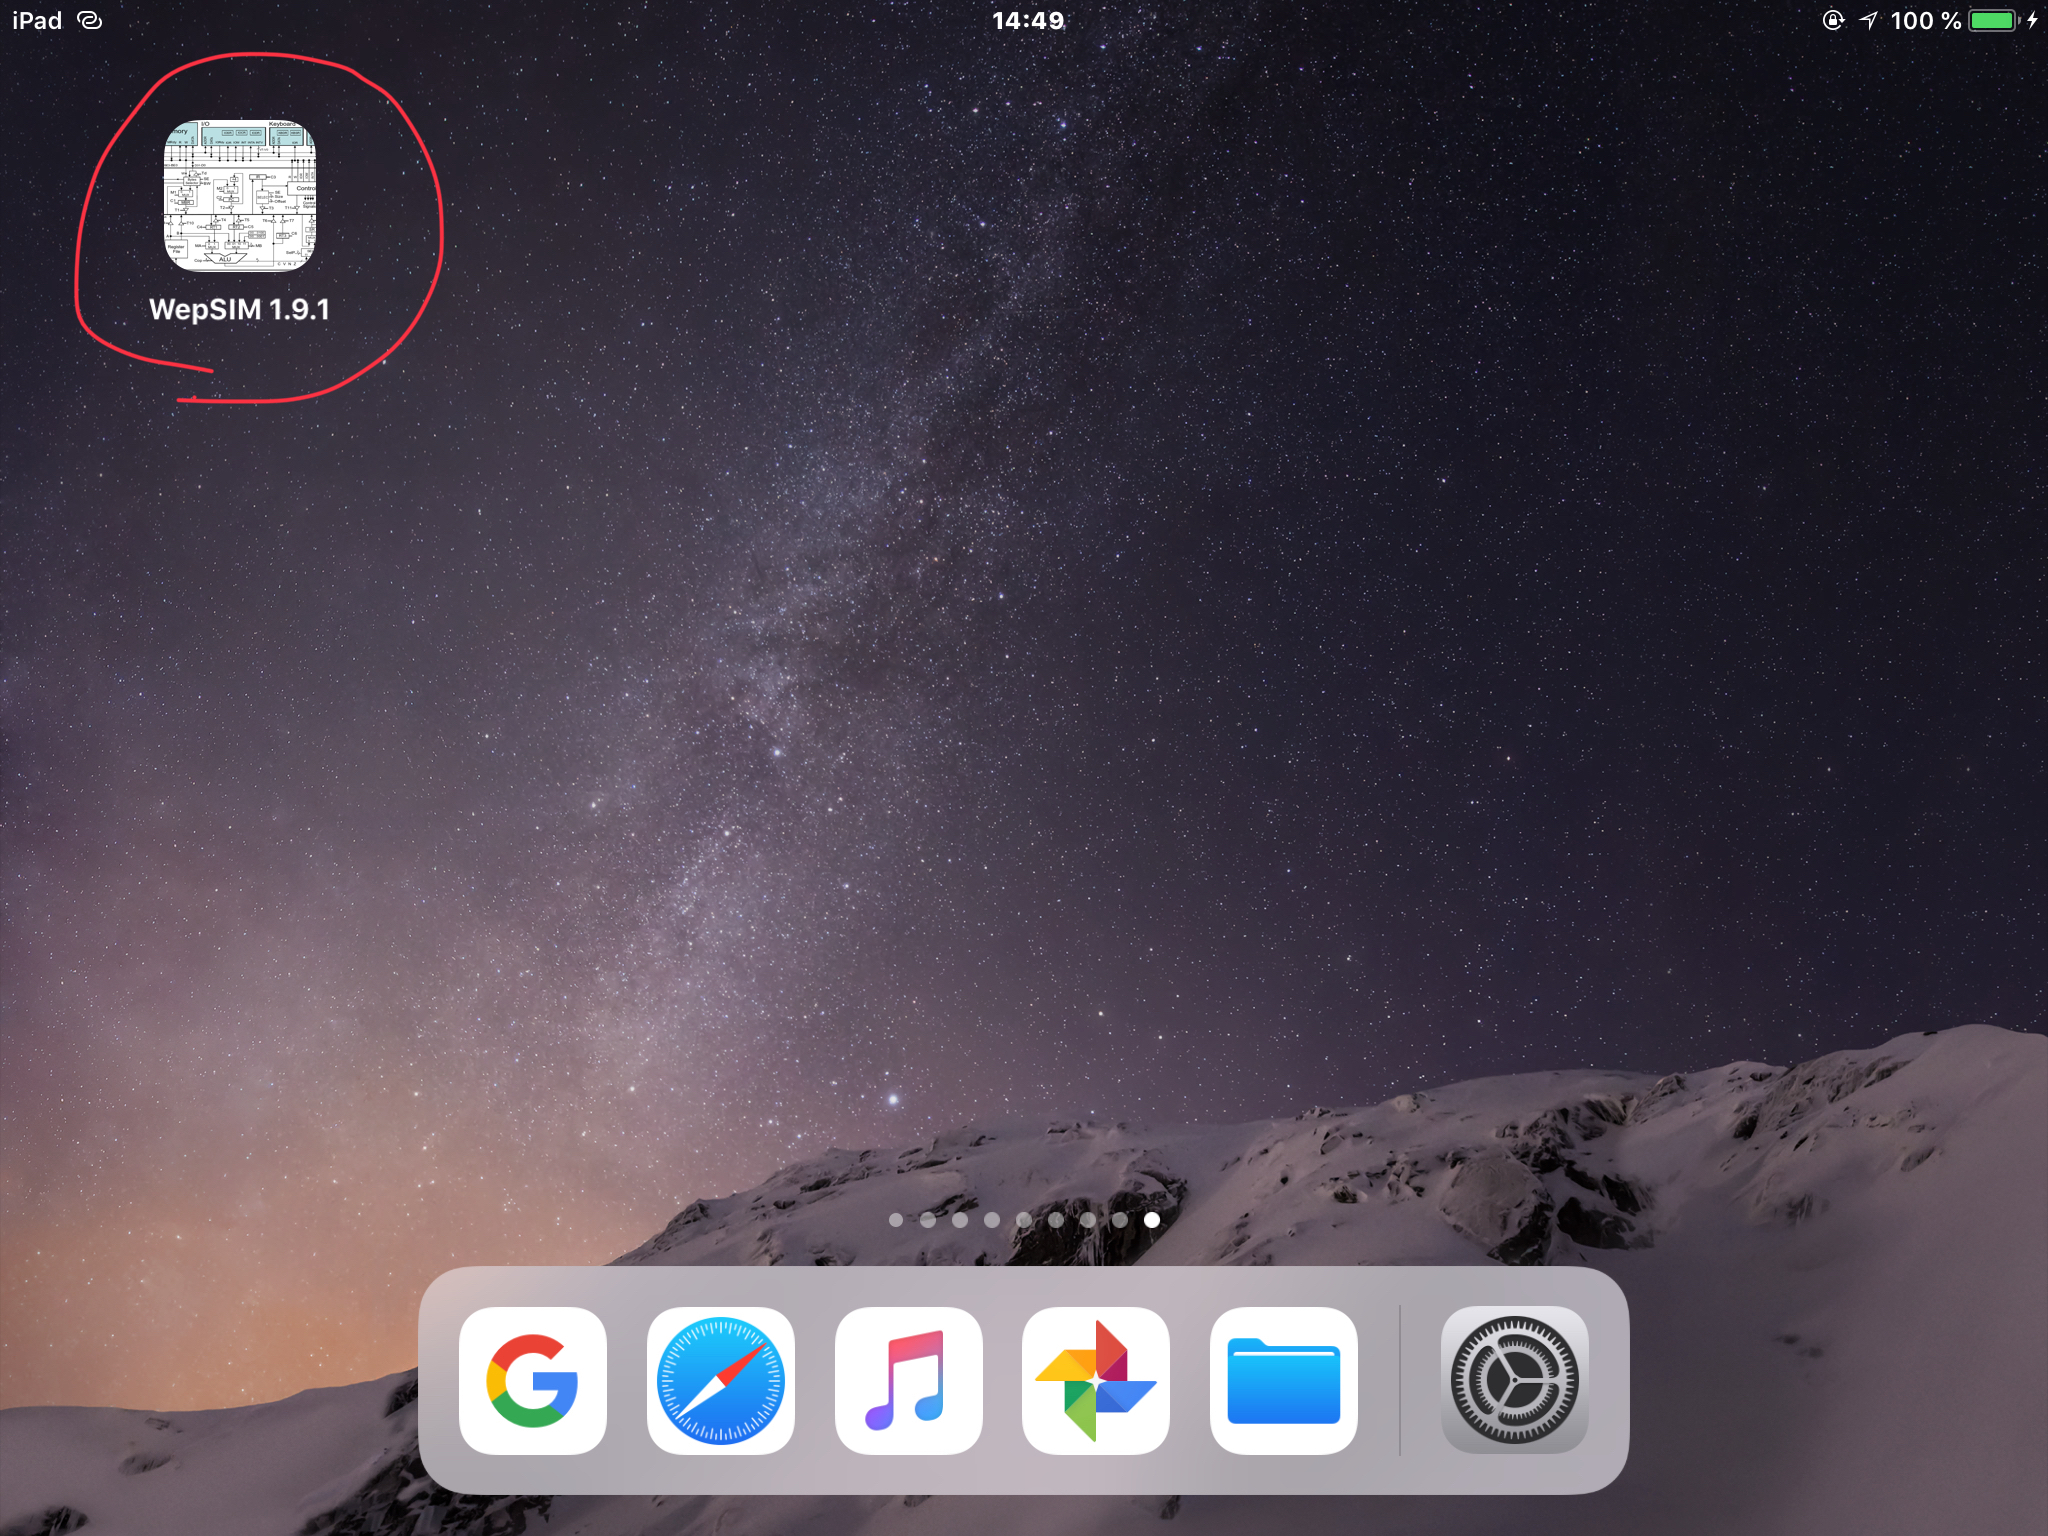 |
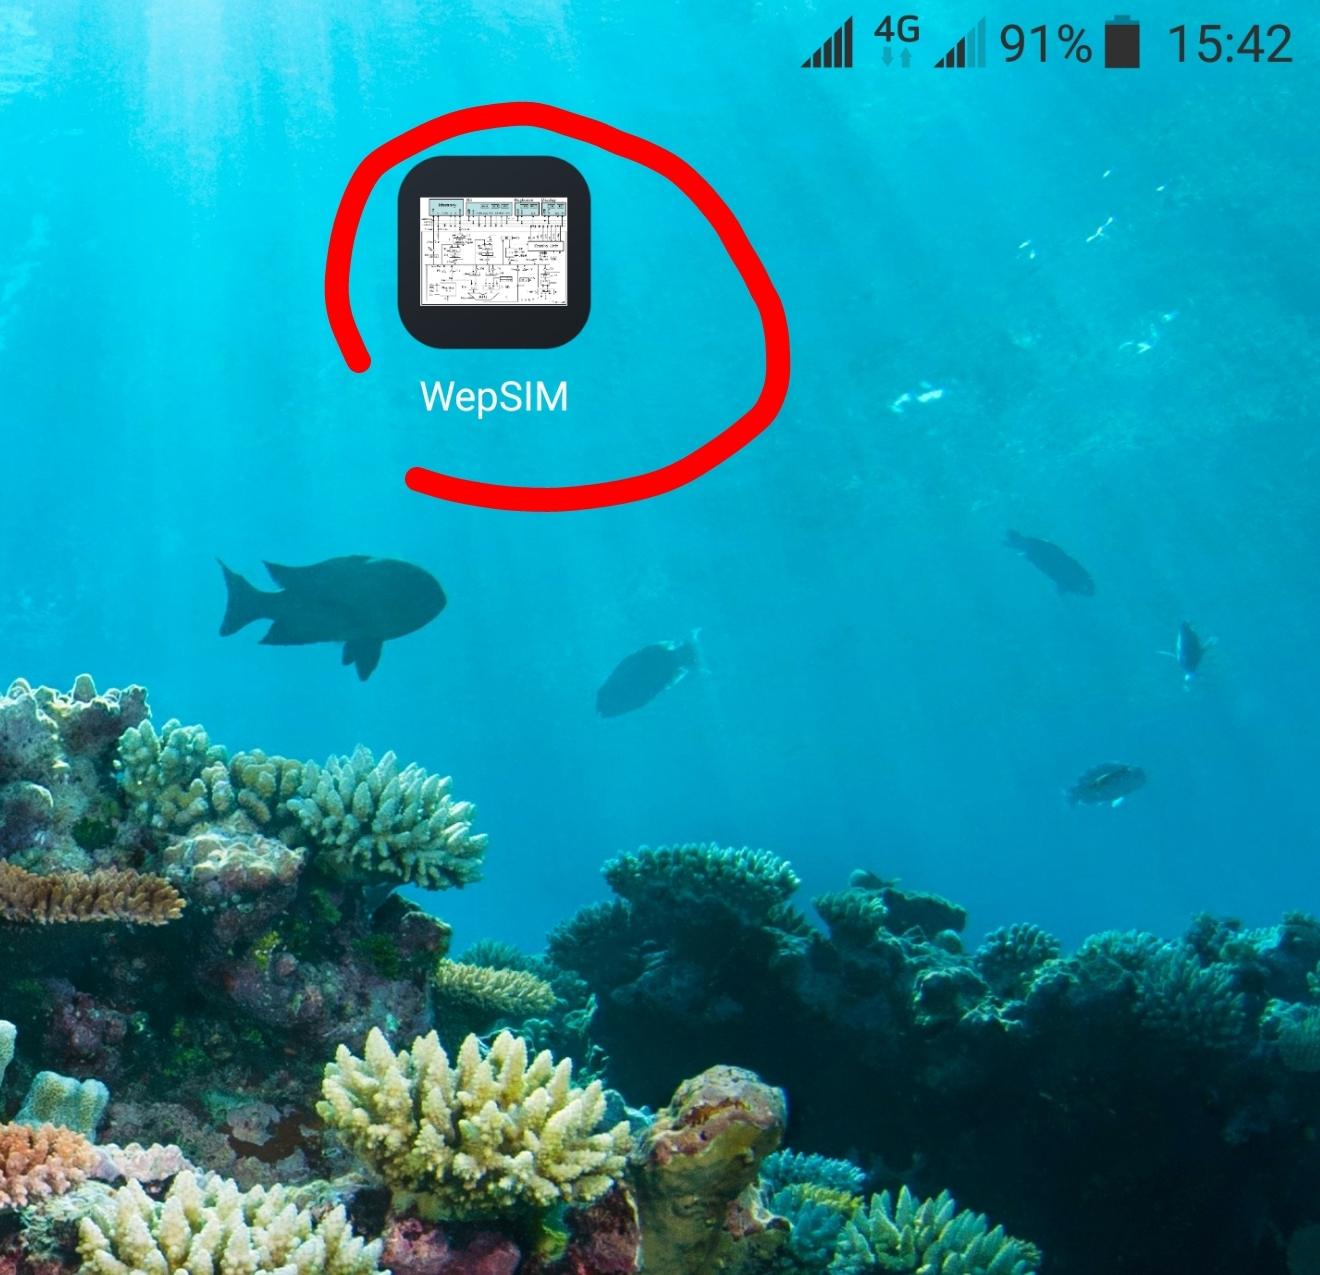 |
Then, WepSIM can be launched from the home screen icon. |
Getting Started: Visual User Interface
A) Steps to execute a WepSIM example
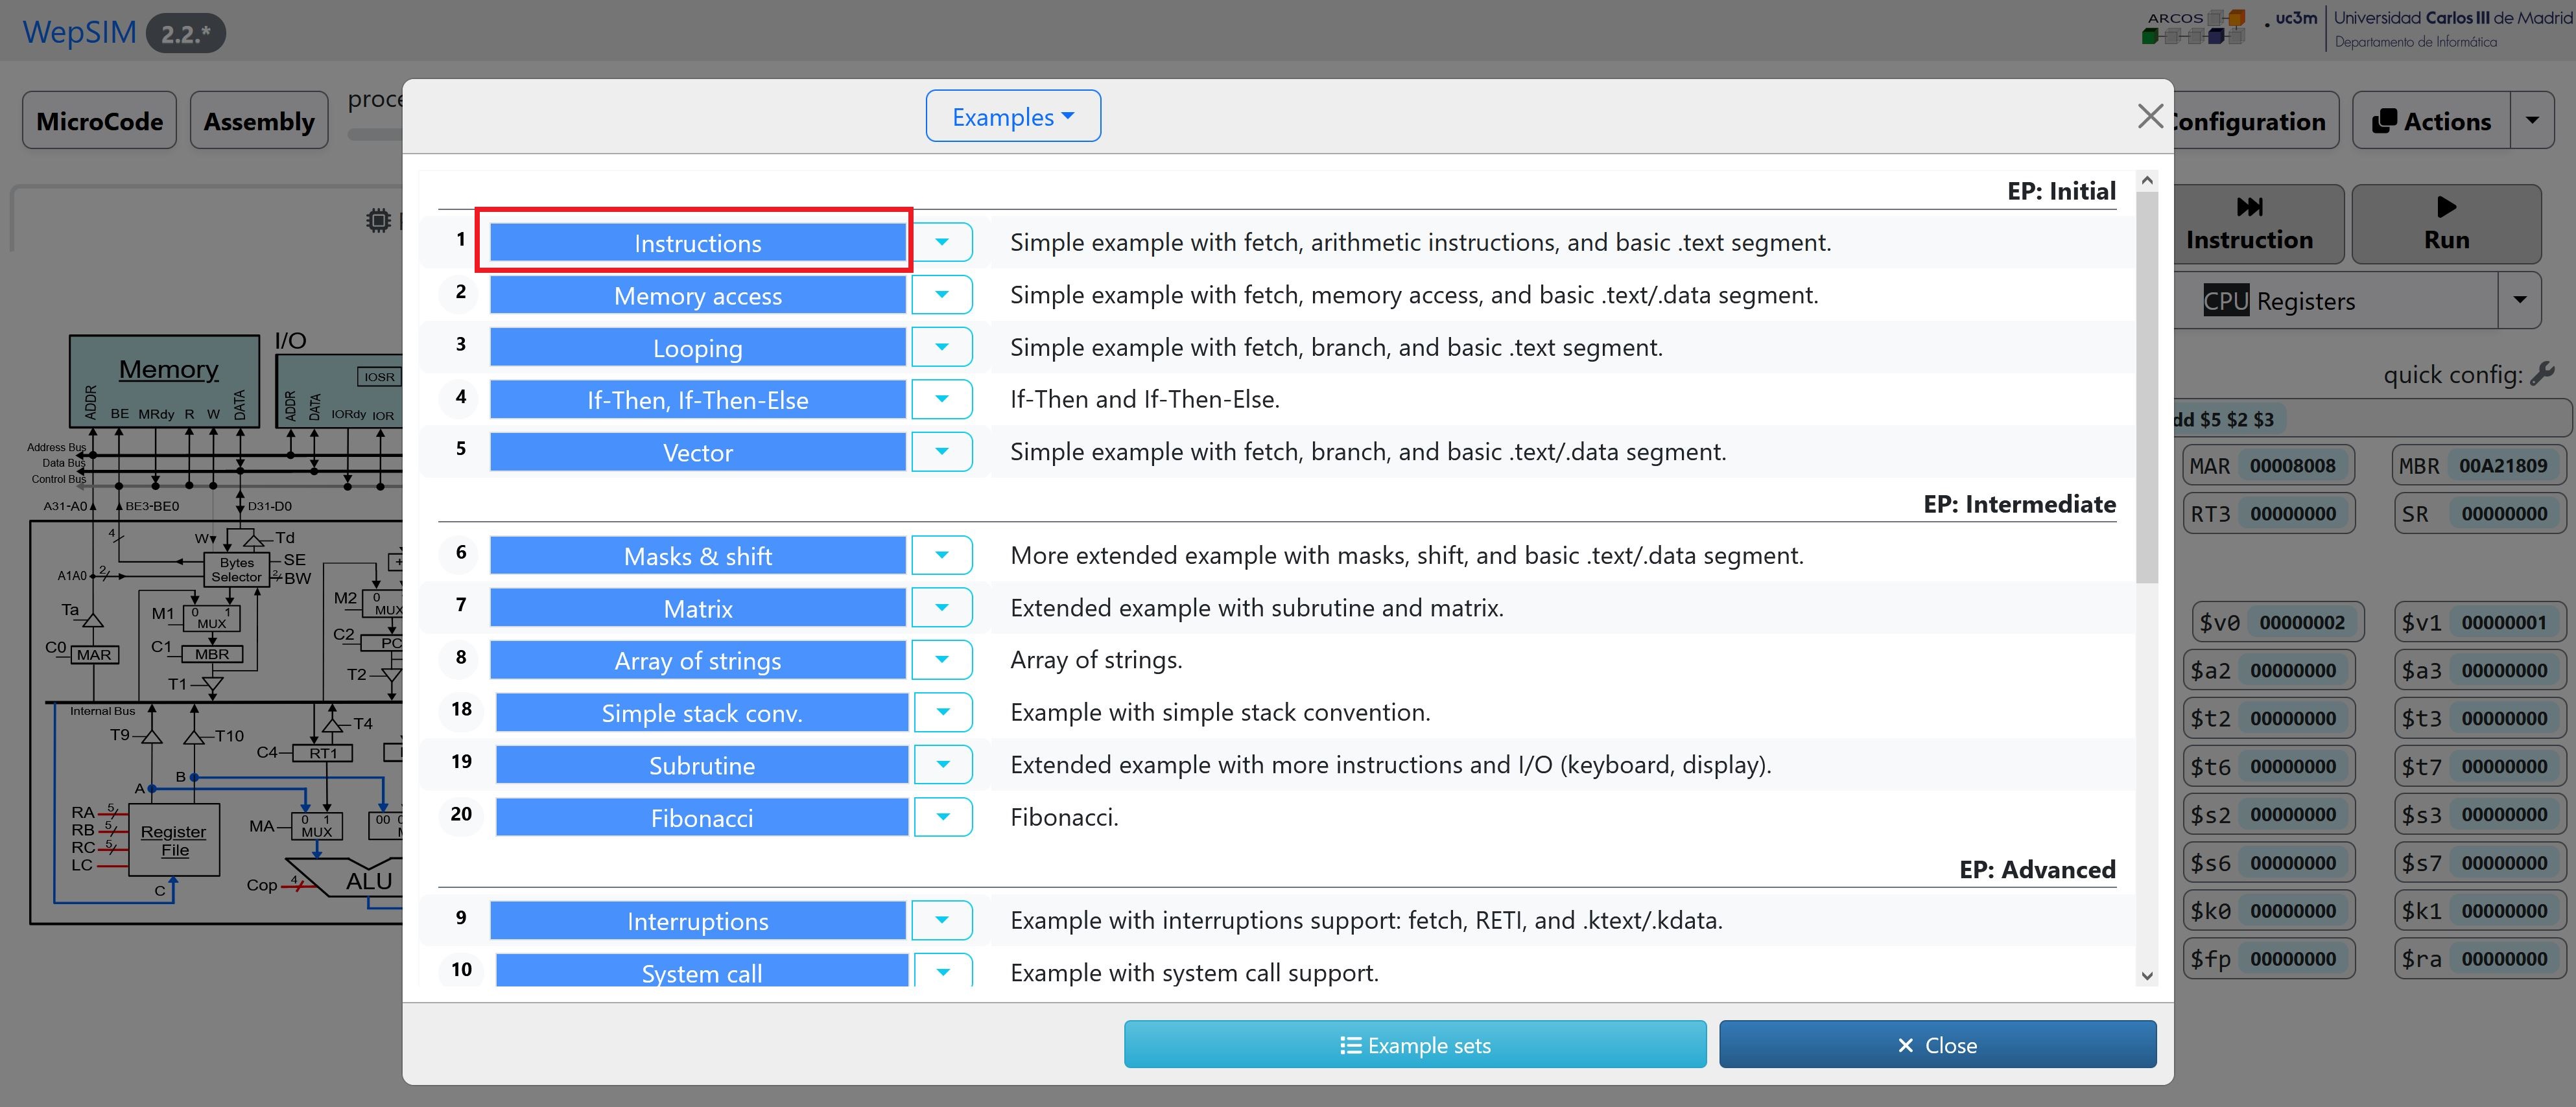
- First, we need to load WepSIM in your favorite web browser. Then click on the Examples button to open the Examples dialog:
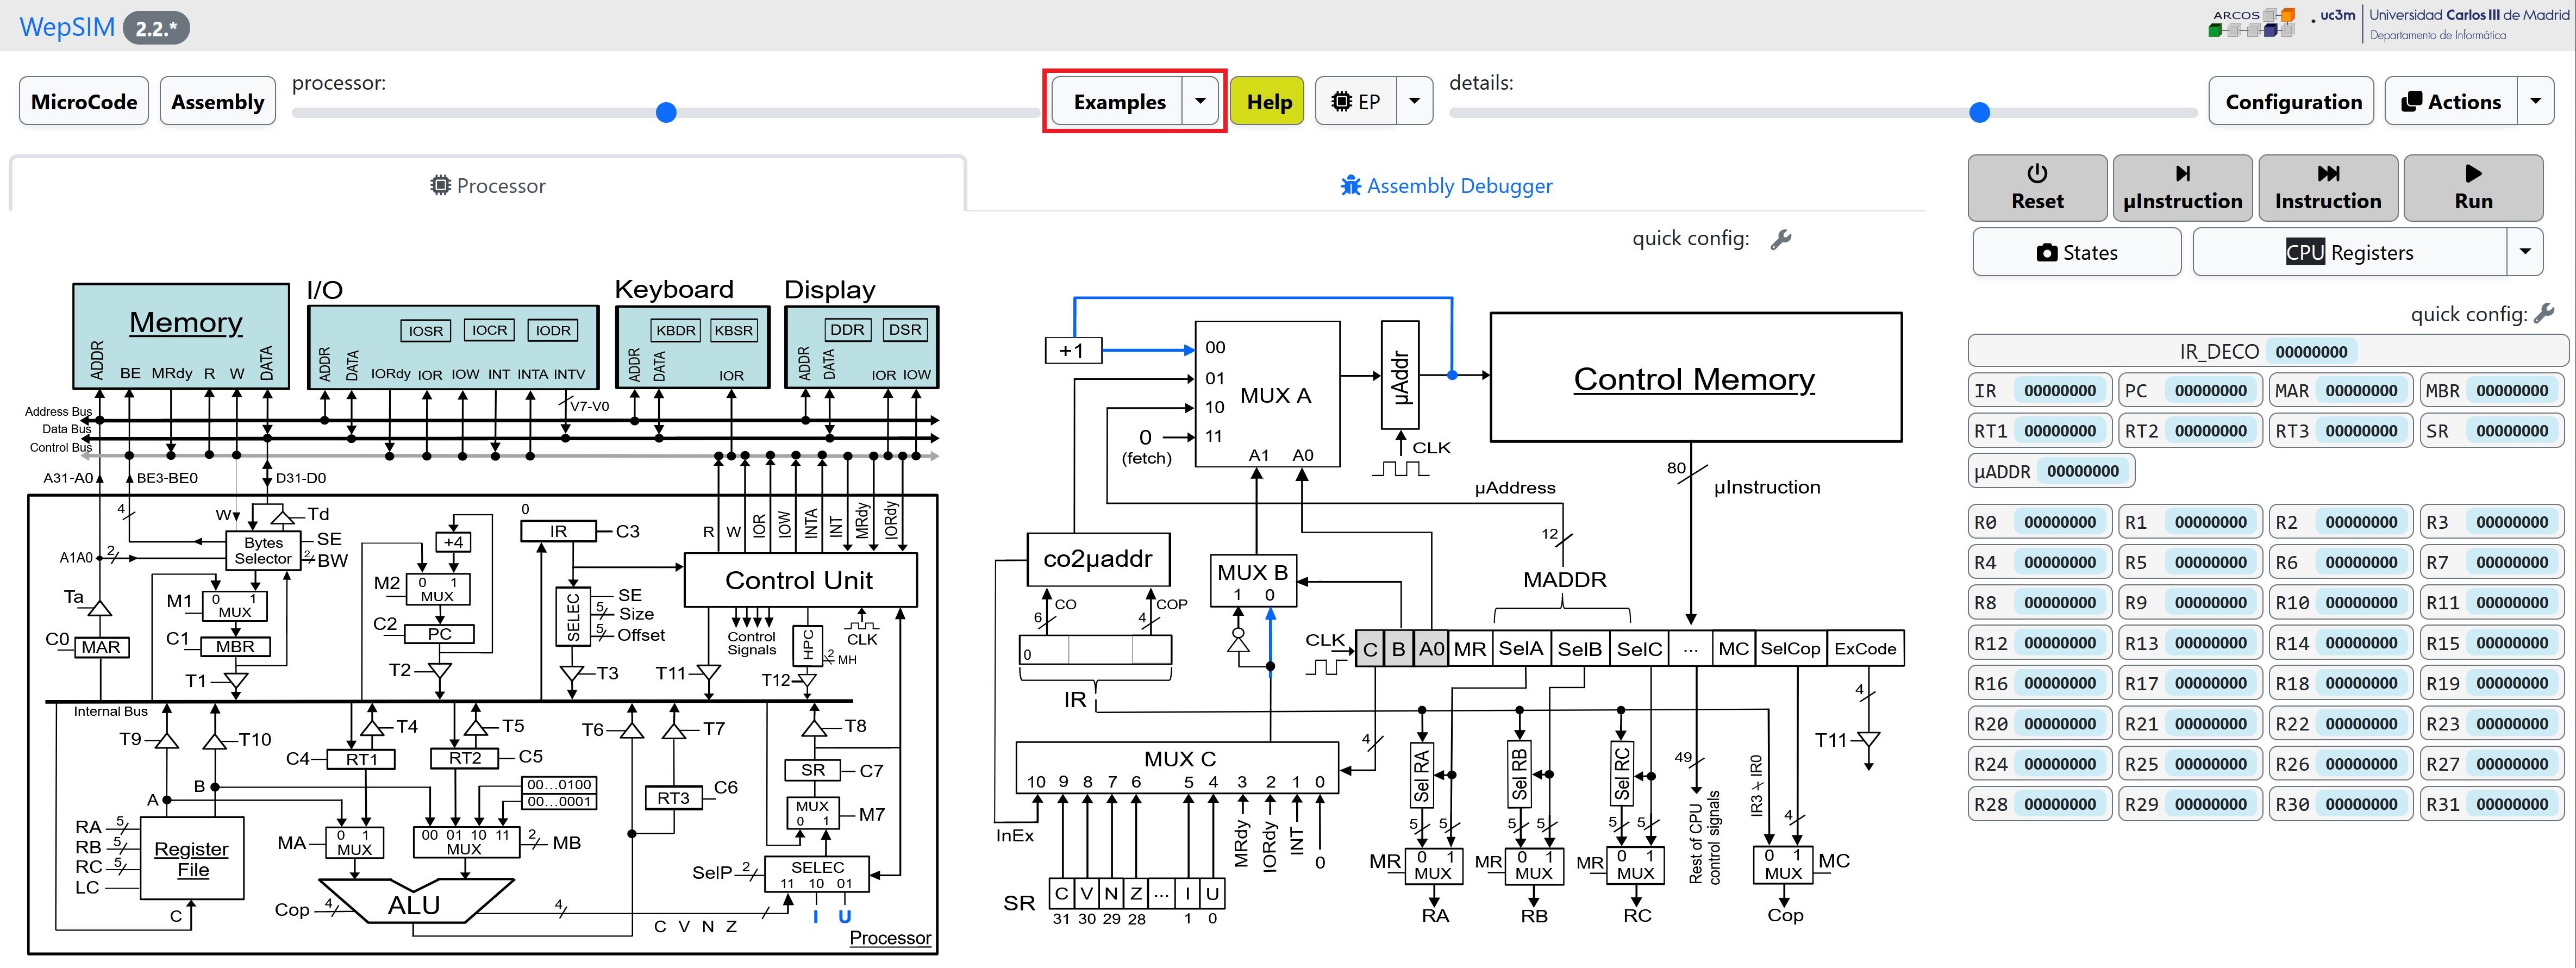
- In the Examples dialog please click on the colored 'title' of the example and WepSIM will load and compile the associated microcode and assembly code:
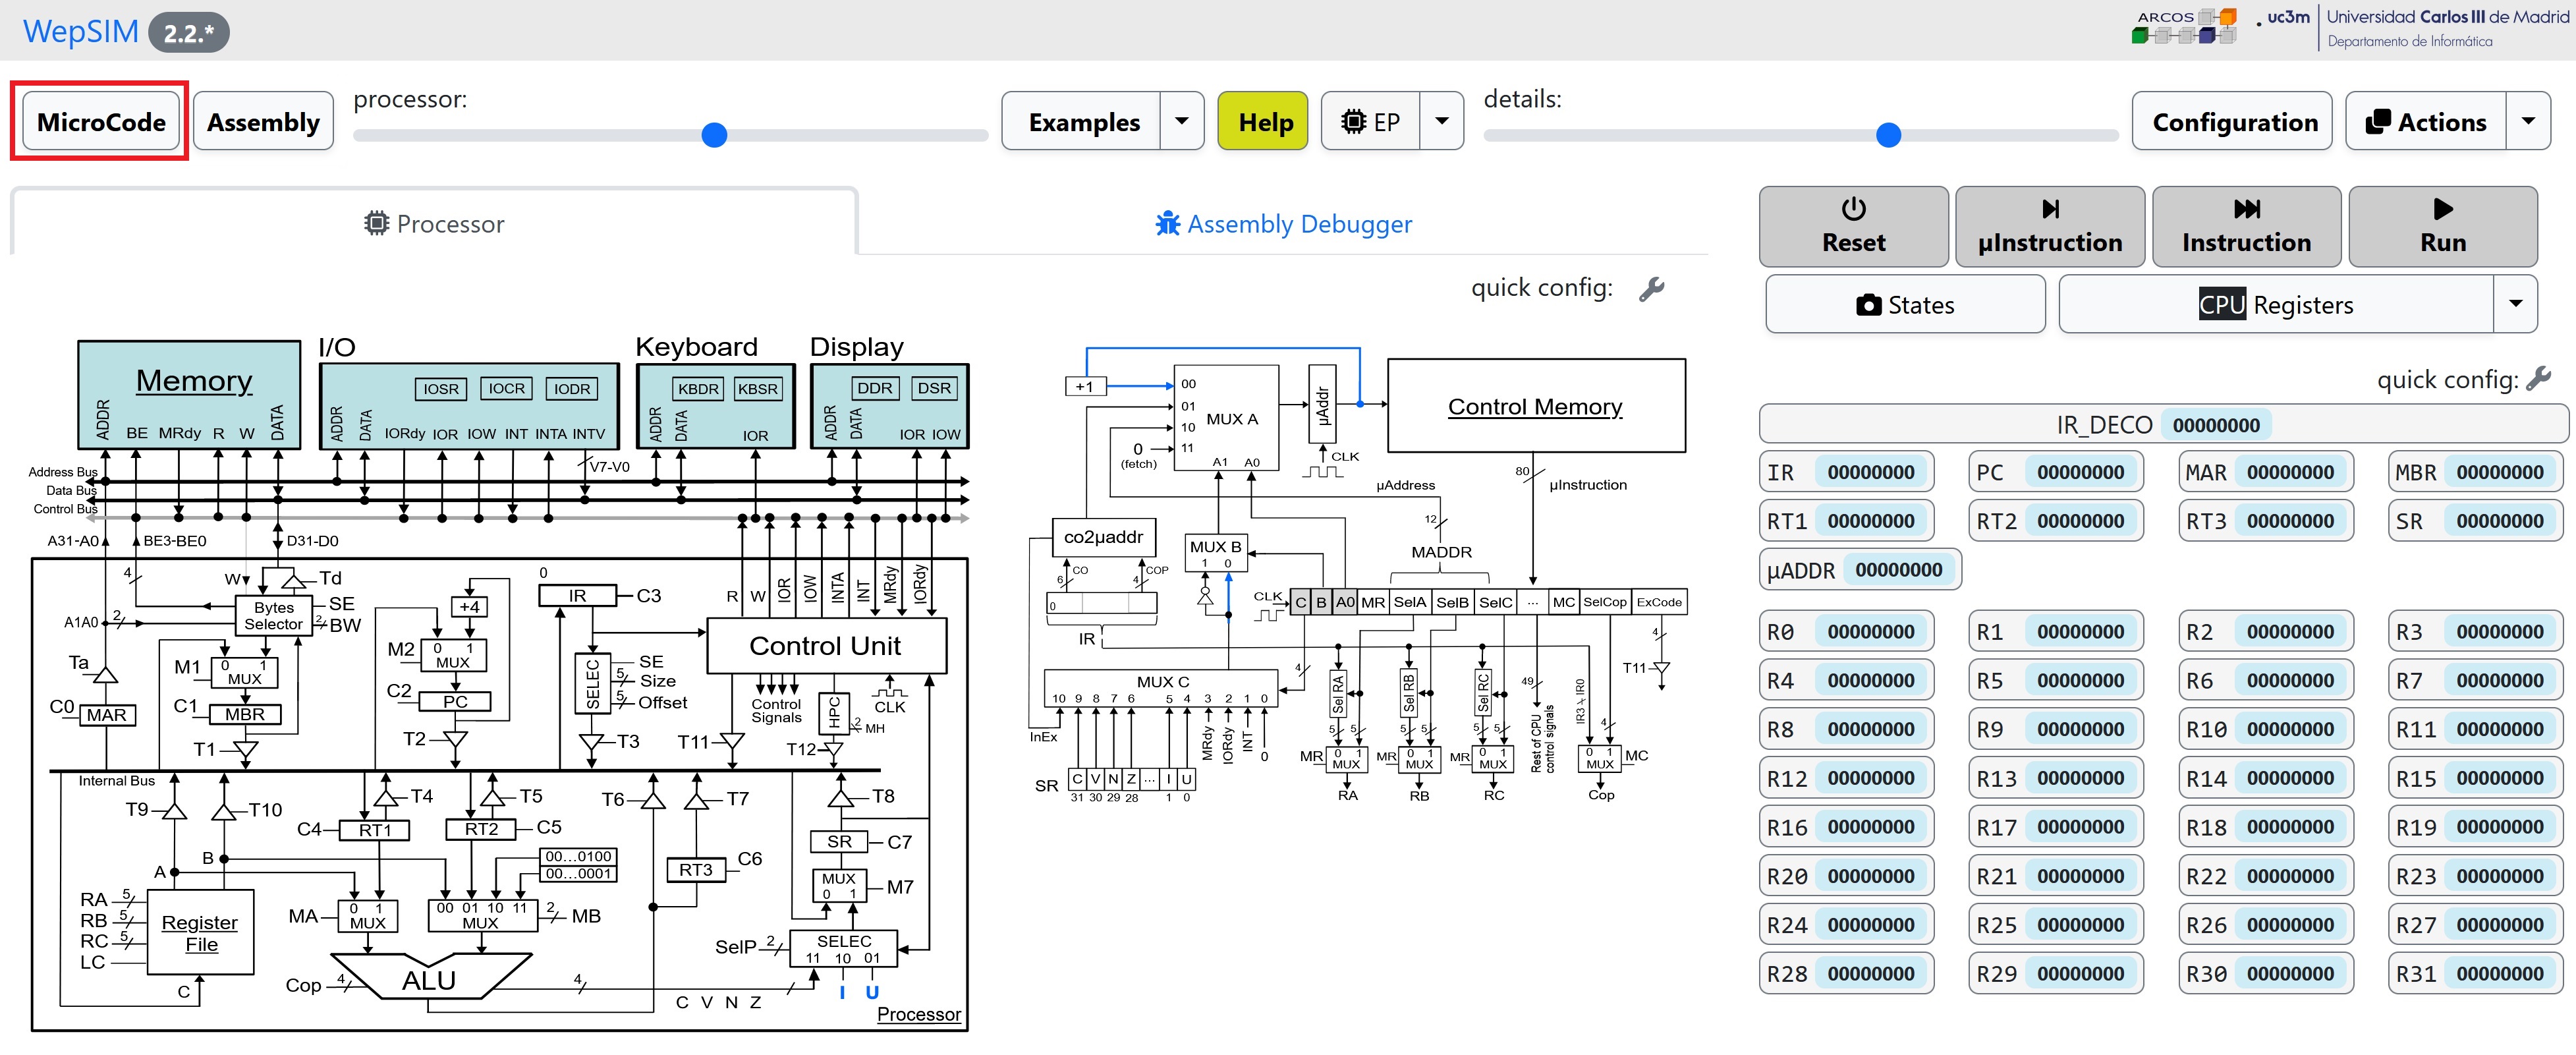
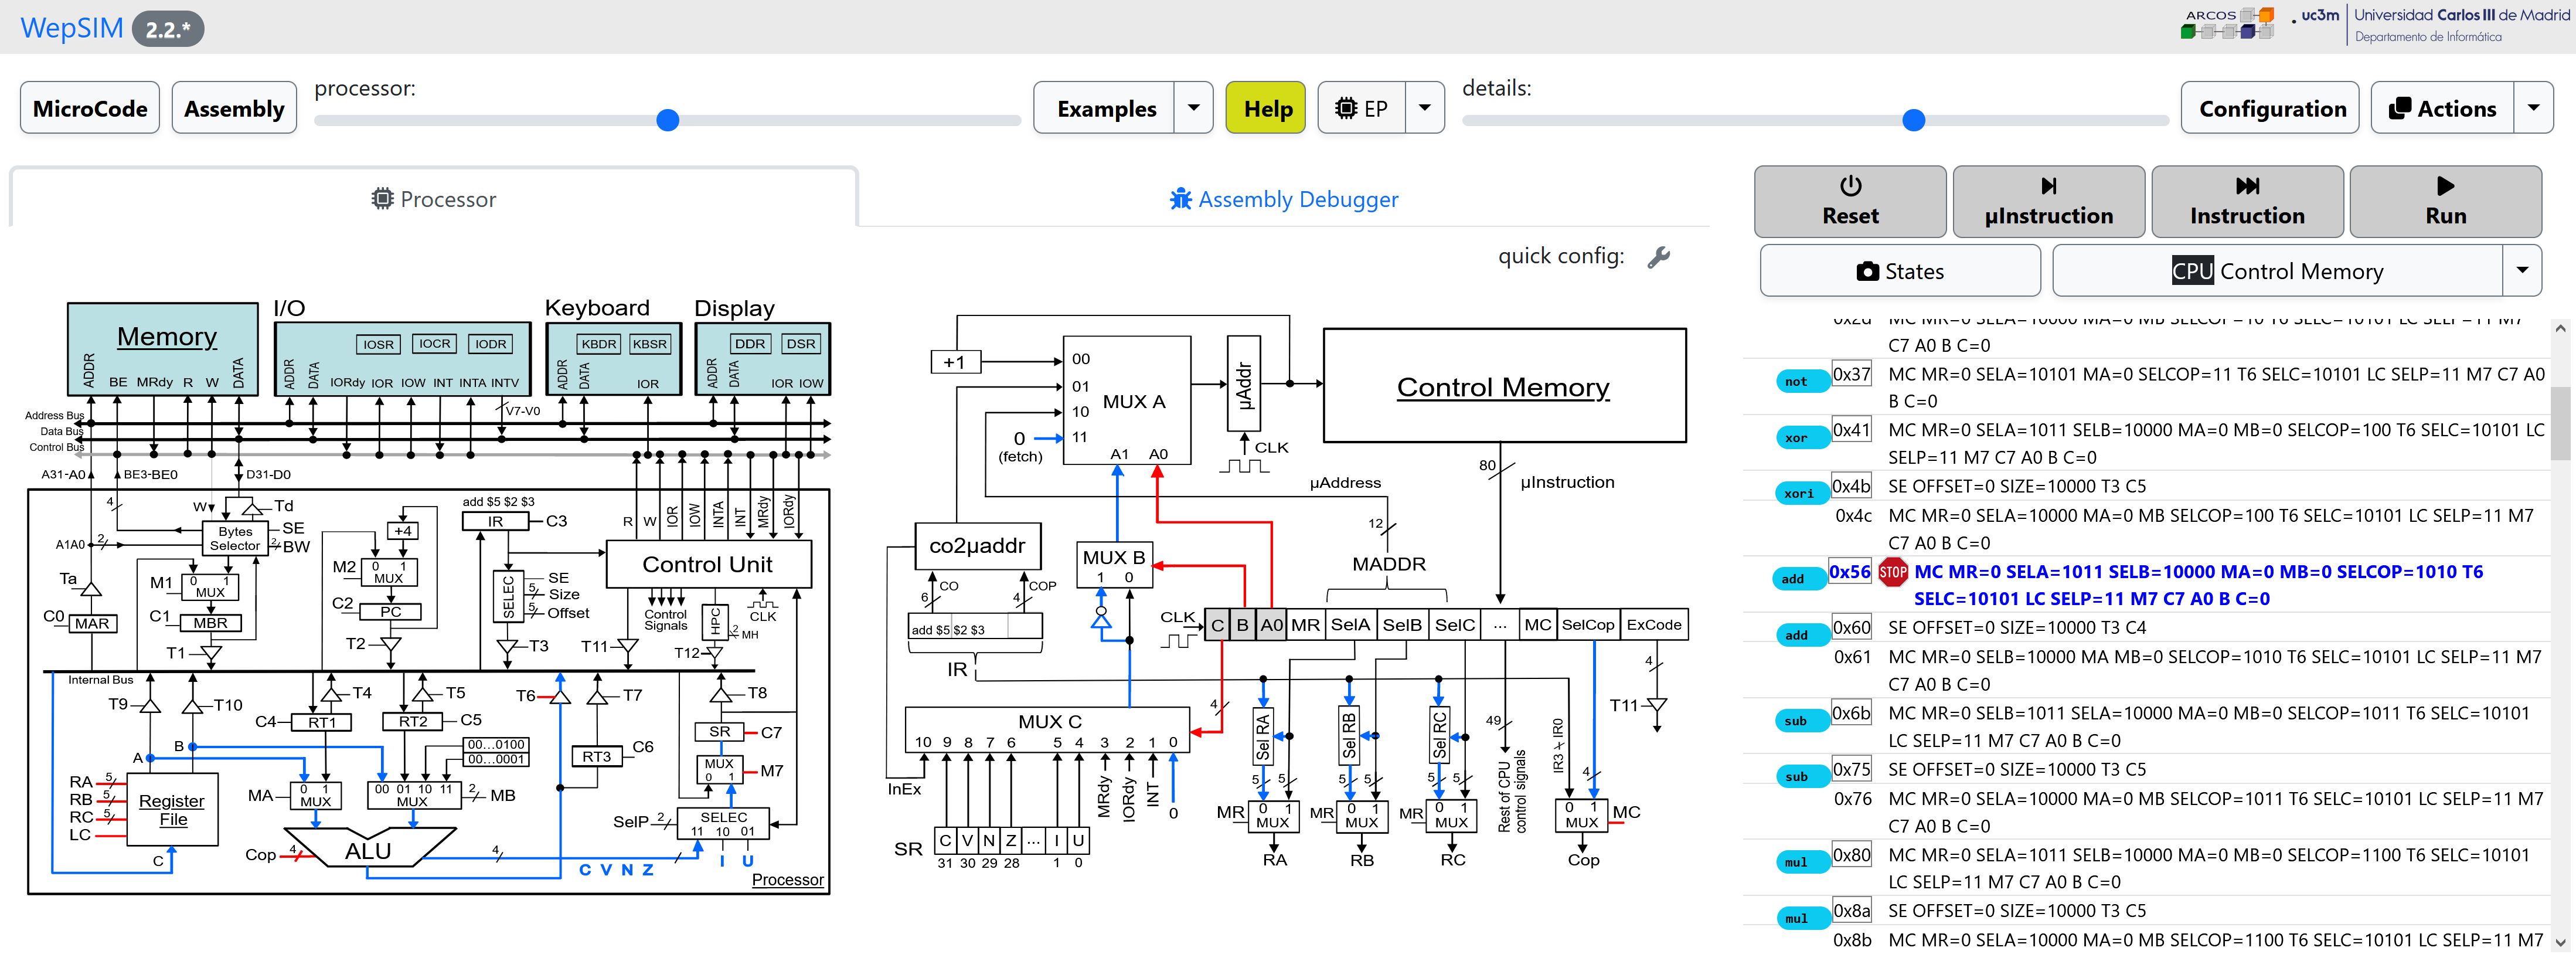
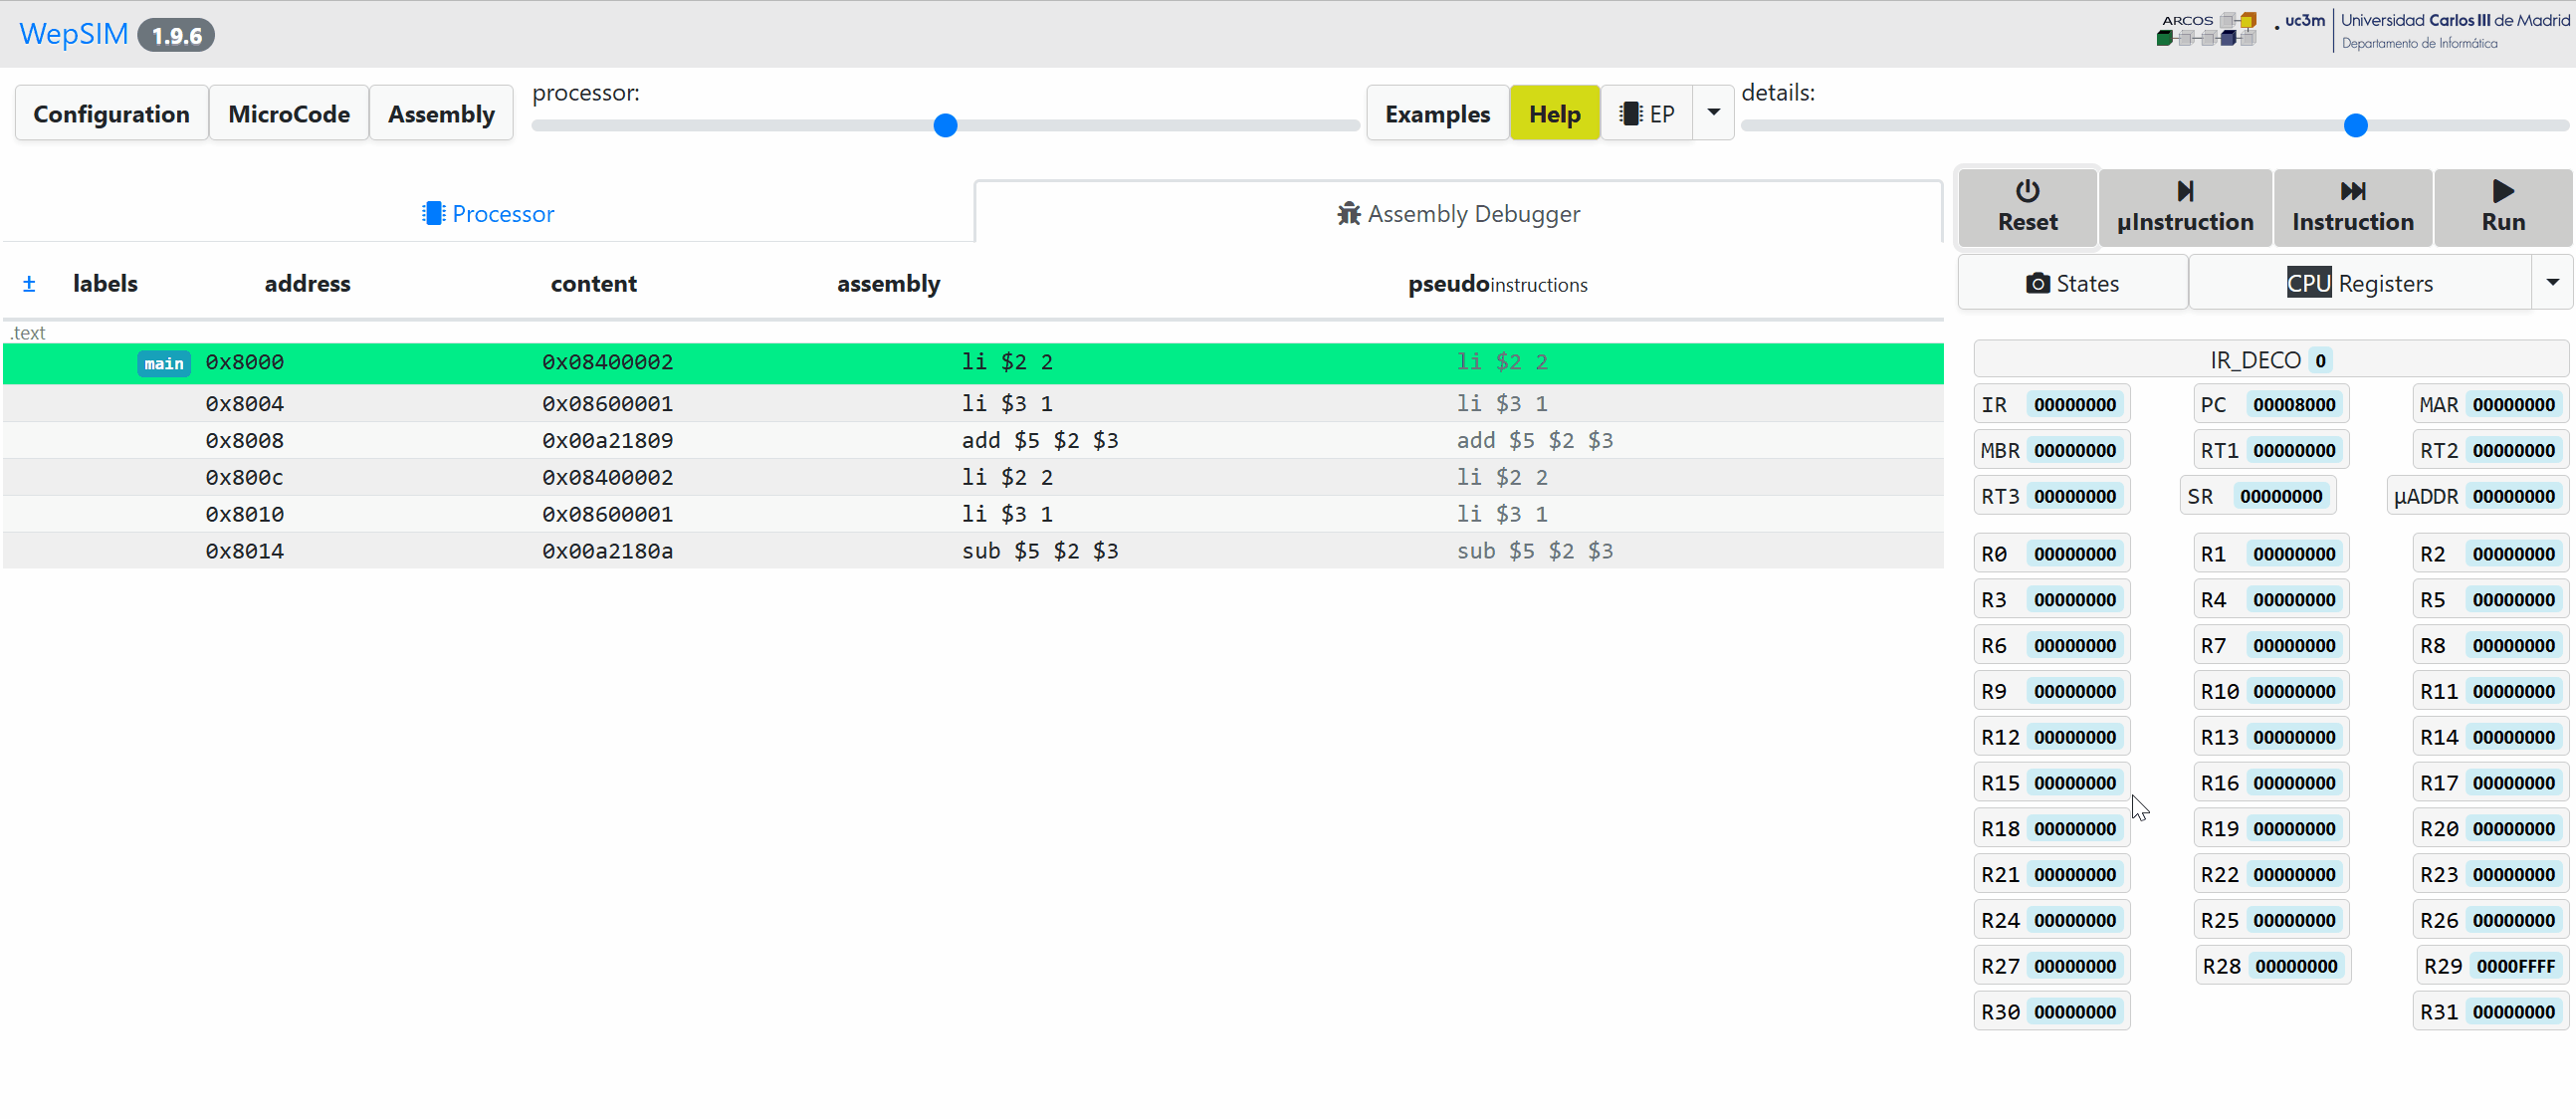
- In the simulator workspace you can execute step by step and analyze the state of the components. It is possible to work both, at assembly level or at microcode level:

B) Typical workflow to modify an existing example or build your own experiment
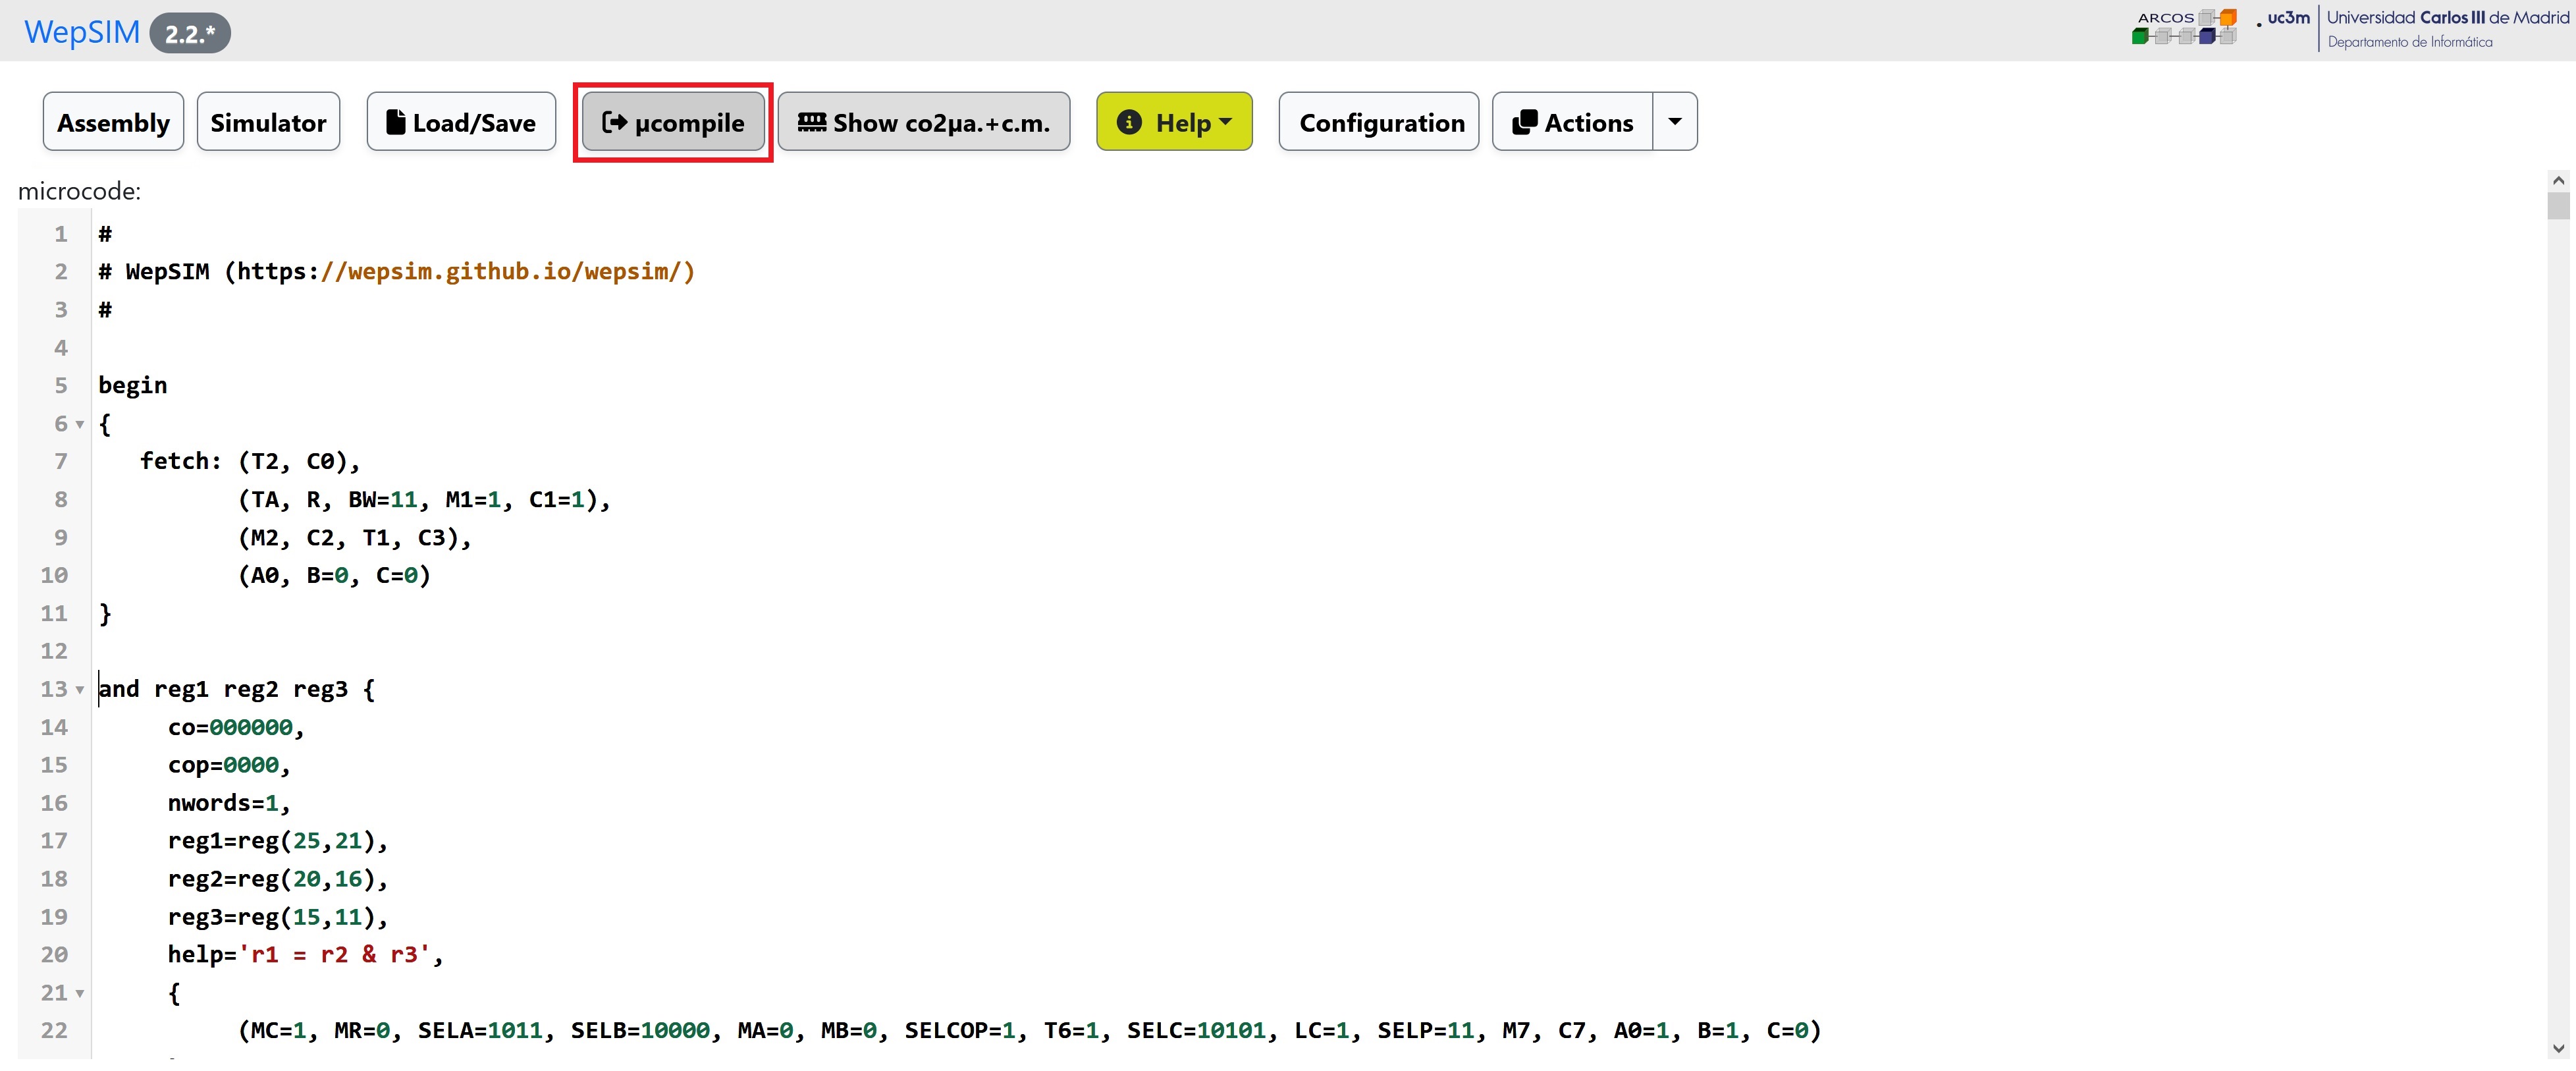
- First, we need to load WepSIM in your web browser. Then you should go to the microcode editor workspace:
- You can load an existing microcode or edit a new one. You have to microcompile the microcode to load the binary into the CPU's control memory:
- Next, you could go to the assembly editor workspace. In the editor workspace you can load an existing assembly code or edit a new one:

- The instructions set defined in the previous microcode is used to create your assembly code. You have to compile the assembly code to load the binary into the main memory:

- Finally, go back to the simulator workspace, and you can execute step by step and analyze the state of the components.
It is possible to work at assembly level or at microcode level:
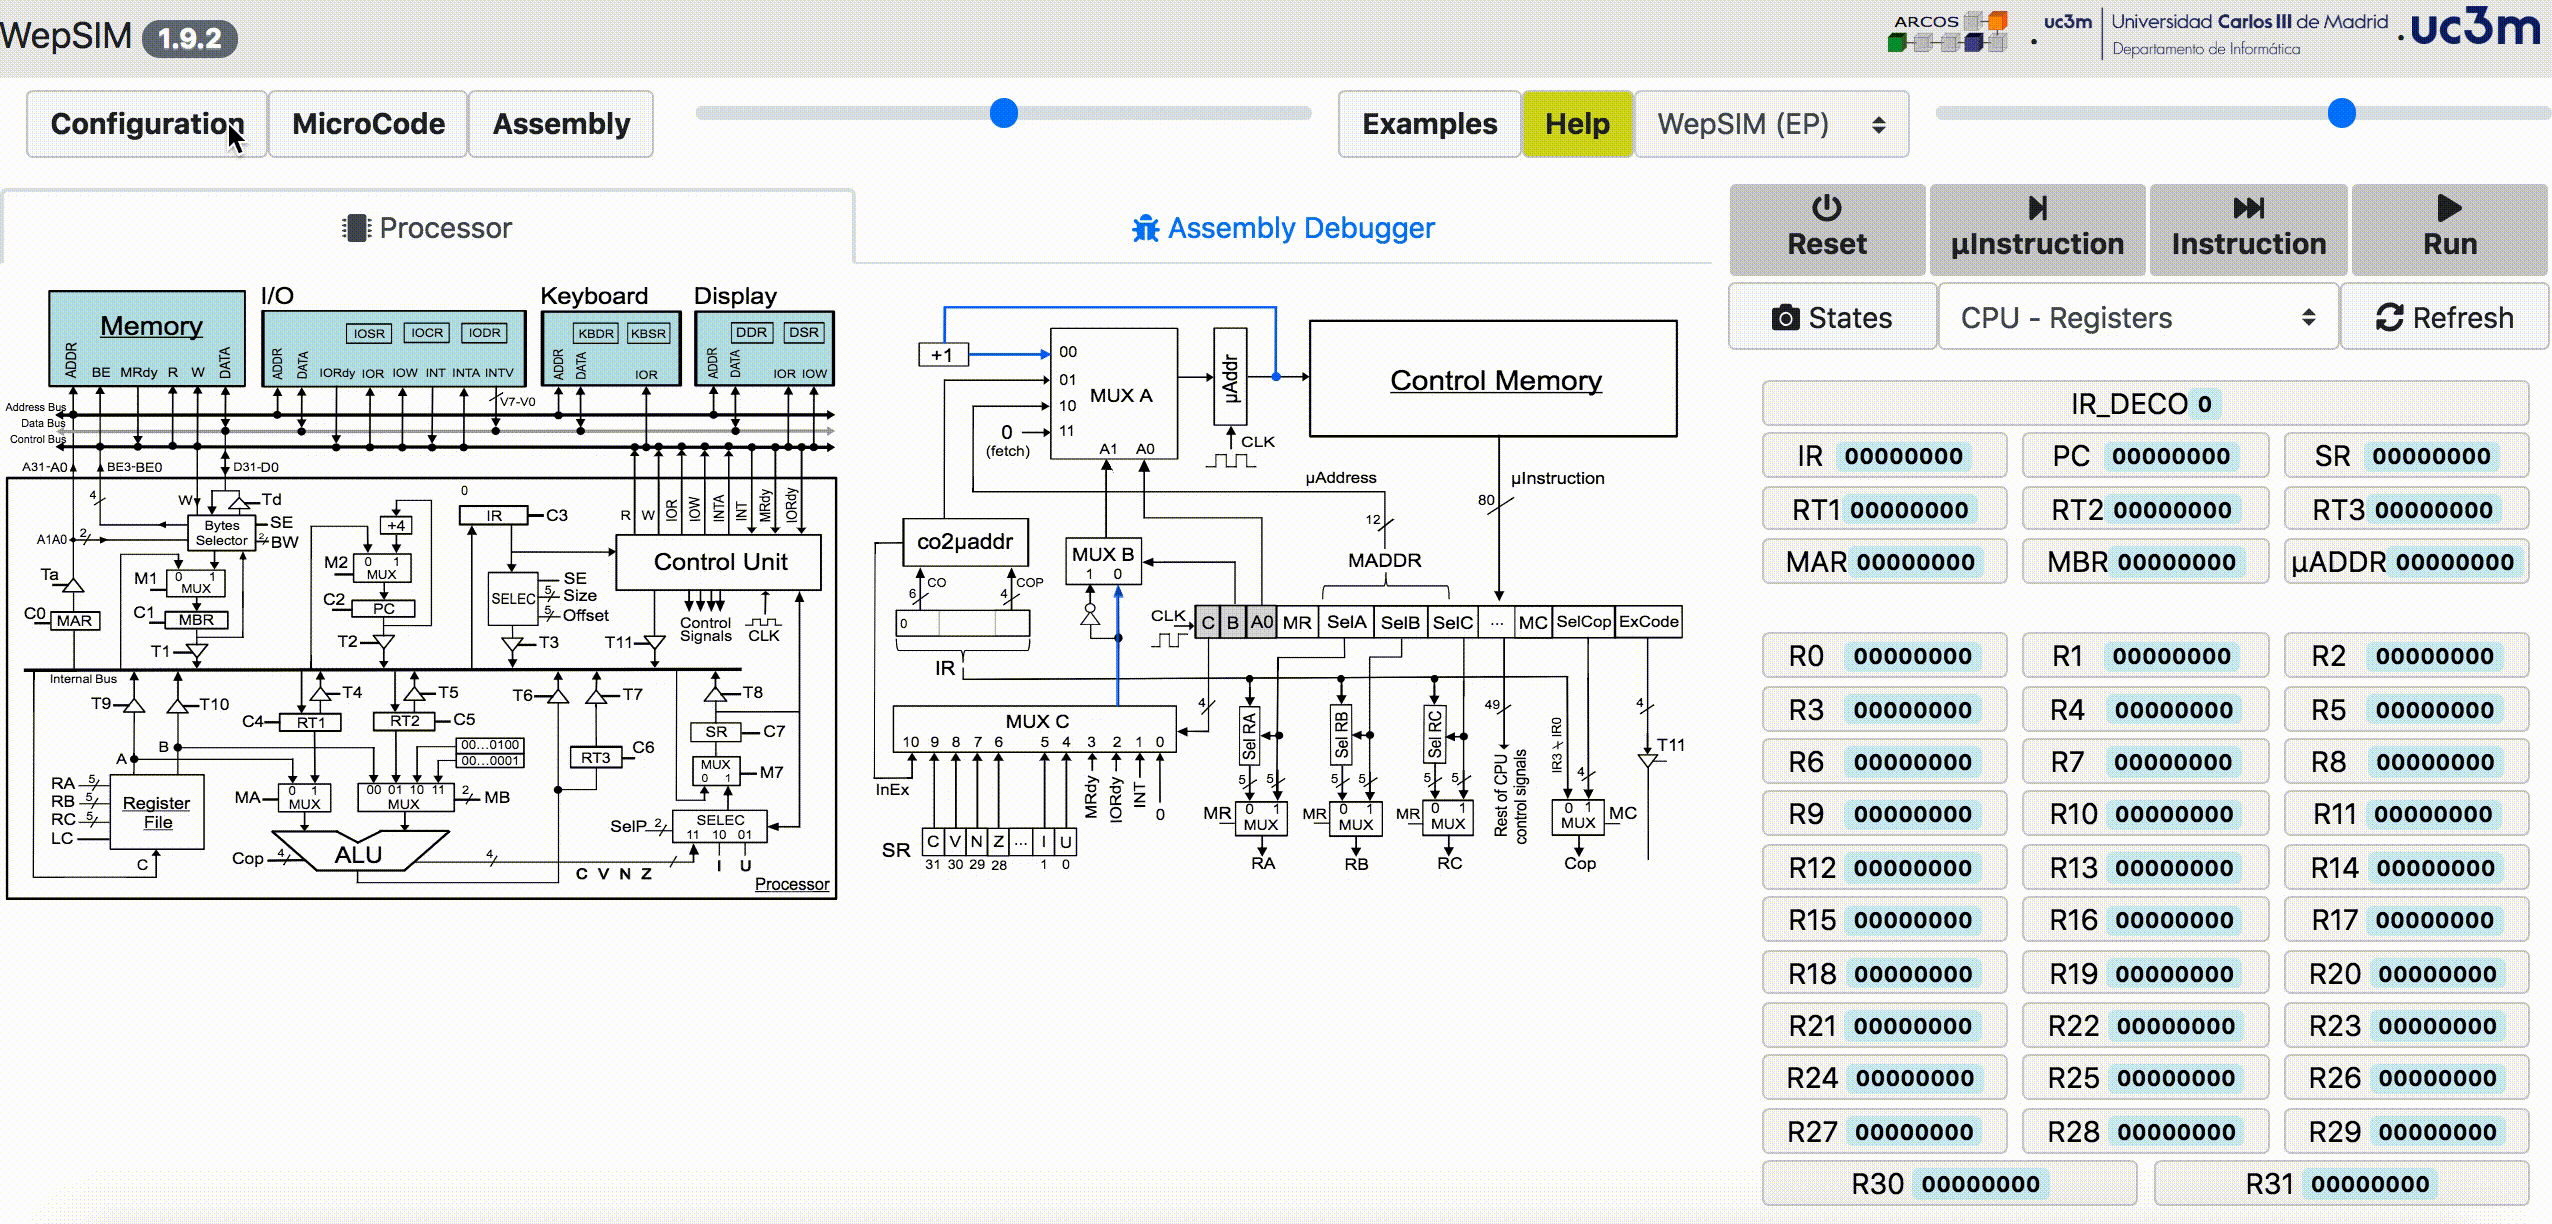
C) Step to change the WepSIM configuration
- From the general toolbar, the configuration button allows users to personalize several options:
- From the general toolbar, please use the left-upper slider to change the CPU/CU size:
D) Typical steps to use the "State Management" in WepSIM
- The values of every visible hardware element is the state in a clock cycle. WepSIM has also a 'state management' dialog where users can see the current state, and check the differences between two states.
- From the execution toolbar, please click over the 'state' button to show the state manager dialog:
Getting Started: Command Line
A) Run (and print the final state)
- From the command line it is possible to 'run' the 'asm-ep_s1_e1.txt' assembly for the 'ep' architecture with the 'mc-ep_mips_base.txt' microcode, and print the final state:
./wepsim.sh -a run -m ep -f ./examples/microcode/mc-ep_mips_base.txt -s ./examples/assembly/asm-ep_s1_e1.txt
register R2 = 0x2; register R3 = 0x1; register R5 = 0x1; register R29 = 0xfffff; register PC = 0x8018; memory 0x8000 = 0x8400002; memory 0x8004 = 0x8600001; memory 0x8008 = 0xa21809; memory 0x800c = 0x8400002; memory 0x8010 = 0x8600001; memory 0x8014 = 0xa2180a;
B) Run step by step
- It is also possible to 'run' 'step by step' the 'asm-ep-S1E1.txt' assembly for the 'ep' architecture with the 'mc-ep_mips_base.txt' microcode, and print for each assembly instruction the state elementes that modify its value:
./wepsim.sh -a stepbystep -m ep -f ./examples/microcode/mc-ep_mips_base.txt -s ./examples/assembly/asm-ep_s1_e1.txt
pc,		instruction,			changes_from_zero_or_current_value
pc = 0x8000,	li $2 2,			register R2 = 0x2; register R29 = 0xfffff; register PC = 0x8004
pc = 0x8004,	li $3 1,			register R3 = 0x1; register PC = 0x8008
pc = 0x8008,	add $5 $2 $3,			register R5 = 0x3; register PC = 0x800c
pc = 0x800c,	li $2 2,			register PC = 0x8010
pc = 0x8010,	li $3 1,			register PC = 0x8014
pc = 0x8014,	sub $5 $2 $3,			register R5 = 0x1; register PC = 0x8018
C) Run microstep by microstep
- And to 'run' 'microstep by microstep' the 'asm-ep_s1_e1.txt' assembly for the 'ep' architecture with the 'mc-ep_mips_base.txt' microcode, and print for each microinstruction the state elementes that modify its value:
./wepsim.sh -a microstepbymicrostep -m ep -f ./examples/microcode/mc-ep_mips_base.txt -s ./examples/assembly/asm-ep_s1_e1.txt
micropc,		microcode,				changes_from_zero_or_current_value
micropc = 0x0,		T2 C0,
micropc = 0x1,		TA R BW=11 M1 C1,
micropc = 0x2,		M2 C2 T1 C3,				register PC = 0x8004
micropc = 0x3,		A0 B=0 C=0,
micropc = 0x67,		SE OFFSET=0 SIZE=10000 T3 LC MR=0 SELC=10101 A0 B C=0,register R2 = 0x2; register R29 = 0xfffff
micropc = 0x0,		T2 C0,
micropc = 0x1,		TA R BW=11 M1 C1,
micropc = 0x2,		M2 C2 T1 C3,				register PC = 0x8008
micropc = 0x3,		A0 B=0 C=0,
micropc = 0x67,		SE OFFSET=0 SIZE=10000 T3 LC MR=0 SELC=10101 A0 B C=0,register R3 = 0x1
micropc = 0x0,		T2 C0,
micropc = 0x1,		TA R BW=11 M1 C1,
micropc = 0x2,		M2 C2 T1 C3,				register PC = 0x800c
micropc = 0x3,		A0 B=0 C=0,
micropc = 0x35,		MC MR=0 SELA=1011 SELB=10000 MA=0 MB=0 SELCOP=1010 T6 SELC=10101 LC SELP=11 M7 C7 A0 B C=0,register R5 = 0x3
D) Run & check end state (example when o.k.)
- You can check if the state at the end of the execution is the same as the one stored on file 'cl-ep_s1_e1.txt'. You can 'run' the 'asm-ep_s1_e1.txt' assembly for the 'ep' architecture with the 'mc-ep_mips_base.txt' microcode (and if it matchs the expected state then the output is going to be):
./wepsim.sh -a check -m ep -f ./examples/microcode/mc-ep_mips_base.txt -s ./examples/assembly/asm-ep_s1_e1.txt -r ./examples/checklist/cl-ep_s1_e1.txt
OK: Execution: no error reported
E) Run & check end state (example when k.o.)
- You can check if the state at the end of the execution is the same as the one stored on file 'cl-ep_s1_e1.txt'. You can 'run' the 'asm-ep_s1_e1.txt' assembly for the 'ep' architecture with the 'mc-ep_mips_base.txt' microcode (and if it fails to match the expected state then the output is going to be):
./wepsim.sh -a check -m ep -f ./examples/microcode/mc-ep_mips_base.txt -s ./examples/assembly/asm-ep_s1_e1.txt -r ./examples/checklist/cl-ep_s1_e2.txt
ERROR: Execution: different results: cpu[R1]='0' (expected '0xf'), cpu[R2]='0x2' (expected '0xf'), memory[0x1000]='0' (expected '0xa07ff0f'), memory[0x1004]='0' (expected '0x10061'), memory[0x1008]='0' (expected '0x7ffff'), memory[0x100c]='0' (expected '0x61000a'), memory[0x1010]='0' (expected '0xf'), memory[0x1014]='0' (expected '0xffffffff'), memory[0x1018]='0' (expected '0x7'), memory[0x101c]='0' (expected '0x12345678'), memory[0x1020]='0' (expected '0x61'), memory[0x1024]='0' (expected '0x6c6c6568'), memory[0x1028]='0' (expected '0x726f776f'), memory[0x102c]='0' (expected '0x646c'), memory[0x8000]='0x8400002' (expected '0x20201000'), memory[0x8004]='0x8600001' (expected '0x10601010'), memory[0x8008]='0xa21809' (expected '0x820000f'), memory[0x800c]='0x8400002' (expected '0x24201000'), memory[0x8010]='0x8600001' (expected '0x840000f'), memory[0x8014]='0xa2180a' (expected '0x14401010'),
F) Run microstep by microstep with verbalized output
- And finally, it is possible to execute microstep by microstep but with a more verbose description:
./wepsim.sh -a microstepverbalized -m ep -f ./examples/microcode/mc-ep_mips_base.txt -s ./examples/assembly/asm-ep_s1_e1.txt
Micropc at 0x0.	Activated signals are: T2 C0. Associated actions are: Copy from Program Counter Register to Internal Bus value 0x8000. Load from Internal Bus to Memory Address Register value 0x8000.
Micropc at 0x1.	Activated signals are: TA R BW M1 C1. Associated actions are: Copy from Memory Address Register to Address Bus value 0x8000. Memory output = 0x8400002 (Read a word from 0x8000). Select the full Word. Copy from from Memory to Input of Memory Data Register value 0x8400002. Load from Input of Memory Data Register to Memory Data Register value 0x8400002.
Micropc at 0x2.	Activated signals are: M2 C2 T1 C3. Associated actions are: Copy to Input of Program Counter Program Counter Register plus four with result 0x8004. Load from Input of Program Counter to Program Counter Register value 0x8004. Copy from Memory Data Register to Internal Bus value 0x8400002. Load from Internal Bus to Instruction Register value 0x8400002. Decode instruction.
Micropc at 0x3.	Activated signals are: A0 B C. Associated actions are: Copy from Input ROM to Input microaddress value 0x67. Copy from Output of MUX C to A1 value 0x0. Copy from Wired Zero to Output of MUX C value 0x0.
Micropc at 0x67.	Activated signals are: SE OFFSET SIZE T3 LC MR SELC A0 B C. Associated actions are:  Copy from Instruction Register to Input of T3 Tristate value 0x2 (copied 16 bits from bit 0).  Copy from Instruction Register to Input of T3 Tristate value 0x2 (copied 16 bits from bit 0).  Copy from Instruction Register to Input of T3 Tristate value 0x2 (copied 16 bits from bit 0). Copy from Input of T3 Tristate to Internal Bus value 0x2. Copy to Register 2 the value 0x2. Copy from IR[SelA], from IR[SelB], and from IR[SelB] into RA, RB, and RC. Copy from Input Fetch to Input microaddress value 0x0. Set A1 with value 0x1 (Logical NOT of MUXC_MUXB). Copy from Wired Zero to Output of MUX C value 0x0.
Micropc at 0x0.	Activated signals are: T2 C0. Associated actions are: Copy from Program Counter Register to Internal Bus value 0x8004. Load from Internal Bus to Memory Address Register value 0x8004.
Micropc at 0x1.	Activated signals are: TA R BW M1 C1. Associated actions are: Copy from Memory Address Register to Address Bus value 0x8004. Memory output = 0x8600001 (Read a word from 0x8004). Select the full Word. Copy from from Memory to Input of Memory Data Register value 0x8600001. Load from Input of Memory Data Register to Memory Data Register value 0x8600001.
...
Getting Started: Developers
WepSIM Source Code
-
WepSIM GitHub Repository:
- Stable build: https://github.com/wepsim/wepsim
- Nightly build: https://github.com/acaldero/wepsim
-
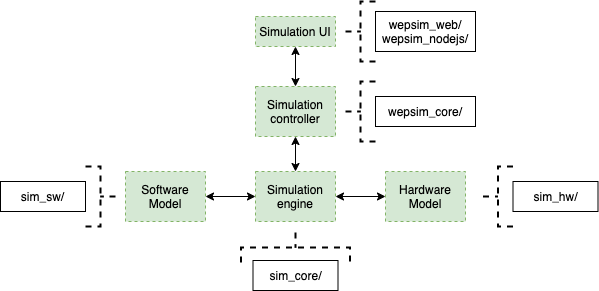
The WepSIM architecture can be summarized in the next Figure (made by https://app.diagrams.net):
WepSIM engine API
- If you want to use the WepSIM engine within your App, there is a WepSIM API in JavaScript available too. You will need to include the WepSIM engine in your proyect:
  <script src="min.sim_all.js"   ></script><noscript>Your browser does not support JavaScript!</noscript>
  <script src="min.wepsim_web.js"></script><noscript>Your browser does not support JavaScript!</noscript>
- And then, one simple example of using this WepSIM API is the following:
  /*
   * Input: minimal firmware and minimal assembly code
   */

   str_firmware = 'begin {\n' +
		  '  fetch:  (T2, C0),\n' +
		  '          (TA, R, BW=11, M1=1, C1=1),\n' +
		  '          (M2, C2, T1, C3),\n' +
		  '          (A0, B=0, C=0)\n' +
		  '}\n' +
		  'nop {\n' +
		  '        co=010110,\n' +
		  '        nwords=1,\n' +
		  '        {\n' +
		  '                (A0=1, B=1, C=0)\n' +
		  '        }\n' +
                  '}\n' +
                  'registers {\n' +
                  '        0=$zero,\n' +
                  '        29=$sp (stack_pointer)\n' +
                  '}\n' ;

   str_assembly = '.text\n' +
		  'main: nop\n' ;


   /*
    * Code: Initialize WepSIM + reset + compile firmware + compile assembly + execute + get final state
    */

    // 1) initialize WepSIM engine
    var ret = simcore_init(false) ;

    if (false != ret.ok) {
        ret = simcore_init_hw('ep') ;
    }

    if (false != ret.ok) {
	var ui_cb = {} ;
	simcore_init_ui(ui_cb) ;
    }

    // 2) reset hardware
    if (false != ret.ok) {
        simcore_reset() ;
    }

    // 3) load firmware
    if (false != ret.ok) {
        ret = simcore_compile_firmware(str_firmware) ;
    }

    // 4) load assembly
    if (false != ret.ok) {
        ret = simcore_compile_assembly(str_assembly) ;
    }

    // 5) execute firmware-assembly
    if (false != ret.ok) {
	var options = {
                         instruction_limit:  1024,
                         cycles_limit:      10240
		      } ;
	ret = simcore_execute_program(options) ;
    }

    // 6) show a final report
    if (false != ret.ok) {
	var state_obj = simcore_simstate_current2state() ;
	ret.msg = simcore_simstate_state2checklist(state_obj, '') ;
    }


    /*
     * Output: the final state (or error found)
     */

    console.log(ret.msg) ;
WepSIM from Google Colab
- The following fragment is a example of how to use WepSIM command-line within Google Colab cell:
!wget https://github.com/acaldero/wepsim/releases/download/v2.1.5/wepsim-2.1.5.zip
!unzip -o wepsim-2.1.5.zip
!rm -fr   wepsim-2.1.5.zip
!./wepsim-2.1.5/wepsim.sh -a stepbystep -m ep -f ./wepsim-2.1.5/examples/microcode/mc-ep_mips_base.txt -s ./wepsim-2.1.5/examples/assembly/asm-ep_s1_e1.txt > ./result.csv
!rm -fr   wepsim-2.1.5

import pandas as pd
import io

df1 = pd.read_csv('./result.csv')
df1.columns = df1.columns.str.strip()
for item in df1.columns[:]:
    df1[item].replace("\t","", inplace=True, regex=True)

df1
WepSIM for Apache Cordova
1) Prepare the Apache Cordova Project:
- 1.1) Follow Apache Cordova tutorial in order to create a new project:
npm install -g cordova
cordova create wepsim es.uc3m.inf.arcos.wepsim WepSIM
cd wepsim
cordova platform add android
cordova platform add ios
- 1.2) Install at least the following plugins:
cordova plugin add cordova-plugin-console
cordova plugin add cordova-plugin-device
cordova plugin add cordova-plugin-dialogs
cordova plugin add cordova-plugin-file
cordova plugin add cordova-plugin-file-transfer
cordova plugin add cordova-plugin-splashscreen
cordova plugin add cordova-plugin-web-share
cordova plugin add cordova-plugin-whitelist
2) Update WepSIM files:
- 2.1) Copy WepSIM files into the www directory:
wget https://github.com/acaldero/wepsim/releases/download/v2.1.5/wepsim-2.1.5.zip
unzip wepsim-2.1.5.zip
mv www www.initial.$$
cp -a wepsim-2.1.5/ws_dist www
- 2.2) Adapt path in "www/examples/hardware/ep/images/processor.svg" for Apache Cordova:
sed -i .bak 's/wepsim/android_asset\/www/g' ./www/examples/hardware/ep/images/processor.svg
- 2.3) Adapt path in files "./www/wepsim-classic.html" and "./www/wepsim-compact.html":
sed -i .bak 's/external\/cordova/cordova/g' ./www/wepsim-classic.html
sed -i .bak 's/external\/cordova/cordova/g' ./www/wepsim-compact.html
3) Build Android .apk:
- 3.1) Build .apk:
cordova build android --debug
- 3.2.a) Run WepSIM's App on Emulator:
cordova run android
- 3.2.b) Run WepSIM's App on Device:
adb -d install -r ./platforms/android/app/build/outputs/apk/debug/app-debug.apk
Note that the project description data, including the texts, logos, images, and/or trademarks,
for each open source project belongs to its rightful owner.
If you wish to add or remove any projects, please contact us at [email protected].