BookmarksDev / Bookmarks.dev
Programming Languages
Labels
Projects that are alternatives of or similar to Bookmarks.dev
Bookmarks Manager for Developers & Co
Bookmarks.dev is a bookmarks and code-snippets manager created and designed primarily for Developers & Co. It helps you save time and nerves when managing your dev bookmarks and eases bookmarking of code snippets via Codelets. Check our HowTo page to help you get started:
Most worthy public bookmarks are published regularly on Github in a separate repository.
Getting started (development or self hosting)
These instructions will get you a copy of the project up and running on your local machine for development and testing purposes.
The project is developed with the MEAN stack and Keycloak for authentication and authorization:

The project contains two parts
- frontend which makes up the User Interface. This uses with Angular and Angular CLI.
- backend which is the API supporting the UI. It uses ExpressJS with MongoDB and Keycloak. See the OpenAPI specification
Prerequisites
What you need to run this app:
-
nodeandnpm(we recommend using NVM)- Ensure you're running Node at least (
v10.x.x+) and NPM (6.x.x+)
- Ensure you're running Node at least (
-
nodemon -
npm install -g nodemon - Docker - we recommend using Docker Desktop
Docker and Docker-compose are currently used only for local development
Installing (development setup)
Start MongoDB and Keycloak server
For the first time uncomment the following line:
#command: -Dkeycloak.migration.action=import -Dkeycloak.migration.provider=dir -Dkeycloak.migration.dir=/tmp/keycloak/export-import -Dkeycloak.migration.strategy=IGNORE_EXISTING
in the docker-compose file, so that the initial Keycloak setup (realm and users) is loaded.
For further startups of docker-compose you should comment back this line, as it starts faster
docker-compose up
Use
-dto run it in the background
Install and run (frontend & backend)
You want to have the backend API running first with the following commands:
# install
nvm use   #only if you are using nvm
npm install

# run
npm run frontend #to run the frontend
npm run backend #to run the backend

#alternatively run in parallel
npm start
or in one line nvm use; npm install; npm start
This starts
- the API with nodemon at http://localhost:3000/api and will watch for code changes in backend and automatically redeploy.
- the frontend available at http://localhost:4200. Login the user/password
mock/mockconfigured for you in the initial Keycloak setup. Some bookmarks are initially loaded with your account so you can start playing with them.
You can create your own test user, or any other extra users by following the screenshots in Add a Keycloak user to create it.
To be able to automatically add youtube videos published date and duration to the title you need to create a nodemon.json file based on the backend/nodemon.json.example and your own youtube api key
Testing
Backend
Integration tests
Keycloak and mongodb have to be started as specified above (
docker-compose upcommand)
Run the integration test by issuing the following command.
cd backend;
npm run integration-tests
A report will be generated.
Debugging
Frontend
Dev Tools in Chromium browsers
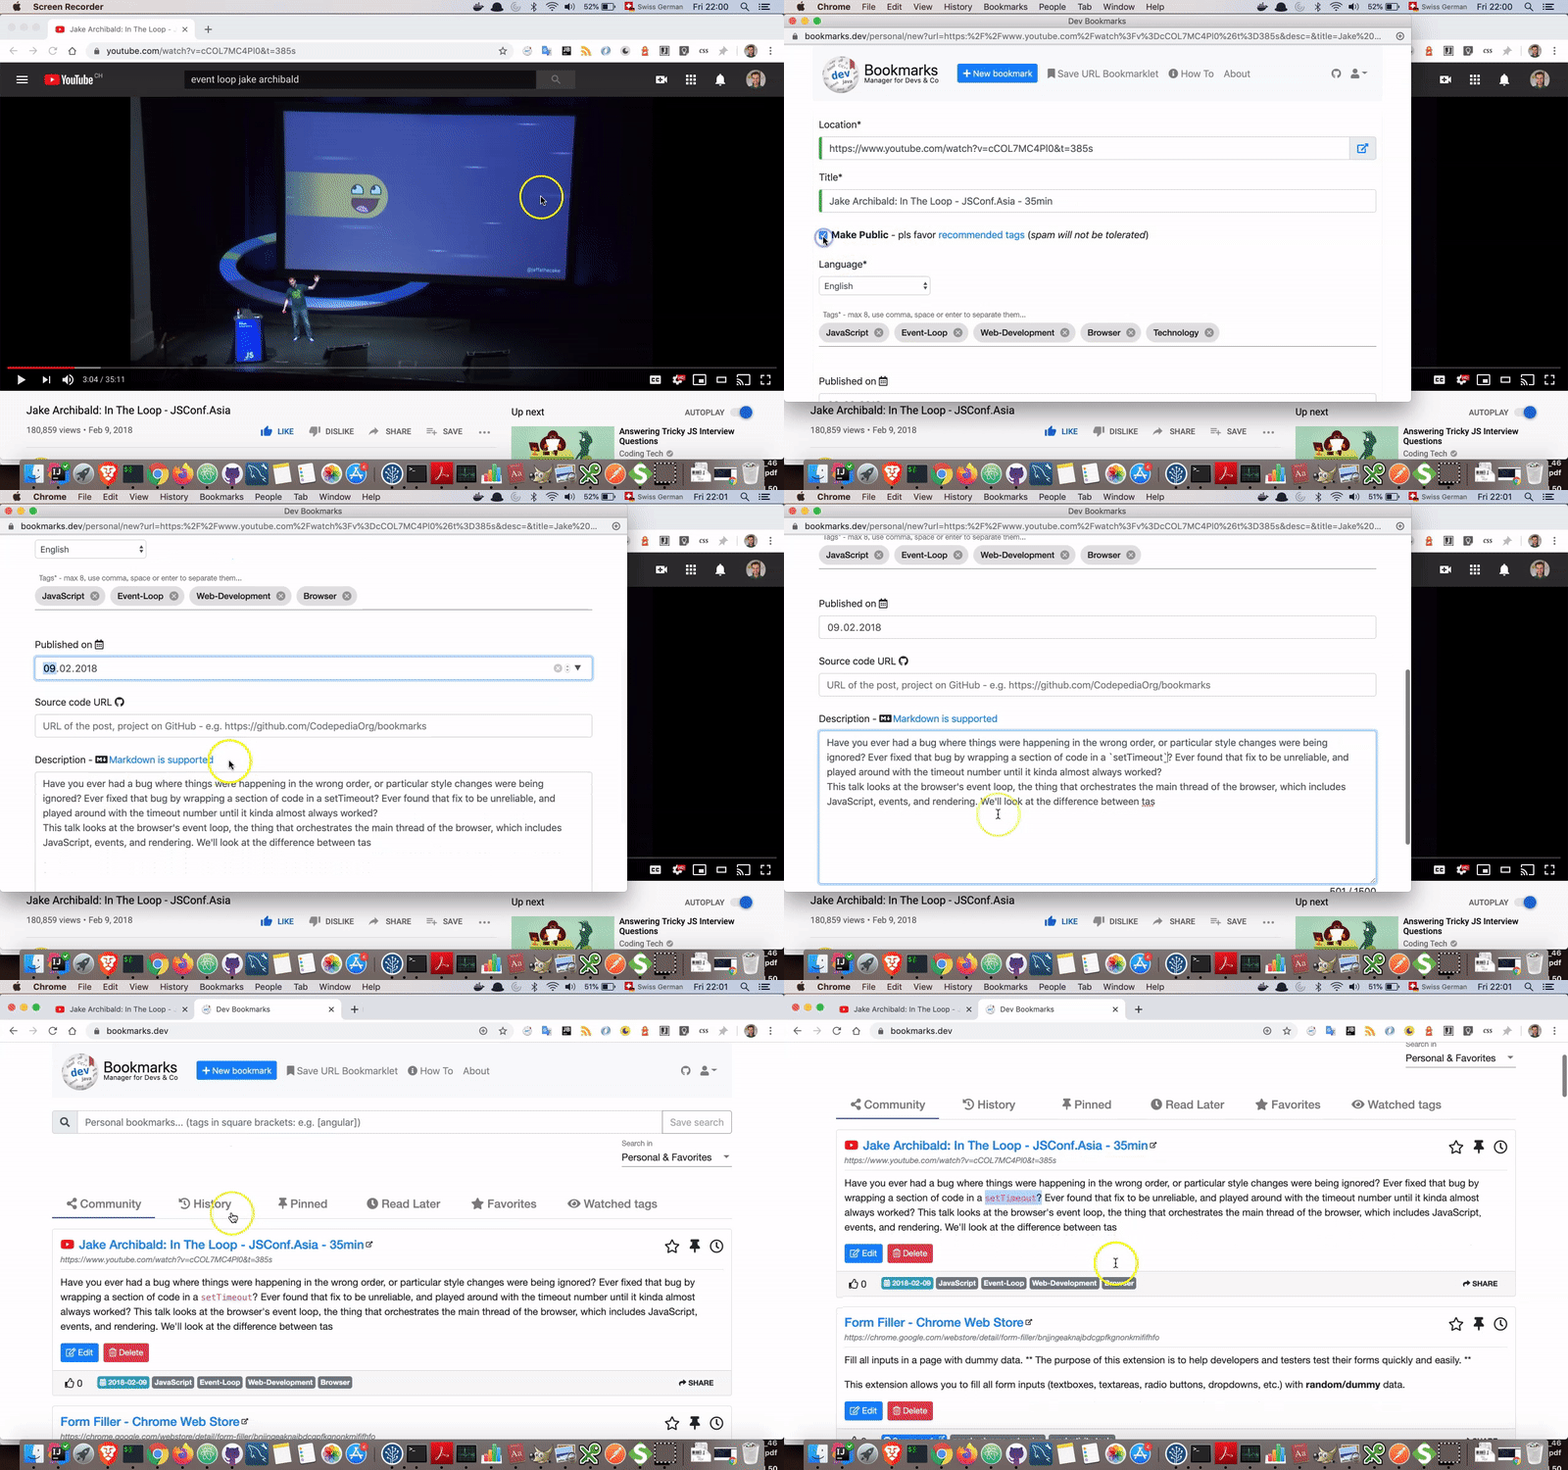
You can use the Dev Tools in Chromium based browsers (e.g. Chrome, Brave). Navigate to Sources and the file you want to set your break points, like in the following example:
IntelliJ
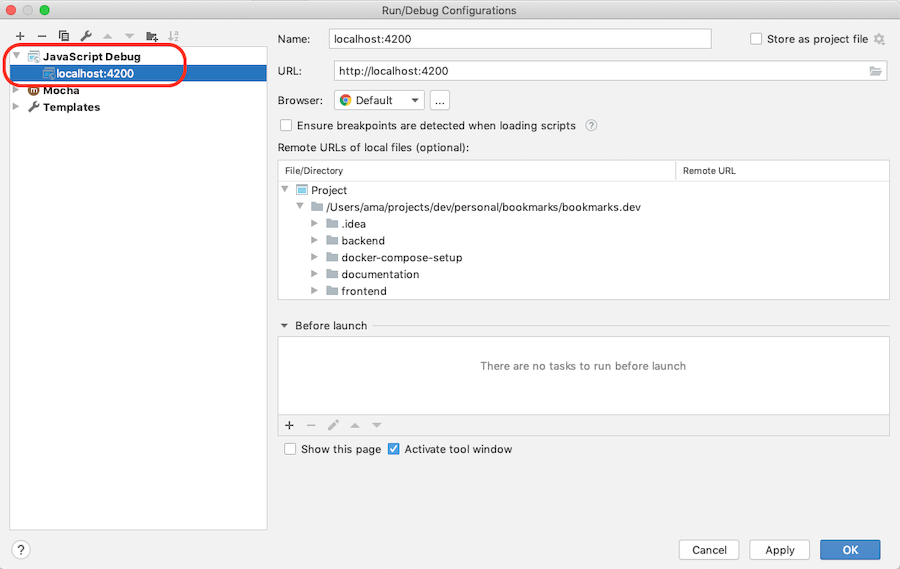
In IntelliJ you add Javascript Debug configuration as shown below:
Backend
IntelliJ / Webstorm (Node.js plugin is required)
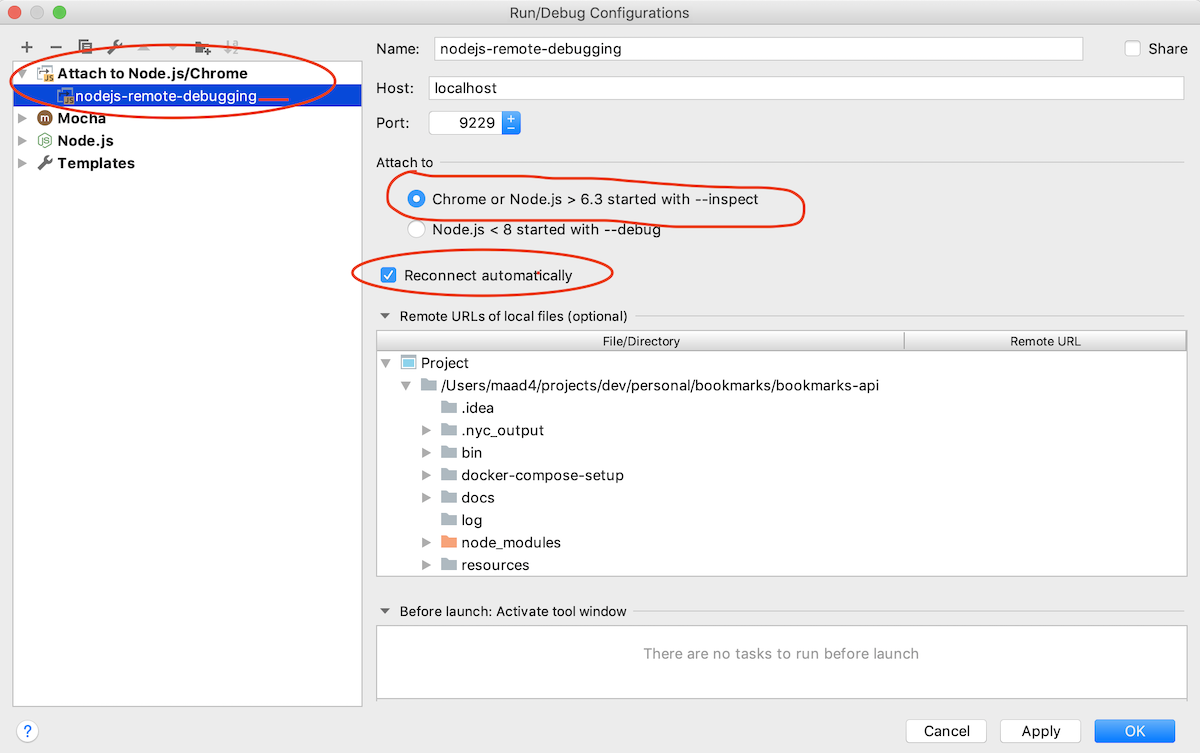
The npm run debug starts nodemon with the --inspect parameter so you can attach to this process, by using the following configuration:

Visual Studio Code
See Node.js debugging in VS Code with Nodemon
Contributing
Please read CONTRIBUTING.md for details on our code of conduct, and the process for submitting pull requests to us.
Versioning
We use SemVer for versioning. For the versions available, see the tags on this repository.
Changelog
The changelog is available in CHANGELOG.md
To update the changelog execute the following commands:
nvm use
standard-changelog
License
This project is licensed under the MIT License - see the LICENSE file for details


